


DIY Tiling for a Beginner


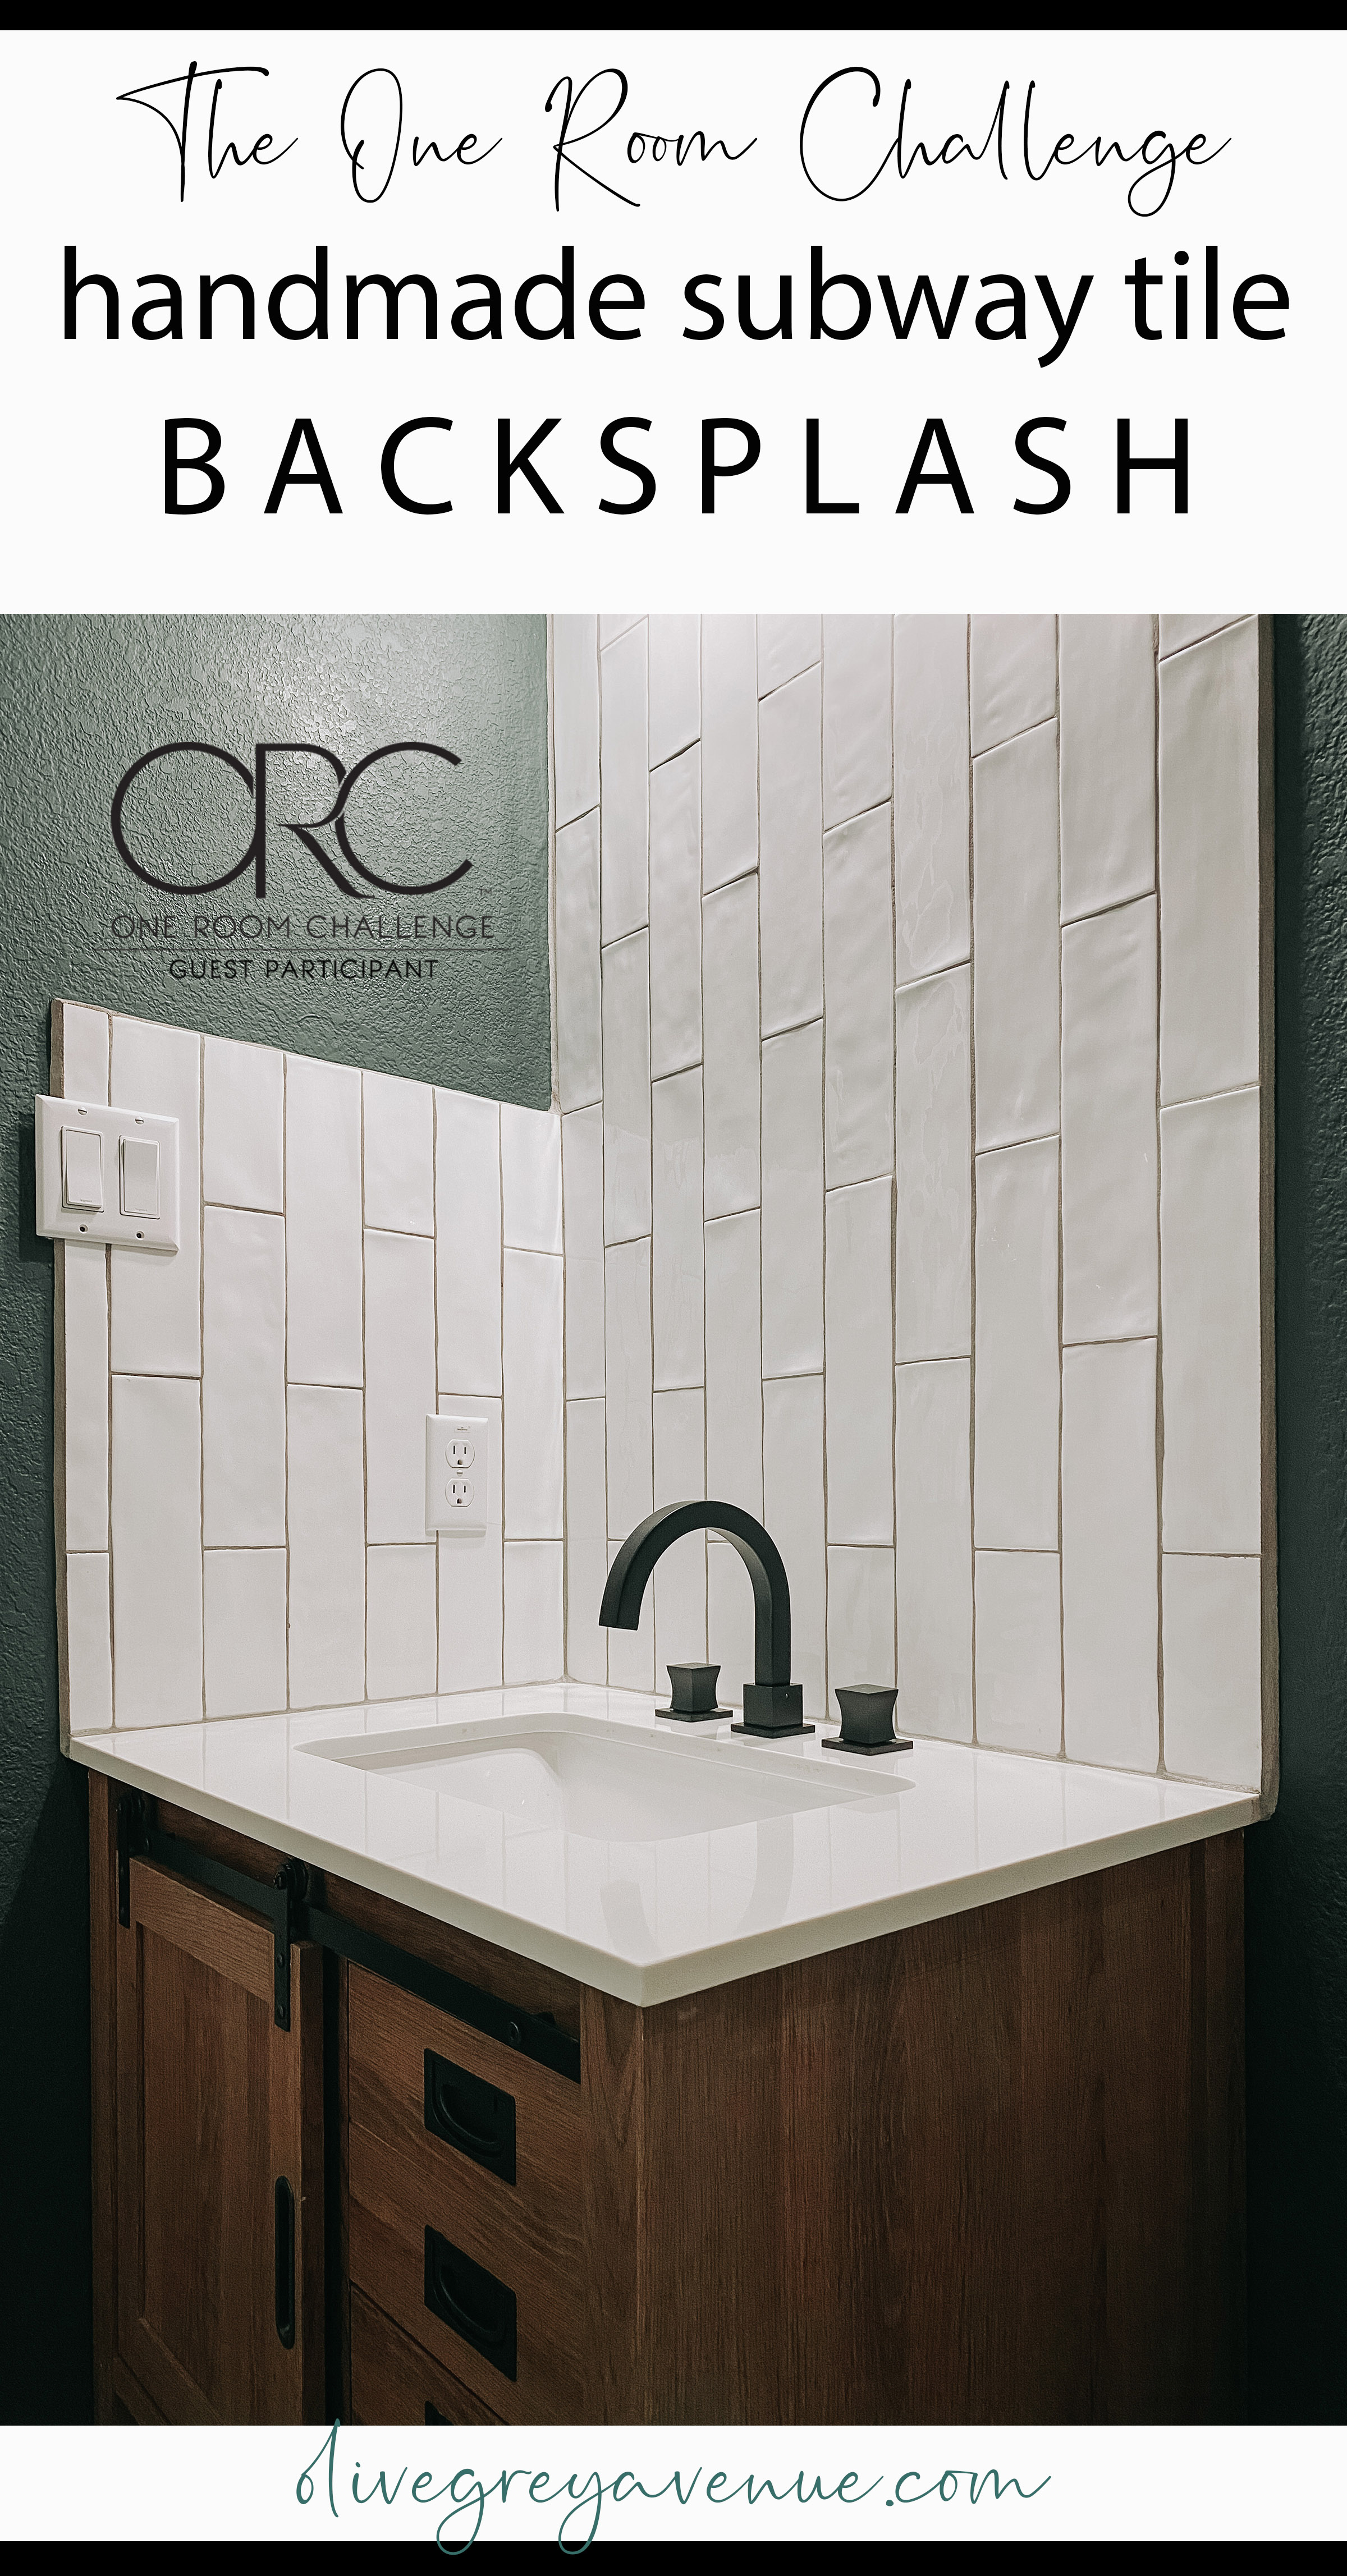
It’s that time again! It’s time to update y’all with our progress of the One Room Challenge for the week! We are DIY tiling in the bathroom. This is perfect for a DIY tiling for a beginner. I’m so excited about the tile we are using in the bathroom! I have been searching for tile like this for a while, in hopes to use it one day in our laundry room. I actually found this tile in the tile clearance section of The Home Depot.
Let’s pause for a sec. Did you know that there is a clearance tile section in Home Depot? No? Because we just found it a few weeks before quarantine and let me tell you, it’s worth swinging by for a look. I was able to find two full boxes of this beautiful tile I’ve been dreaming of for only $25/box (that’s only $0.48/square foot)! I know, amazing right?
Do you also remember how I said that we buy tools as we need them? Well I found a tile saw on sale and jumped on it since I was planning on needing it for the mudroom makeover. I didn’t end up using it because I decided to use faux brick panels. Since we were doing a German schemer over them. Check out that process here. All that being said, I had a new tile saw and I was itching to bust it out for the first time!
I realized during this phase of The One Room Challenge that I’ve never actually tiled myself. My husband, Steve, has done it and we’ve hired it out but I’ve never personally done it.

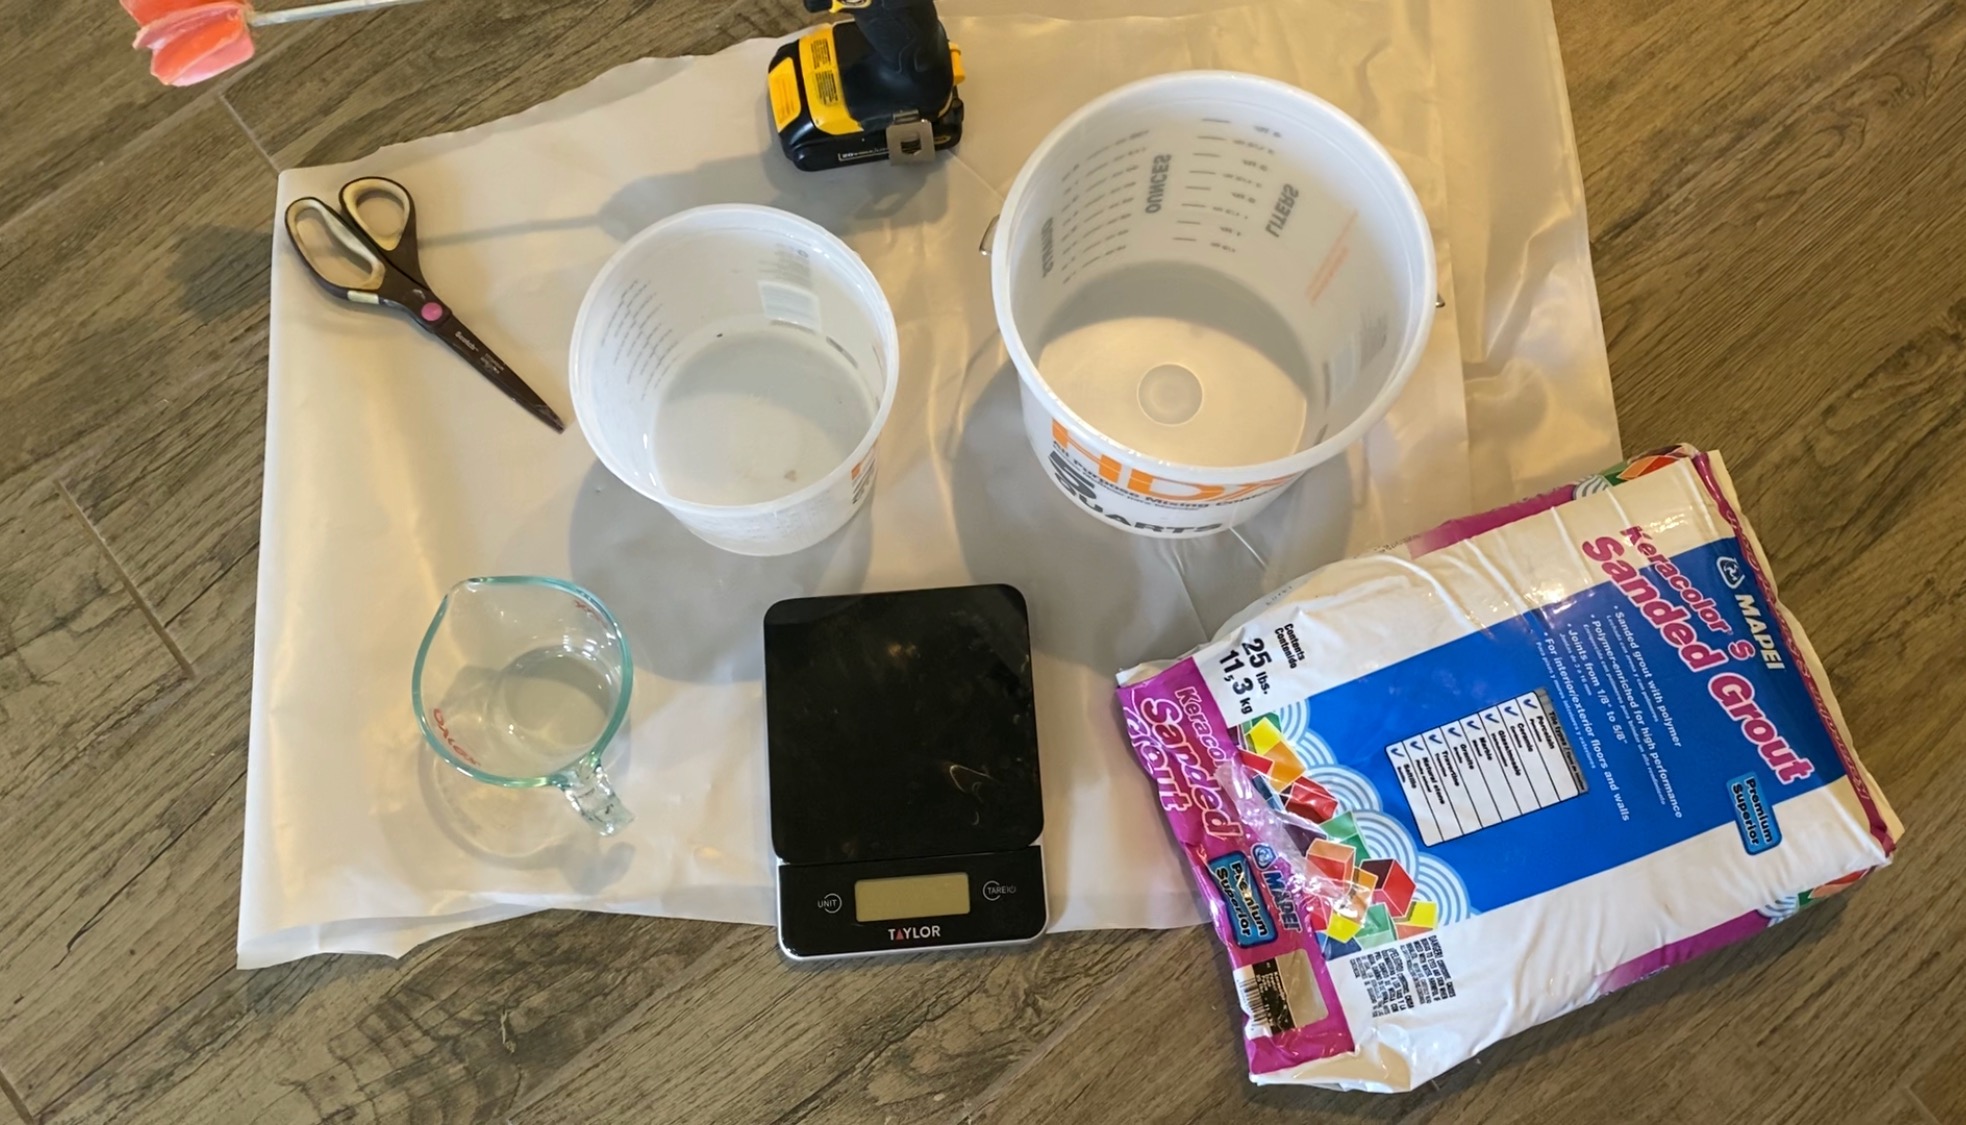
SUPPLIES YOU’LL NEED (shop all of the supplies you need below):
– Tile of choice
– Tile Adhesive/Thin-set mortar
– Grout of choice
– Putty knife (5-6″ and 1″)
– Notched trowel
– Rubber float
– Tile spacers (optional)
– Level
– Tile saw
– Dremel (for specialty cuts)
– Sponge
– Small bucket
– Painter’s tape
– Extended outlet box screws
TIPS FOR BEGINNER TILING
1. Make sure to spread the tile adhesive on THICK. At first I was just applying “just the right amount” because I thought it was plenty. The notched trowel makes it even thinner so I thought it should be fine. Well some of my first tile pieces started popping off as the adhesive dried. Remember the adhesive is what is keeping your tile stuck to you wall. So, you need to make sure it has full contact with the tile. Also a very thin layer makes a weak bond except with thin-set and thats another story.
2. When applying tile to the adhesive, smoosh and wiggle. Meaning that you don’t want to just place the tile on the adhesive and move on. You want to press it onto the adhesive (smoosh) and sightly move it up/down and side to side (wiggle) to make sure it has optimal suction onto the wall. This help the tiles from just popping off the surface because the “smoosh” actually helps the mortar cover the most surface area on the tile. So think of the wiggle the way you get to fill in those valleys made by the notched trowel and push air out from under the tile.
3. Make sure your mortar lines go the right way. When installing rectangular (plank) tiles, the trowel ridges should go in the same direction as the short side of the tile. This allows better air release from under the tile since the air travels a much shorter distance when you lay the tile.
1. PLANNING YOUR PATTERN
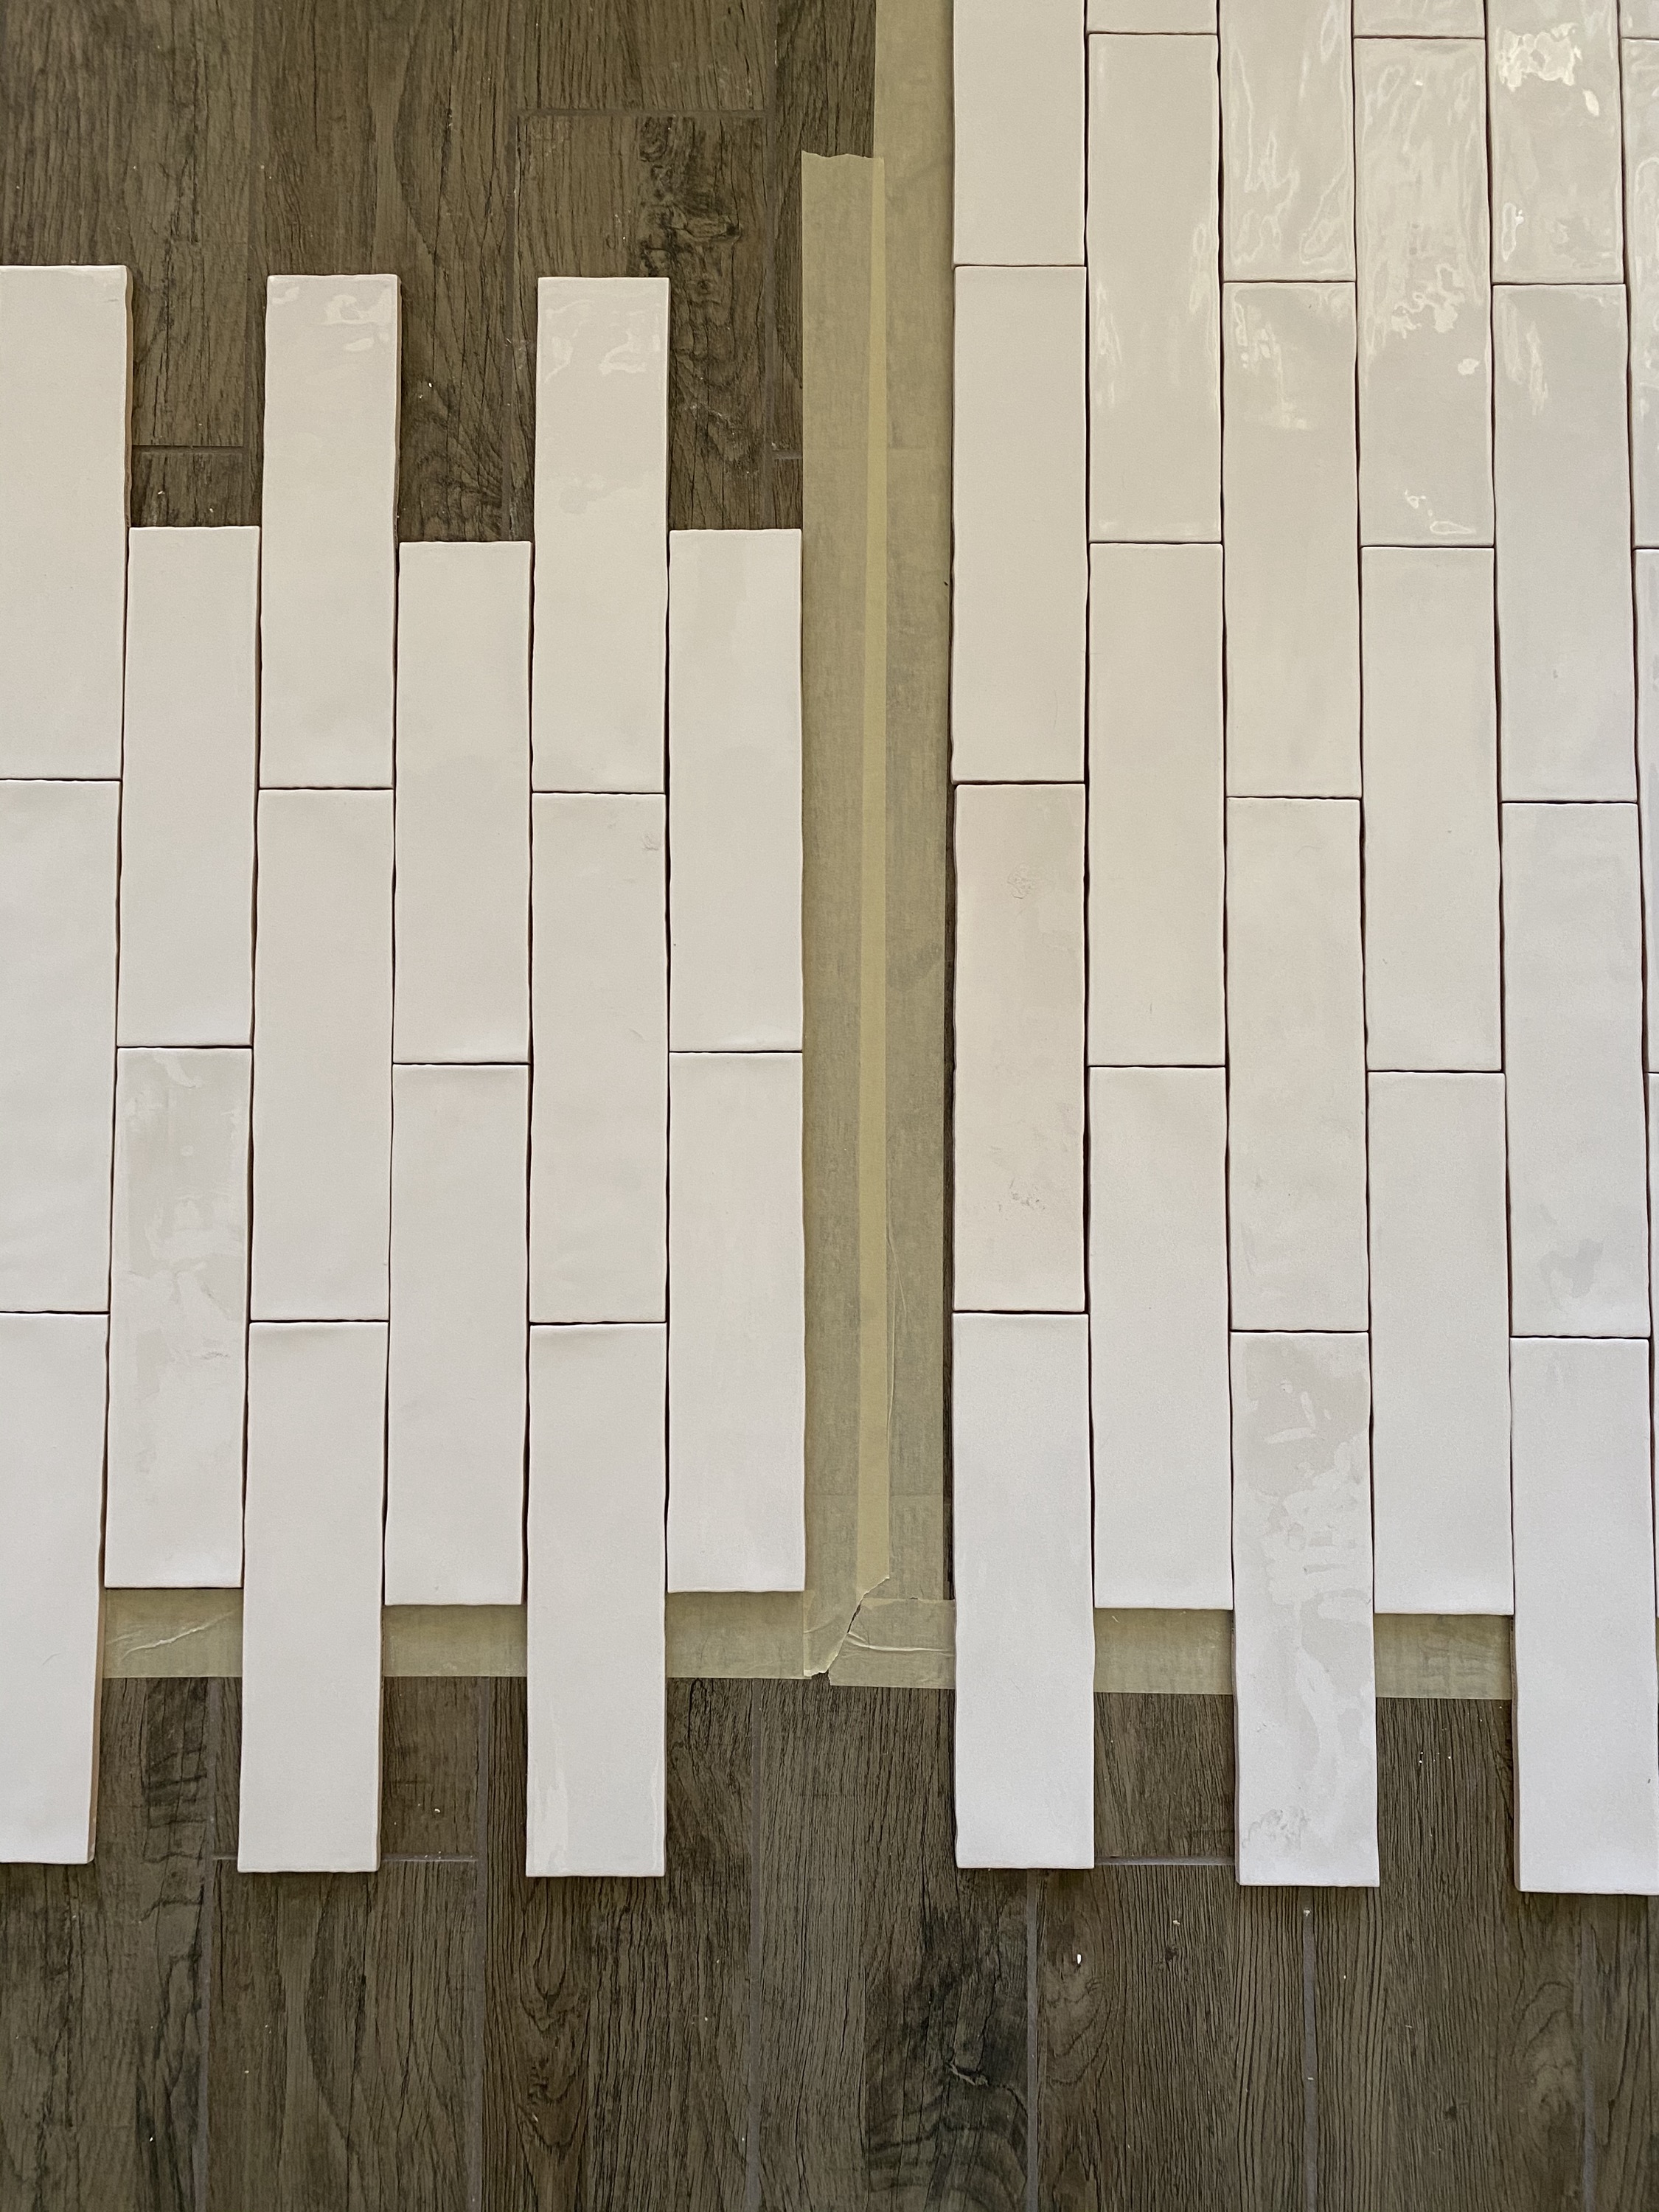
Whether you have different options for patterns or not, I like to lay out my tile . Not only to decide on the pattern but also to ensure that I have enough tile.
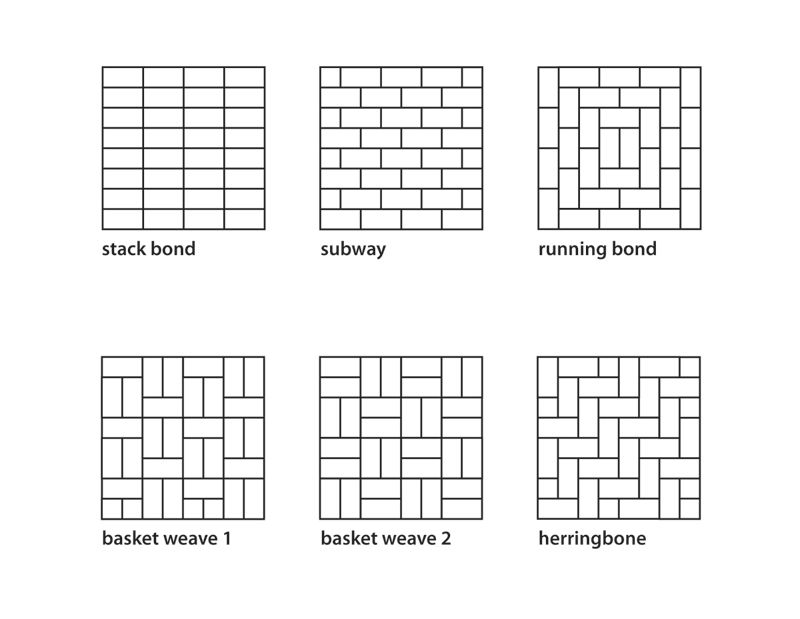
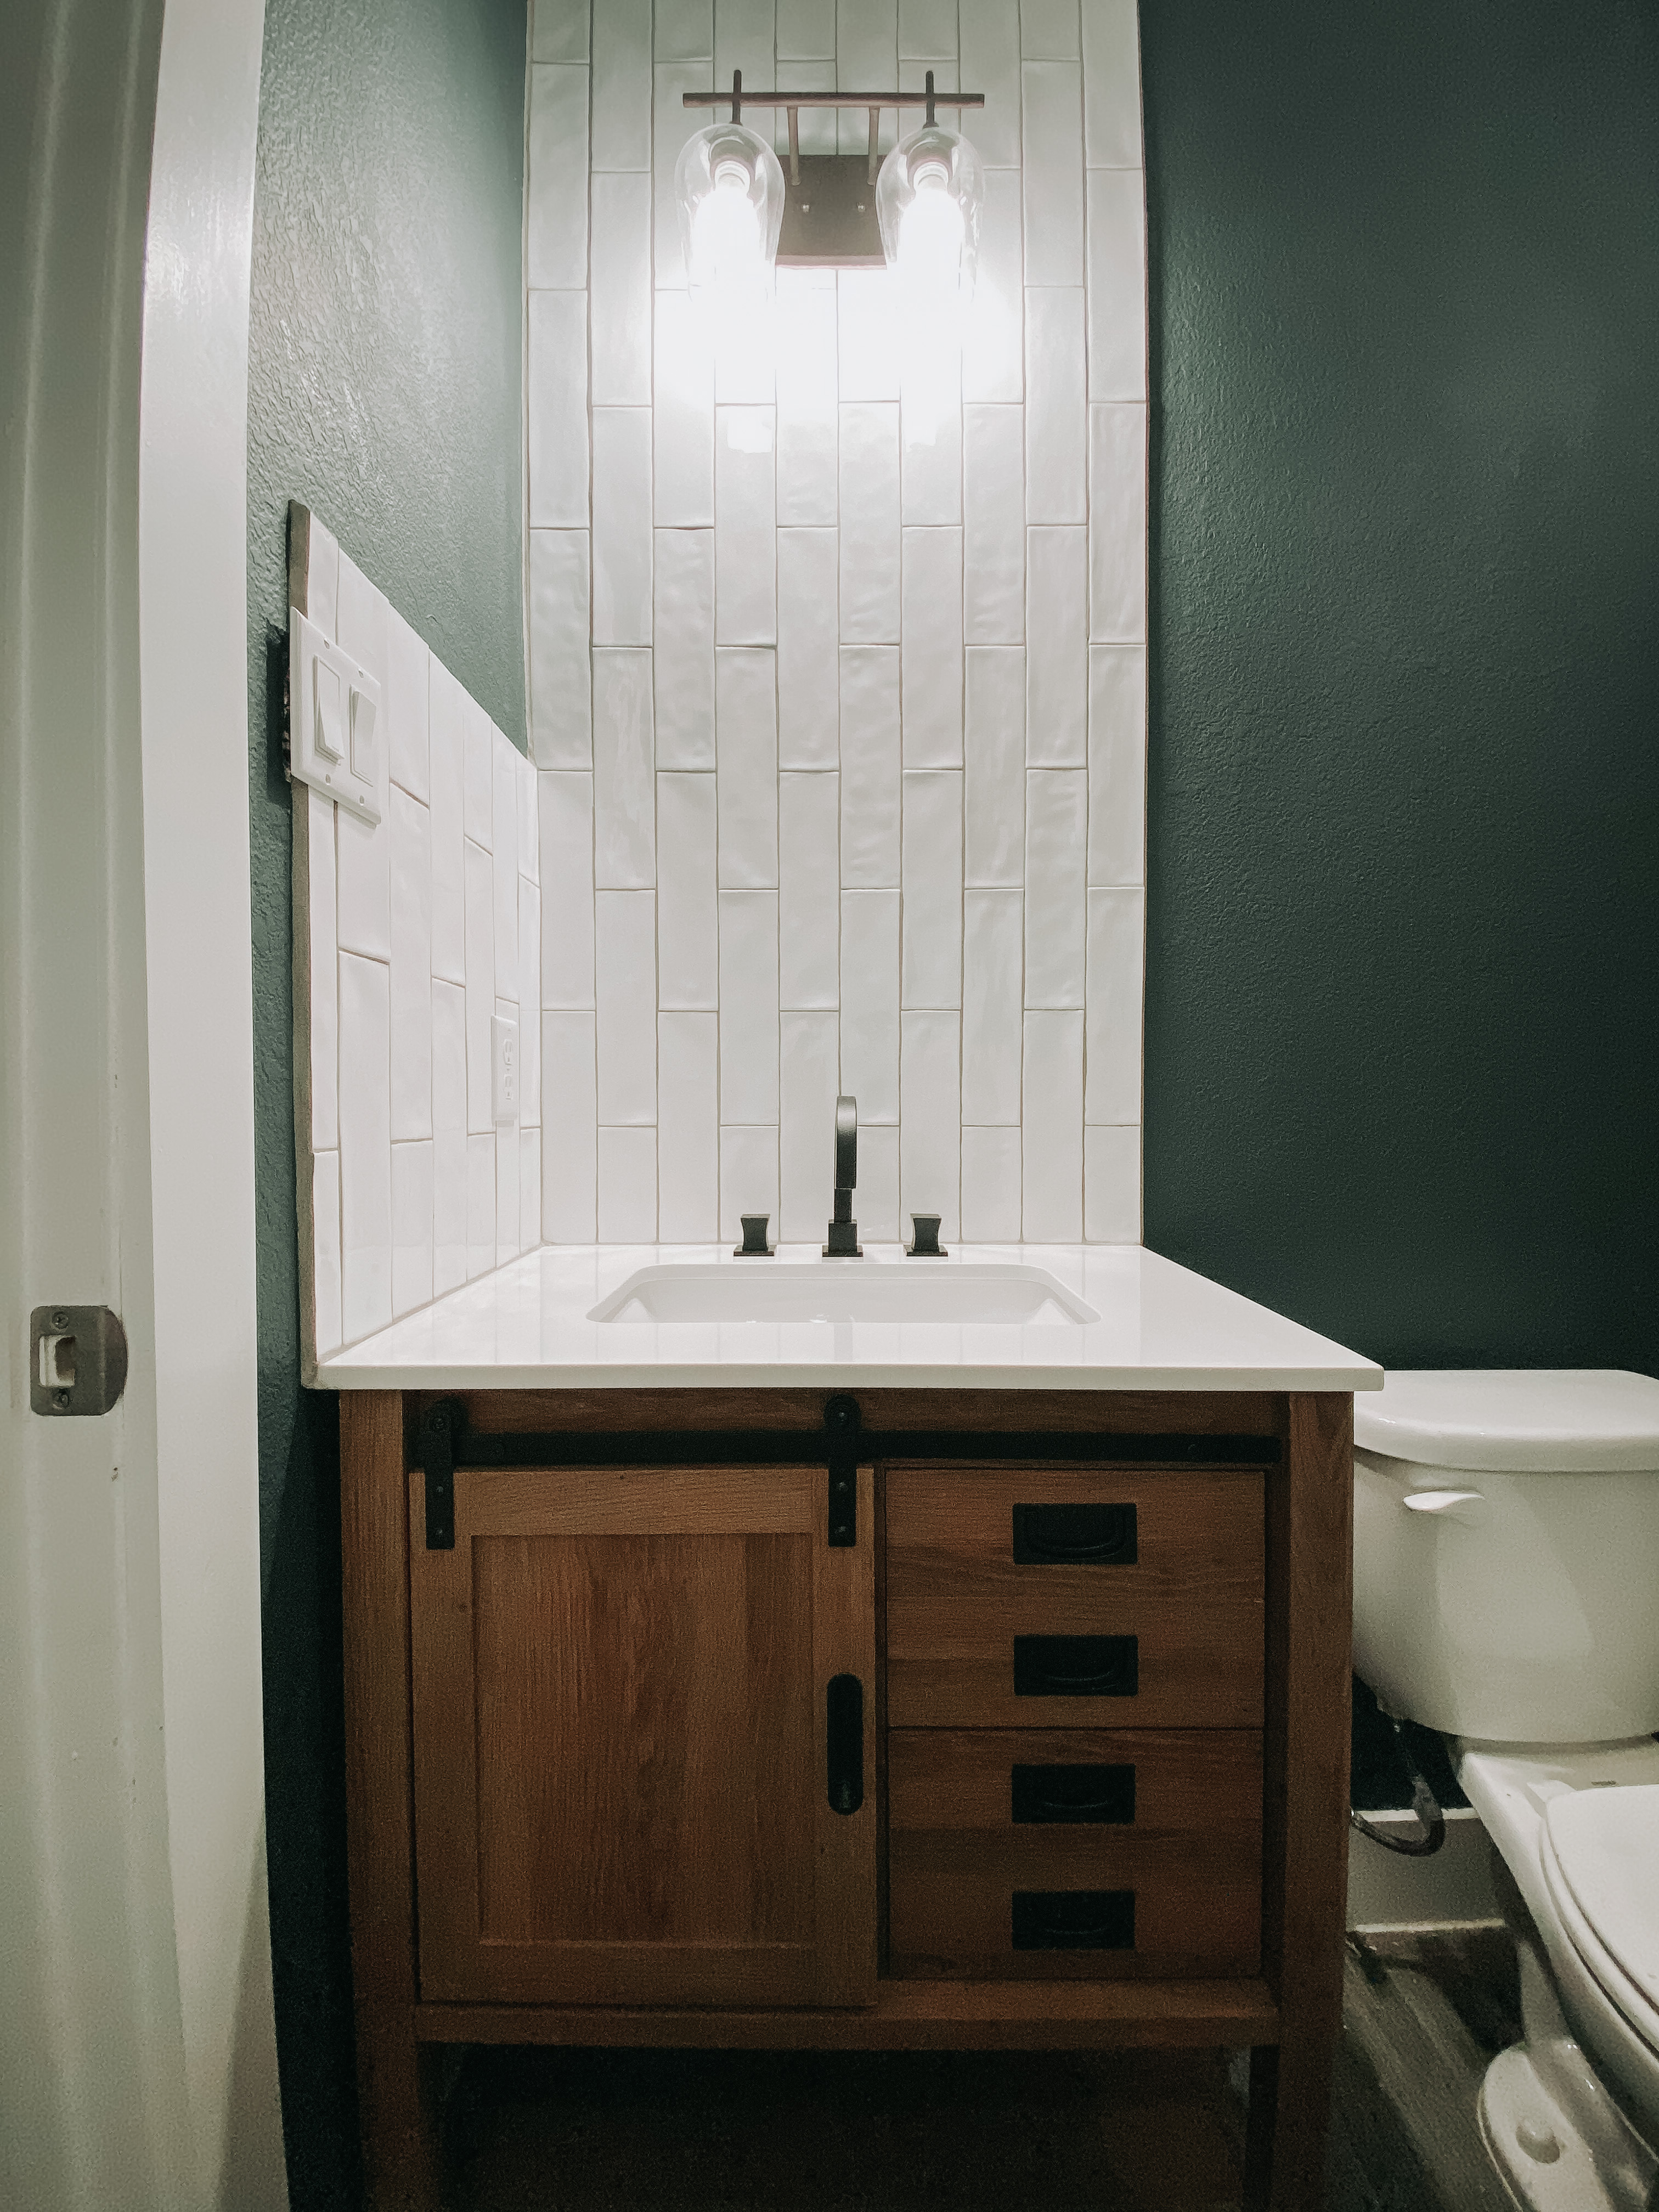
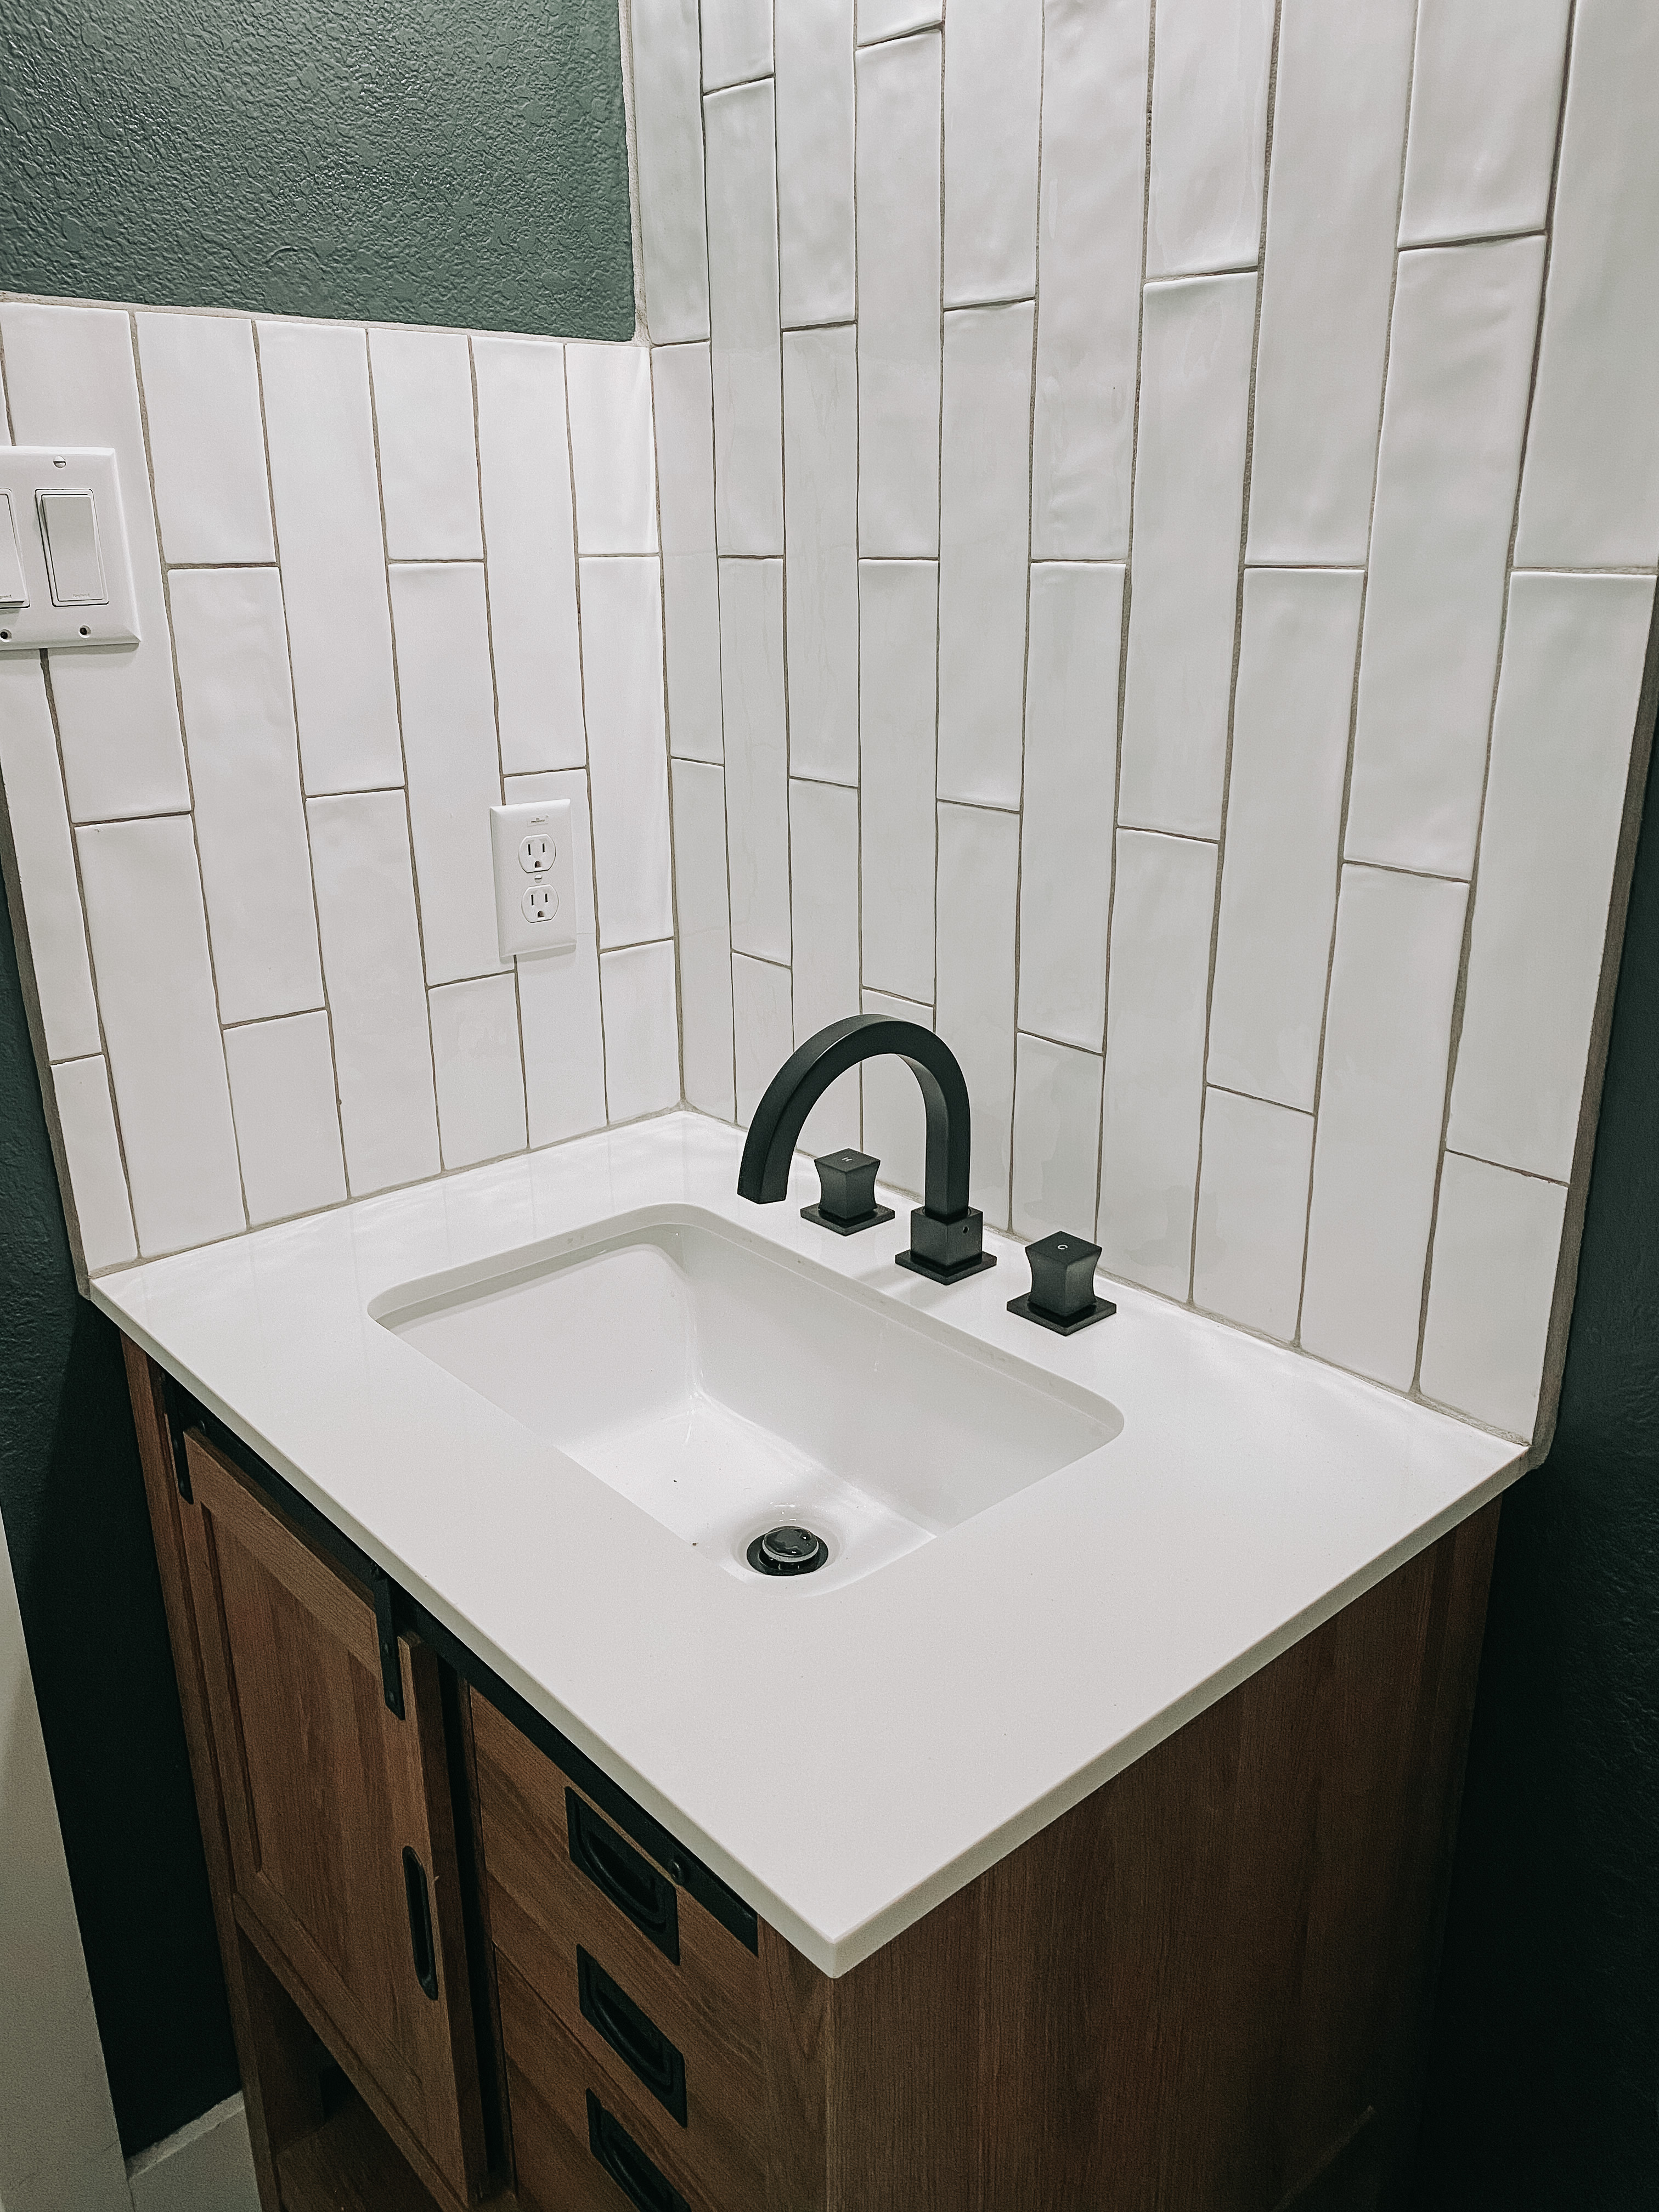
To start, I measured out the dimensions of the space I wanted to tile. Then taped those dimensions onto the floor. Then I was able to start laying the tile to fill the space and visualize the final product. I briefly attempted another pattern but quickly decided that I wanted to go with my original plan. In this particular case, the tiles I have are 3″x12″ so there are tons of different options for how to lay them. In the very beginning I was going to do a traditional subway pattern. I ultimatly decided to modernize it a bit and turn them vertical.
I actually loved this process. Usually the prep work for a project is something I dread but this was actually enjoyable. Laying it all out and it really made for a much clearer plan for what I needed to do. Plus I wouldn’t have been able to change my mind on the pattern, had I not liked it as much as I thought.
2. APPLY TILE ADHESIVE/THIN-SET MORTER
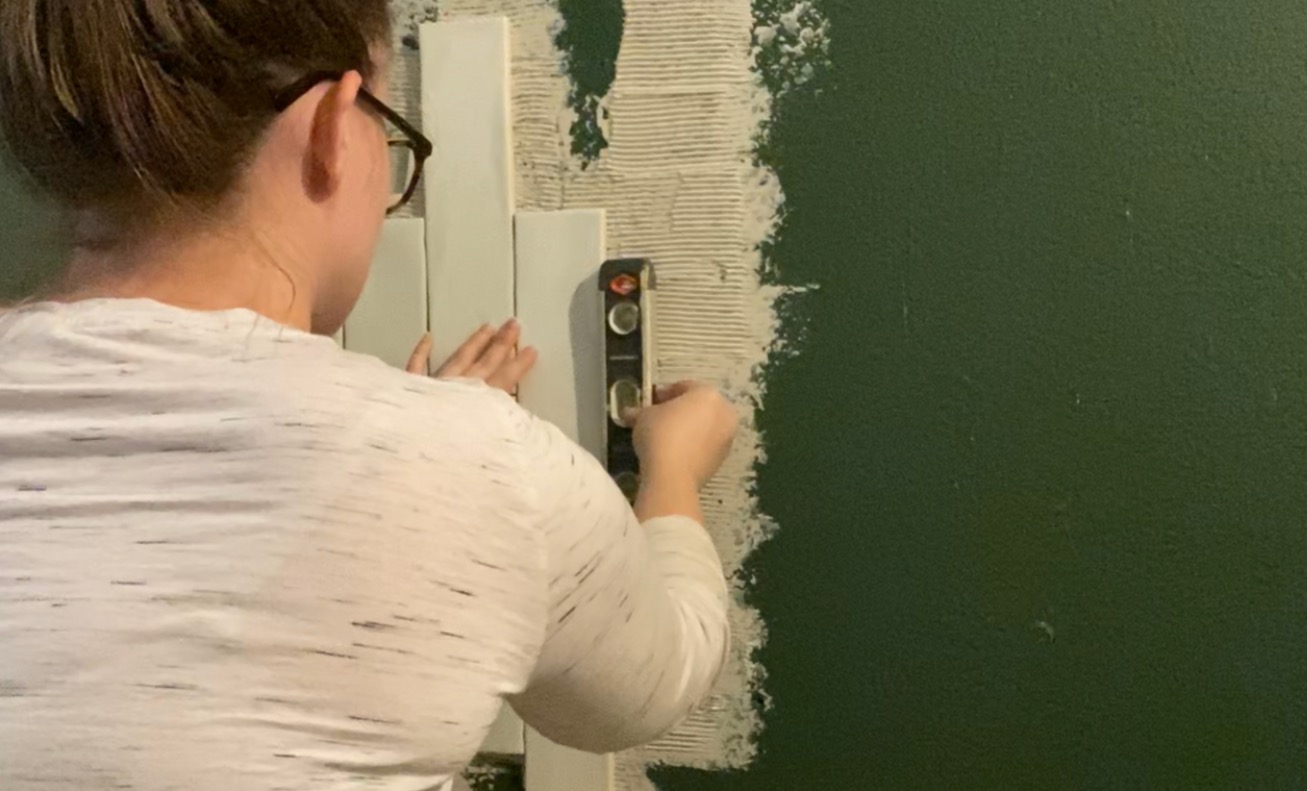
When tiling, make sure to work in small sections. So, that your tile adhesive doesn’t dry out before putting your tiles in place. Cover the small area you are working in with a thick layer of tile adhesive, spreading it with a putty knife. Anywhere you will be putting tiles in this section, has to have tile adhesive fully covering that area. Once you have a thick layer applied to your area, take your notched tile trowel (make sure to look up what size of notched trowel you need based on your size of tiles) and scrape it so that the lines go across the short side of your tiles. There will be a lot of excess at this point so just put that back in the bucket to use next.
3. LAYING THE TILES
The first thing you should figure out is where you want to start your pattern and where you want cuts to be. Personally, I like for the pattern to only be cut on the outer edges. Meaning that if you have a corner, your pattern continues around the corner. So for me, I started my pattern in the bottom corner of my wall and worked my way up and out. Each of the tiles I put up, I made sure was level so my pattern didn’t drift.
Most of the time with single tile, you will use a tile spacer. I did not use one because of the handmade look to my tiles. This left me with organic lines and gaps so I decided to place the tiles directly next to one another without spacers. Then I just leveled them as I went.
I have very simple cuts for this project which made this process of working around the spots that weren’t cut yet pretty simple. Starting with a full tile piece and then measured 6″ up from the counter (half of the size of my tiles). Then placed my next tile so that I could quickly tile 95% of the area without having to stop and cut. I waited until I laid all of my full pieces and then went back and did all of my cuts. The hardest part of this is keeping them all organized for what cut goes where.
If you are going to be using tile trim to finish the edges of your tile, you will need to install it along with your tile. The tile trim I’ve seen gets secured by pressing it into the adhesive and then you place the tile over that. I am not using one of those so I can’t give you much more information than that. Keep reading to see how I’ll finish the edges.
4. CUTTING TILES
Trust me, I know how intimidating cutting tiles sounds but you have nothing to worry about! Tiles are one of the easiest things to cut. Yes, they are fragile but this was my first experience cutting tiles as well. I made 2-3 mistakes cutting (and this was just because some of the cuts were slightly more difficult).
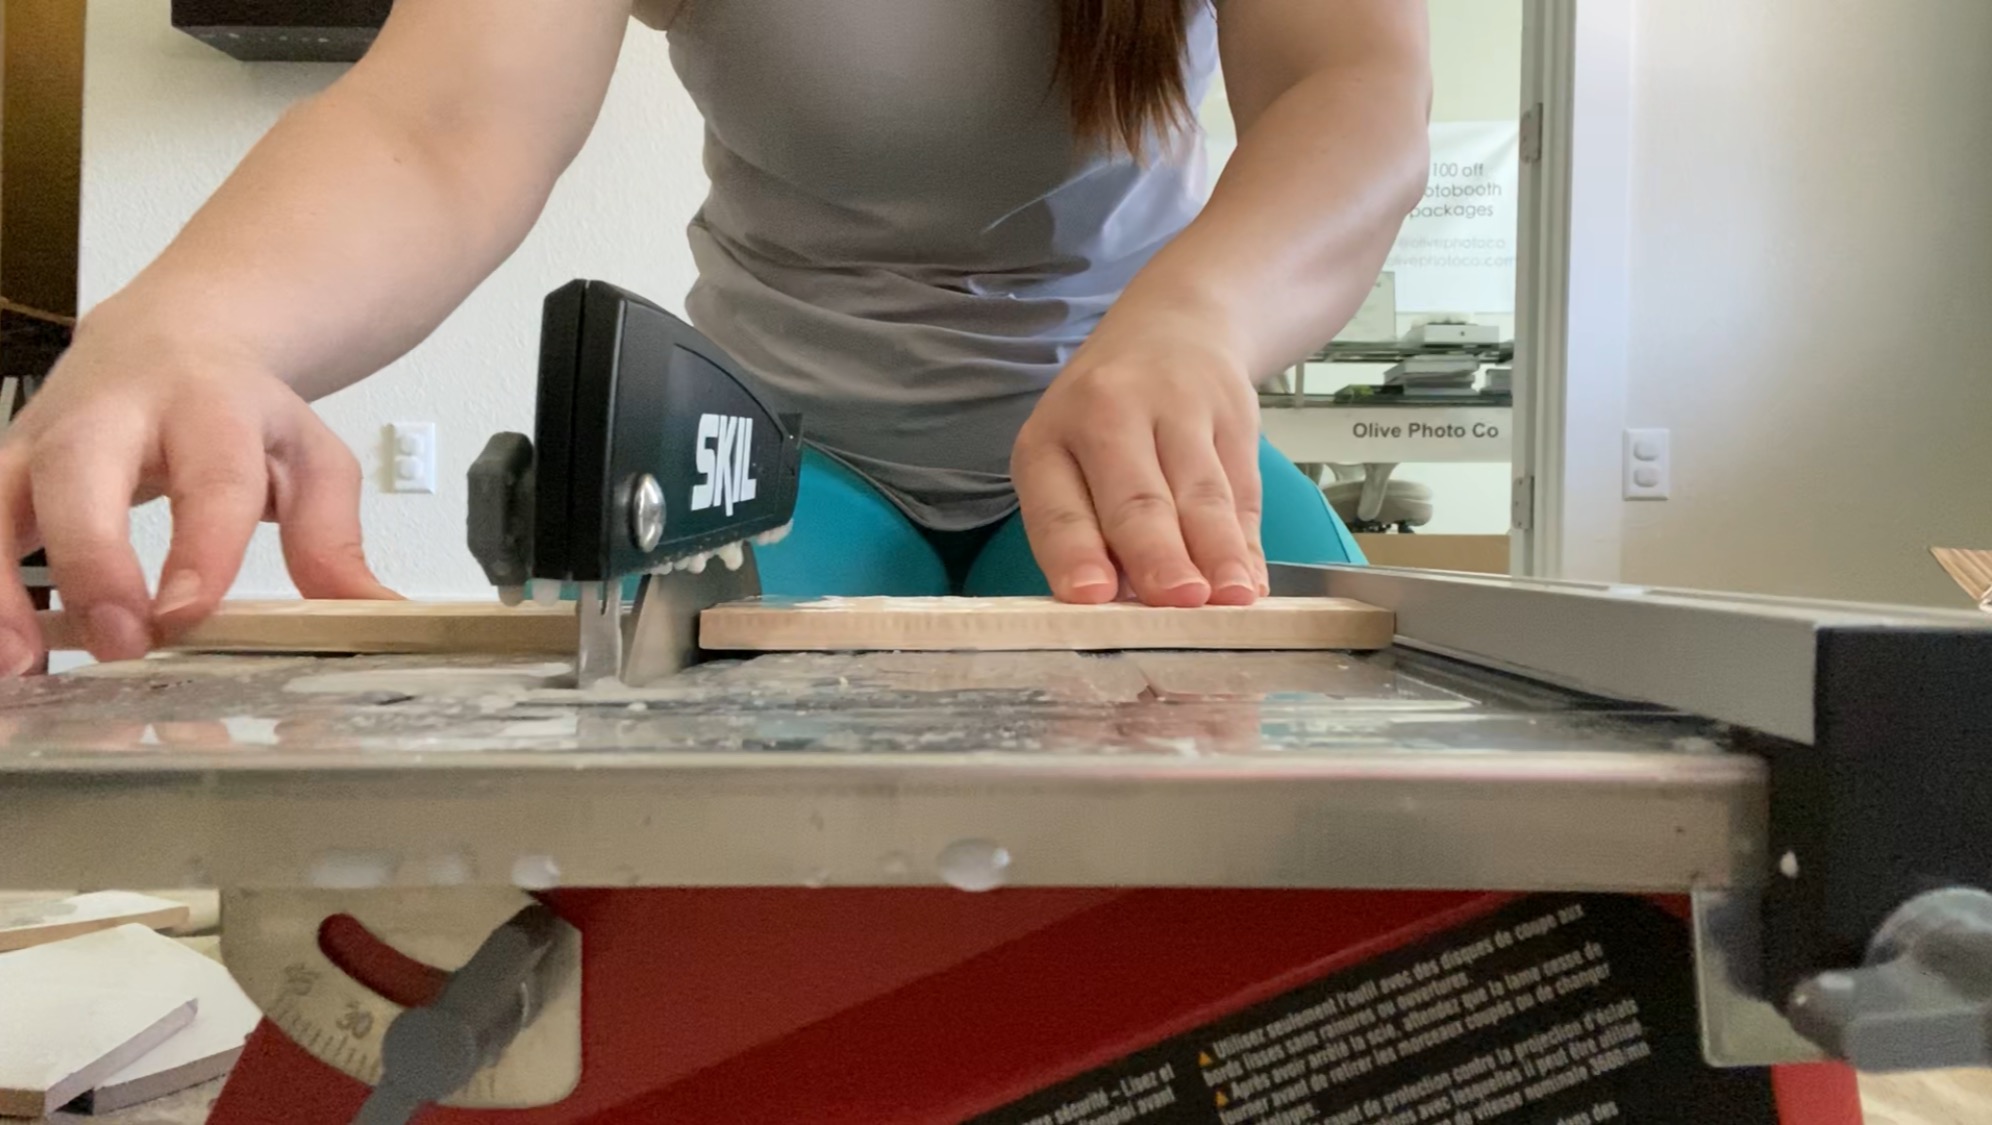
If you don’t have a tile saw, you can rent one from your local Home Depot for pretty cheap! If you ever plan on tiling again, though, I highly recommend just buying a small one. We have rented a tile saw 3 times and if we would have bought it the first time, it would have already paid for itself. But the point is that either way you go, just rent one at least. You do NOT want to have uncut tiles. You can fill some cracks with grout, but take just a little more time and money to cut them down to fit your space perfectly. Then make it look like a professional did your tile work.
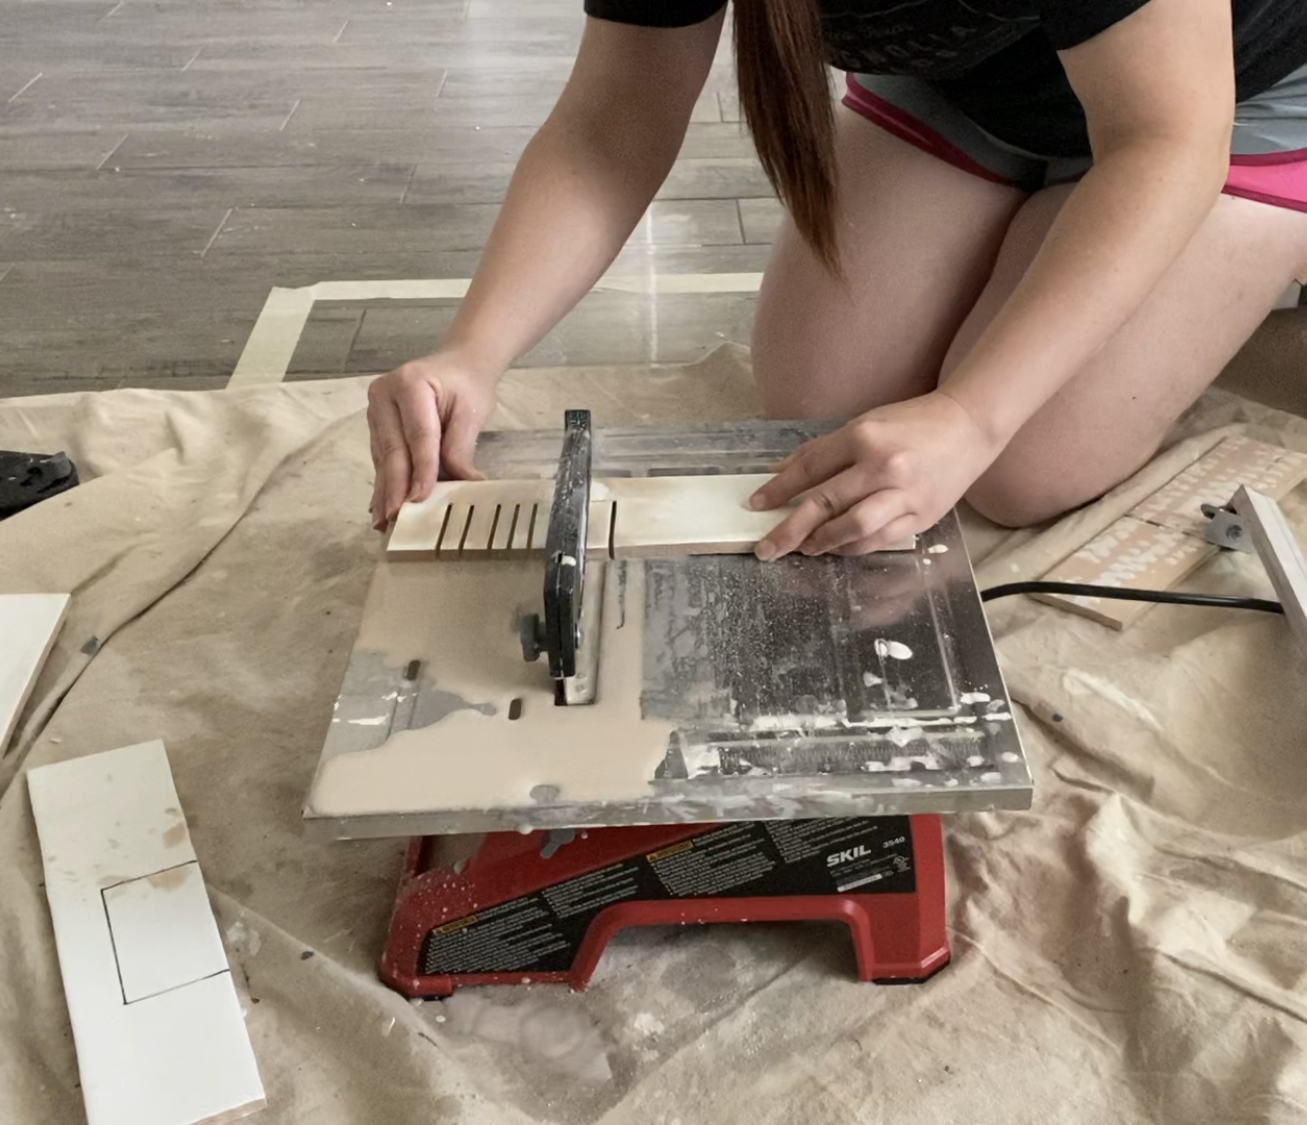
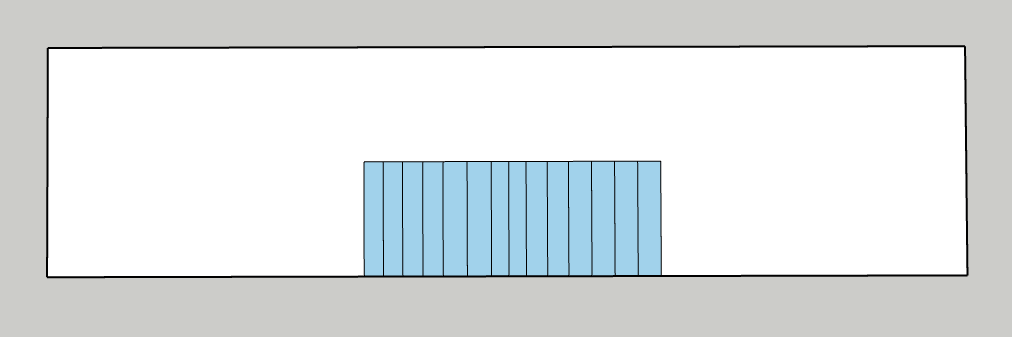
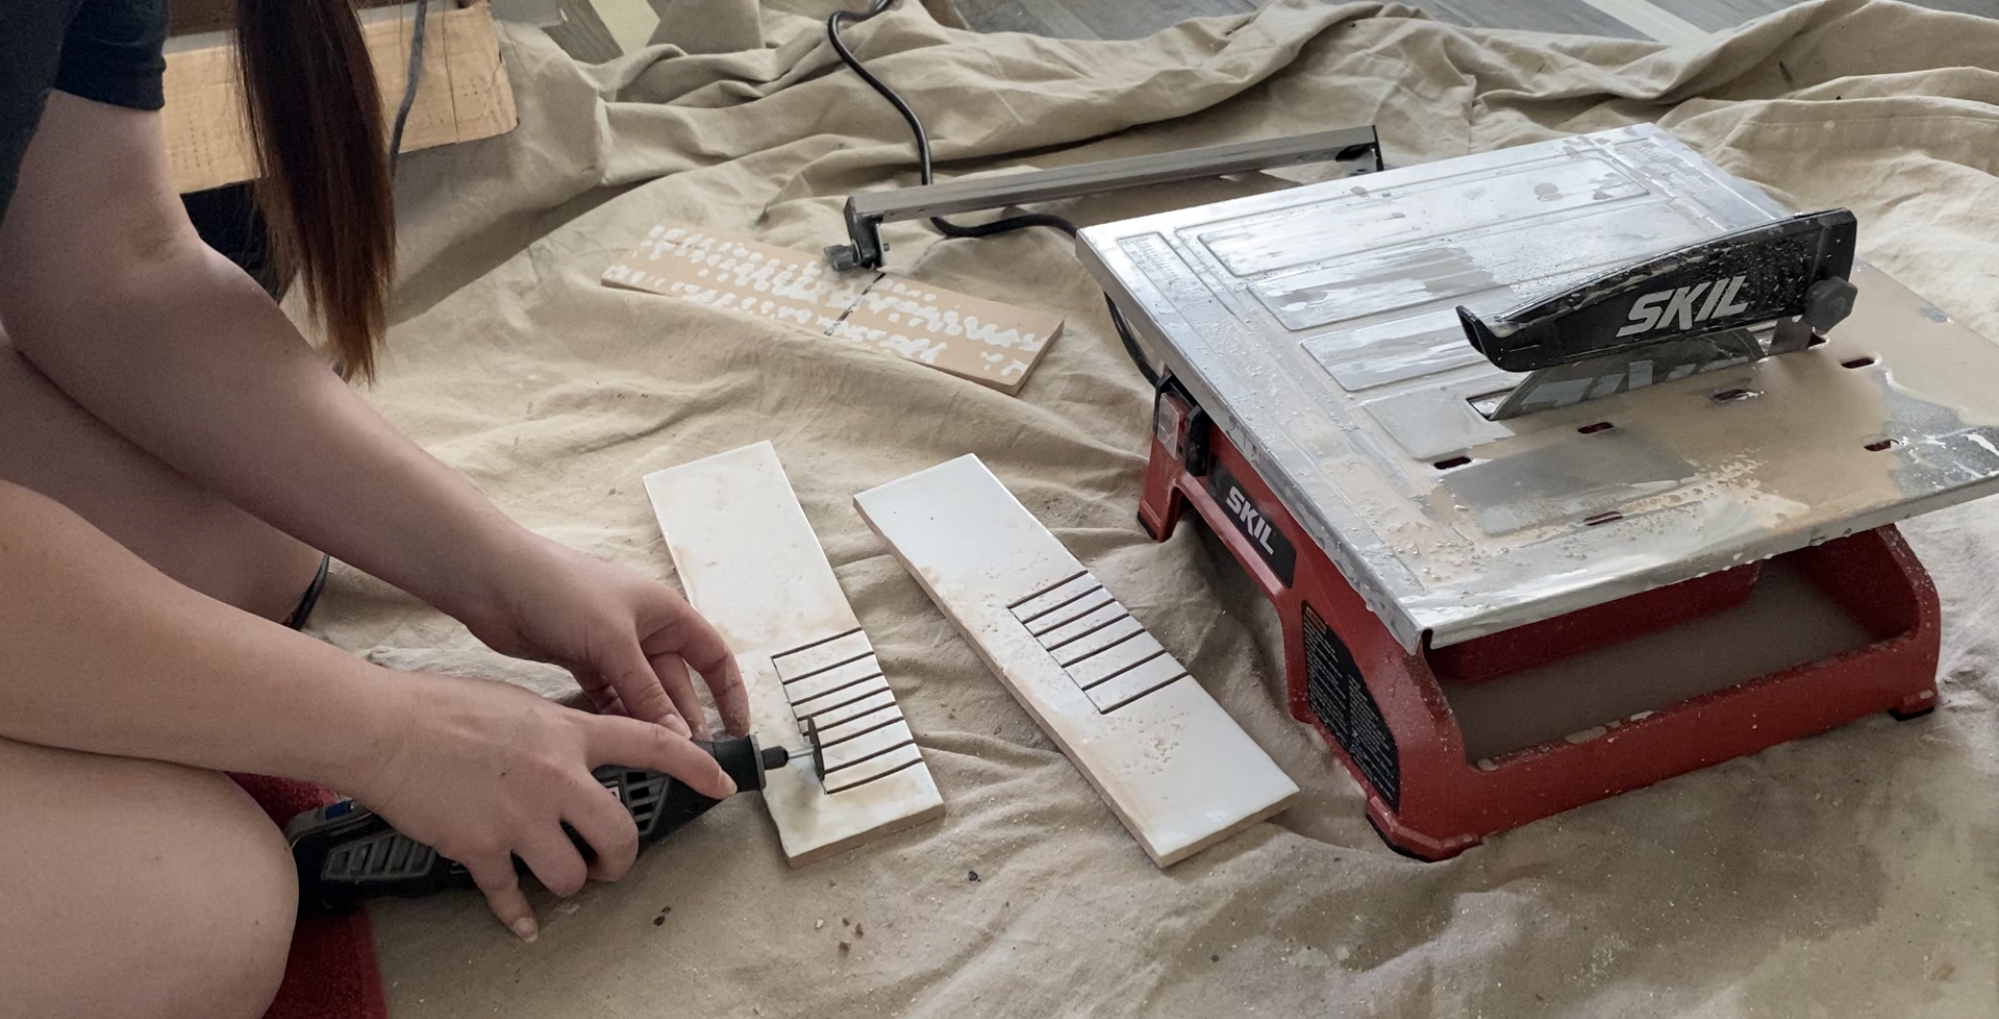
If you have a weird cut to like going around an electrical outlet, here’s what you do. I needed to cut around the outlet and the light switch in my bathroom so I had to lookup what to do, I had no clue! But no worries, it’s super easy! If you see the diagram below, this is basically an example of the piece I needed to cut out of my tile. The blue is the part you want gone, so you will cut the two outer edges of the area you are cutting off. Then you will just start making smaller cuts like the lines shown below. All you’re doing is weakening the tile where you want it to break (but don’t break it yet!) You will want to do this with the face of the tile up so that it is left with the cleanest cut.
After making your small cuts, you want to score along all of the small cuts made so that you can have a clean break. I used a Dremel to make this score on the face of the tile. Once you score the tile a little bit, you can just tap the end of the tiles with another piece of tile or a small (tiny) hammer. Just be sure to only hit the pieces that you want to come off. Then you’ll have just about the cleanest cut you can get!
5. CLEAN YOUR TILES
In case some of the tile adhesive squeezes out from behind the tiles, be sure to clean it before it dries or you’ll have to scrape it off with a razor blade. Depending on your tile, this could damage it.
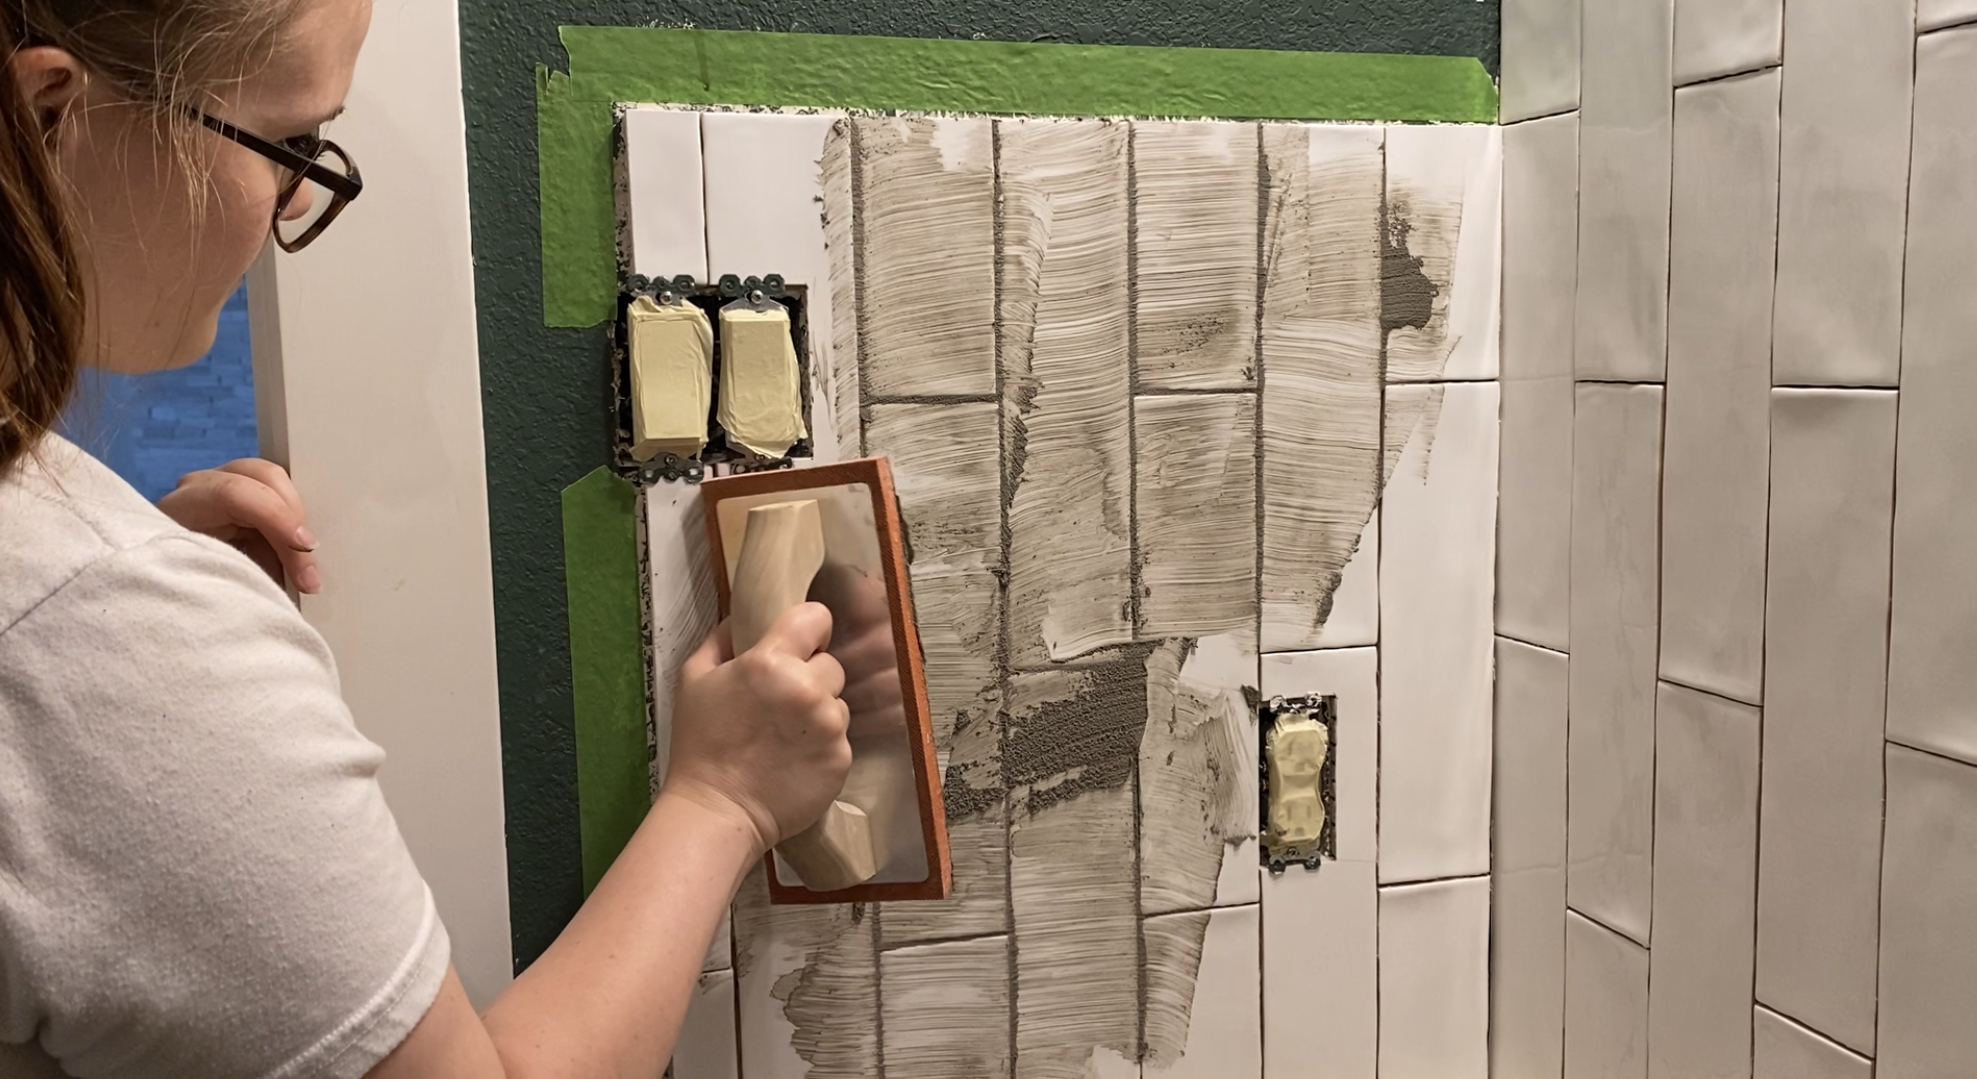
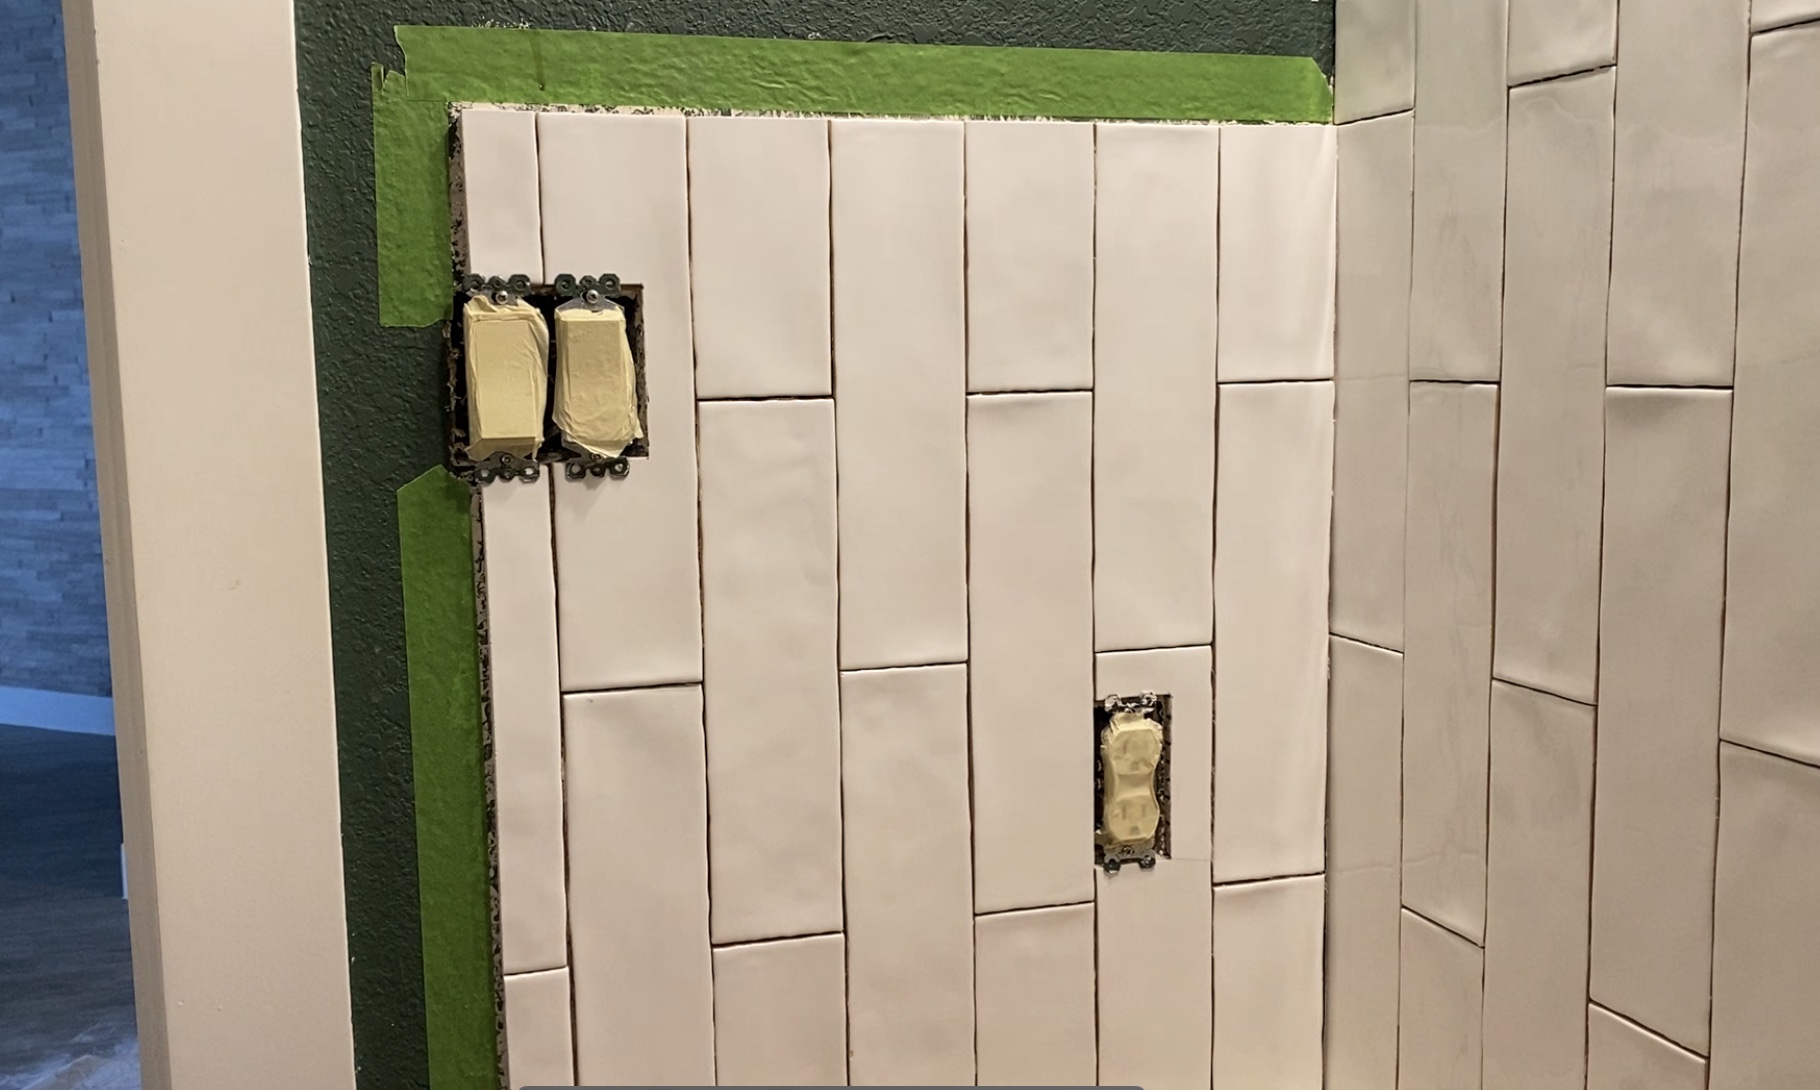
6. GROUT
Let your tile adhesive dry before grouting.
There are two options for grout, pre-made and mix yourself. I bought a bag of mix yourself grout. Only because I actually found a bag in the color I wanted on clearance for $2! If you saw the blog post about how we build the stone garden borders, you will already know how to mix this because it’s similar to the mortar mix except its just the dry grout and water until its a thick peanut butter consistency.
To apply the grout in between the tiles, you will put the grout on a rubber float and rub the grout across the face of the tiles and press into the cracks. Run the float perpendicular to the tile lines with the float also tilted at about a 45 degree angle. This just means that the float shouldn’t be flat against the tiles. Make sure you also work this in small sections because the grout will be all over the tiles and you don’t want it drying on the face of the tiles.
In between sections, take a damp sponge from a small bucket of water and wipe off the excess grout. I also took a paper towel after the sponge to make sure I got everything off the tiles.
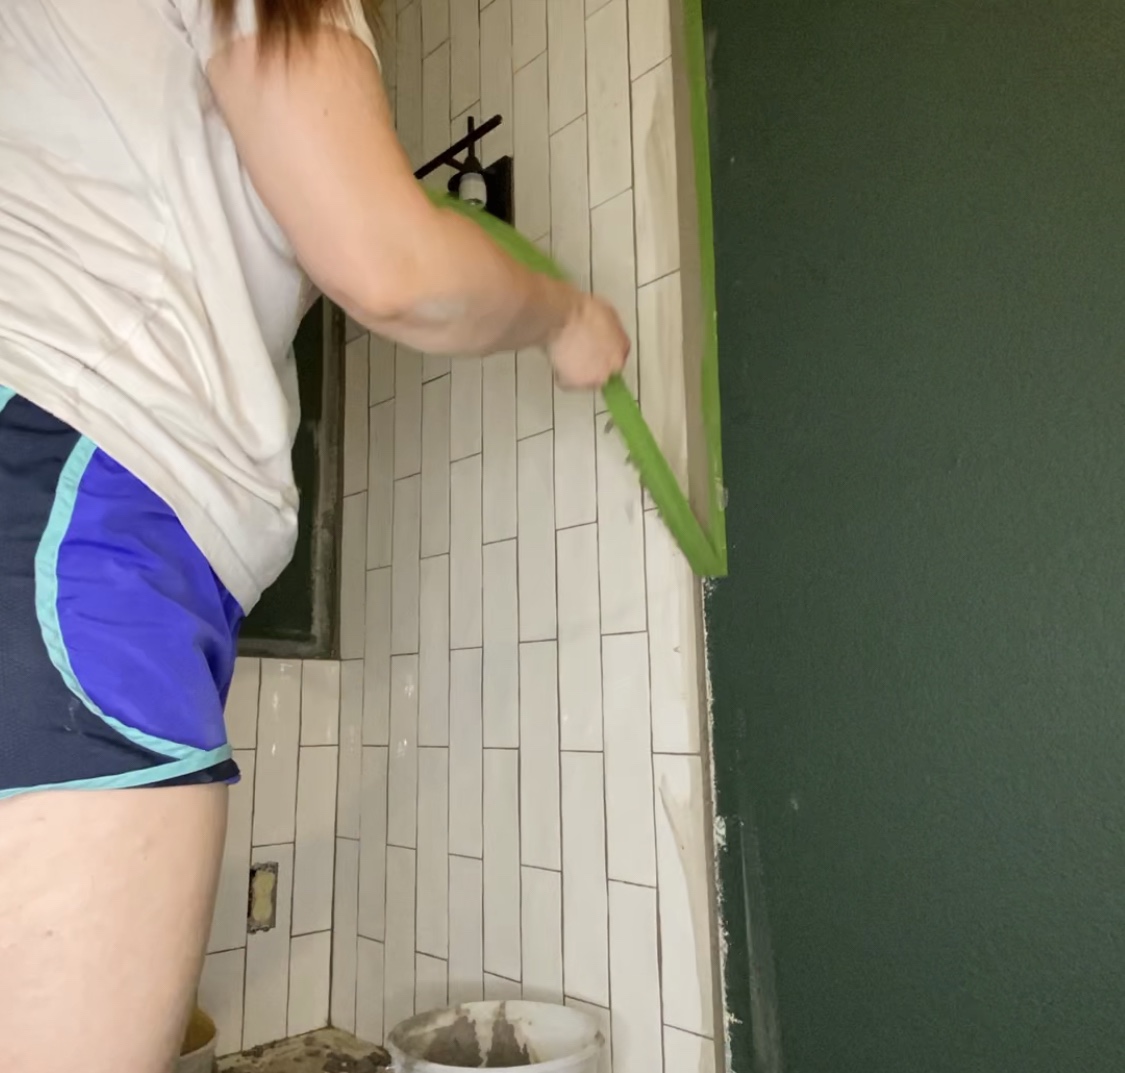
7. FINISHING THE EDGES
Finally let’s finish the edges. Like I mentioned earlier, you can finish the tile with a tile trim but I am not using that. So what I will do to finish the edge is simple. I first took painters tape and taped parallel to the edges where I want to finish the tile about 1/4″ away from the tile.
Then I filled the gap between the tape and the tile with grout. Similar to how you use caulk on a seam.
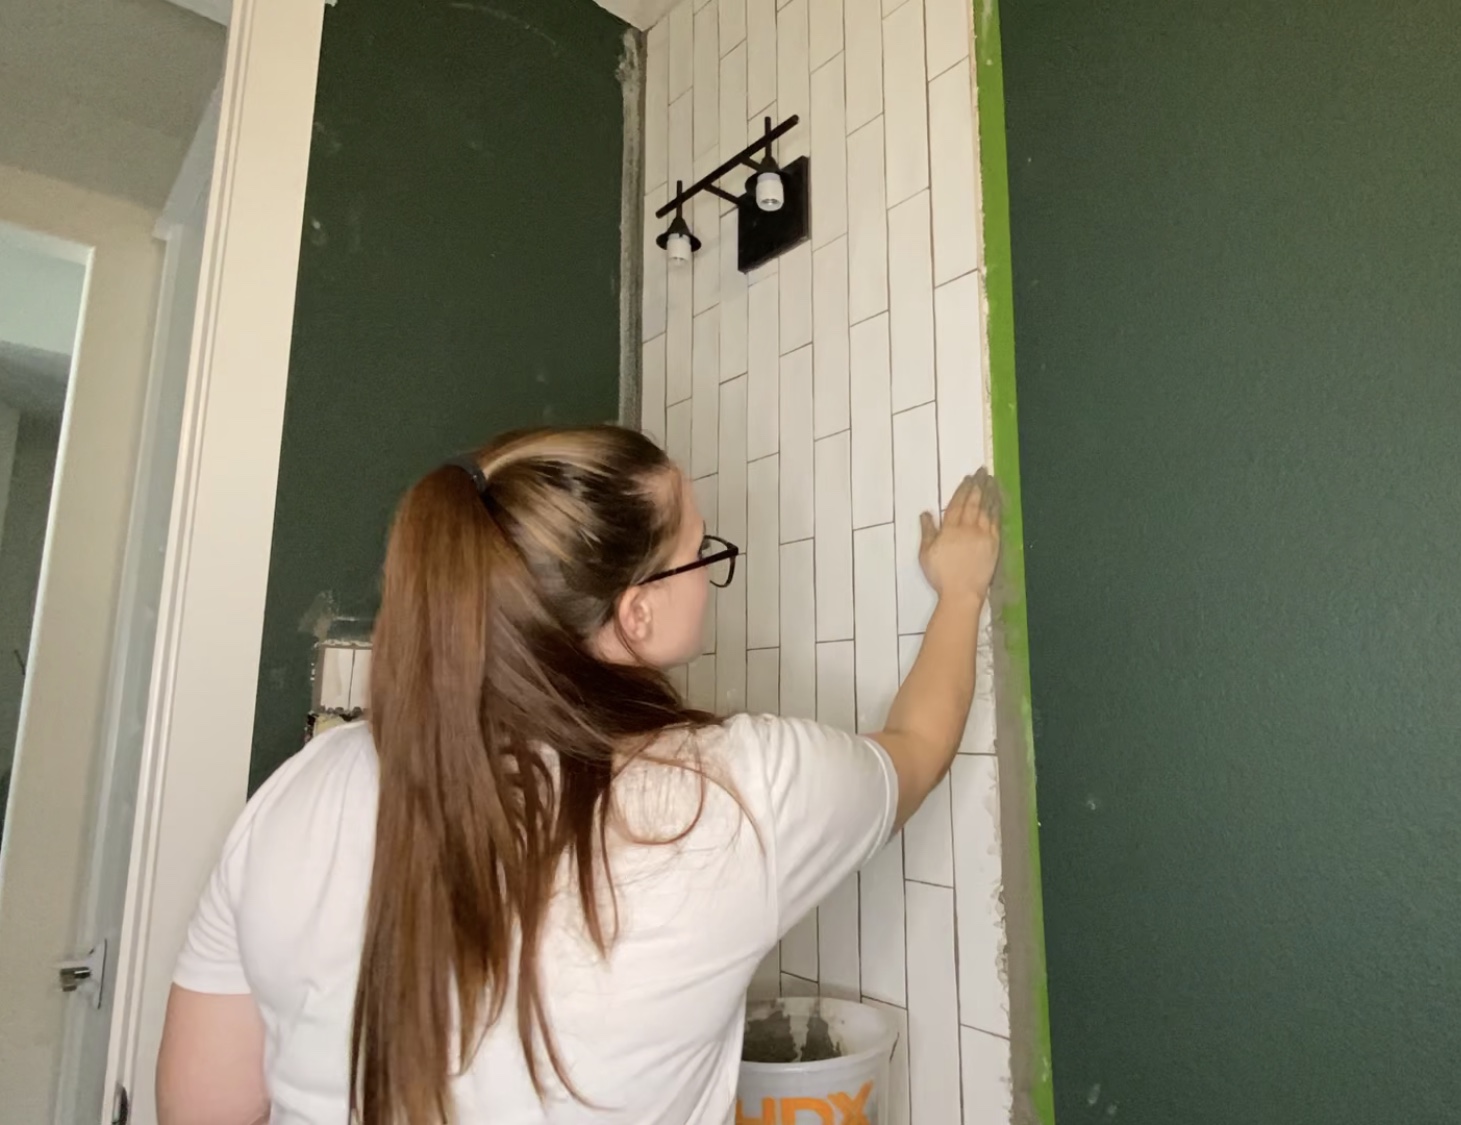
As soon as it’s covered the area and smoothed out, take the tape off before it dries. This will give you a straight and beveled line for your grout finish.
Thank you for joining us this week for week three of the One Room Challenge! Next week we will be diving into the lighting details of this space, how we brightened it up and a fun DIY light shade!
Be sure to subscribe to the blog and to our YouTube channel so that you’re the first to see what we’re up to every week!
Until next week, friends!
Find us on social HERE!


