DIY Wiring a New Light


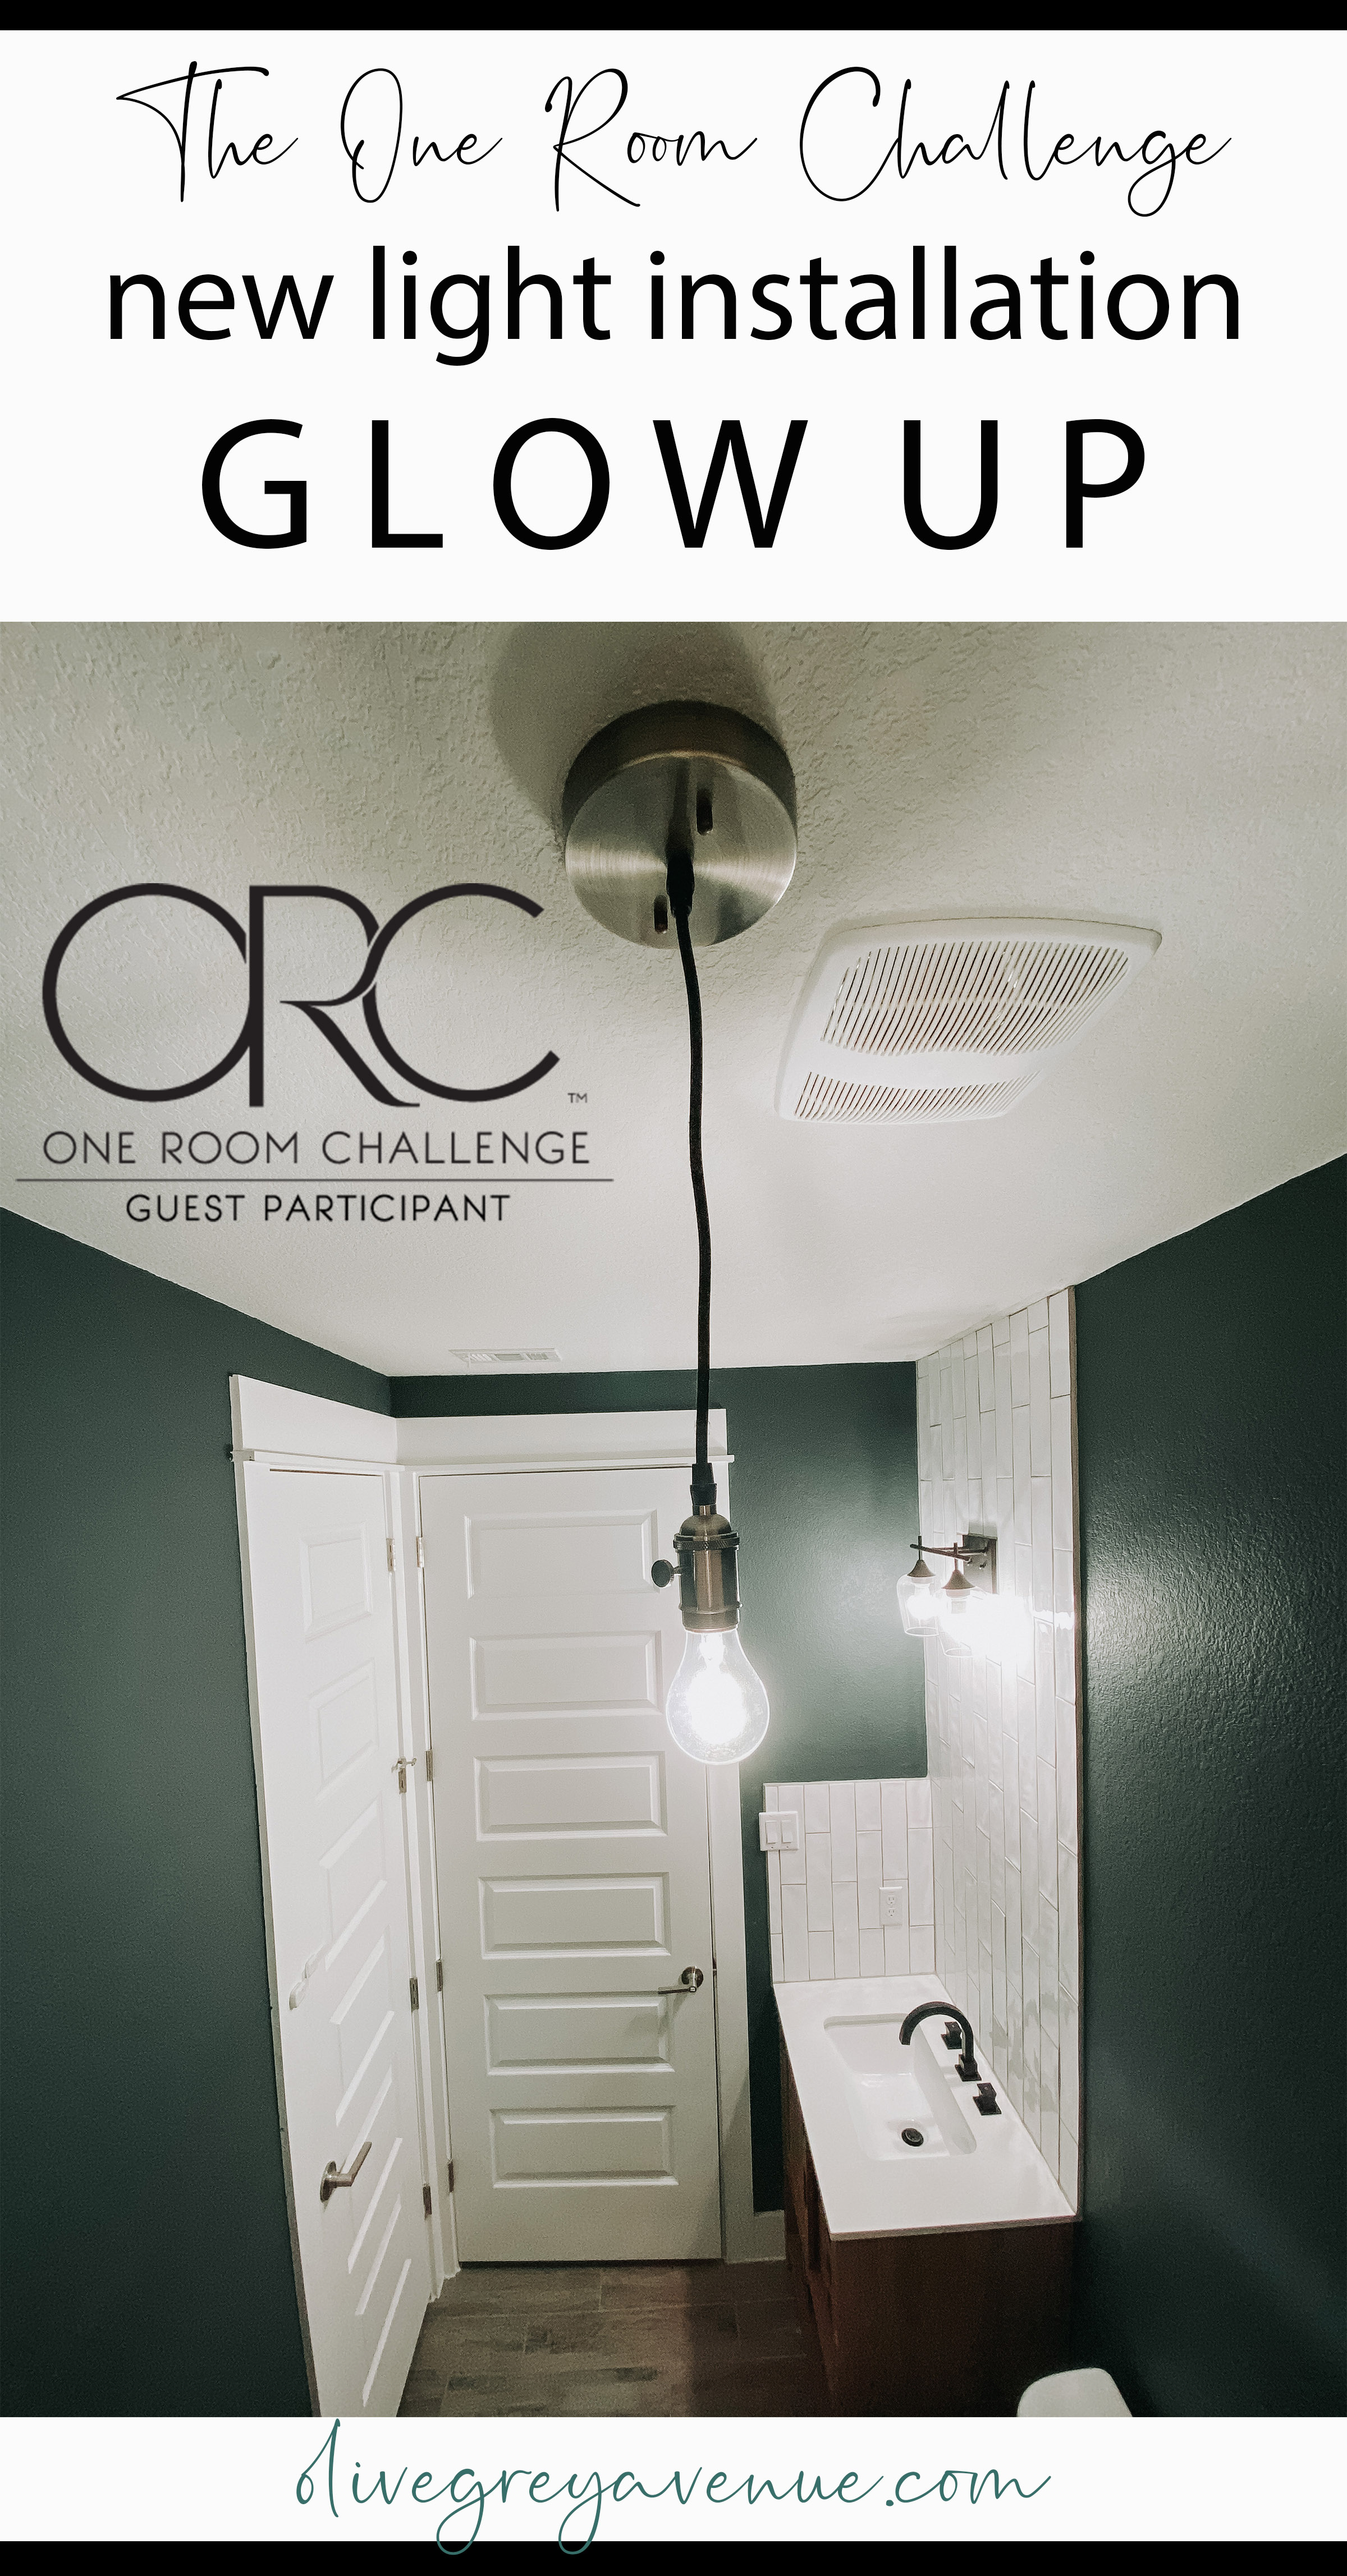
HEY EVERYONE! A little change of pace for this blog with a new writer, ME! I’m Steve, Ruth’s husband and general jack of all trades that usually does some work in the background. This time we’ll be going over the upgrade of a light fixture. As well as the installation of a new light in the room tied to the existing switch for this week of the One Room Challenge. This means running some new electrical cable to the location of the new light.
WARNING: If you are not familiar or comfortable doing electrical work please reach out to a licensed electrician. A house wiring circuit can, under certain conditions, transmit a fatal current. While any amount of current over 10 milliamps (0.01 amp) is capable of producing painful to severe shock currents between 100 and 200 mA (0.1 to 0.2 amp) are lethal.
Wiring a New Light Fixture
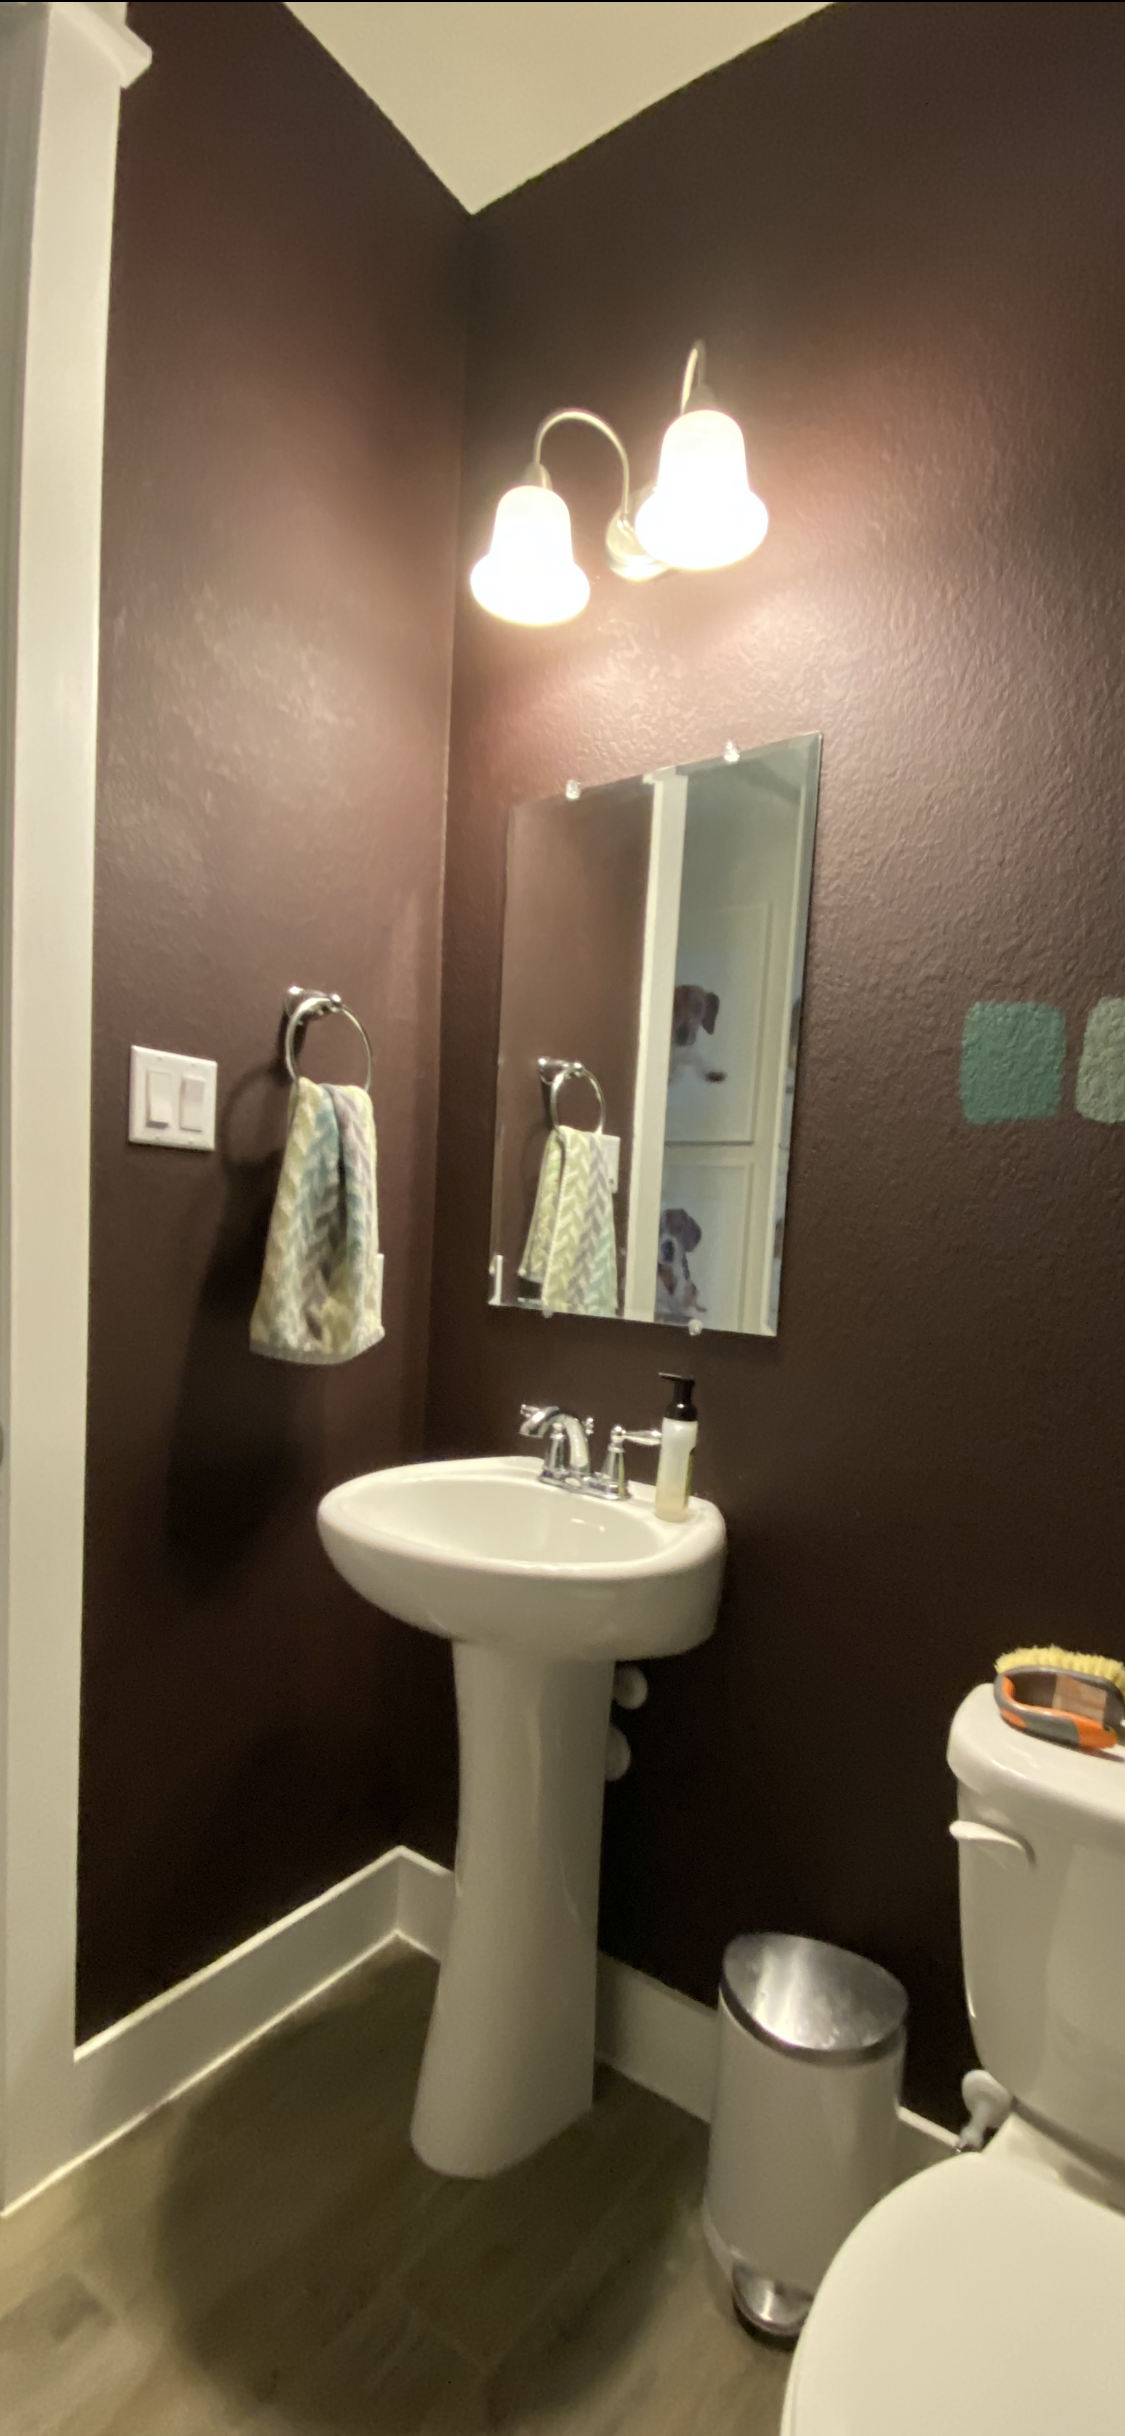
This bathroom had some builder basic light fixture. With the room being so large it felt a bit under lit. So as part of this One Room Challenge we want to make sure that all the new features and improvements we’re making to this room are properly lit
This tutorial may not be for everyone, as mentioned above, we’ll be doing some electrical work. This means working in the dark for a while. As it is very important to turn off power to the room you are working in. This work may seem daunting but if you take the necessary precautions it’s not so bad. The upgrade of a light fixture is pretty simple. We’ll go over it first and then dig into the work that goes into the installation of a new light as its tied into the existing light fixture we’re already going to be working on.
SUPPLIES:
For the light fixture upgrade:
- Phillips Screwdriver.
- Diagonal Cutting Pliers.
- Wire Stripper.
- Electrical Tape.
For the new light work in addition to the list above:
- Drywall knife
- Drill
- 1″ Spade drill bit or a flexible drill bit
- Wire Connectors
- Old work/retrofit electrical box
- 12/2 w/ ground Romex electrical cabling (amount varies we got 50ft)
Let’s get started with the upgrade of the light fixture. This work is as simple as following the instructions that come with the light fixture you purchase. If those instructions aren’t as clear as you’d like or maybe you don’t have them, then this should help you out.
STEP 1: TURN OFF POWER
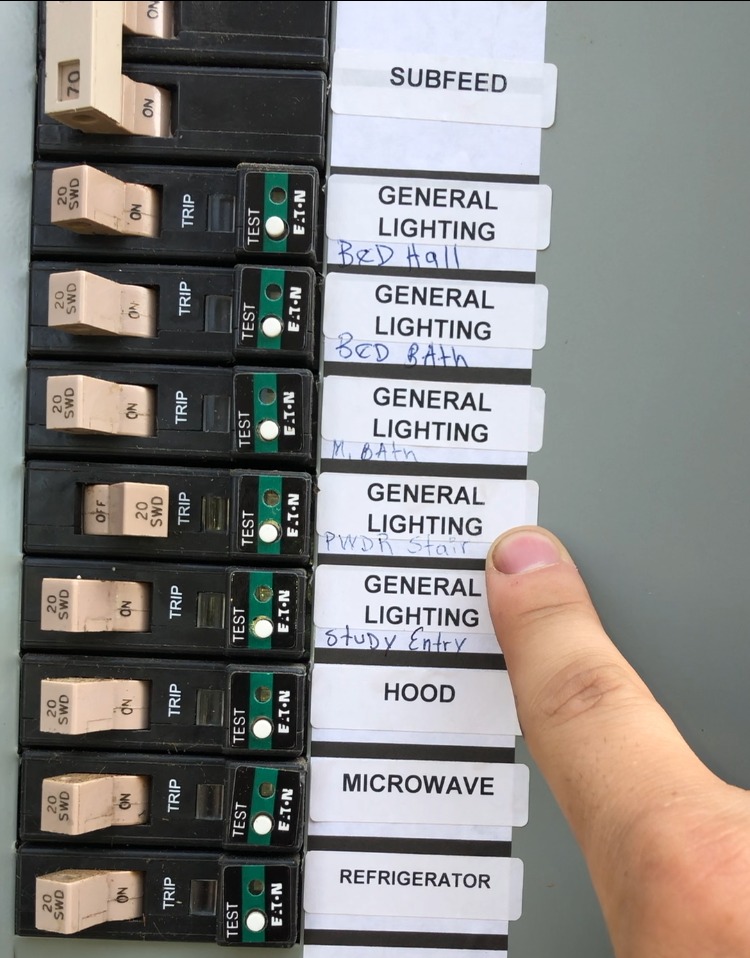
This is always step 1 and the most important part of doing any electrical work. Just head over to your electrical panel and turn off the breaker that corresponds with the room or location in your house you’re working on.
Normally the breakers are labeled. If yours aren’t then you can use this opportunity to figure out which breaker is which and label them for the future. So turn on all the lights in your house and then turn off one breaker at a time and see which room or area goes dark. Then label the breaker accordingly, turn it back on, and move on to the next.
Once you have turned off power to the room you’ll be working in, it’s time to get started!
STEP 2: REMOVE THE OLD LIGHT FIXTURE
Since you’re working in the dark it’s a good idea to have a couple flash lights or other light sources. The fixture we had in the bathroom was removed. Just about the same way many of the other light fixtures are. It had two thumbscrews on the face and once you unscrew those it comes right off the wall.
There should be no power on these cables but I like to treat the cables as if they were live. This means that once disconnected, I don’t let any exposed wires touch.
Now the only thing holding the light fixture up will be the wire connections. If you live in a newer home, you should see 3 wires. The black wire is the “hot” wire. This carries the electricity from the breaker panel into the switch or light source. The white wire is the “neutral” wire. This takes any unused electricity and current and sends them back to the breaker panel. The bare copper wire is the ground which connects to…well the ground.
The wires are commonly held together with some twist on wire connector as seen below. Simply untwist these connectors and pull the wires apart. Keep these connectors though because they can come in handy later on.

You can leave the existing hardware connected to the electrical box if its compatible with your new fixture. Our new fixture came with the same hardware. So, there was no point in removing it. If you need to remove it, a screw driver is usually enough to remove it. Then you would put on the hardware that came with your fixture. Now you should have a hole in your wall with some wires coming out of it.
STEP 3: INSTALL THE NEW LIGHT FIXTURE
NOTE: If you’re installing a new light in the room and want it tied to the existing fixture, like we want, then you will have to pause here and begin the work on the new light. This is because we need access to these cables and will tie into them later.
The installation is as easy as doing what you just did in reverse. So with your new light fixture set up the mounting bracket. If you removed it from the existing light, and then connect the wires to the corresponding colors. Your fixture should have a ground, a black, and white wire as well.
Using the connectors you removed earlier or with the ones that came with your new light.
Roughing In A New Light
So when we went over the steps on installing this new light it sure sounded easy, at least that’s what I thought.
The basics of this installation are:
- Determine new light location
- Calculate minimum cable distance
- Start making some holes
- Route your cable
- Install rough in the electrical box
- Strip the cable and install the light
DETERMINE THE NEW LIGHT LOCATION
Ruth wanted the light about close to the center line of the room as possible. She also wanted it to the rear of the room to light up the dim area. This adjustment would also shine some light onto our improvements. Selecting a location is very important and its also critical to deciding the type of old work electrical box you need.
There are multiple types of electrical boxes for a variety of situations. We initially went with an electrical box that could brace to the joists so that the location of a stud or joist wouldn’t be much of an issue…or so we thought.

Once our location was set we calculated how much Romex was needed. To do this we measured from the center of the new hole to the wall then from that point to the center of the existing hole but on the ceiling and then down to the hole. This calculated to about 20 ft so we bought 50ft because we have other projects coming up. This will also get you your minimum length of cable you need to buy because you need slack to go over plumbing or around corners and other obstacles and it would suck to be short on cable.
ROUTING THE ELECTRICAL CABLE
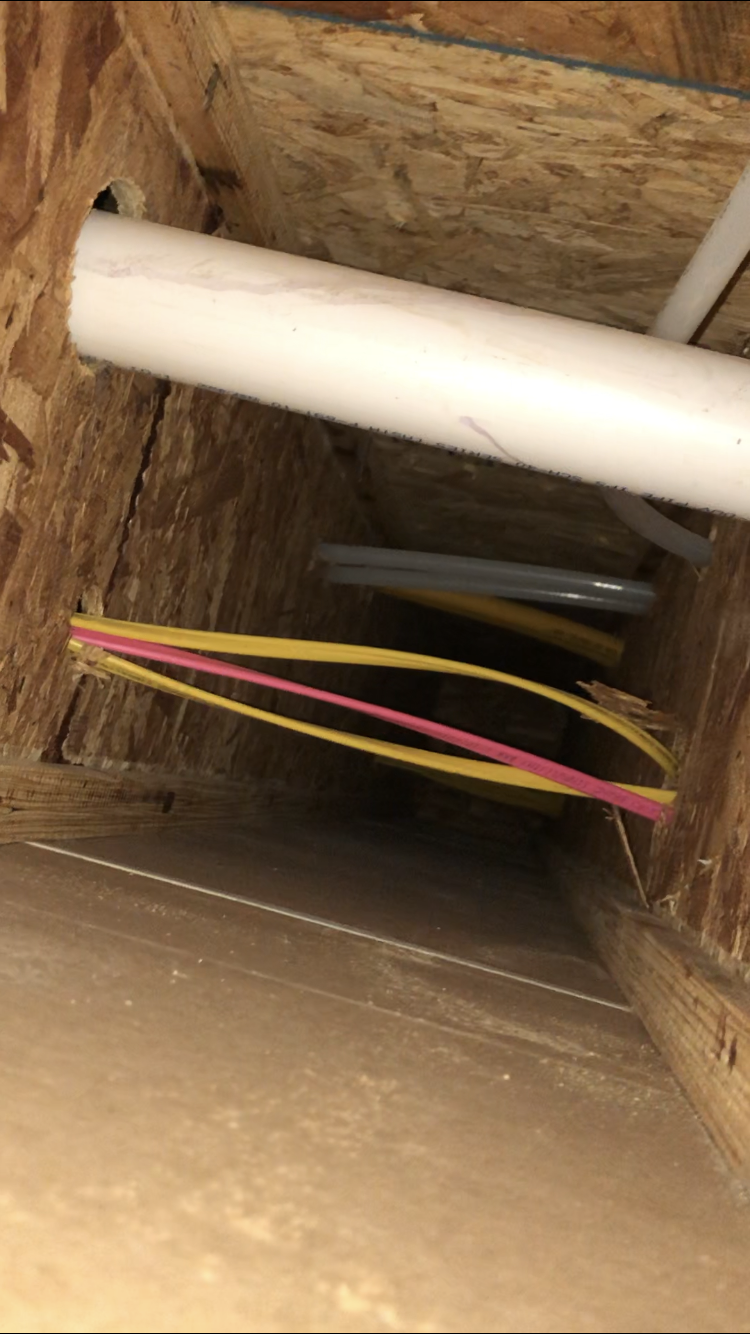
We had our location set so we used the electrical box to trace the shape on the ceiling. Then we took a drywall knife and carved out the hole. When we took a look inside we found ourselves in a valley between two I-Joist since right above us is the second floor. This meant we couldn’t see the cabling that we needed to splice onto. We needed to get a better vantage point.


Right next to the location of our new light was the bathroom exhaust fan. It was easy to remove and this gave us a good position to look for the existing cabling because the fan was connected to the switch (red cable) that was right next to the light switch. So we thought, follow the cabling of the fan and we’ll find the light cabling too. We removed the exhaust fan and we were in the next valley over and able to see the cabling.
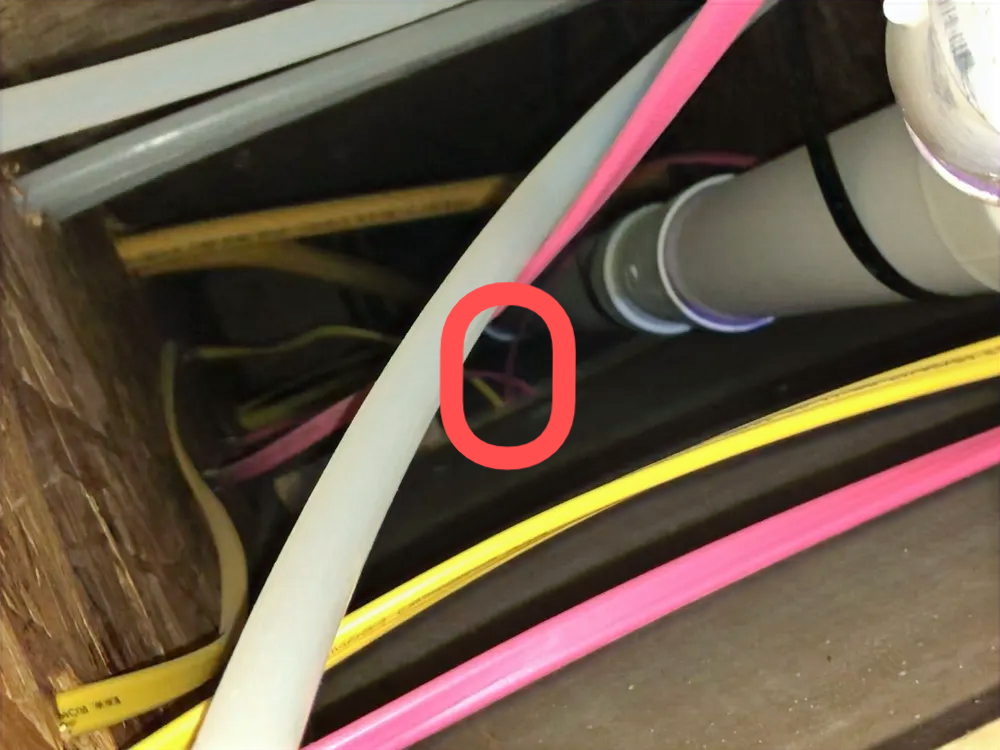
Finding the right cable can be difficult…
From here we were able to see that the cabling on the existing light fixture went up the wall, into the valley our head was poking up into, and then down into the wall to the light switch (X marks the spot below). So what we had to do now was feed the cable through along the existing route. We could see the top area of the cabling. We could not see the portion in the wall that lead to the existing light fixture.
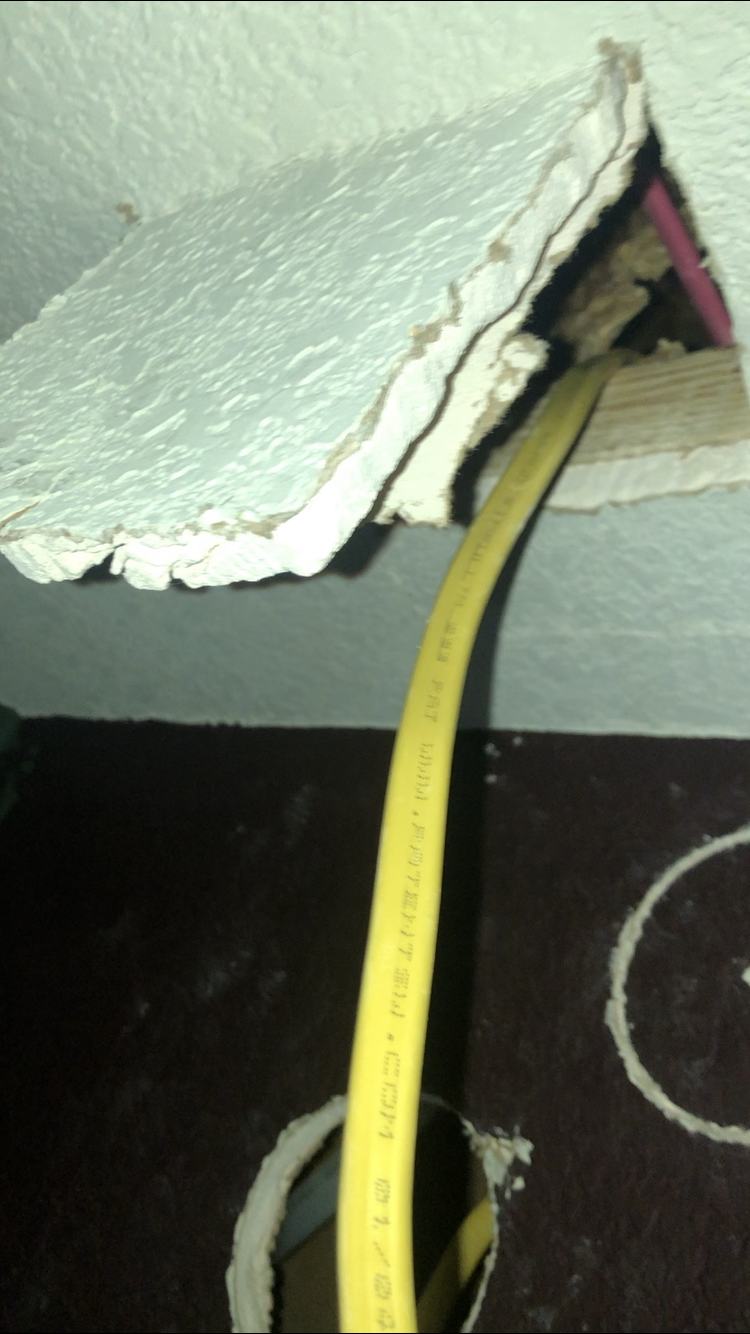
The next step in our adventure was to find a way to feed the cabling through. We decided to open a hole near the ceiling on the wall and another near the wall on the ceiling. This way we could feed the cabling up through the existing light fixture, through the I-joist and down the valley towards the exhaust fan. This part sounds easy, but it took many attempts. It even a couple hours to get the cable through the holes that existed. We even had to drill another exit hole in the I-Joist near the wall to allow the cable to be fished out.


We finally got the cabling through from the existing light fixture opening up the wall, through an I-joist and over to the fan. Now we only had 1 I-joist in our way. Using the drill and 1″ spade bit we drilled a neat hole in the I-joist to make it to our new opening and light location.


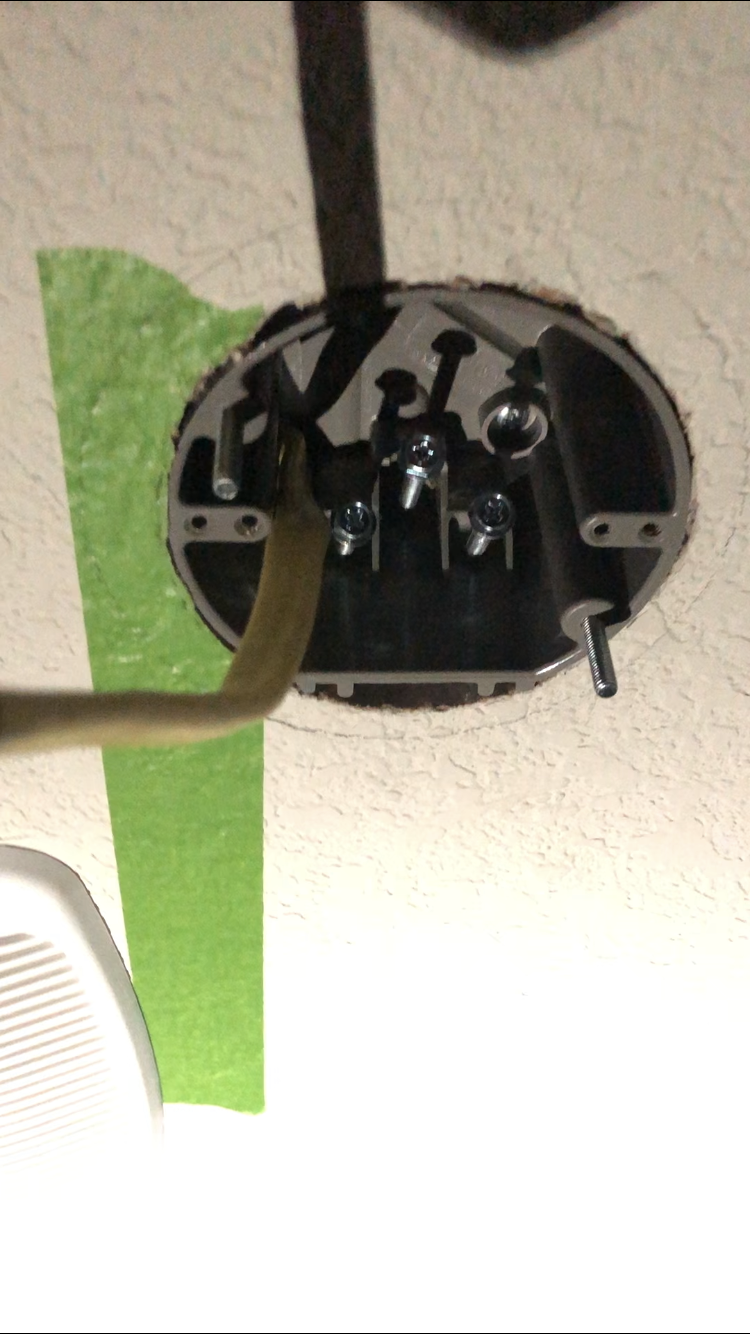
INSTALLING THE ELECTRICAL BOX
We now have the cable routed from point A (existing light) to point B (new light hole). Our next step in the process is to install the electrical box which I mentioned above was an expanding brace and could hold up to a 70 lb ceiling fan. The way this brace works is you set it between the joist and spin it to expand the side brace which then bite into the joists. Good news was that this type of old work electrical box was perfect for our situation but bad news was that the joists were about 11″ apart and the brace was 12″ long. This meant we couldn’t use this brace because of one inch.

Thinking on our feet we found another type of electrical box and made it work. This time we got an electrical box that just screws into the joists with lag bolts on one side of the box. Time for the next problem, our hole was not close enough to the I-Joist to properly be secured, it was about 1-3/4″ away from the I-Joist so we used a 2×4 to close that gap. The 2×4 was secured to the I-Joist and then the electrical box was installed to the 2×4 with the cabling feed through the box.
Now we could move to the splicing of the cable.
TYING INTO THE EXISTING CIRCUIT
By now we’re covered in sweat and drywall but we’re getting close to finishing up. We need to connect our newly fed cable to the existing light fixture point. This is why we paused on step 3 above. Using the Diagonal Cutting Pliers and wire strippers we cut the Romex to size and stripped the cables contained within to expose the bare copper at both points of the new cable .
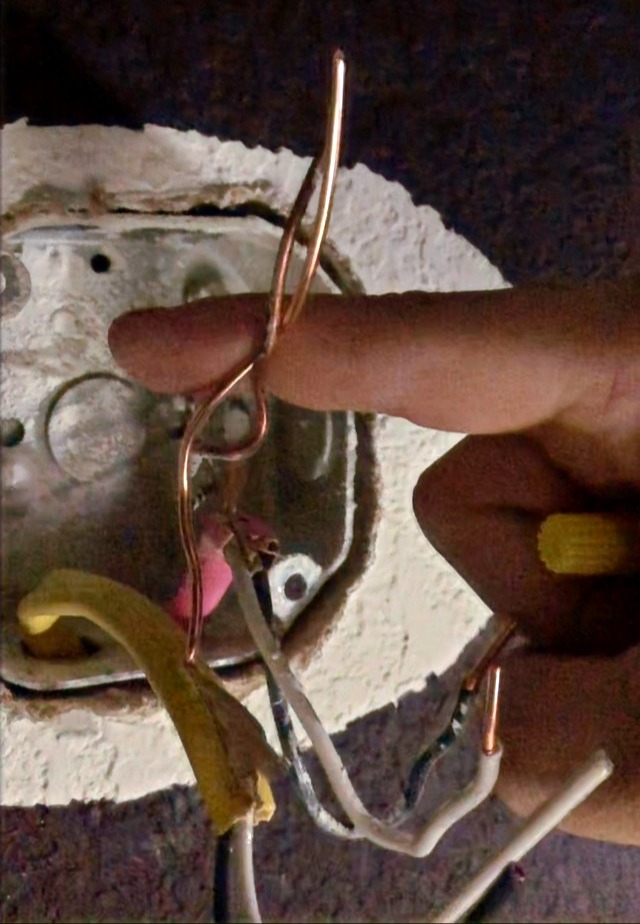
Then we go back and twist it onto the corresponding cables, white to white, black to black and ground to ground. Now just connect the upgraded light fixture to the now doubled up cables in the wall. This is what ties our two lights together to a single switch. You can continue with the light fixture upgrade above and perform the same steps twice as you connect your existing light fixture and your new light fixture. The new light fixture will need to use its new hardware to connect it to the new electrical box but the steps are the same as installing an upgraded fixture.
LET THERE BE LIGHT
Ok so the steps make it seem easier than it actually is, if you thought this was easy boy oh boy will this be a fun project for you. Like I mentioned before, it was easy in theory but it just depends on what the inside of your ceiling/walls looks like because running the wire was the only difficult part. So now you have an upgraded light fixture that is tied to a brand new light fixture but you’re still in the dark.
It’s time to GET LIT. Make sure your switch is in the off position and head on over to your breaker and flip that bad boy. I like to make sure no one is in the room when I’m turning power back on. It’s just an extra precaution on my part, I don’t want something to go wrong and have a light bulb explode or something. It’s never happened but you never know.
So now that the breaker is flipped and power is flowing if you didn’t hear a bang and if the breaker didn’t trip then, YOU DID IT!

Finishing touches
Now the only thing left to do is to patch any remaining open holes. I personally used butterfly patches which is where you create a patch from some scrap or other drywall. This neat illustration shows you what I mean.
There are also lots of drywall patching kits and options so we won’t go into detail on that right now.
We will have to end this post here and leave with you new lights but make sure to subscribe so you can be notified of new posts. This isn’t the last you’ll see of the new light in this challenge. We still have lots to do in this room including a DIY pendant light shade but next week were going to be tackling a feature wall!!!
Also don’t forget to subscribe and check out our Youtube page where we are uploading videos that accompany these posts for the One Room Challenge! Let us know if you have questions in the comments below or hit us up on any of our socials!
Youtube – Olivegrey Avenue
See you next week for week 5 and the feature wall!
Find us on social HERE!