


Restoration Hardware DIY Media Console Dupe


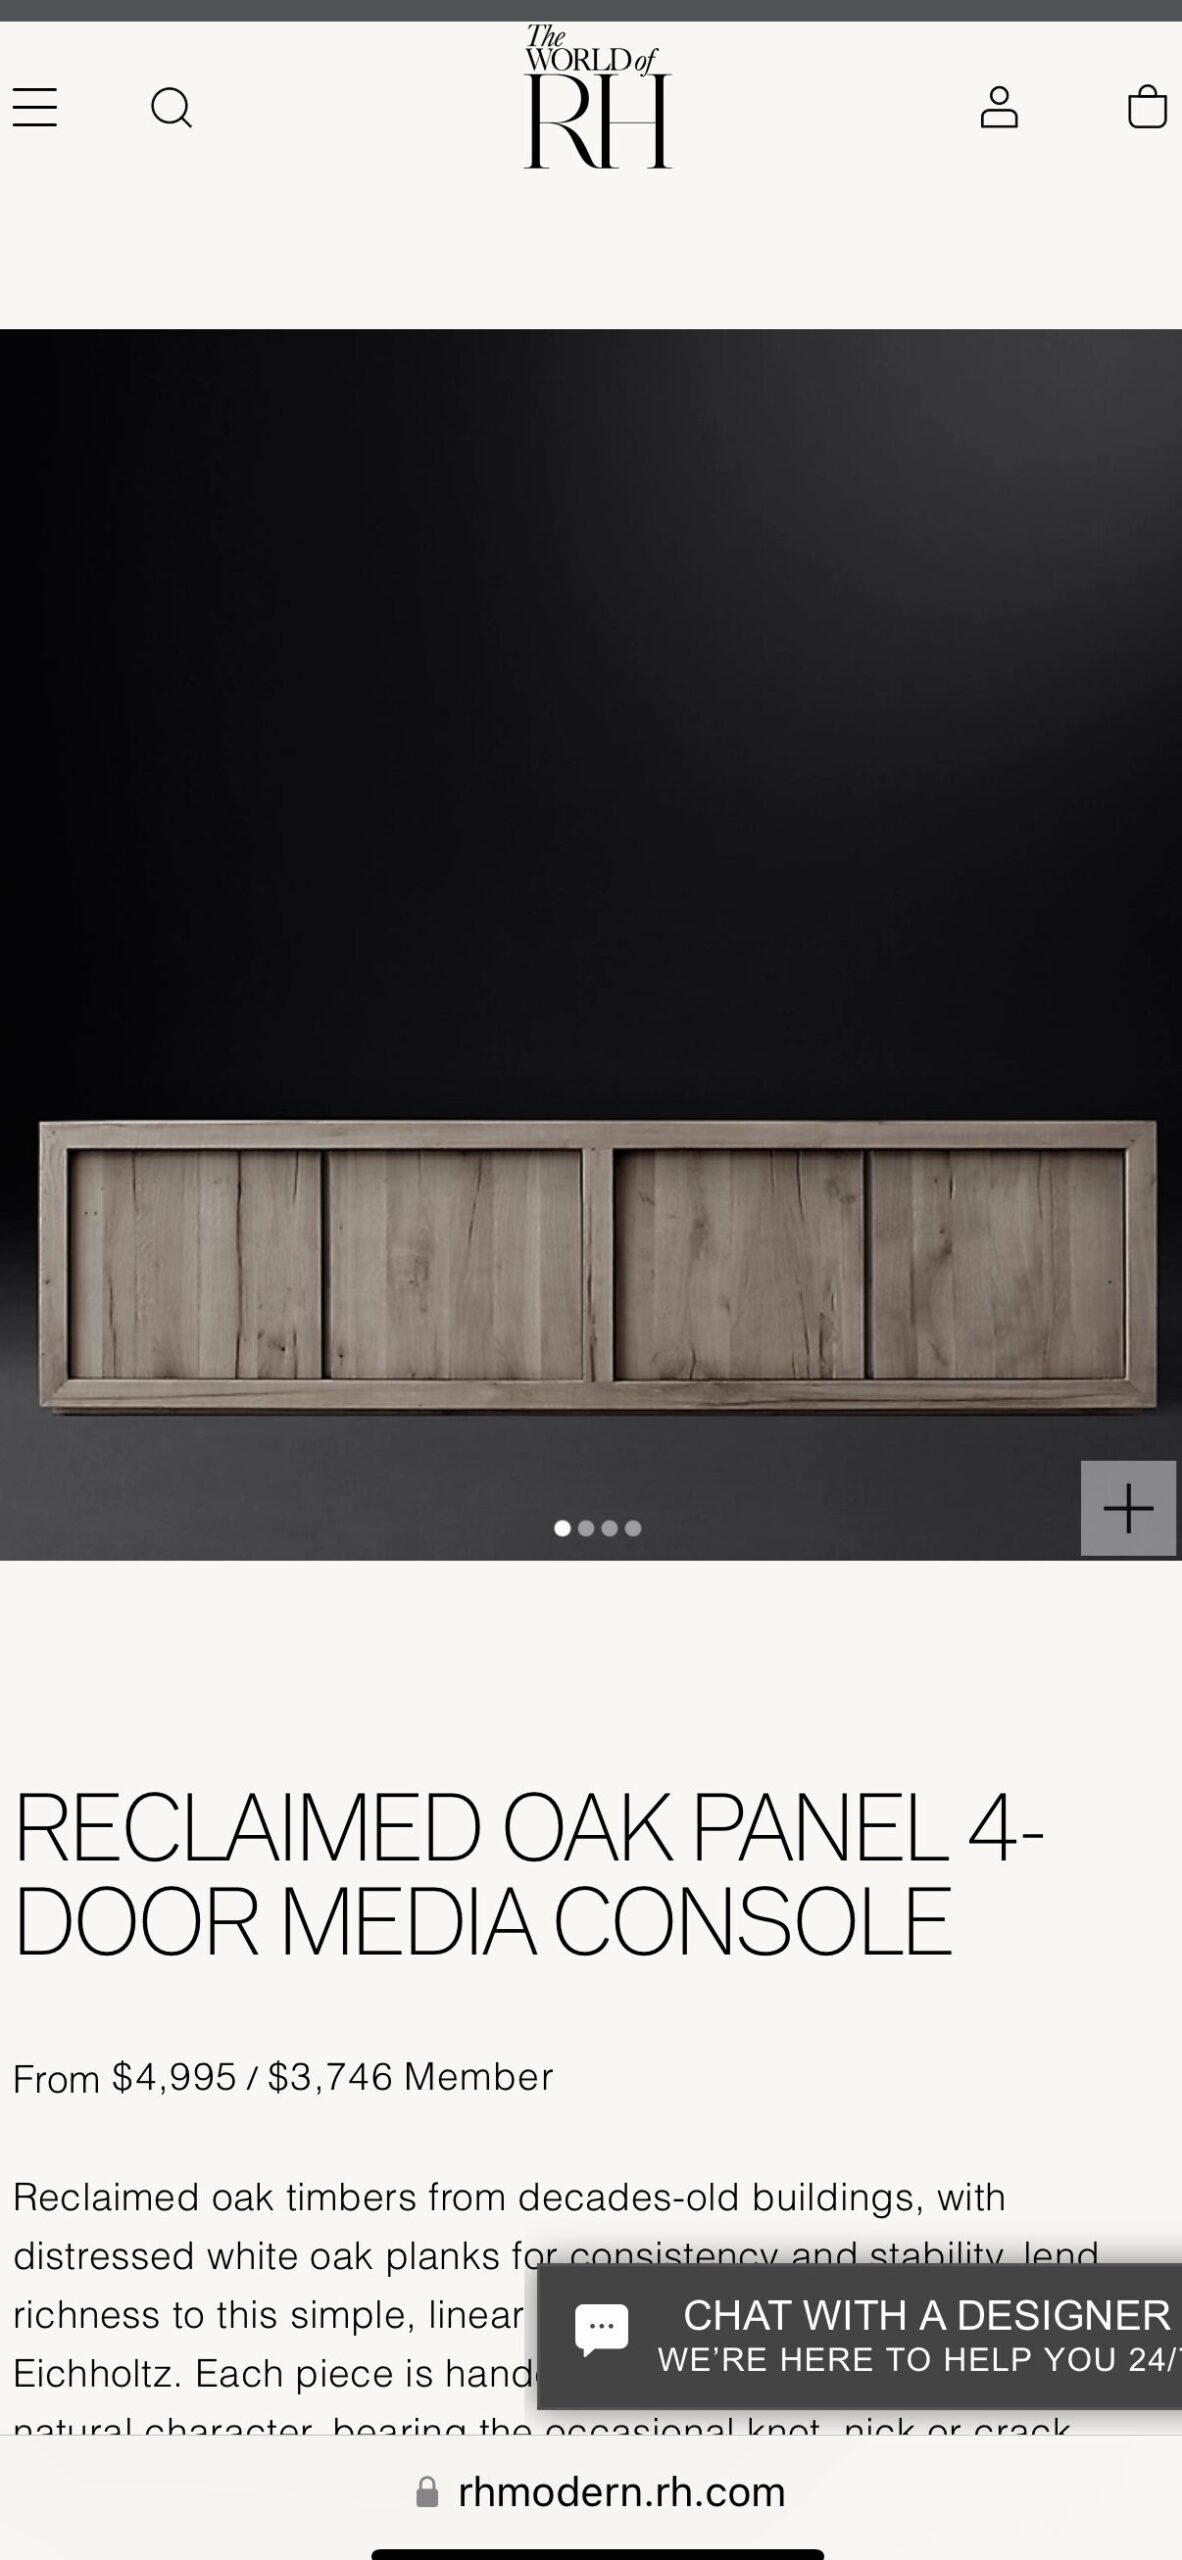
For months I have eyed this Restoration Hardware media console. The only problem was that it costs $4,995. YIKES! I like to splurge every now and then, but if I can make this, and make it cheaper then why not make it? I also get to customize it to my liking and style. Hang in there this is a lot, but totally worth it!
Getting Started
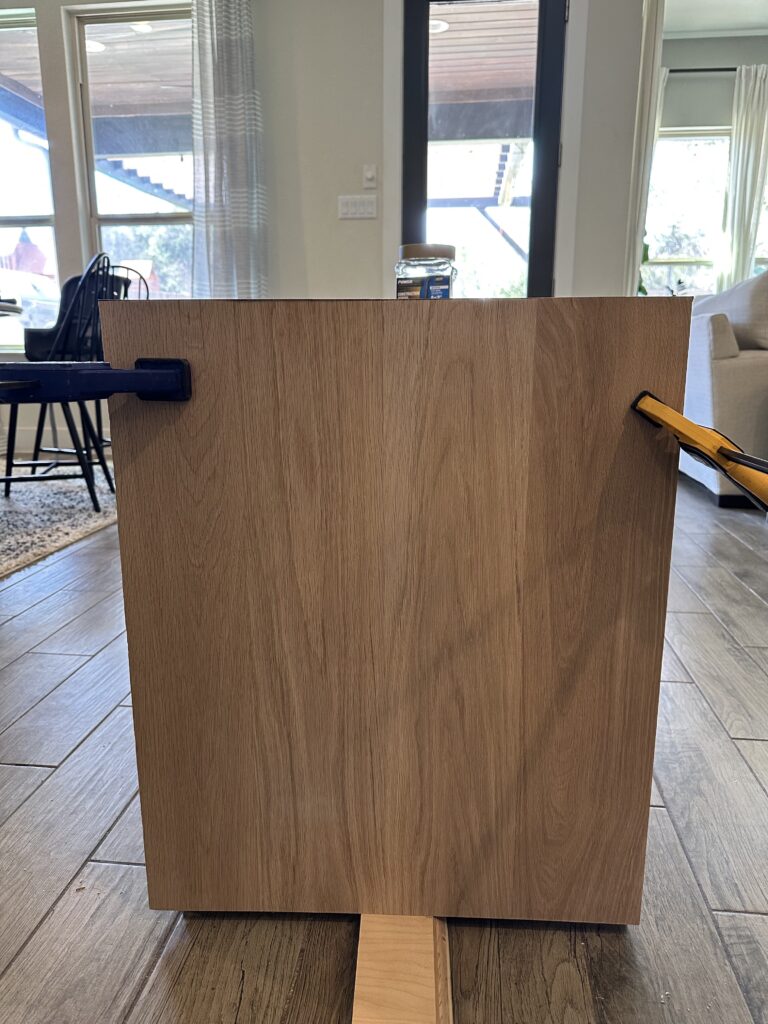
Funny thing, I thought I could start this back in December all while I had 2 other projects going on. I mean, that makes total sense right? I did get the top all glued up by using 4 pieces of white oak from Weaber Lumber.
Fast forward to February: I wrote out the plans and sketched the measurements out. Steve also told me it might be a good idea to have an internal structure for the oak to attach to so it will be sturdier.
Building the Frame

I used 2 x 4’s for the frame of the console.
Take the two long 2 x 4’s then add the 3 braces horizontally in-between them to create a strong frame.
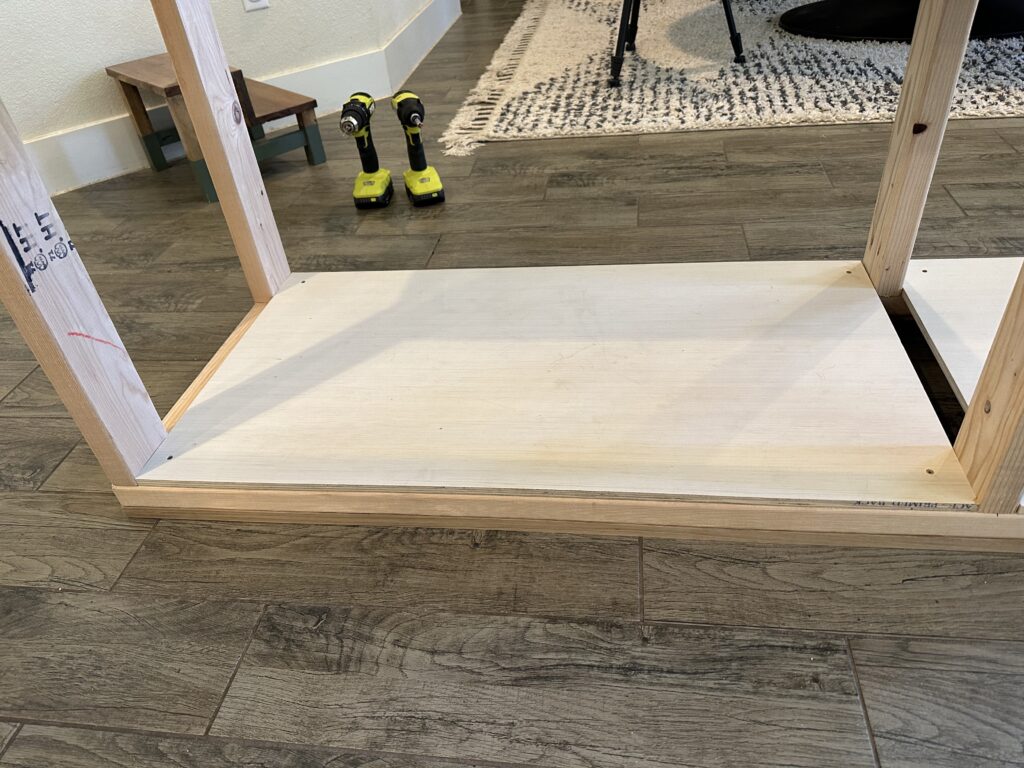
I did that 2 times for the top and bottom pieces.
When I finished assembling the frame, I re-measured and saw that it was two inches too big. Don’t you love that for me? I mean it wasn’t that big of a deal, but I did have to take all the braces off, re-cut them and also re-drill the pocket holes. It was a lot of extra work that could have been avoided.
Preparing the Oak for the Media Console
A little advice would be to change the blade of the table saw to a fine tooth blade, we did a 40 tooth blade so it will be a nice clean cut.
I was so incredibly nervous to cut this beautiful oak. It was my first time working with a hard wood, so I just didn’t know what to expect. It might have been the nerves or not doing a project in a while, but the first cut I made, I calculated the size of the piece I needed wrong.
But all mistakes have a solution. I slept on it overnight and I had a revelation. My plan was to put oak on all sides, but honestly who is going to see the back of the media console anyways. Steve and I were talking and decided to just put a piece of mdf or plywood on the back, so this makes my mistake a blessing in disguise.
Be aware, sanding will take like 5 years, not literally, but it felt like that. Once the top piece of oak was sanded perfectly it was BEAUTIFUL.
Adding the Oak to the Frame of the Media Console Dupe
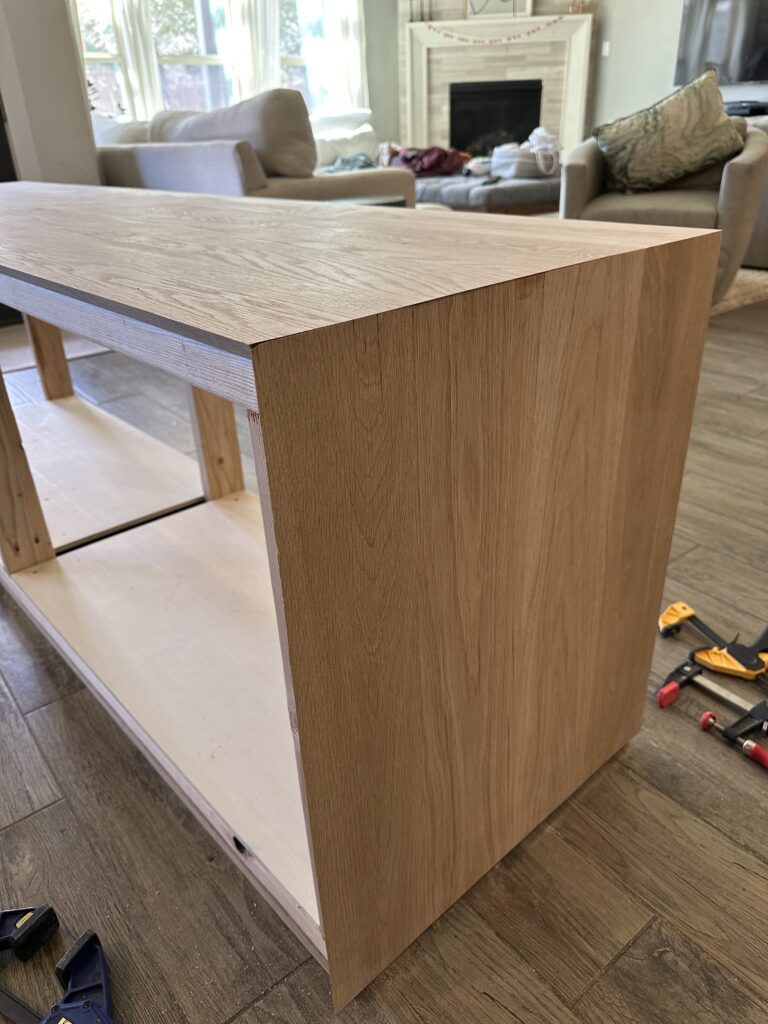
I wanted to secure the oak panels from the inside so so I don’t have to fill the holes and lose the beautiful grain pattern of the wood. I did a little test that worked so I felt confident to use screws in the inside of the cabinet.
Make sure to pre-drill all the holes since oak is a hardwood, the screws will go into place nicely and you reduce the chance of splitting the wood. I pre-drilled through the 2×4’s into the oak and then used 2″ screws. It was a perfect hold.
I clamped down the wood before drilling it in to line it up perfectly, so there’s no shifting while I secure it.
A little tip, since I wasn’t able to line up all the oak pieces perfectly a little solution is adding some saw dust from cutting the wood to clear wood glue and it is a perfect match to look seamless.
Building the Doors
For the doors, I glued up three boards (plus an inch more) to make them the correct width and then cut them to the right height to fit the opening.
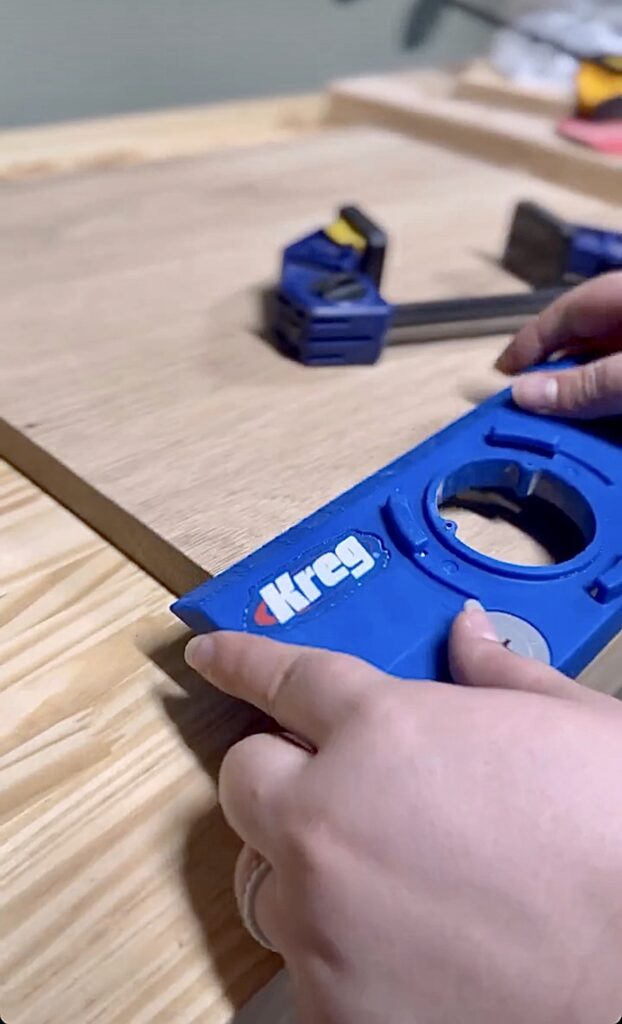
To make it easy for the hinges, I got this amazing tool called the Kreg Concealed Hinge Jig. It truly made it so simple to add in these hinges.
I wanted the doors to be inset a little from the trim so all I had to do was place the hinges inside the cabinet accordlingly and add a little piece of trim on the bottom of the inside so the doors wouldn’t go past that point.
Let me tell you this, I don’t LOVE hanging doors. They can be difficult with adjusting to make them the perfect fit no matter how good you measured. Once I got the first one done the other 3 were easier, thankfully.
Inside of the Media Console
The more I am building this, it feels so bulky and huge, but it’s going to be super sturdy!
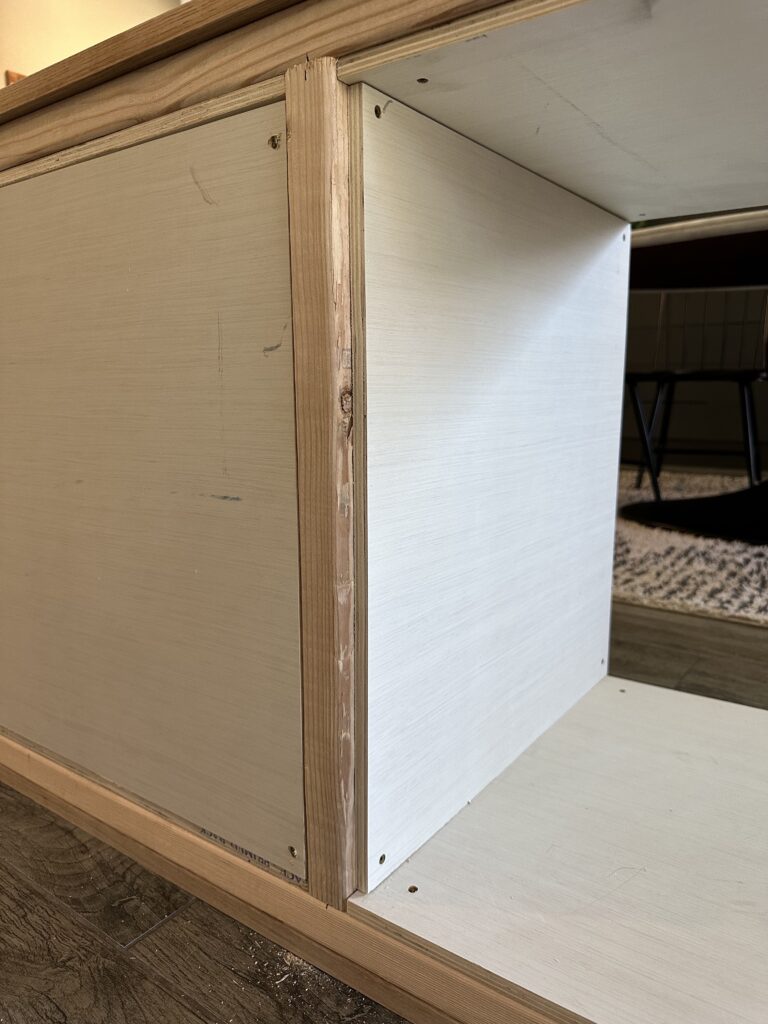
I added 1/2″ plywood inside for the shelving to attach to. I closed up the back with this as well. The more I looked at it, I didn’t need the MDF to cover it. Who’s going to see the back anyways?
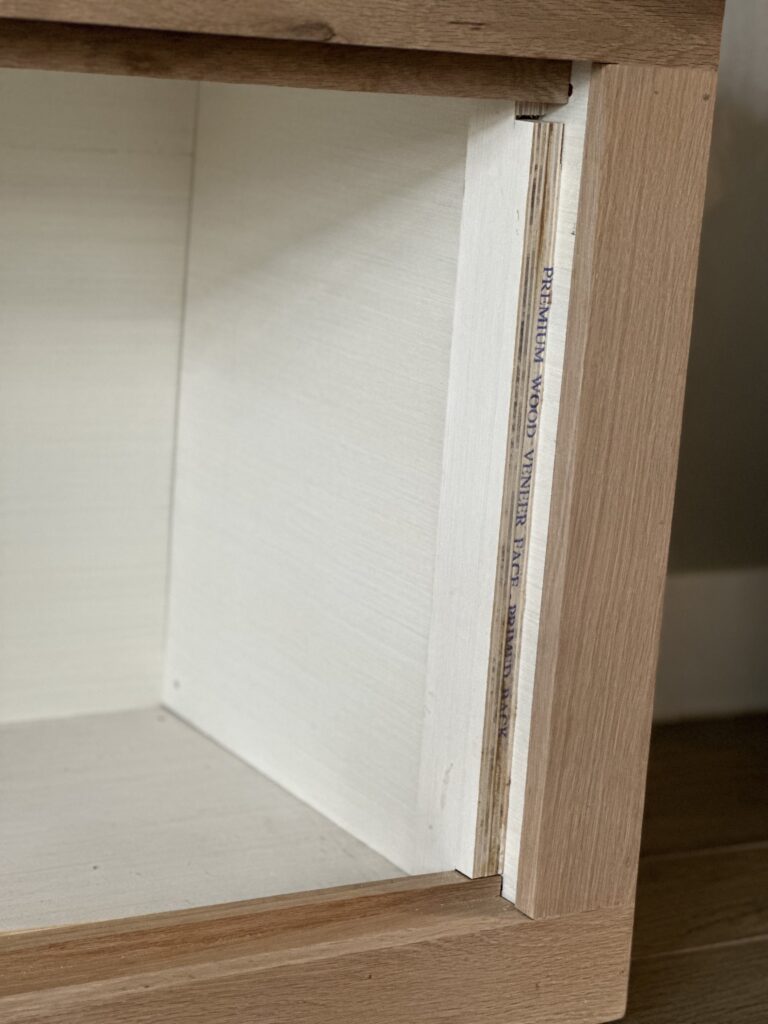
For the shelves they are 1″ plywood with some oak trimming out the front.
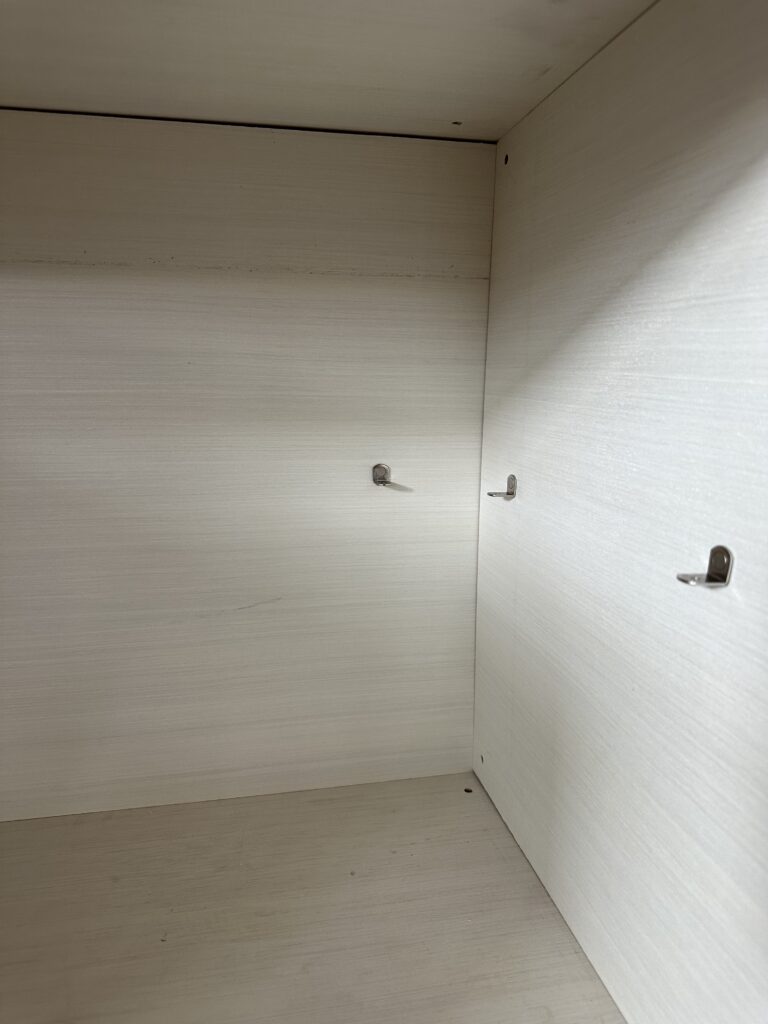
I drilled some holes for the pegs, which the shelves will sit on. This was the easiest part of the whole media console.
DON’T FORGET- add a media cord hole in the back so the cords can be hidden!
Stain
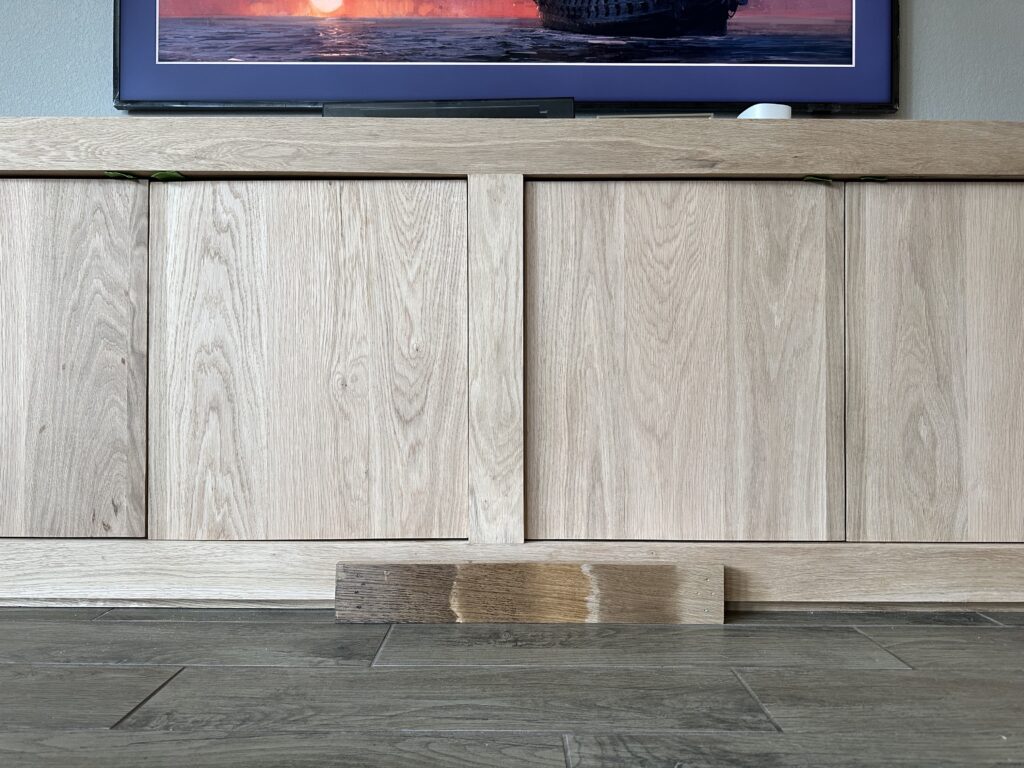
Always, I repeat, ALWAYS do a test on a scrap piece of wood. I didn’t like the stain I originally picked for this project. It was way too warm for my floors. Don’t get me wrong it is a beautiful color, but not when I put it against the very grey floors I have. I had to sit on this for a few days because I couldn’t decide what I wanted to do, either keep it natural or stain it like how I had originally planned.
When I did make a decision I still hated it, but had to continue with it because if I had sanded that part then, it would stained differently than the other parts. I applied a white wash to neutralize the warmth. I think it didn’t work out because the can wasn’t completely mixed so it turned out way more white than my tests prior. We will leave it for now and maybe in the future I will sand it back down and change it up. It isn’t horrible just not what I envisioned.
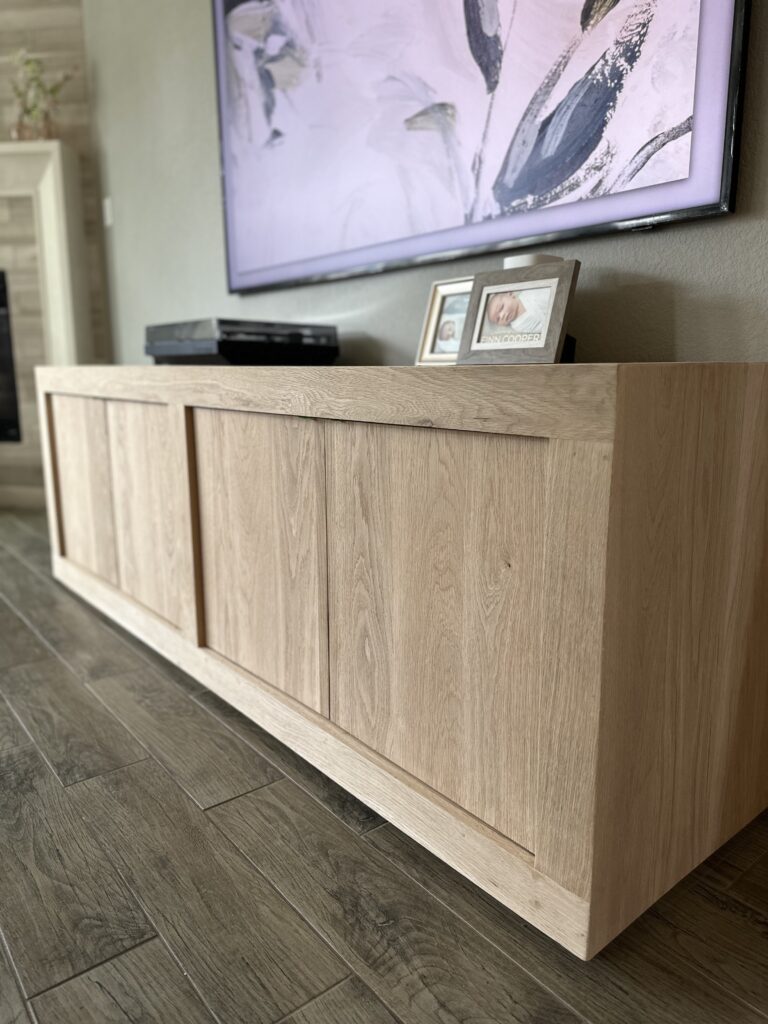
The FINISHED Product!
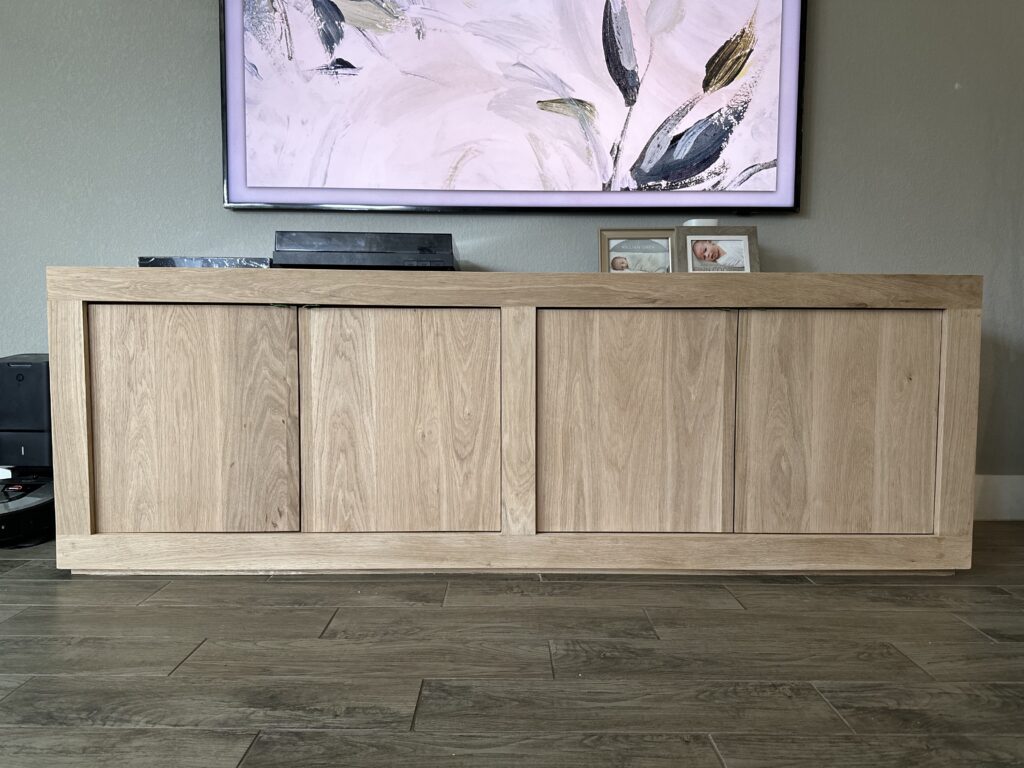
The last piece of this media console I had to add were the gold handles. They definitely completed this whole project and they blend in so perfectly they’re practically invisible.
It was such a fun project! There were a few mistakes but I truly believe it was worth it. I saved a lot of money building rather than buying. I also got to build it my way and make it custom to my home/family. I’d say it was a win! I am ultimately happy with the outcome regardless of the color not being what I wanted.
The Cost Breakdown
-Oak $800
-Plywood $180
-2×4 $25
–Handles $17
–Wood Glue $10
–Shelf Pegs $5
-Stain, paint, poly, hinges $0 (already had all of this)
TOTAL COST: $1042
If you don’t want to build your own, you can check out some other dupes I have found that are very similar in the size and looks HERE!
Stay tuned to see how I decorat it!
Shop our favorites HERE!
Find us on social HERE!


