


DIY Faux Brick German Schmear


I have been researching and reading about the Faux Brick German Schmear technique for almost a year. I love it and have felt just really intrigued by the process and how it can transform bricks. Last year, I started this blog with the DIY Brick Paver Patio project and although I love the results of the paver patio, I have felt like it’s missing a little something. The more research I did, the more I loved the technique. It’s also a big commitment to completely change the look of the patio that I already love. So, I found an opportunity to try it with the Mudroom.
When going through all the options for the mudroom refresh, I thought of adding bricks to the design for a touch of an industrial look to my very neutral house. I love the look of real brick and was planning on using the thin bricks for the space since it was just a small strip of wall, I didn’t think it would be too costly.
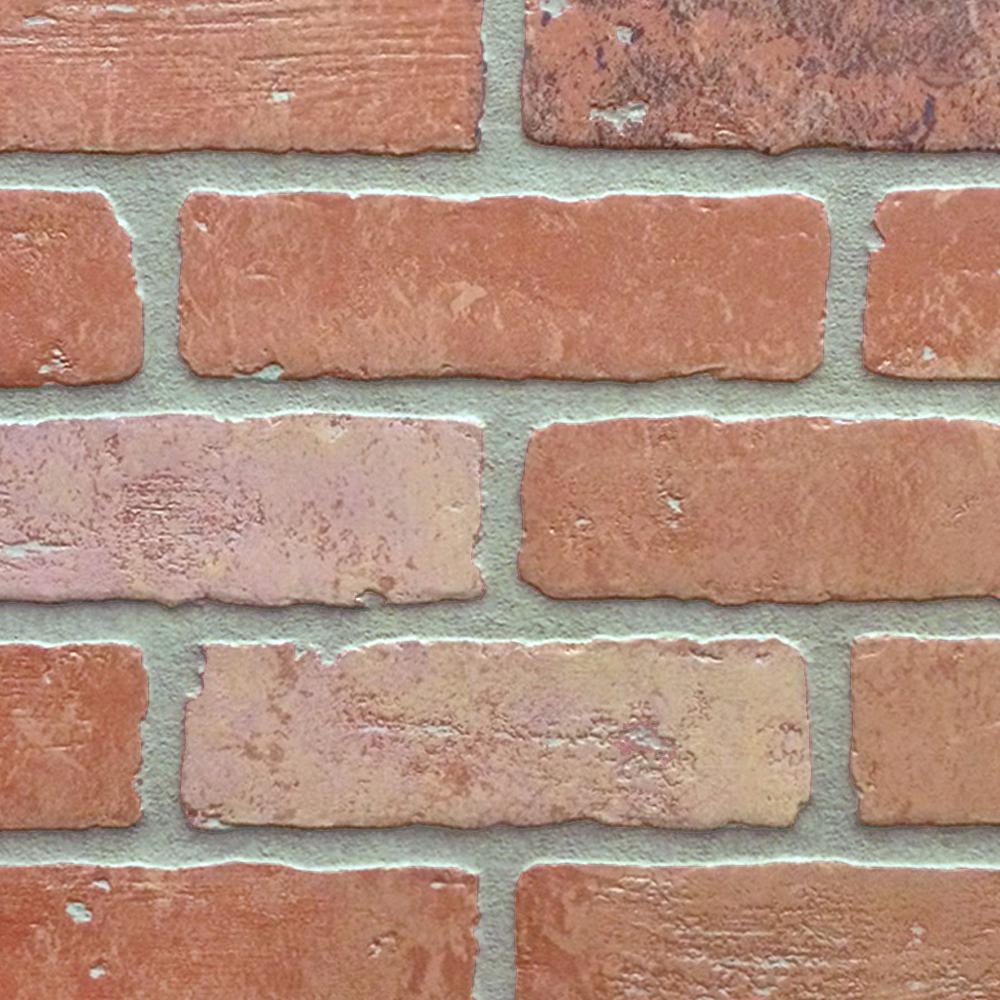
The more looking around I did, I found the HDF panel of faux brick at The Home Depot. The more my ideas developed, it turned into bricking the whole mudroom which would be very costly with the thin bricks (I did a cost break down below). I decided to take a chance and buy three 4’x8′ panels of the faux brick for less than $30 each to cover the entire room.
Here’s what supplies I needed and how I accomplished a real German Schmear look with faux brick sheeting:
SUPPLIES Needed for the Faux Brick German Schmear:
– Construction Adhesive
– Caulk Gun
– Brad Nailer and nails (I used 1 1/2 in brad nails)
– Circular saw
– Jigsaw
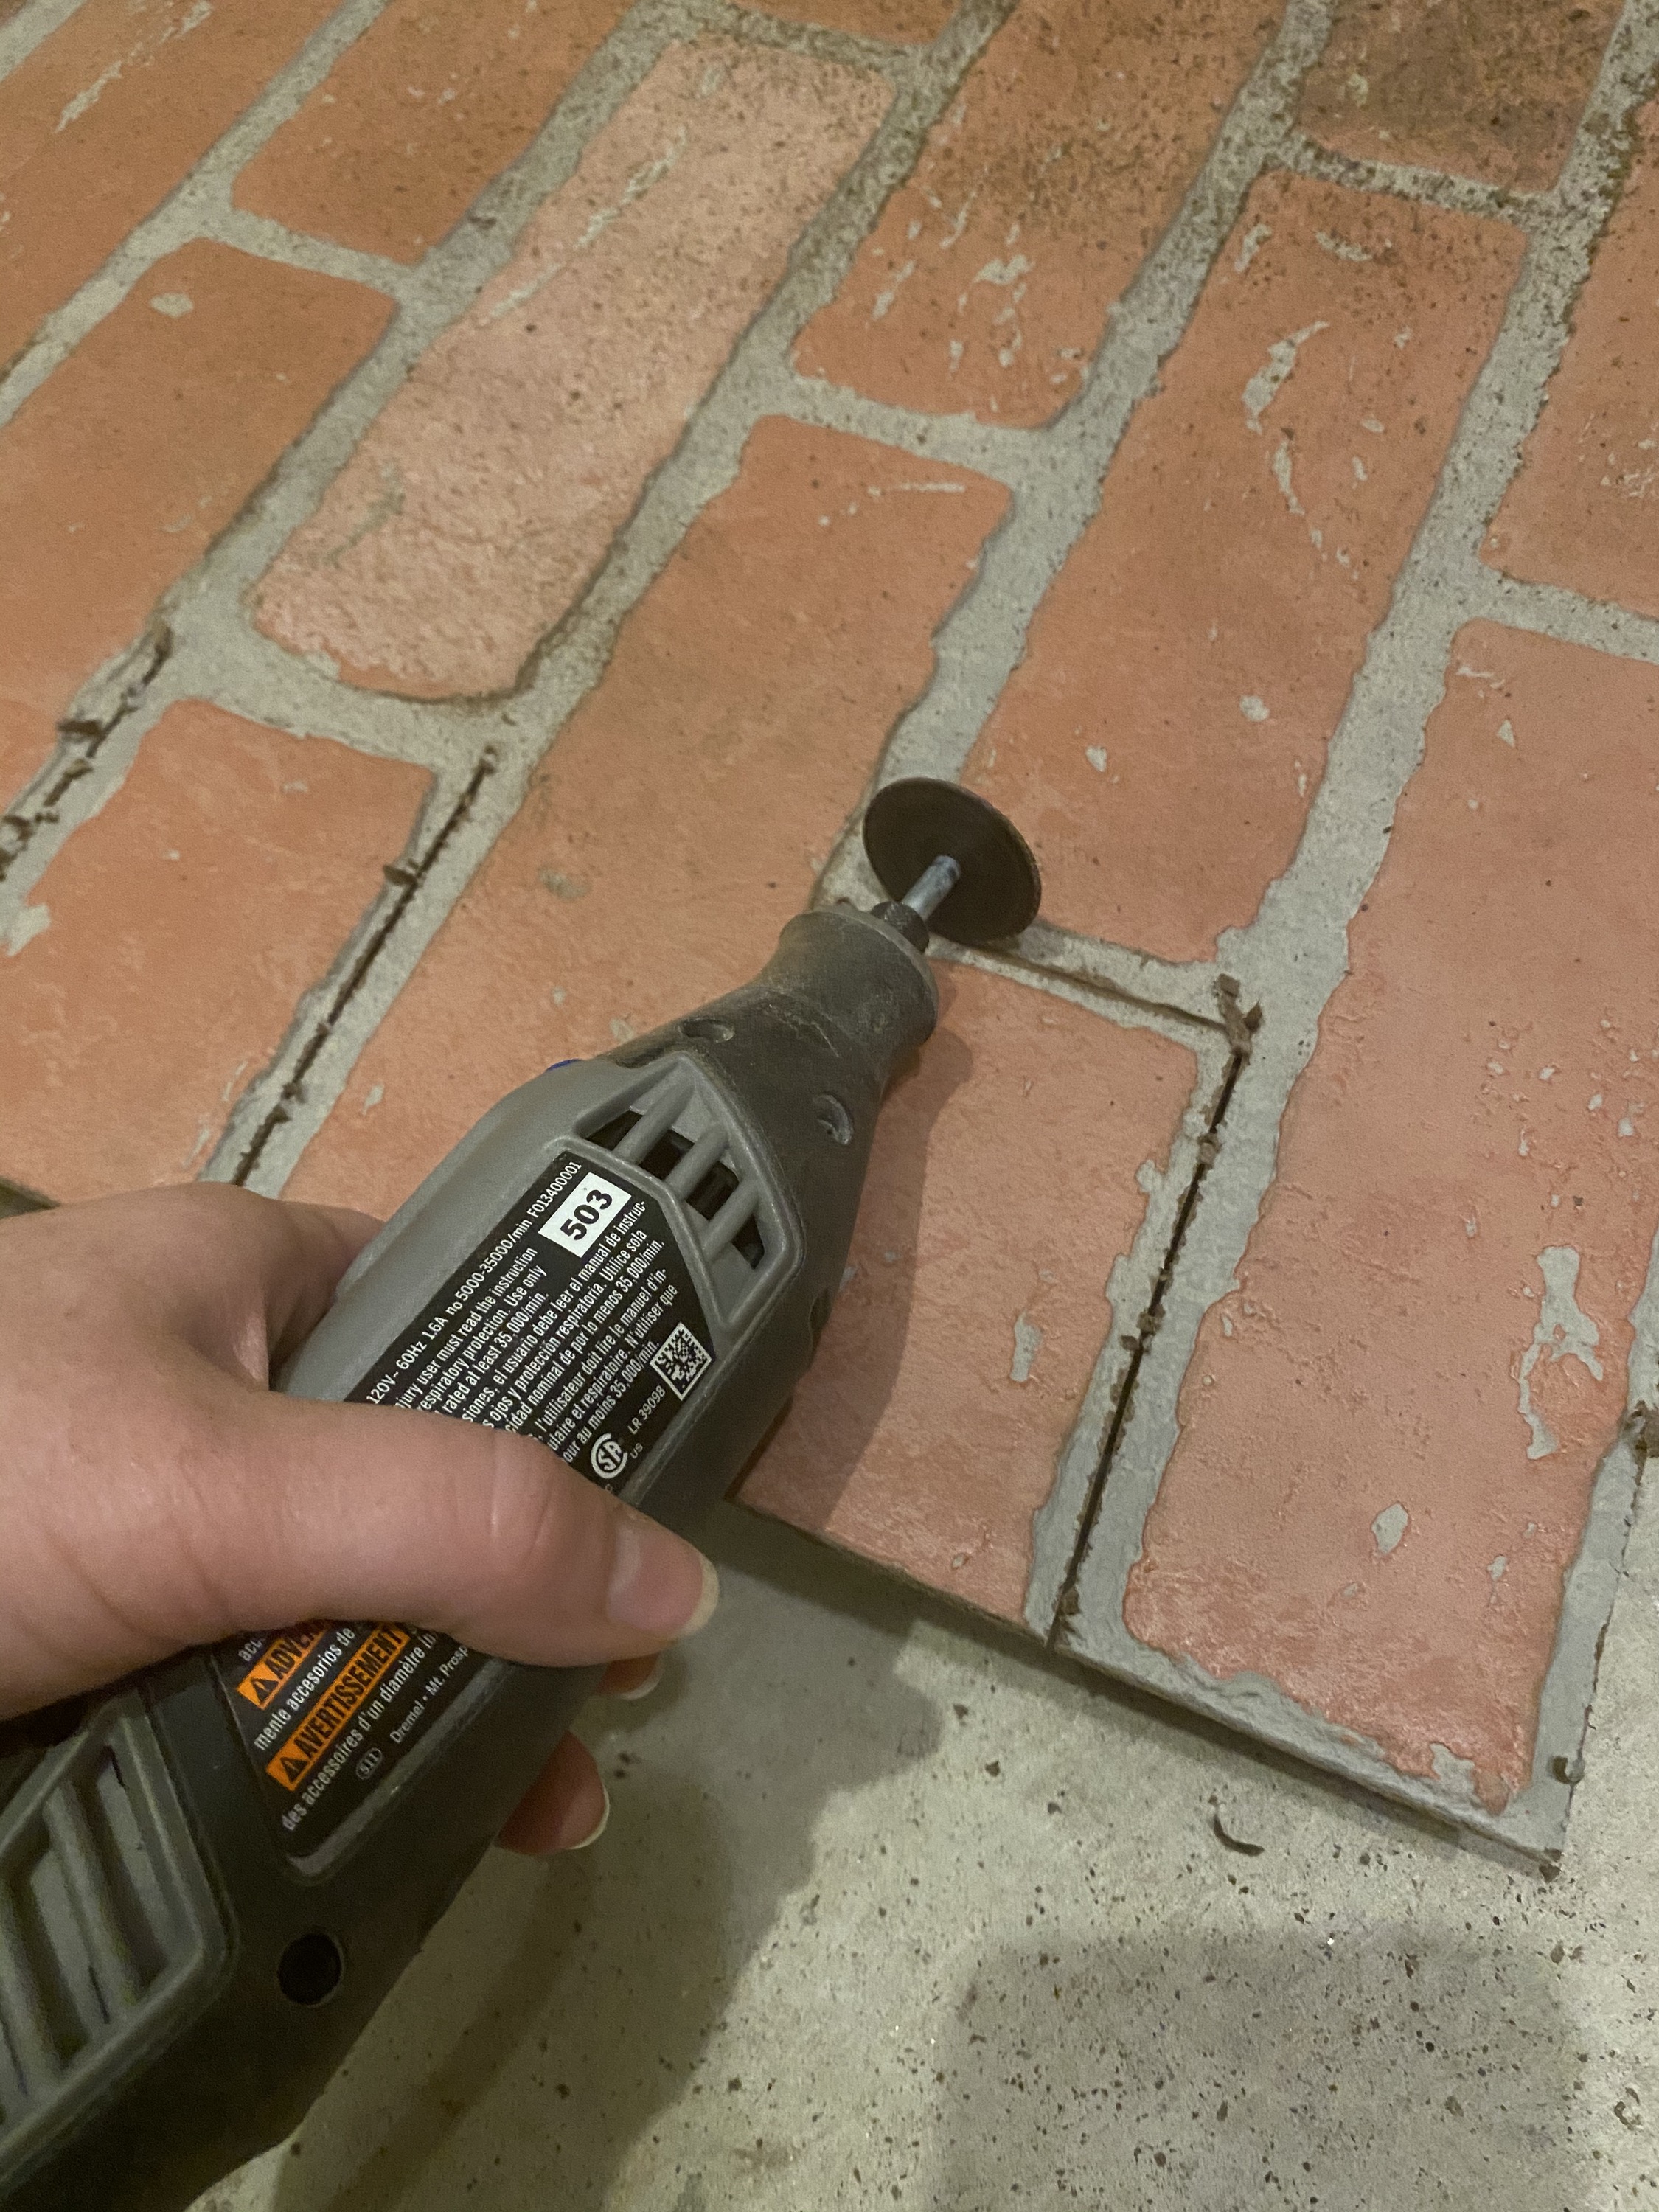
– Dremel (although I think a multi tool would have worked better)
– Mortar
– Putty Knife
TIME: Time depends on the area — but this is definitely the quickest way to get a brick wall look!
DIFFICULTY: Easy/Beginner
Step 1: CUTTING the Faux Brick
When researching this material I saw that the descriptive name was “HDF” which I was unsure what that meant. So I’ll share what I’ve learned with you. HDF is “High-Density Fiber” meaning it’s a “wood” material of sorts. It at least cuts the way wood does. You don’t need a tile saw or anything like that which makes it an even easier DIY for anyone to do.
Fun Fact: I actually bought a tile saw for this project but ended up not needing it so it’s still in the unopened box. I’m going to keep it though because I will be needing it soon for the One Room Challenge beginning on April 2nd, 2020!
I measured the area of the spaces that I wanted covered in brick. The spaces wider than the panel were a fun challenge to make look seamless. So I cut the panels to the right height and cut out the half bricks with a jigsaw and cleaned it up with a Dremel (A multi-tool would have been great here). When the boards met, the whole bricks would interlock and eliminate the “cut brick” look.
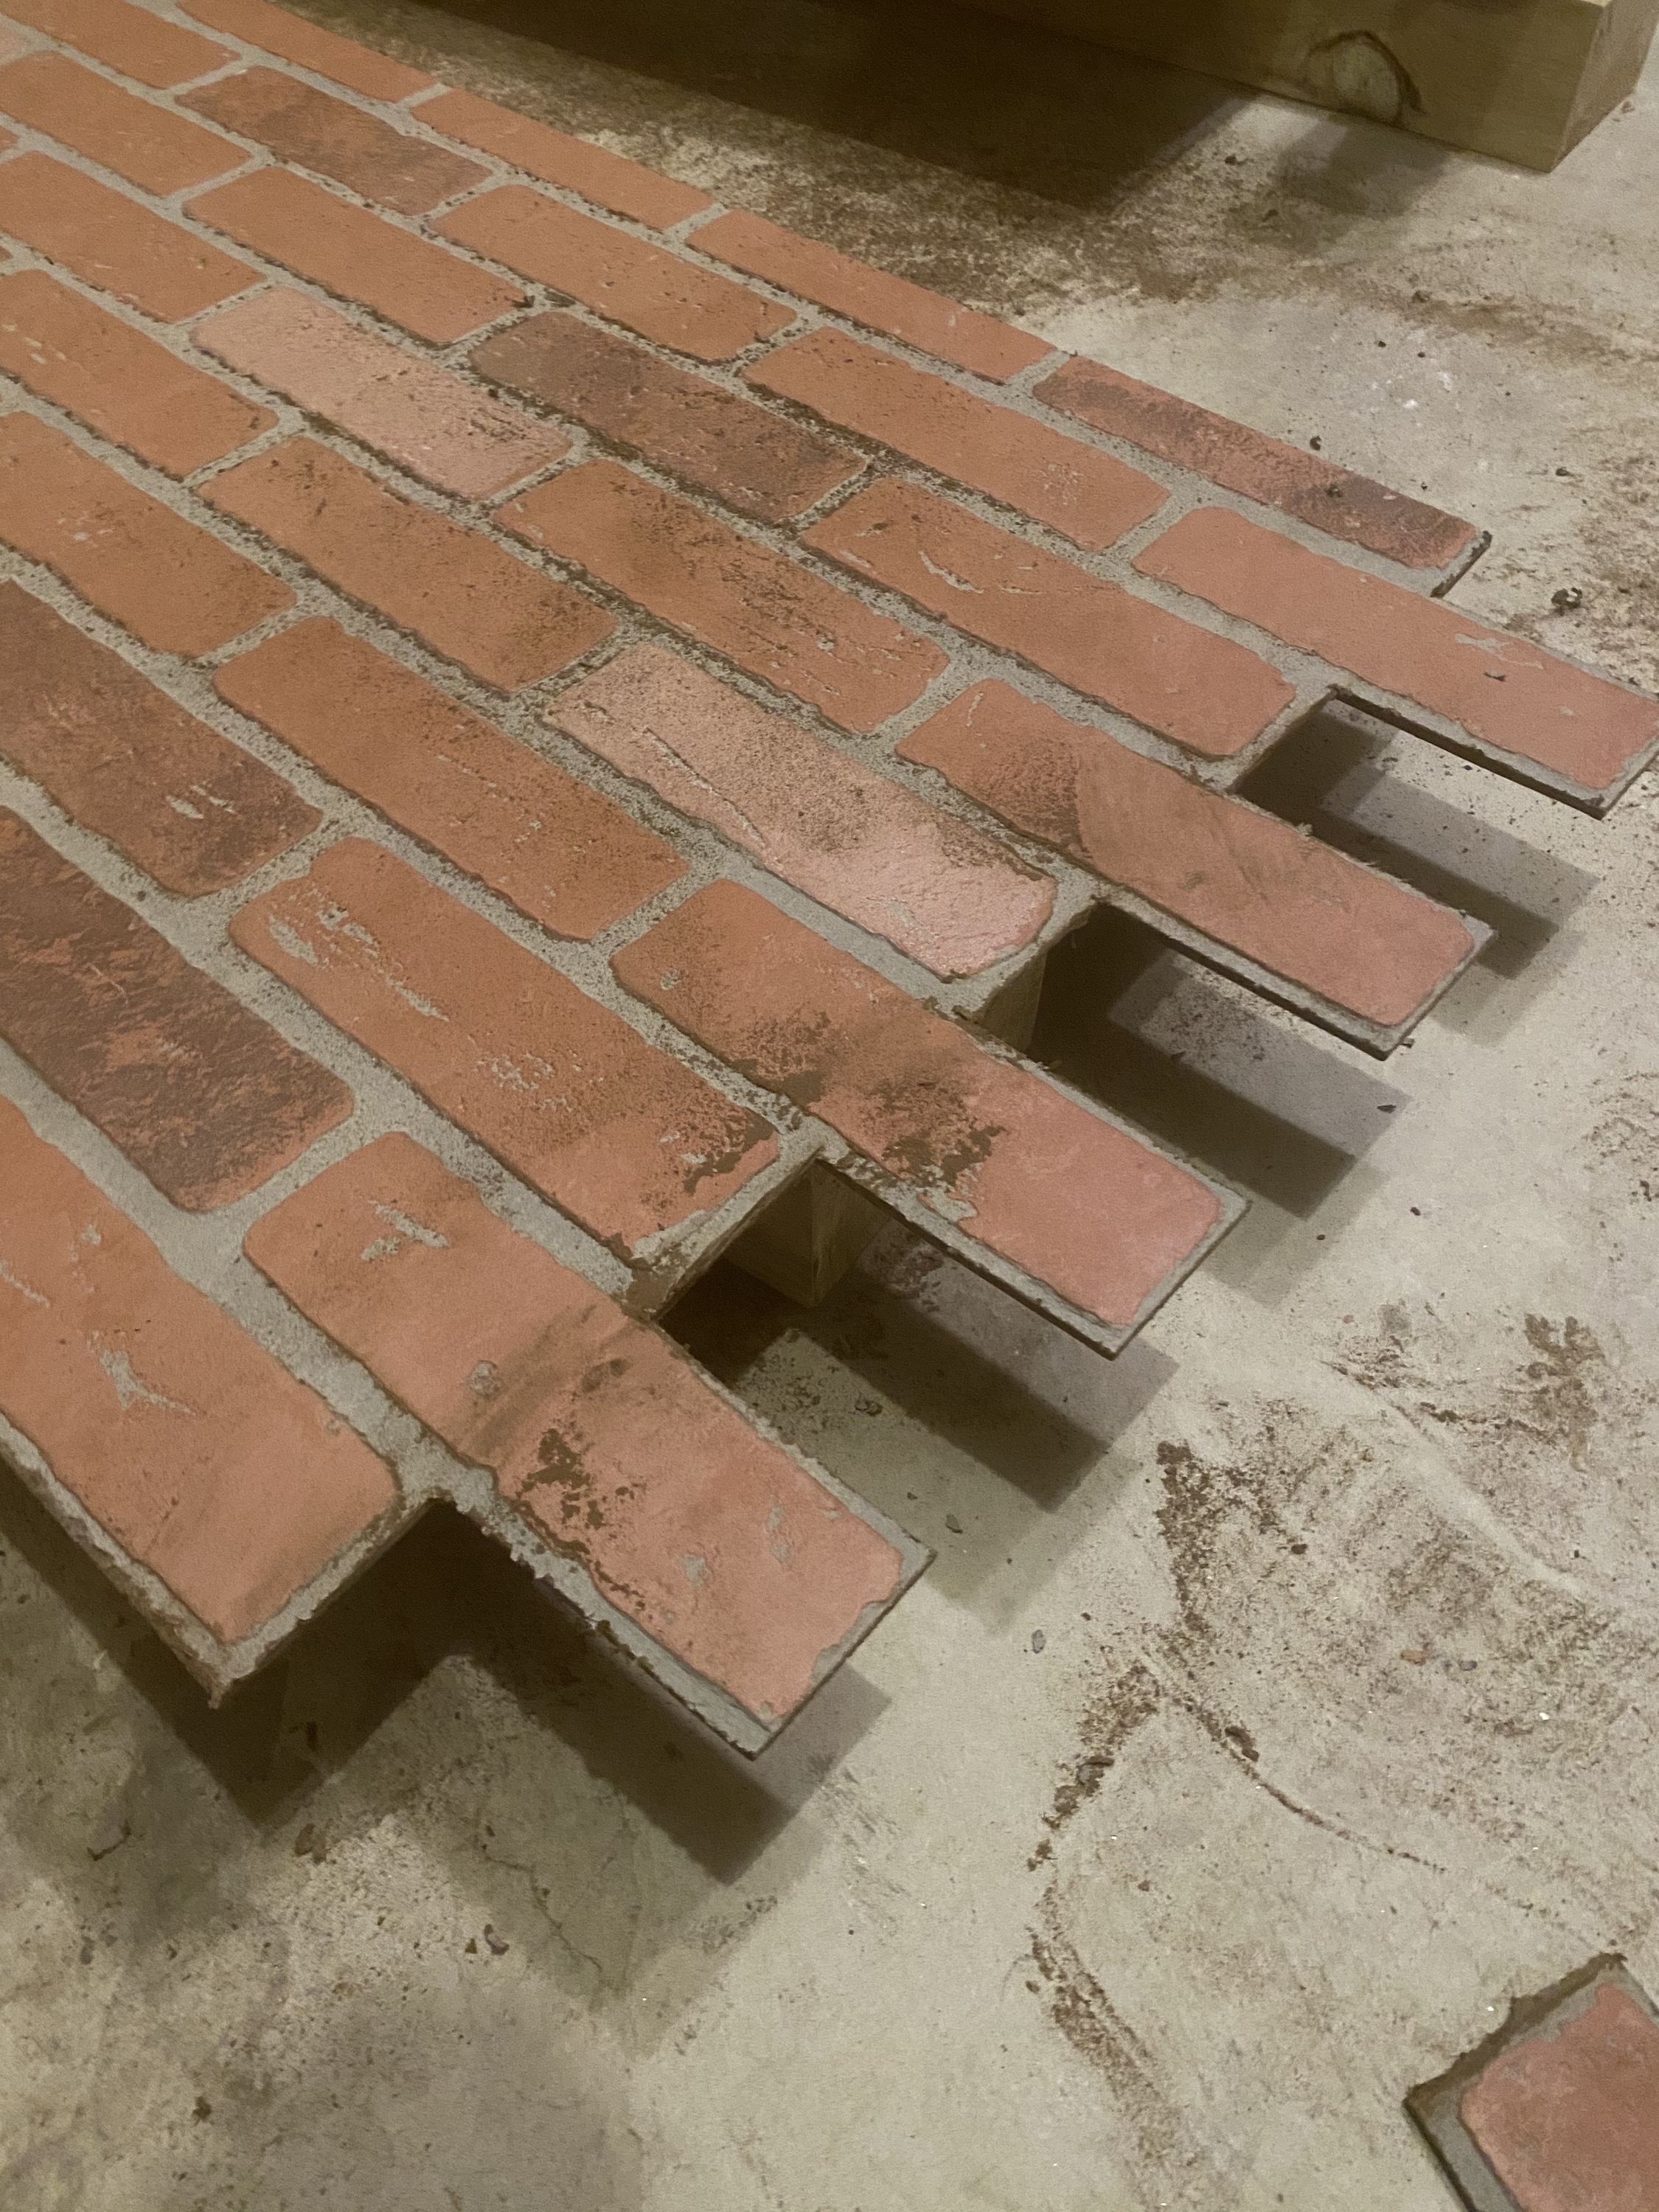
Now with the two panels interlocked I measured and cut the panels to the right width. You could also measure the widths of the boards and account for the overlap by subtracting the width of the half bricks. I wanted to make sure the boards fit together just right.
I measured all of the walls that I was putting the brick sheeting on to make best use of each sheet and my little mudroom used 3 sheets with lots left over.
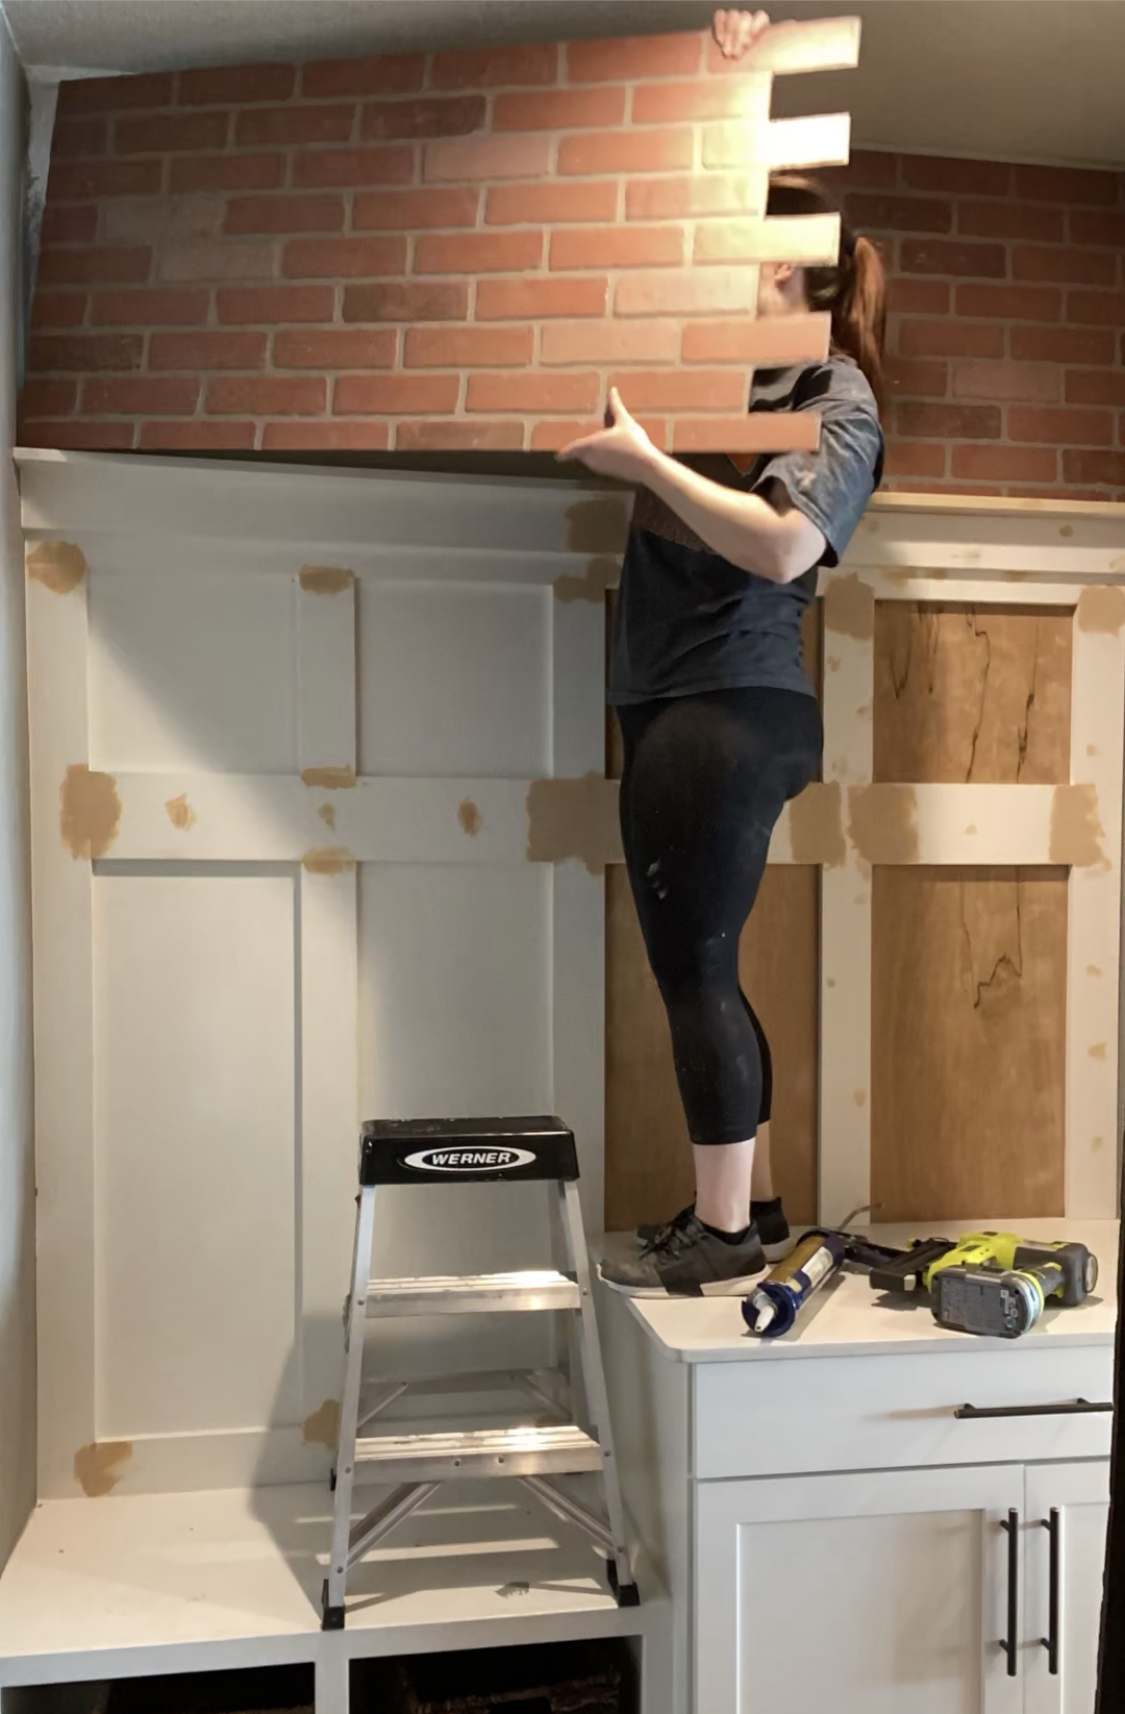
Step 2: ATTACH TO THE WALL
This HDF material, that the faux brick panels are made of, is light weight and super easy to attach to the wall. Find where the studs are before you put up the boards so you know where is best to put the brad nails. Evenly cover the back of the board with construction adhesive and then brad nail the board secure to the wall. Easy as that!
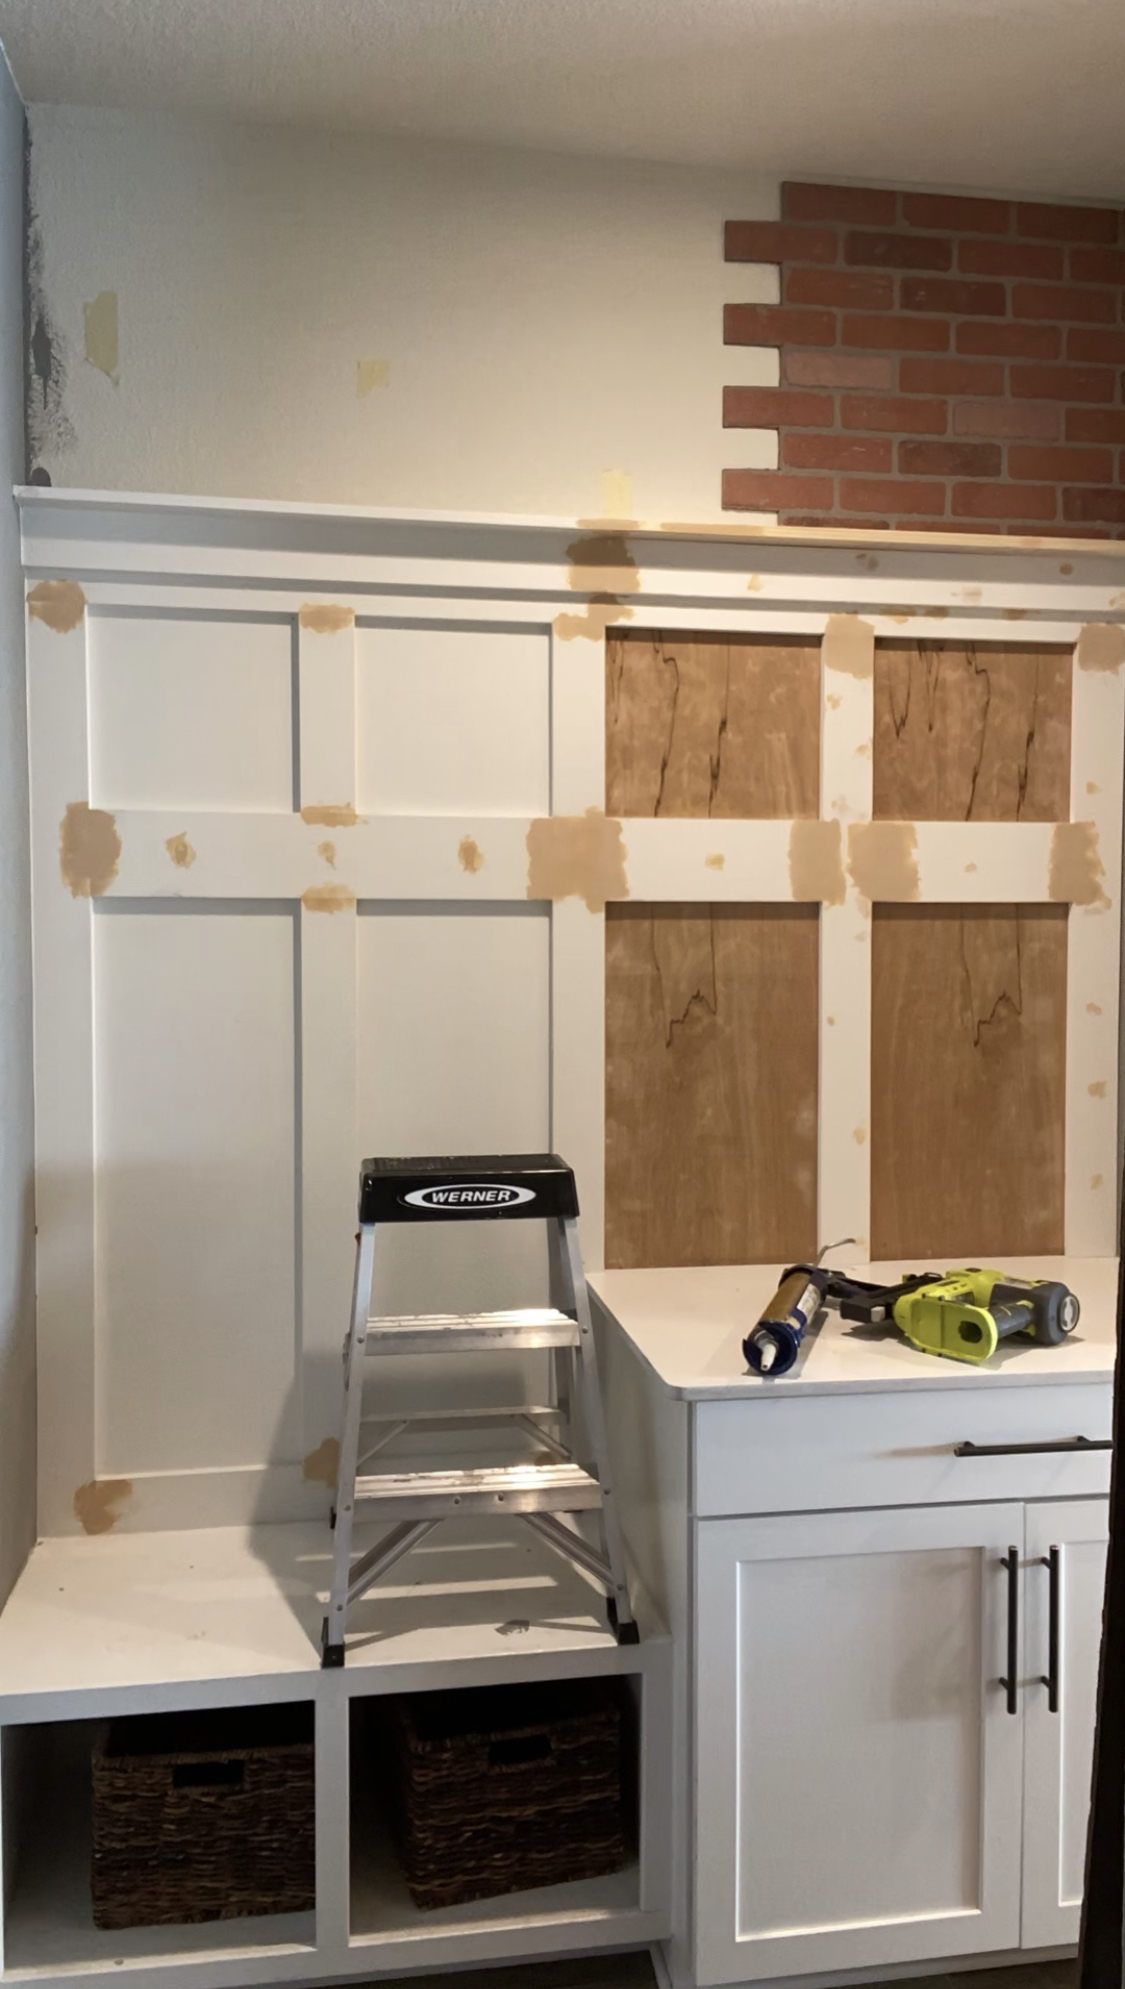
I decided to start the brick panels at the ceiling and work my way down (instead of the typical of working from the bottom to top) because of the panels going above the mudroom board and batten. I wanted to be sure that the top of all the brick panels lined up just right.
Step 3: THE GERMAN SCHMEAR
This step turned out more simple and at the same time more complicated than I first imagined. It was a really easy process but it was so difficult deciding what process and product to use. See what options I had to decide between:
GERMAN SCHMEAR TESTING
I spent some time testing different materials to create the German Schmear look I was going for. These are the different options I tried and what I liked and didn’t like about each.
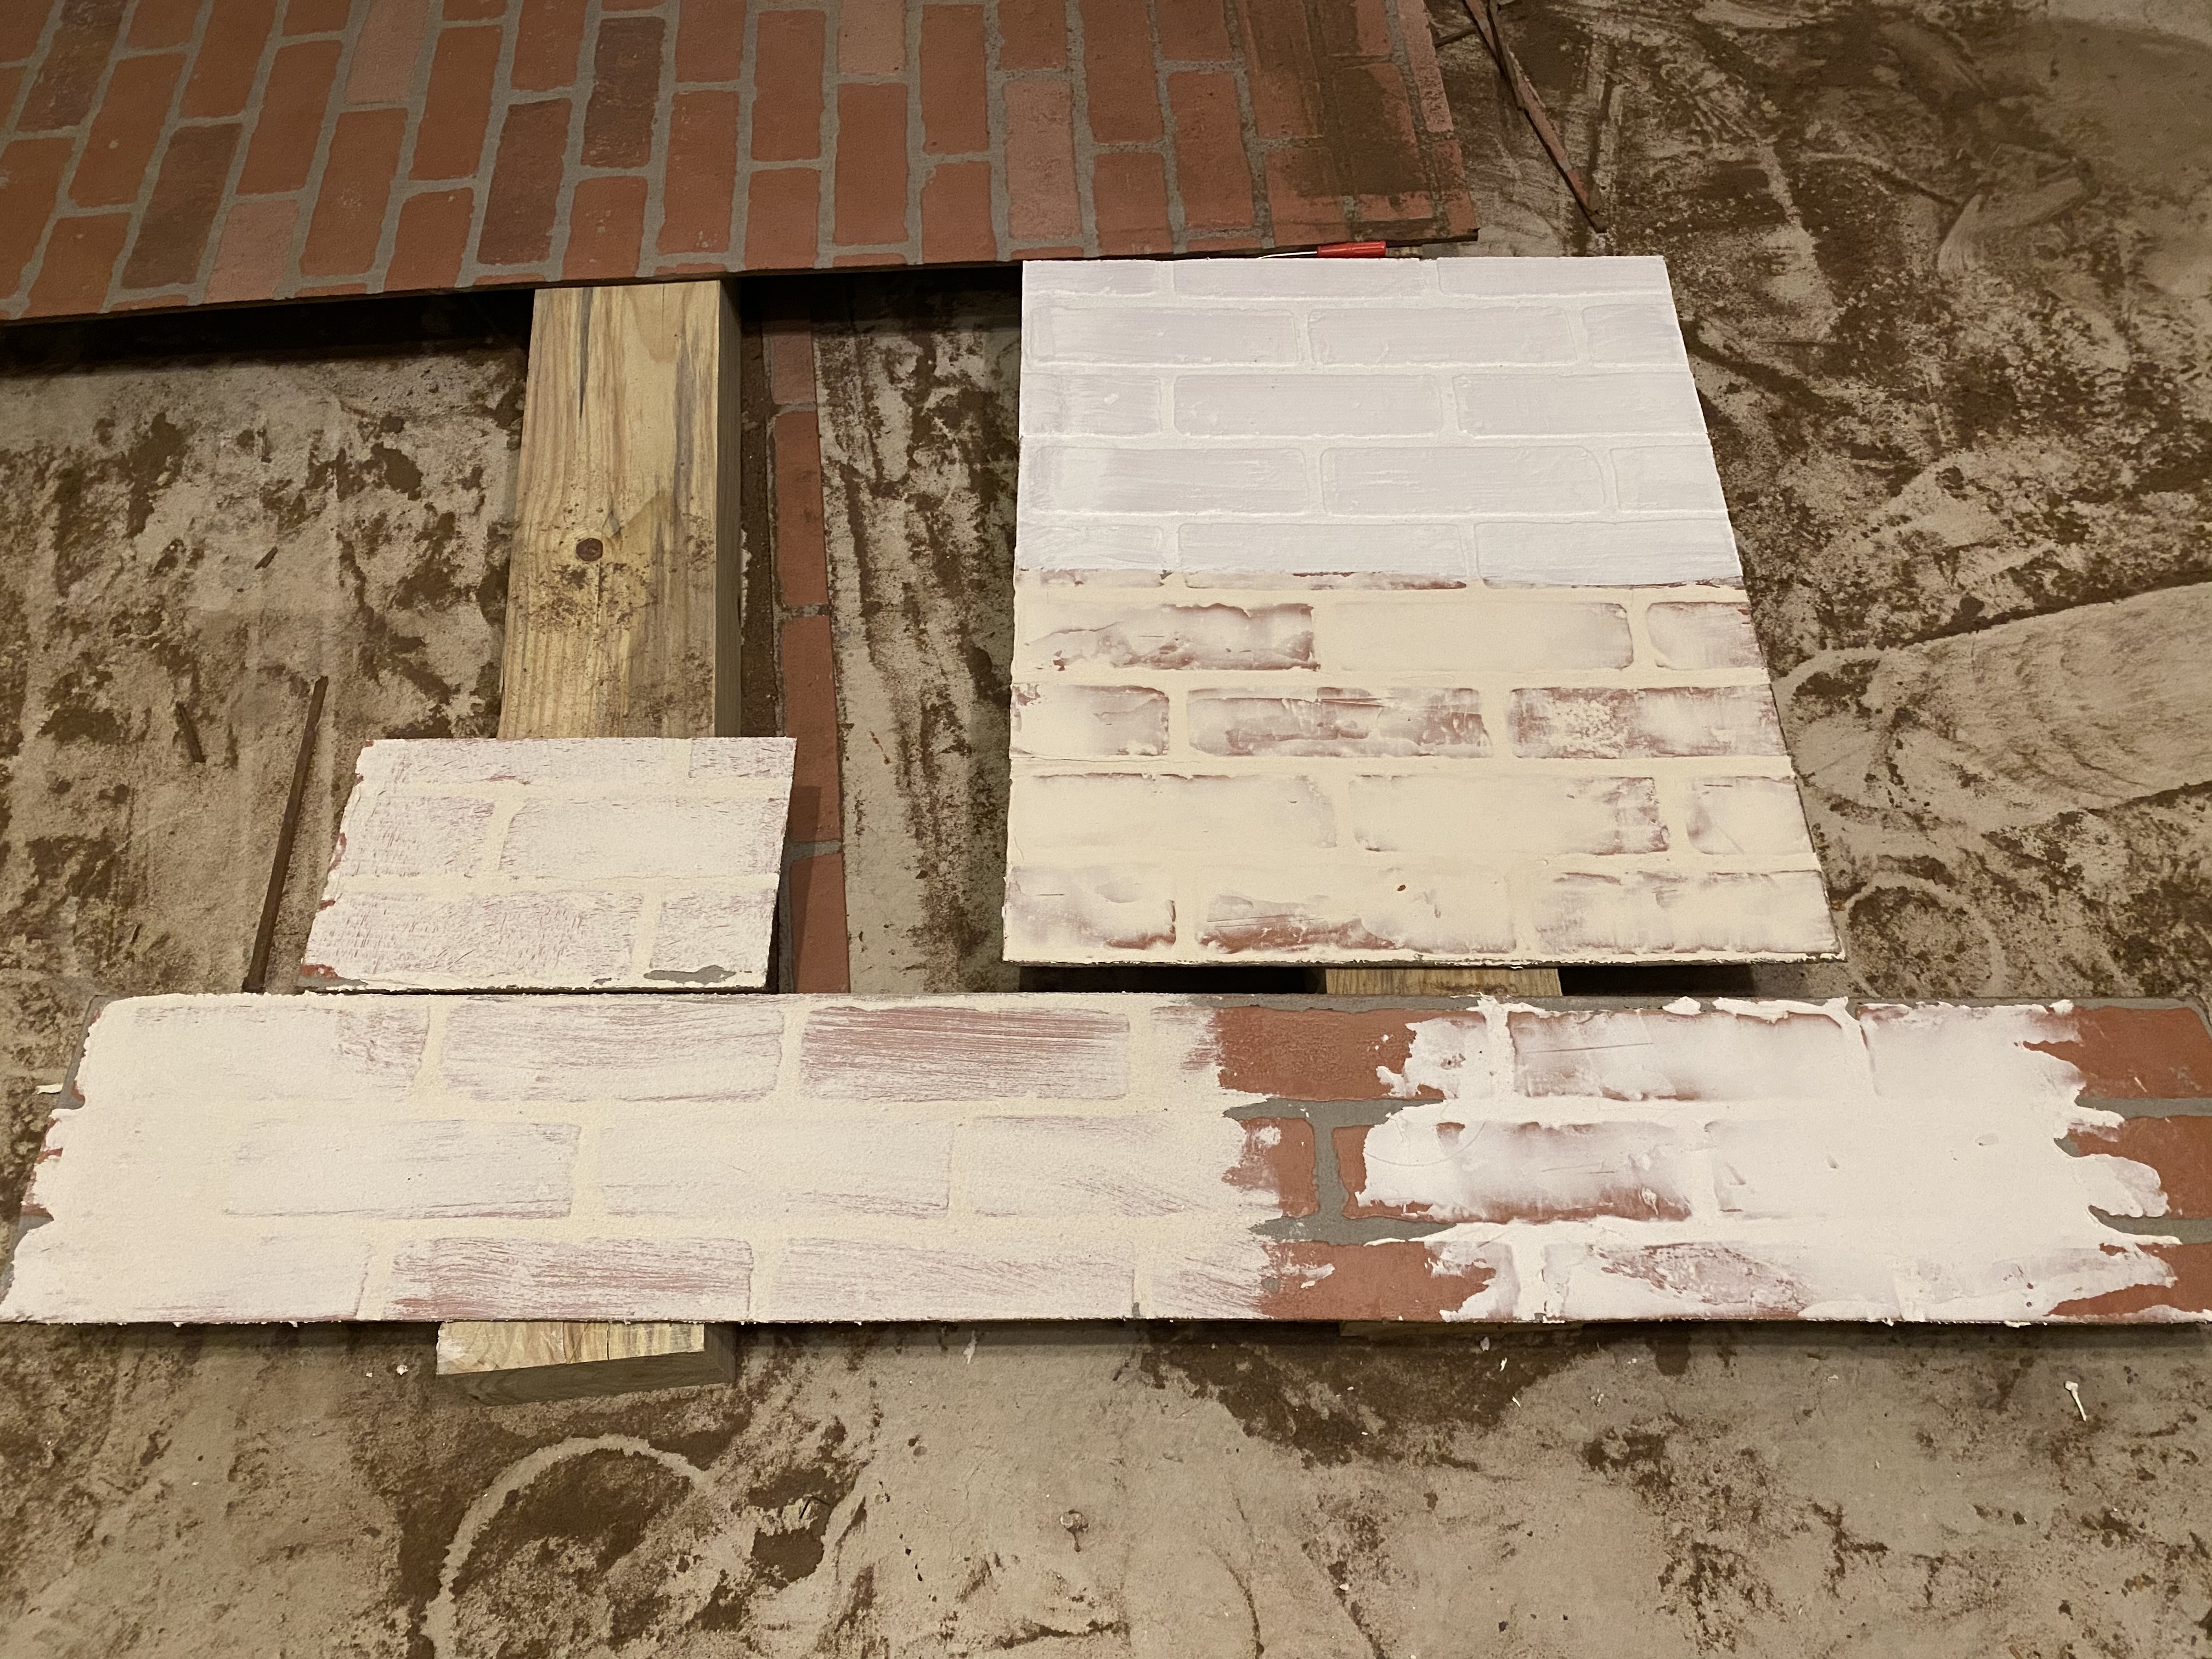
Tile Adhesive:
We had tile adhesive on hand so decided to try it out. I actually really loved the way it turned out and I fully planned on using this substance. The only issue I really had with it was the color of the tile adhesive when dry because of the dull, yellowish-brownish color looked very dirty next to the white trim in the room.
Mortar:
On to trial number 2 and 3–white mortar. After trying the tile adhesive and deciding that I just needed something that was white in color. I picked up some mortar with the full intent of using this immediately, no trial needed but decided to play it safe. I just want to make sure that the “traditional” German schemer was what I wanted to do.
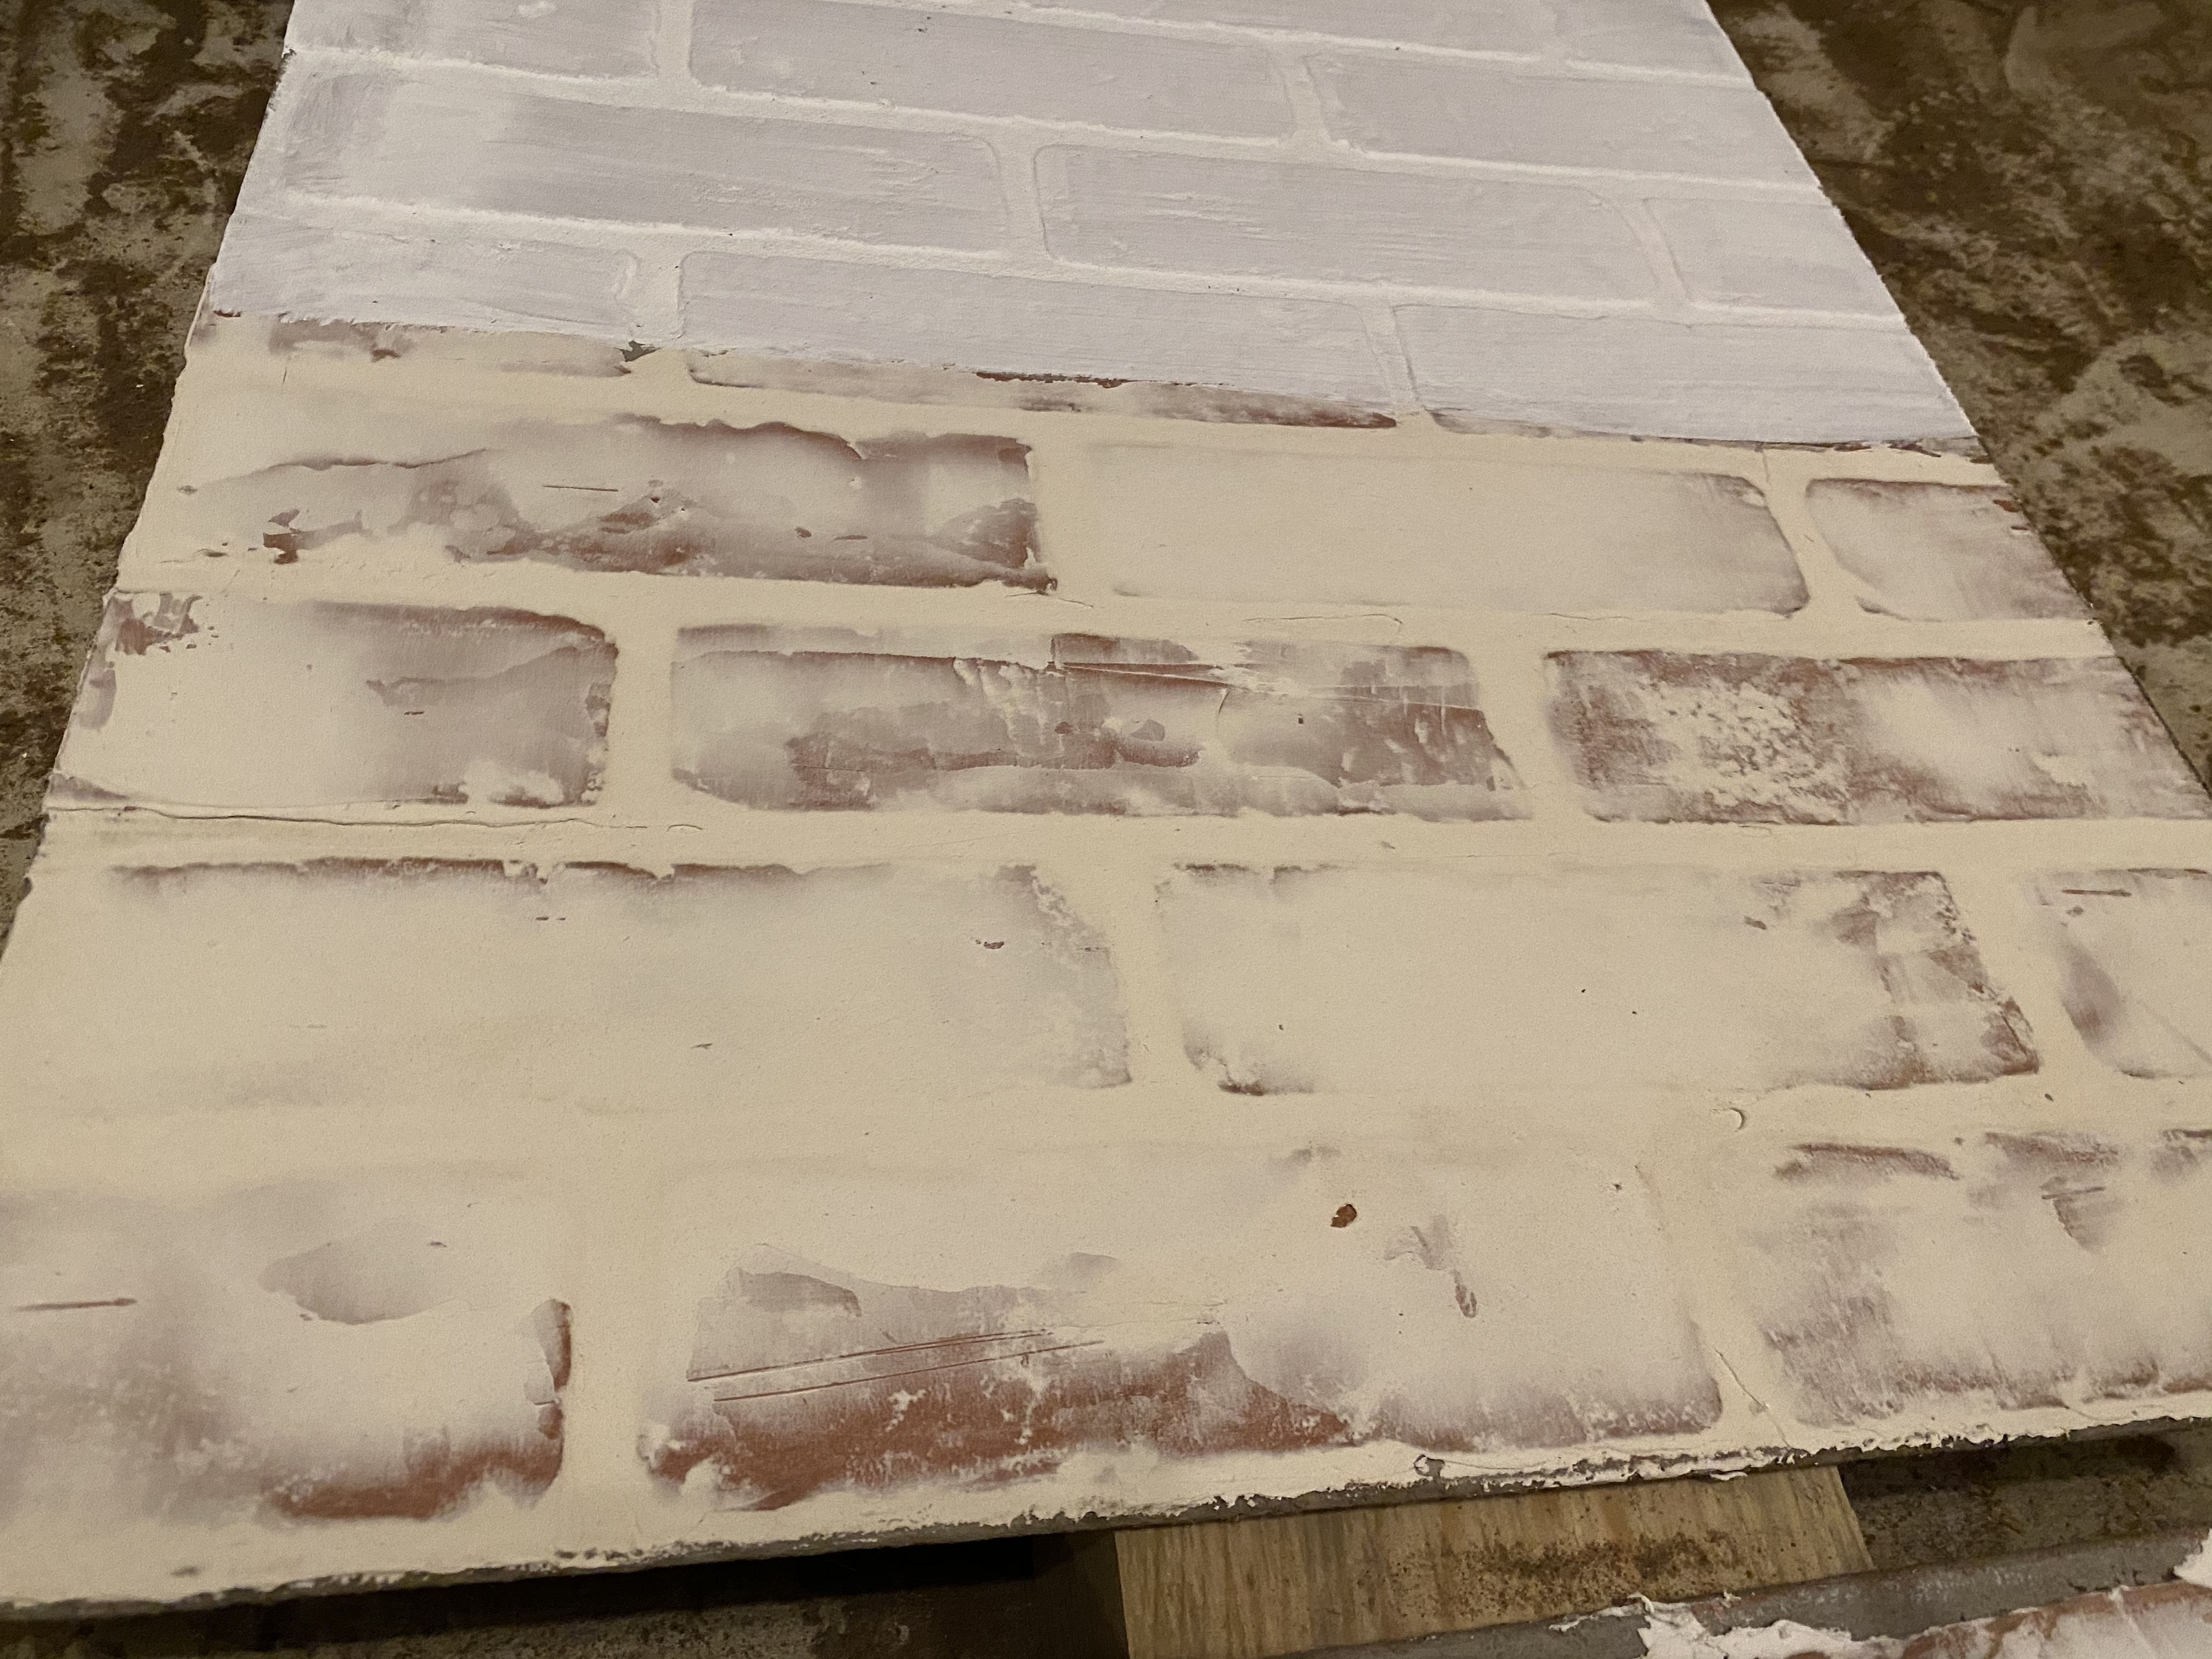
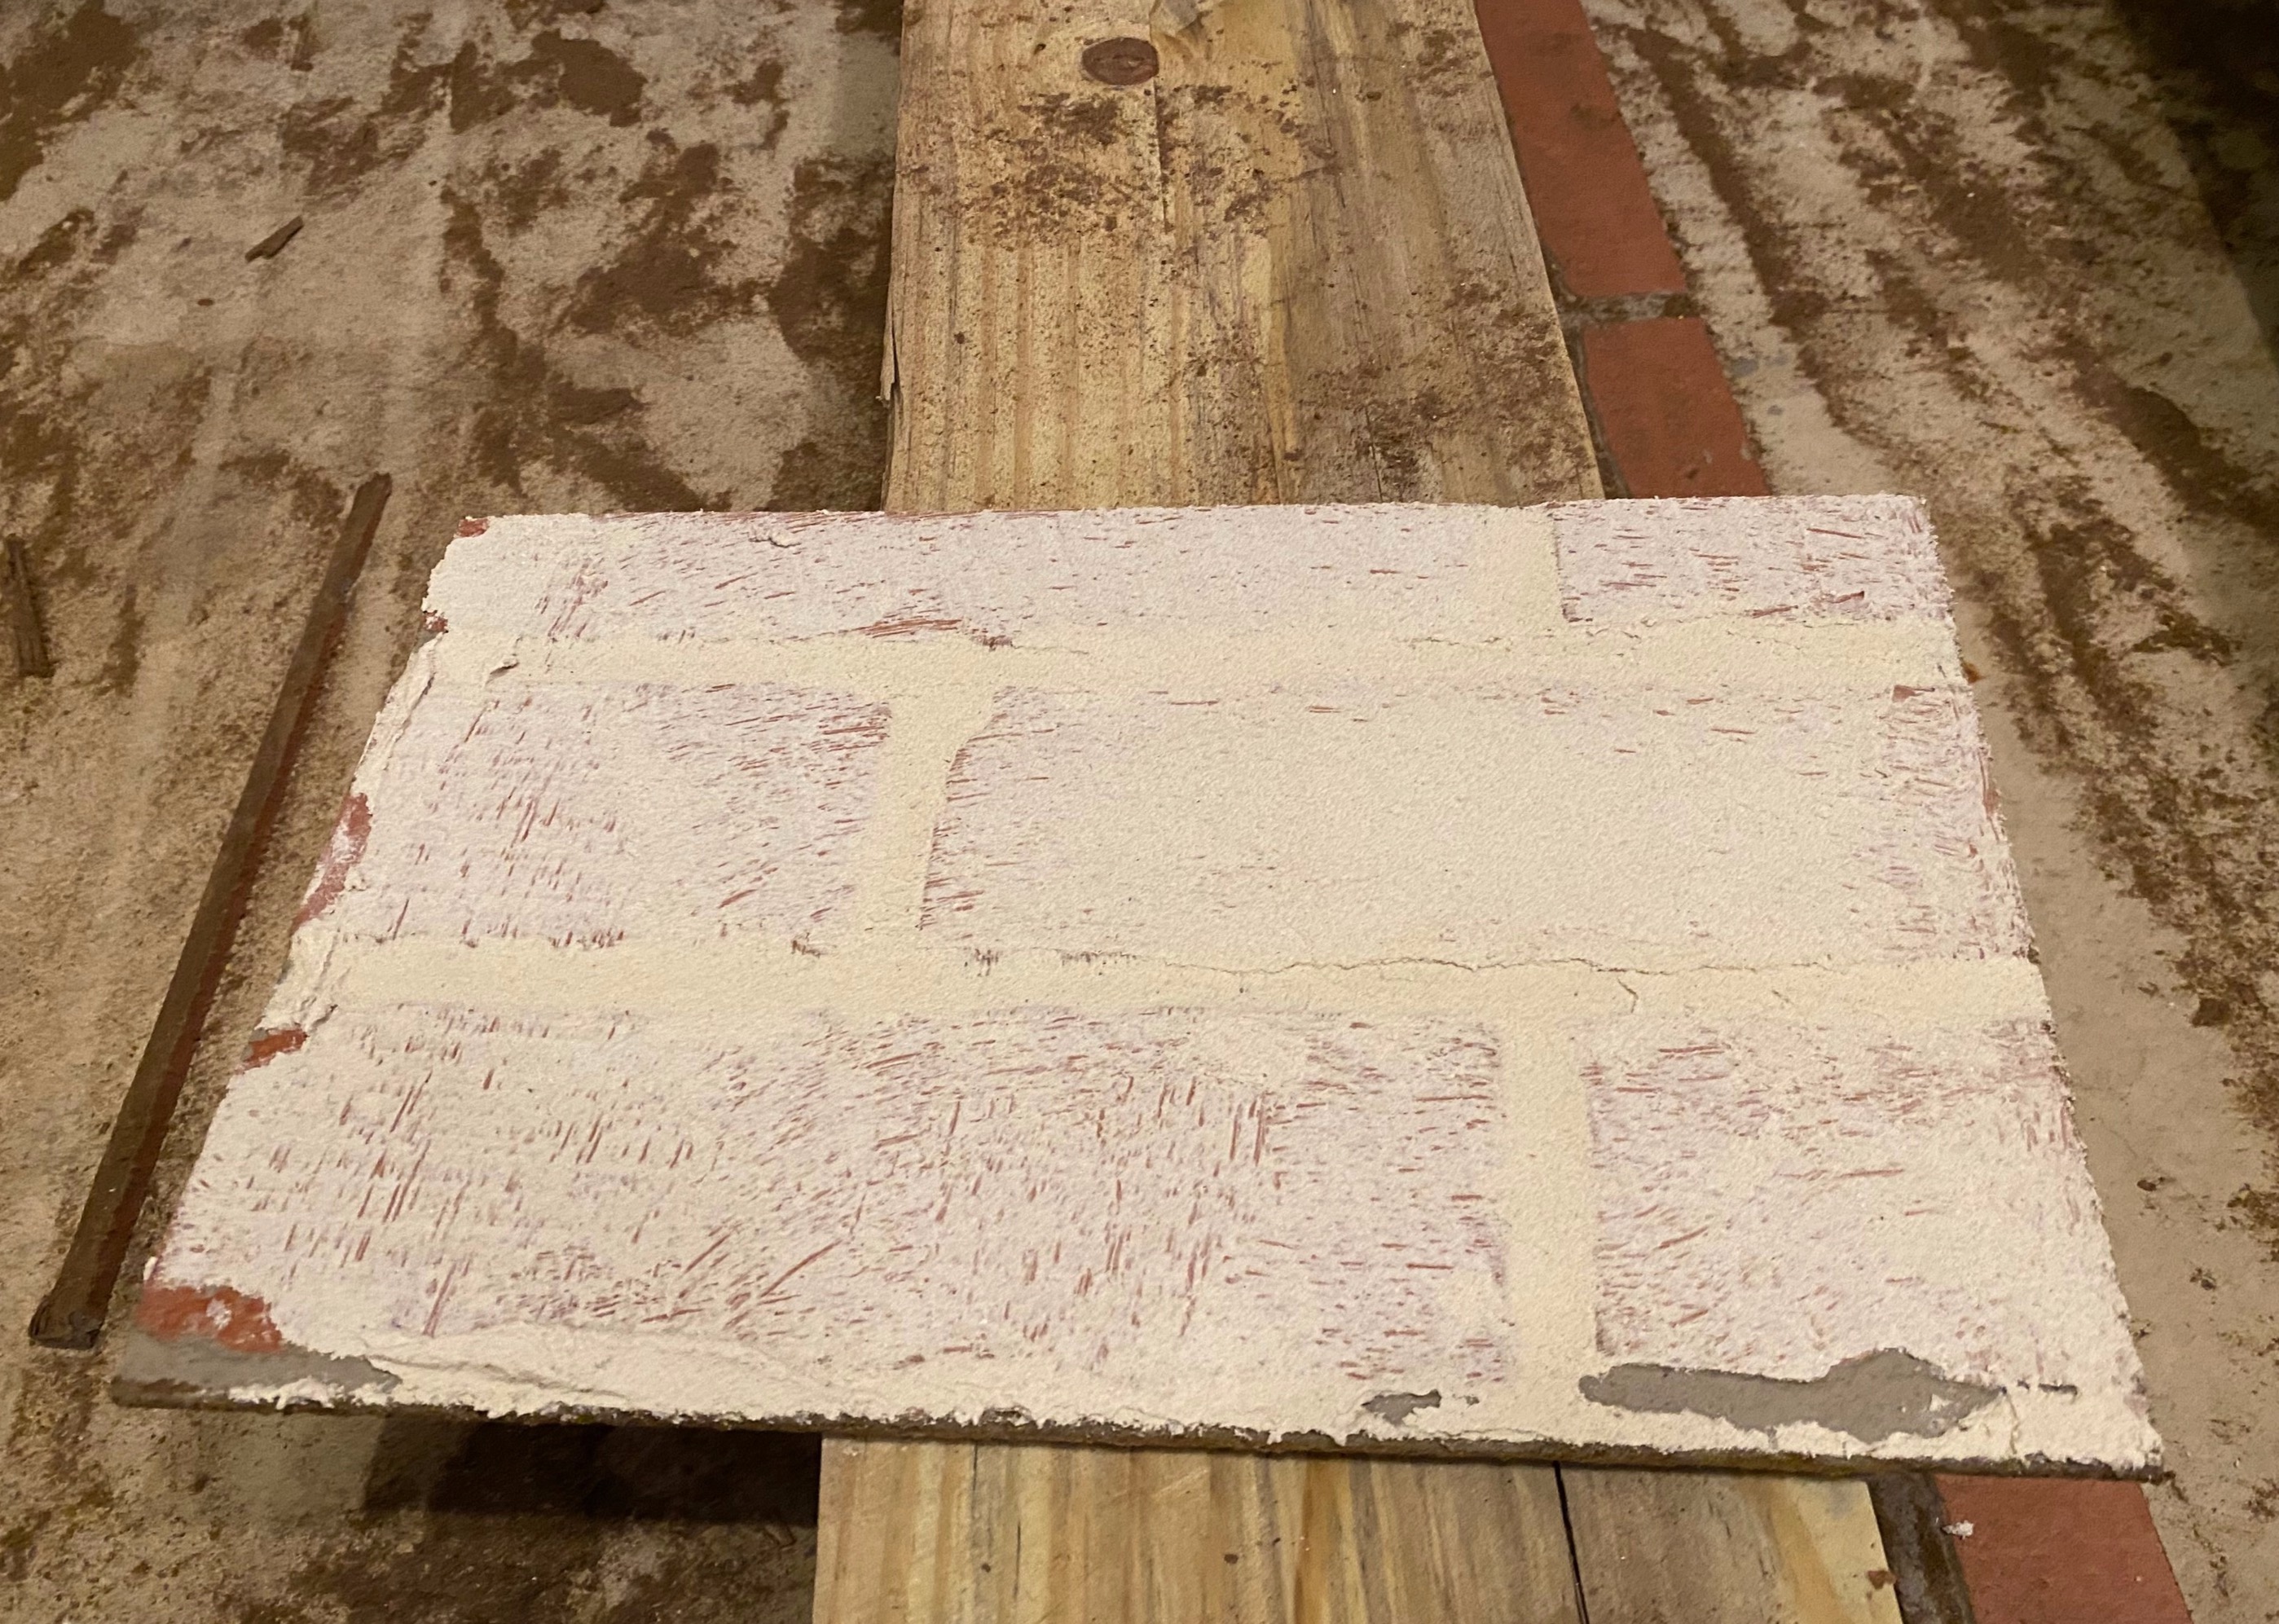
First, I tried just using the putty knife to spread and scrape off the mortar, but this left streaks from the granules because the faux brick is a fairly smooth surface compared to real, rough bricks.
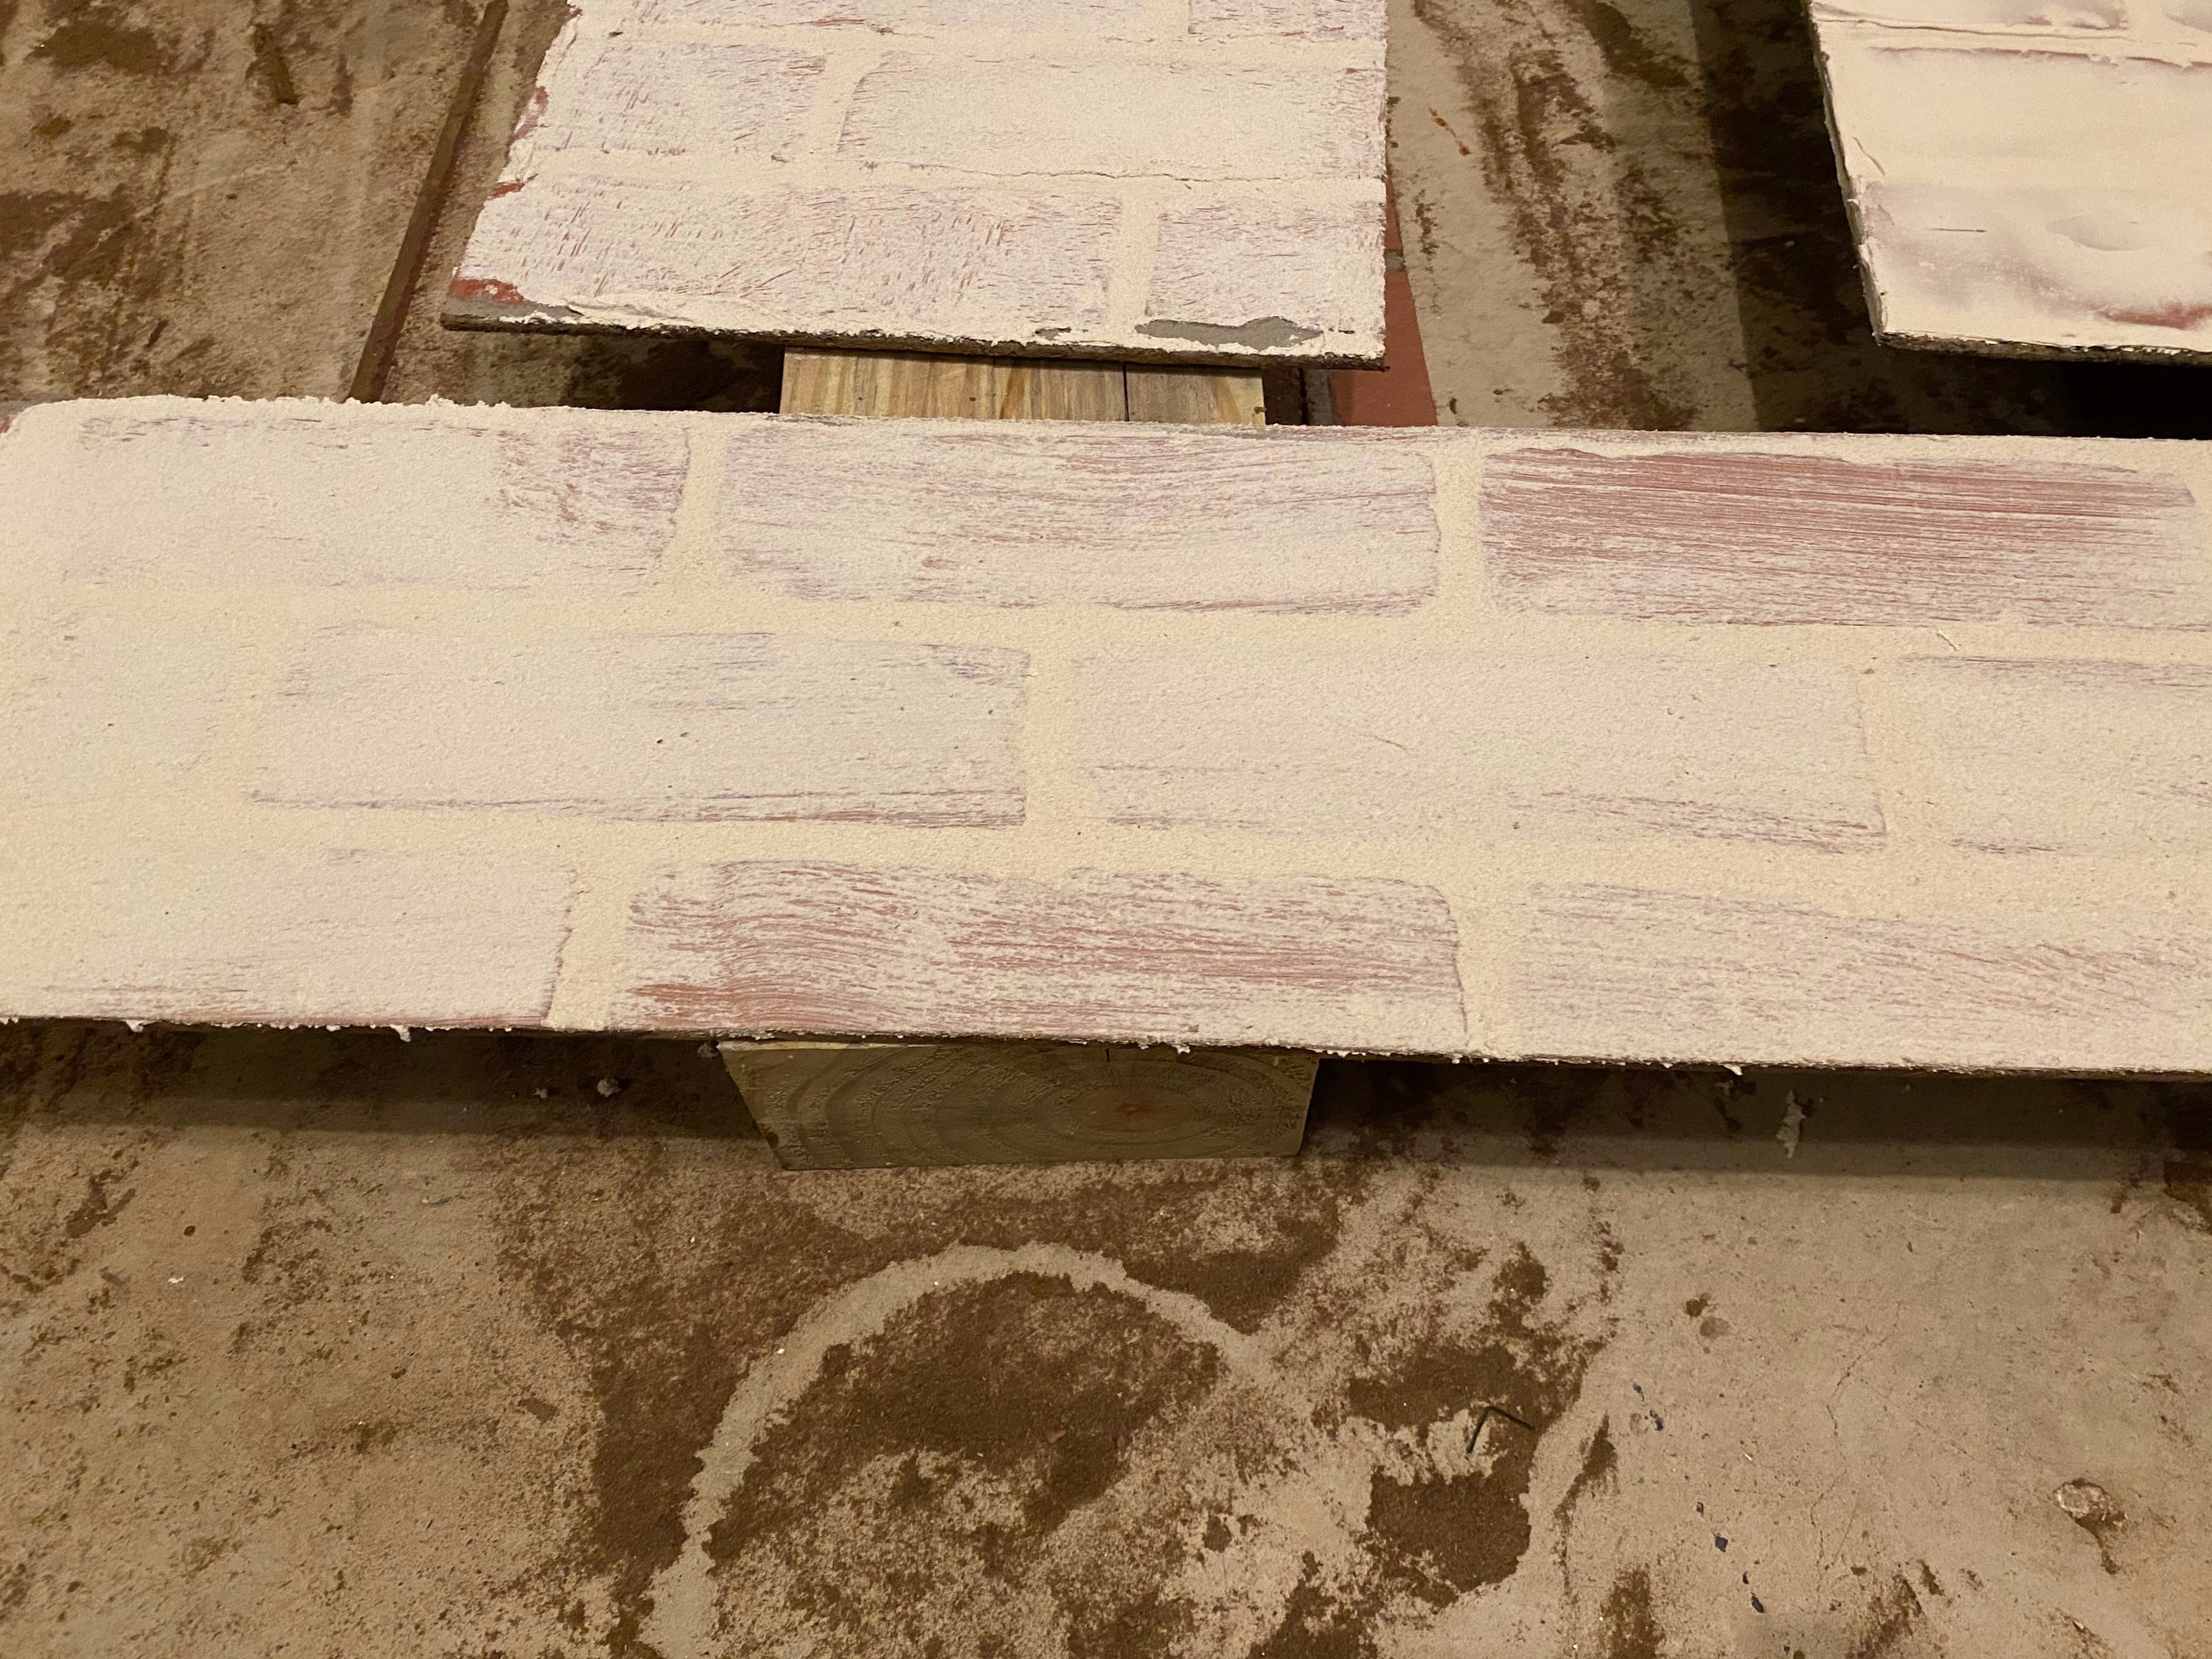
Secondly, I tried spreading it on the bricks with the putty knife and taking a damp sponge to wipe some of the mortar off. The only issue I found with this that it also left streaks from wiping the mortar off of the bricks and the white streaky lines left behind.
Joint Compound/Spackling:
The last trial was with joint compound. I thought it would be the perfect medium between the discolored Tile Adhesive and the grainy Mortar. It basically was exactly what I was looking for. But I actually looked at the Mortar more and decided that I loved the texture that the mortar adds to the space to make it feel more like real bricks.
Bonus- Paint:
After my project was complete, I saw another DIYer use paint to create a Faux German Schmear. Basically, rolling on paint and, when it’s still wet, scrape off with a putty knife. This technique will provide a very smooth finish but will give the basic look of a German Schmear.
THE DECISION — MORTAR
In the end, I decided to take a chance with a technique that I wasn’t 100% comfortable with. Neither of the mortar tests really turned out how I wanted but I decided on mortar because after doing all of these tests, I realized the realistic texture that the mortar added to the very smooth faux brick finish.
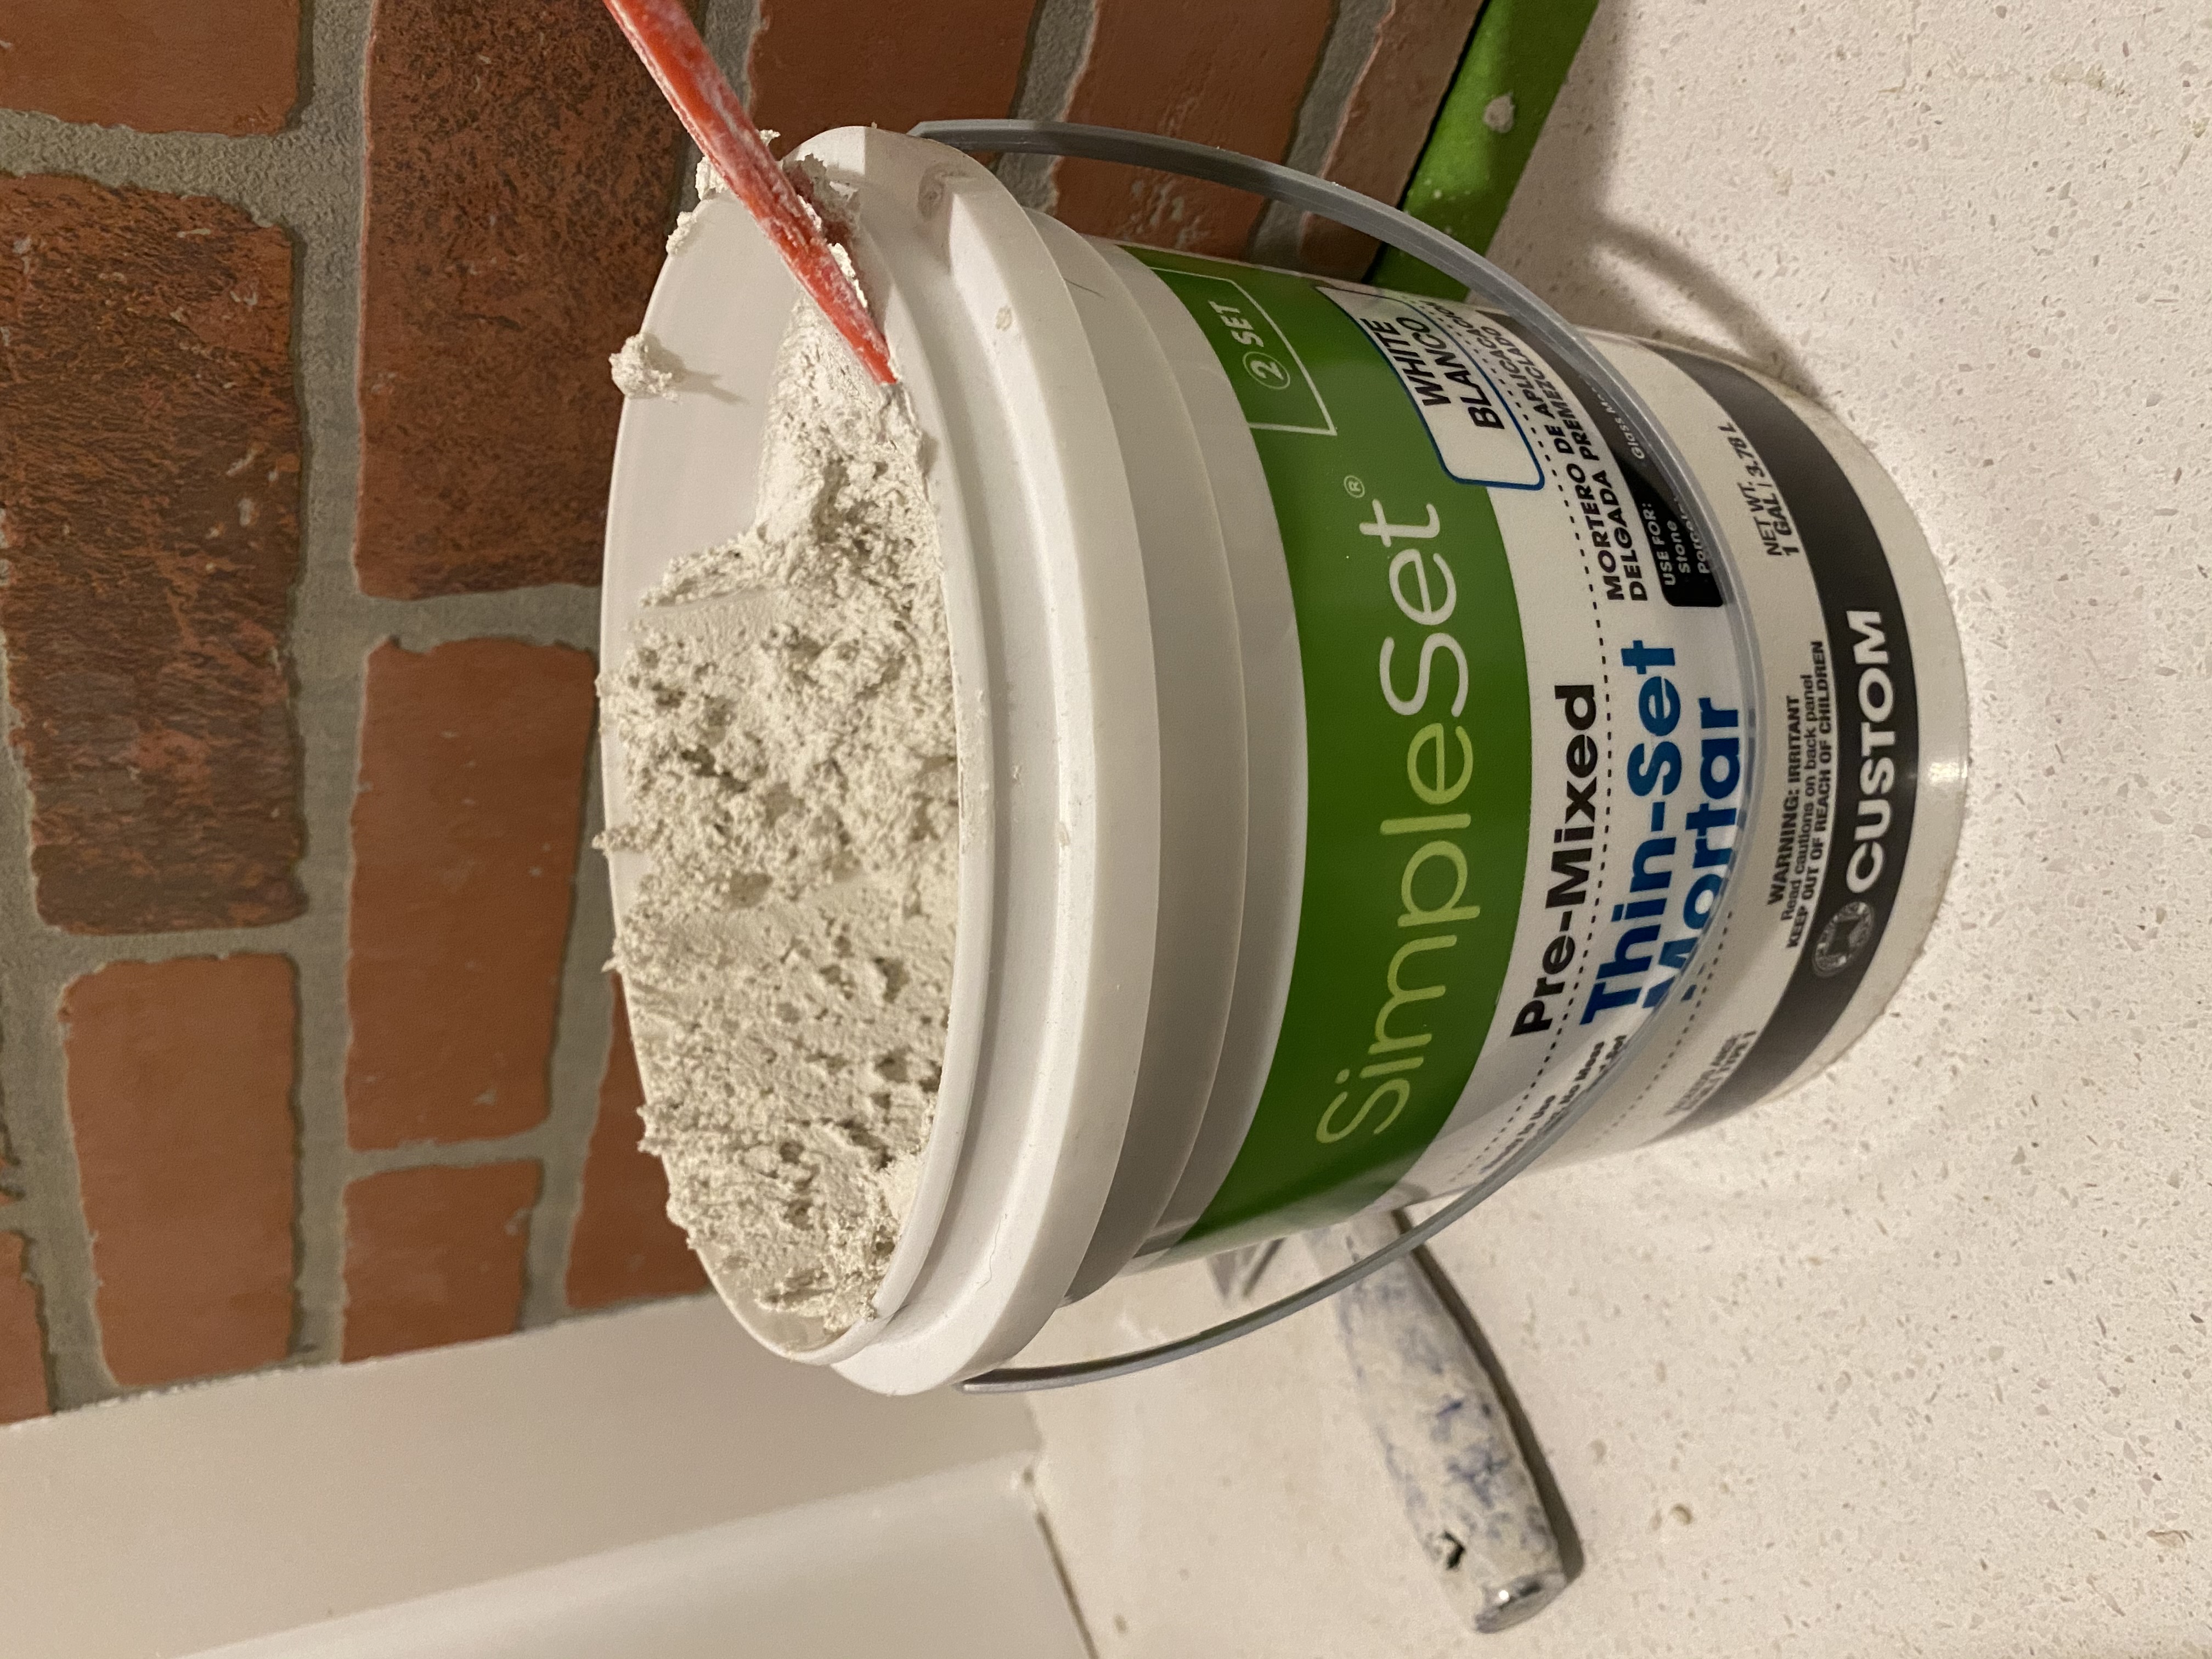
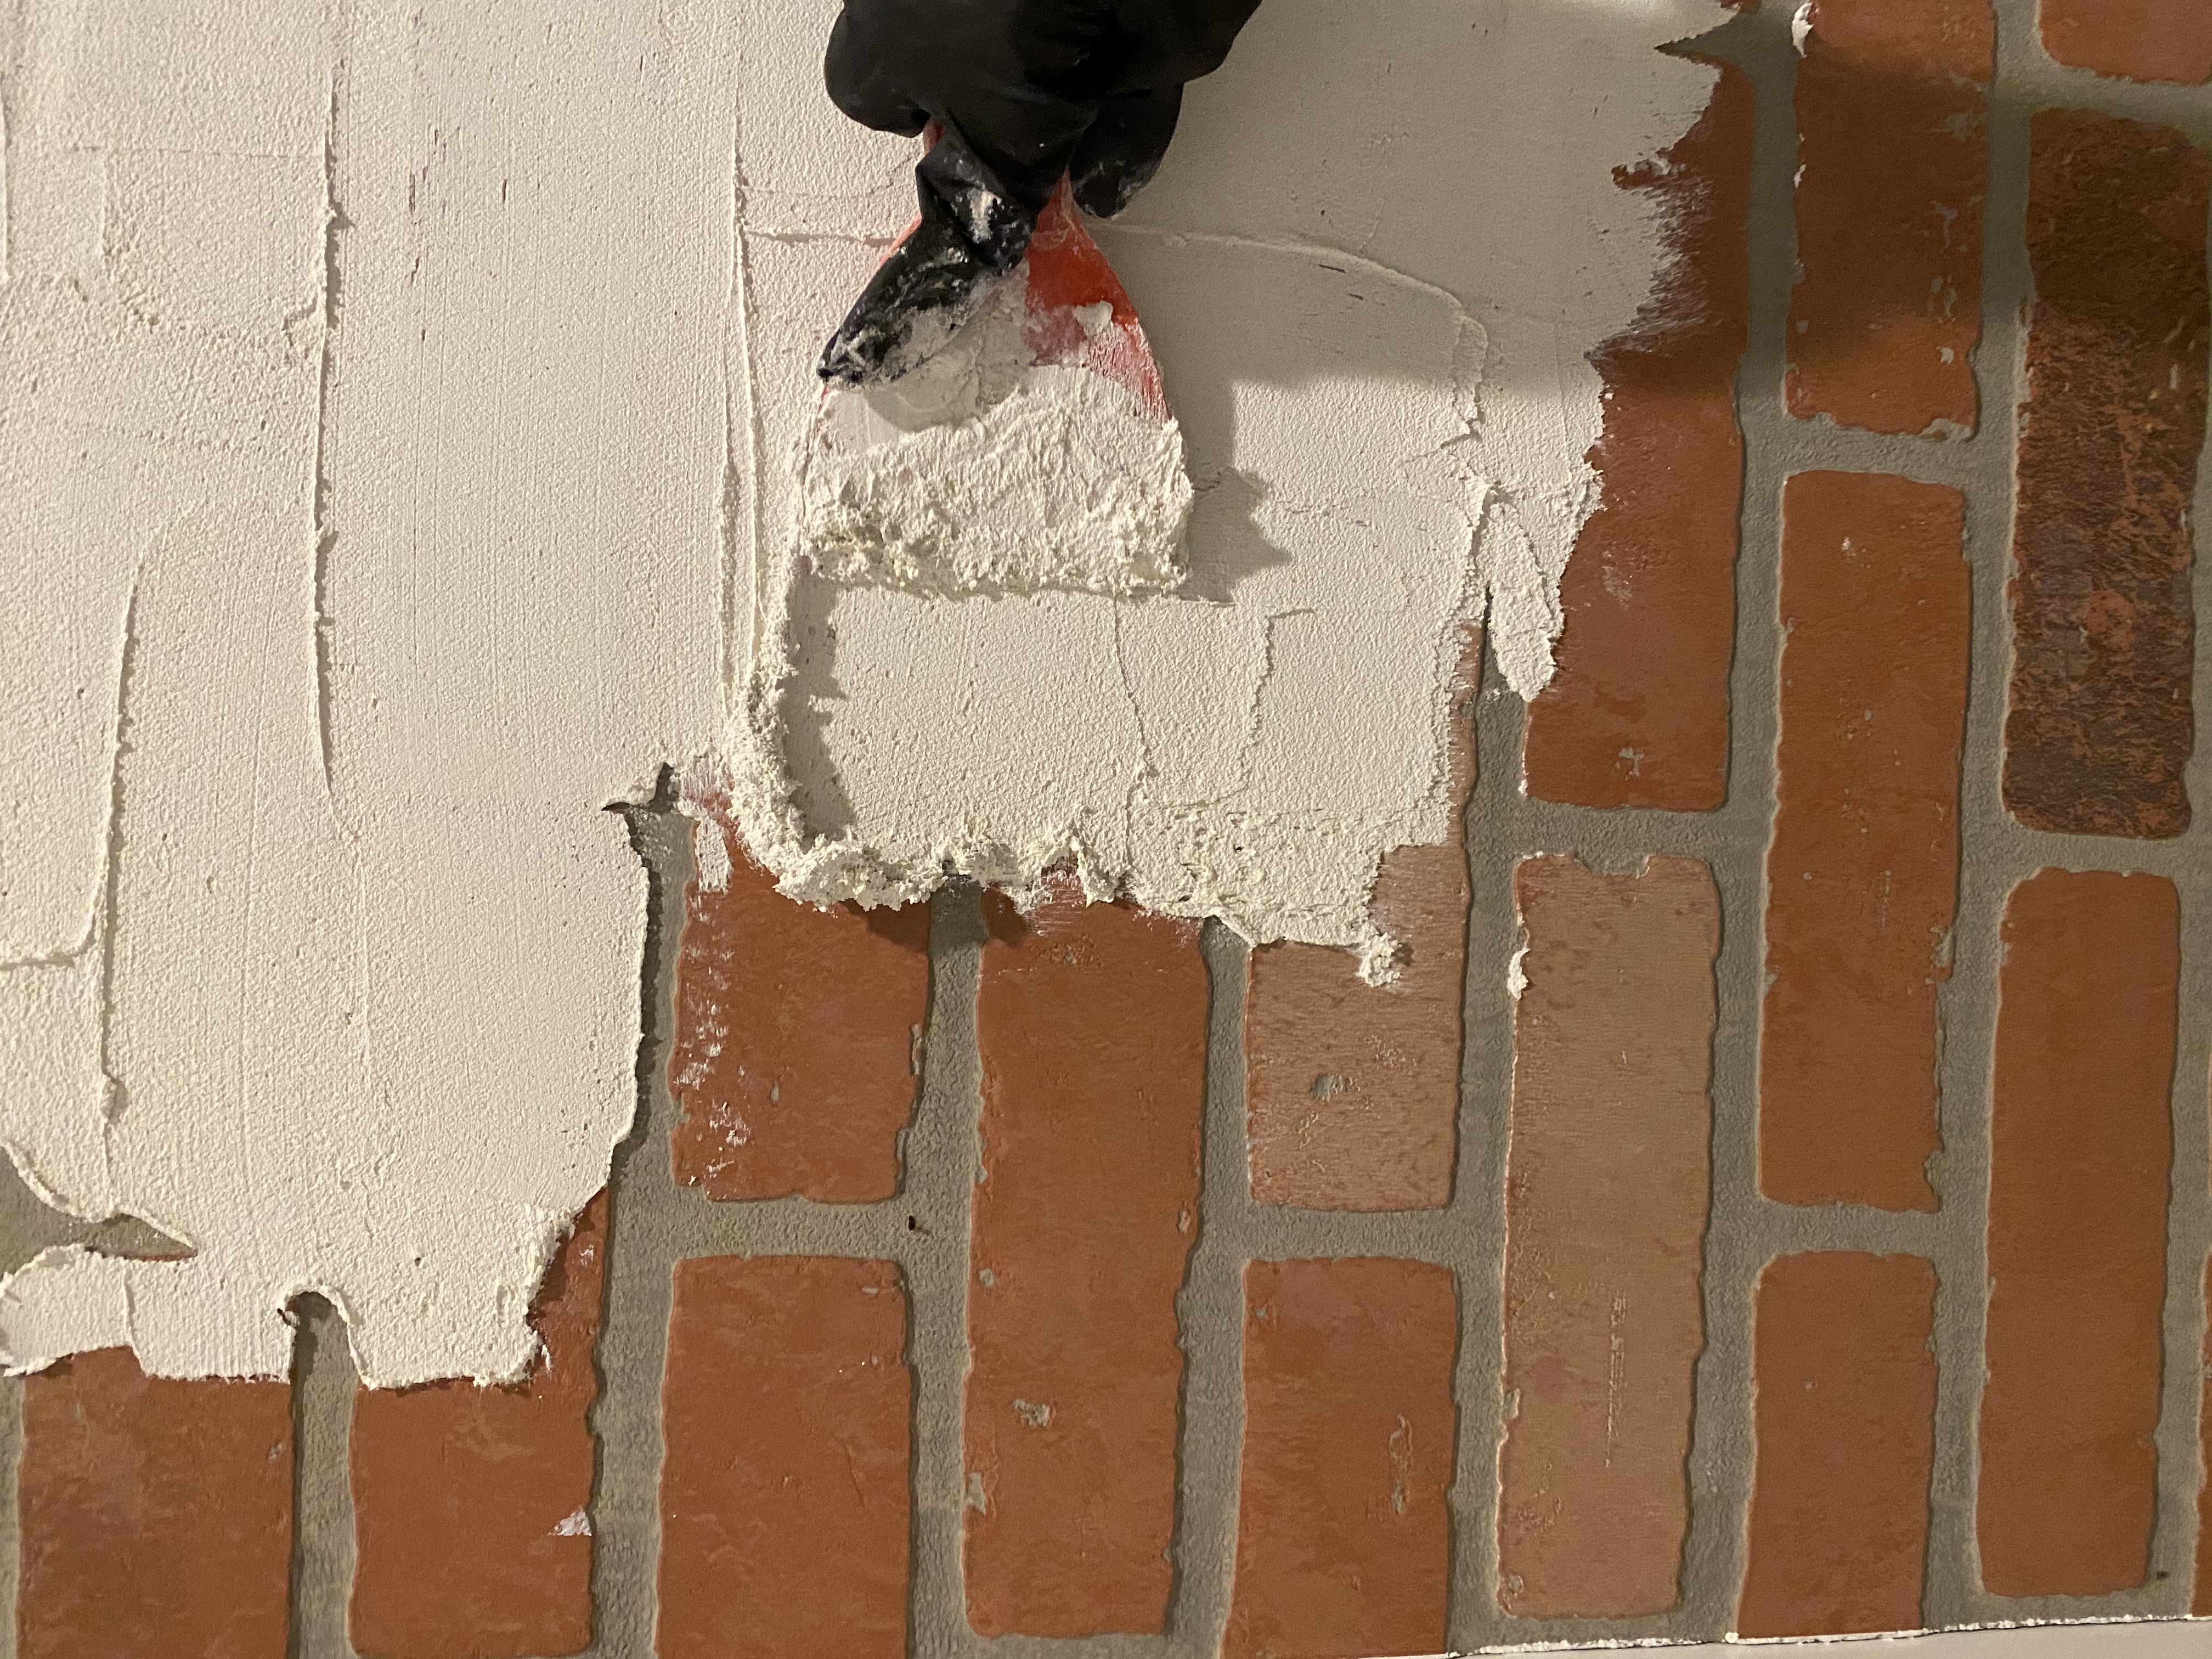
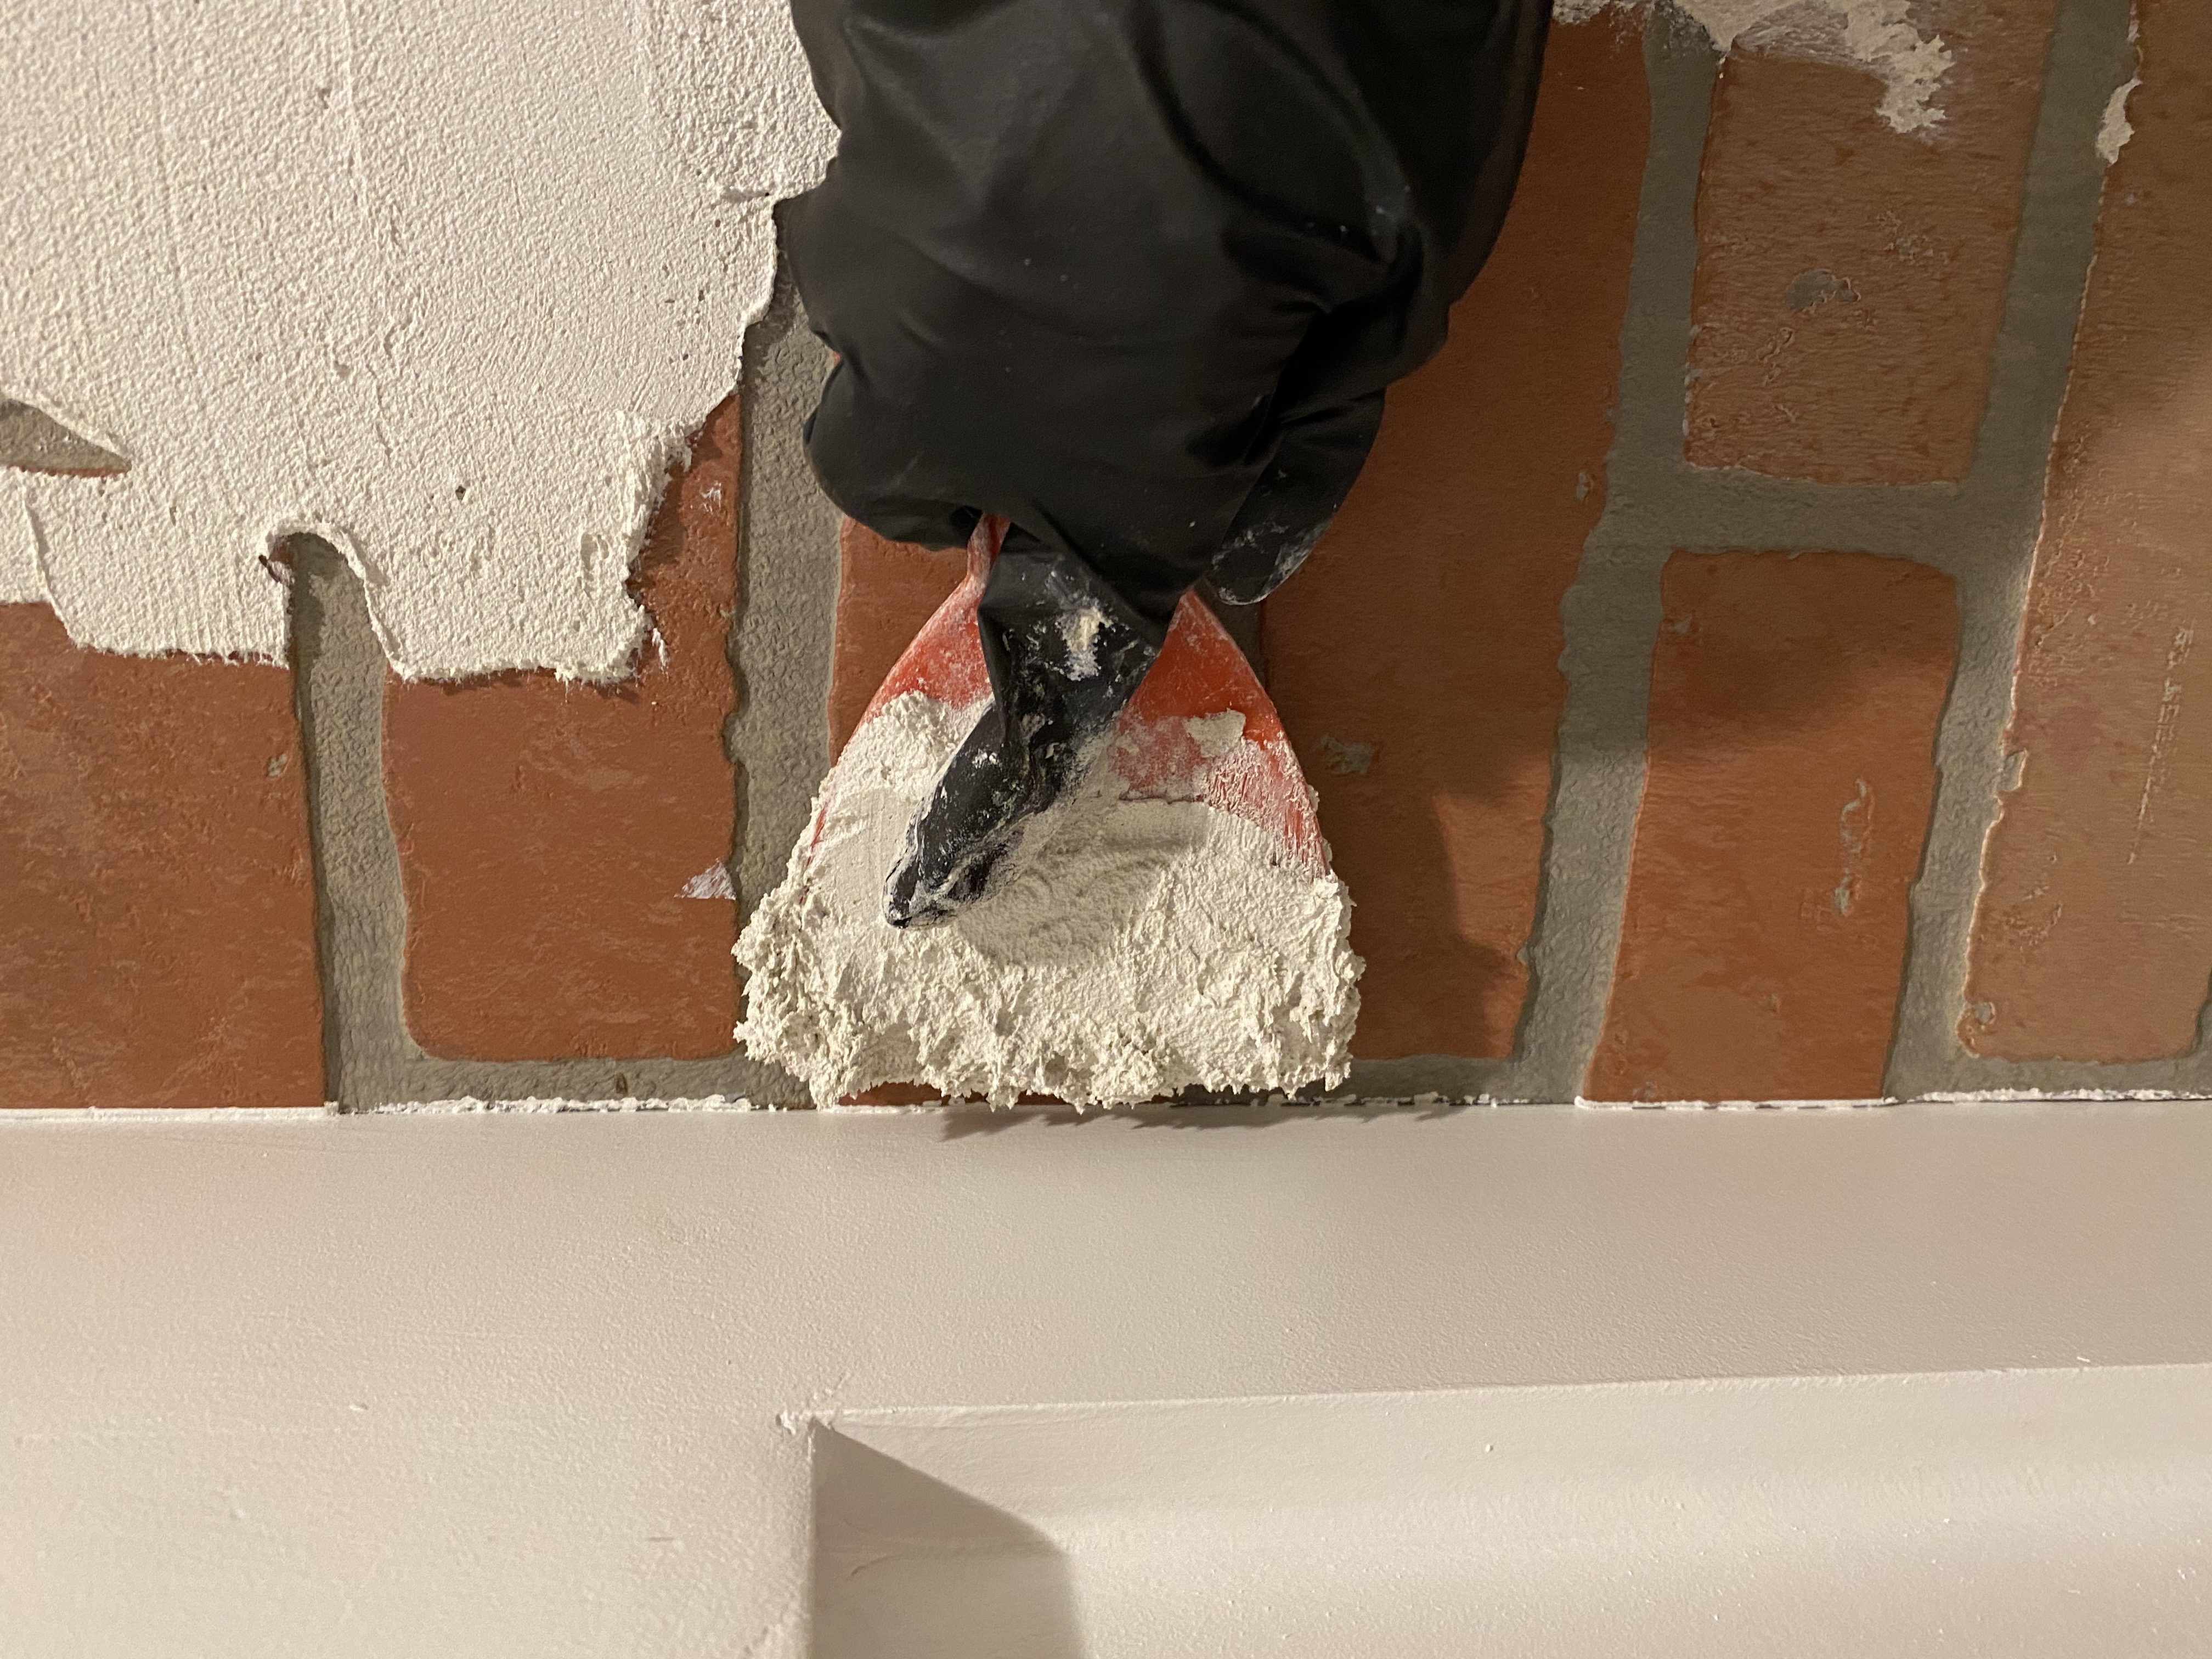
The technique I used was so simple and took me about 2 hours or less to schemer the entire area (approximately 58 square feet). By taking the pre-mixed white mortar, smearing it on the brick panel and smoothing with a putty knife. This is a process where imperfection is perfect.
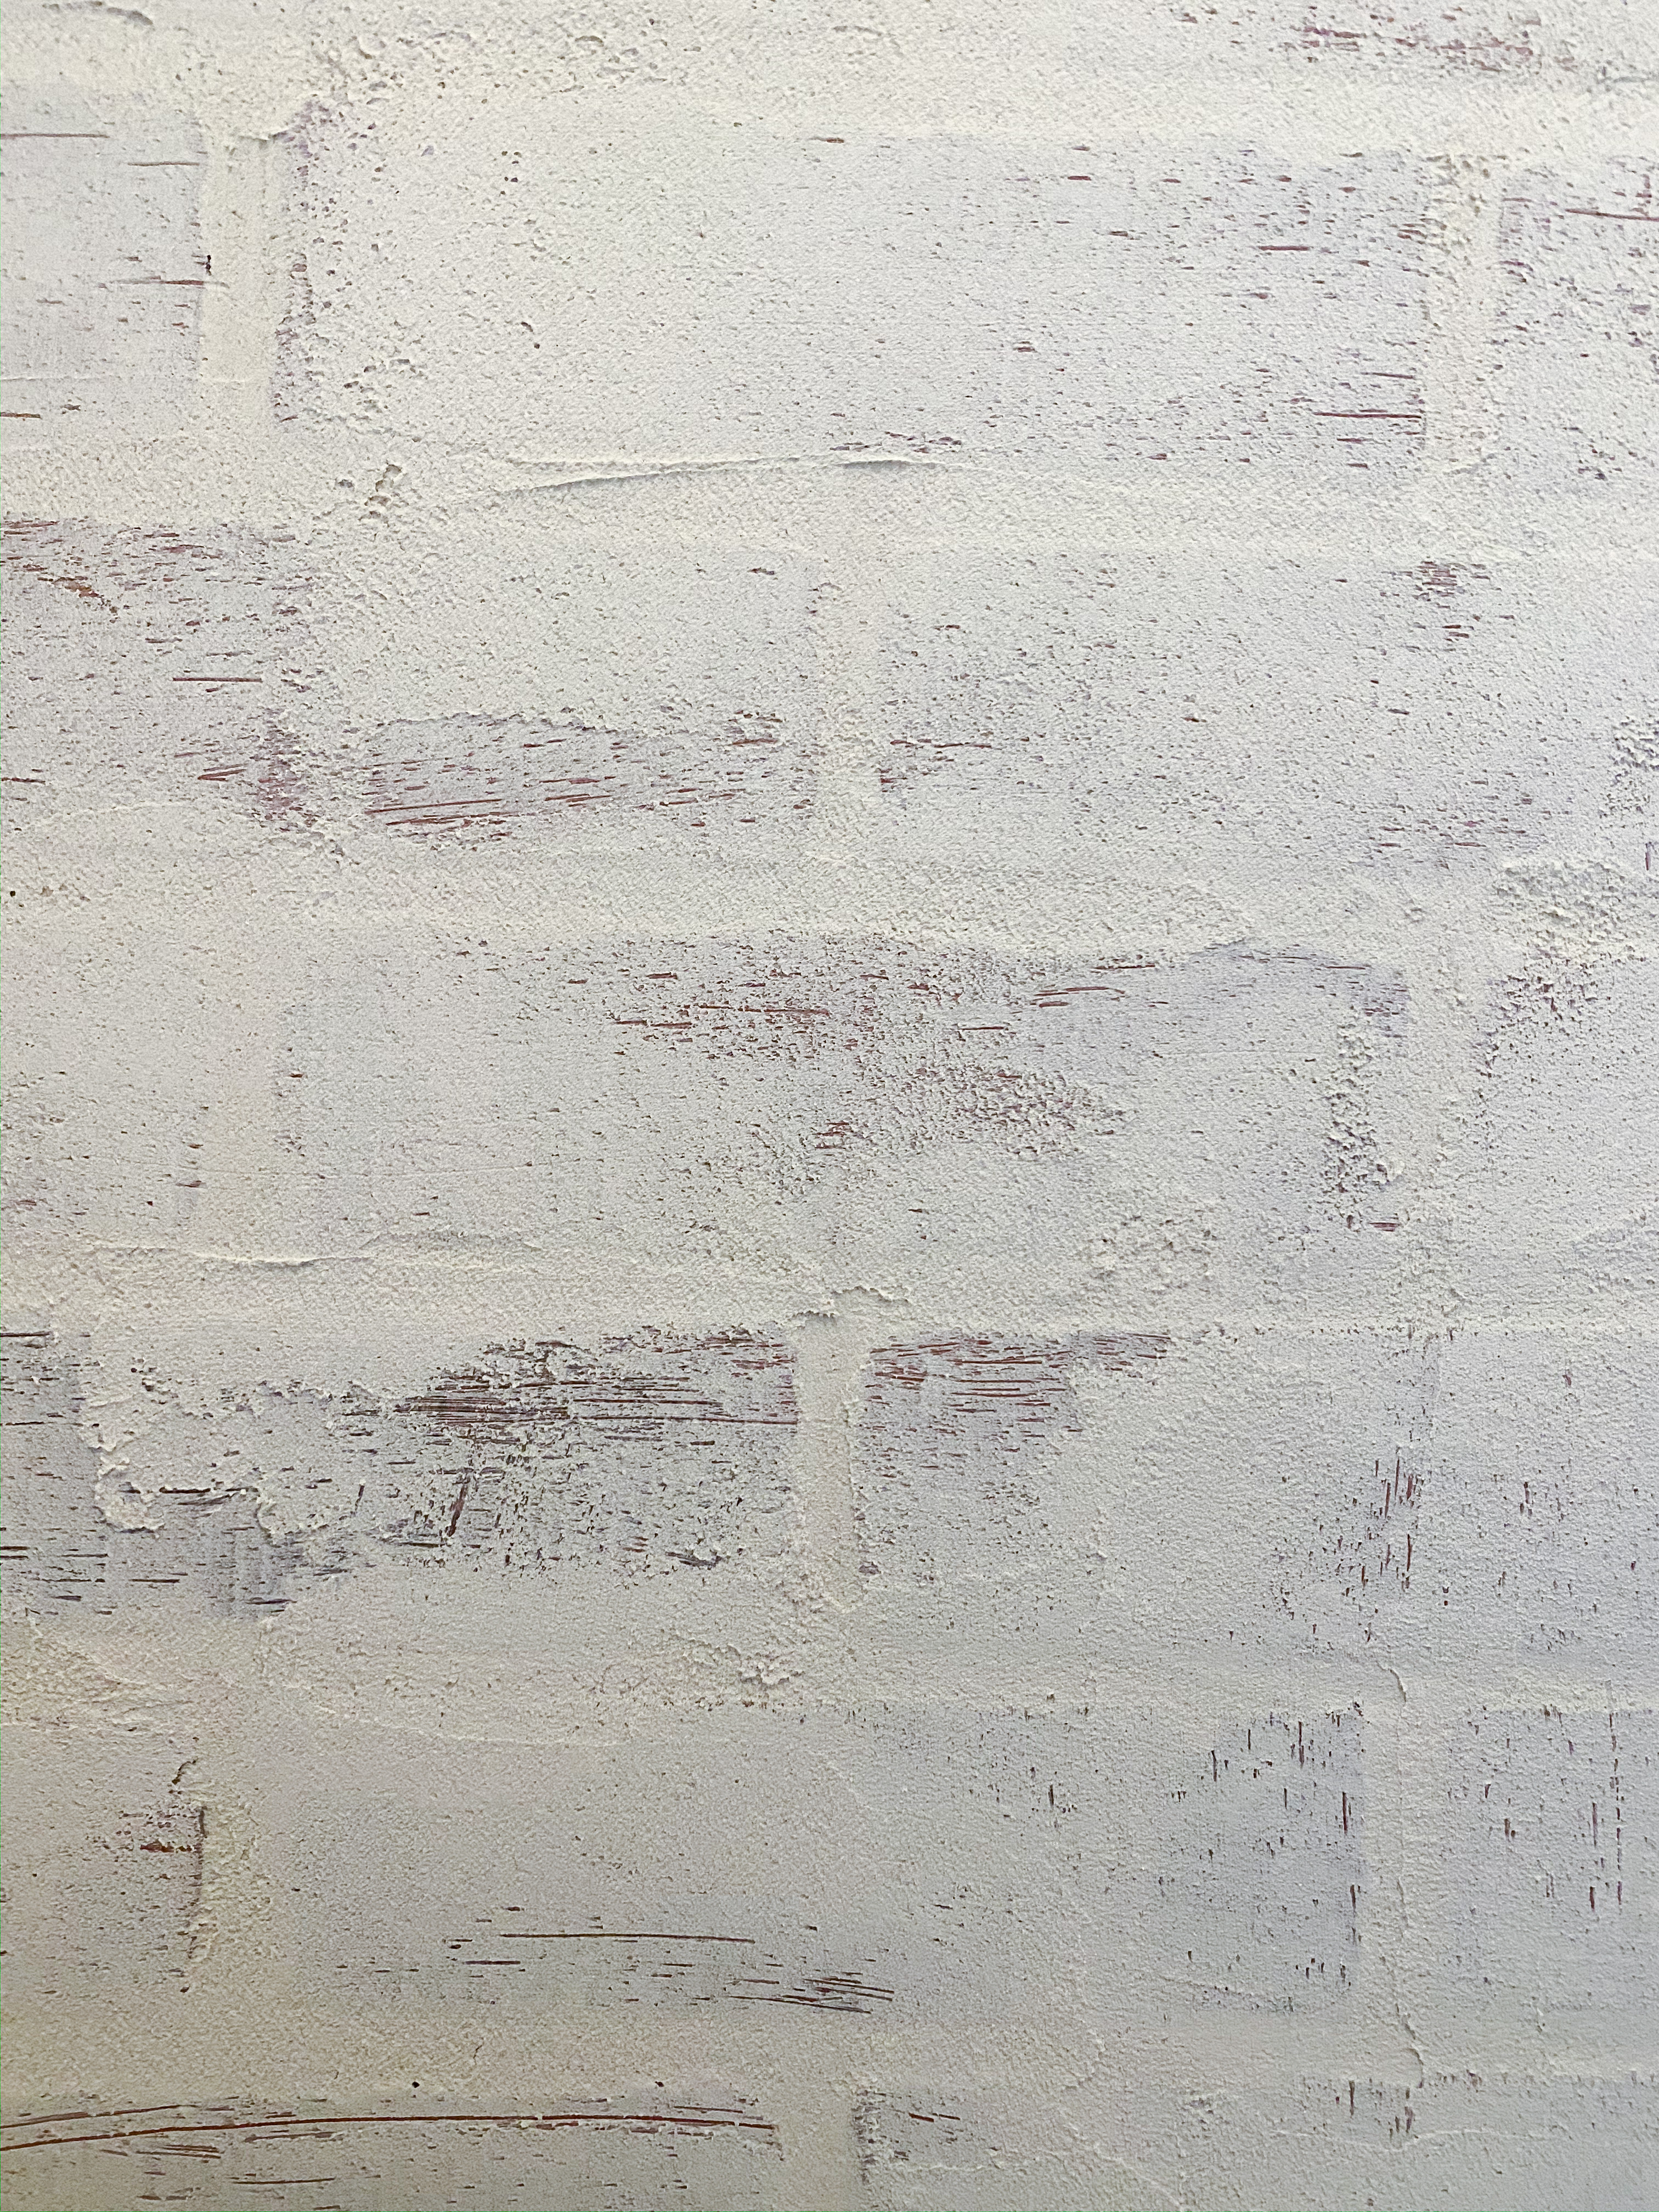
Some areas I scraped off as much of the mortar as possible and some I left it almost fully covered in mortar. I loved being able to control how much to use over the entire area. While working the mortar over the bricks with the putty knife, I pulled it in all directions, I didn’t just move the putty knife up and down or side to side. This helped with the variation in texture and look. If you look at the outside of a brick house, it has imperfections and isn’t one uniform look throughout–this brings character to a house. I stepped out of my comfort zone with this technique. and it paid off in a major way.
The seams where the two board met had gaps where I cut them. Some of the corners didn’t meet up all the way because of a crooked wall or I measured something wrong. I was concerned about this at first, but I soon realized that one of the beauties of the mortar is that I could fill it in with mortar and no one would be the wiser. Any imperfections with the brick panel will easily be hidden by the German Schmear mortar.
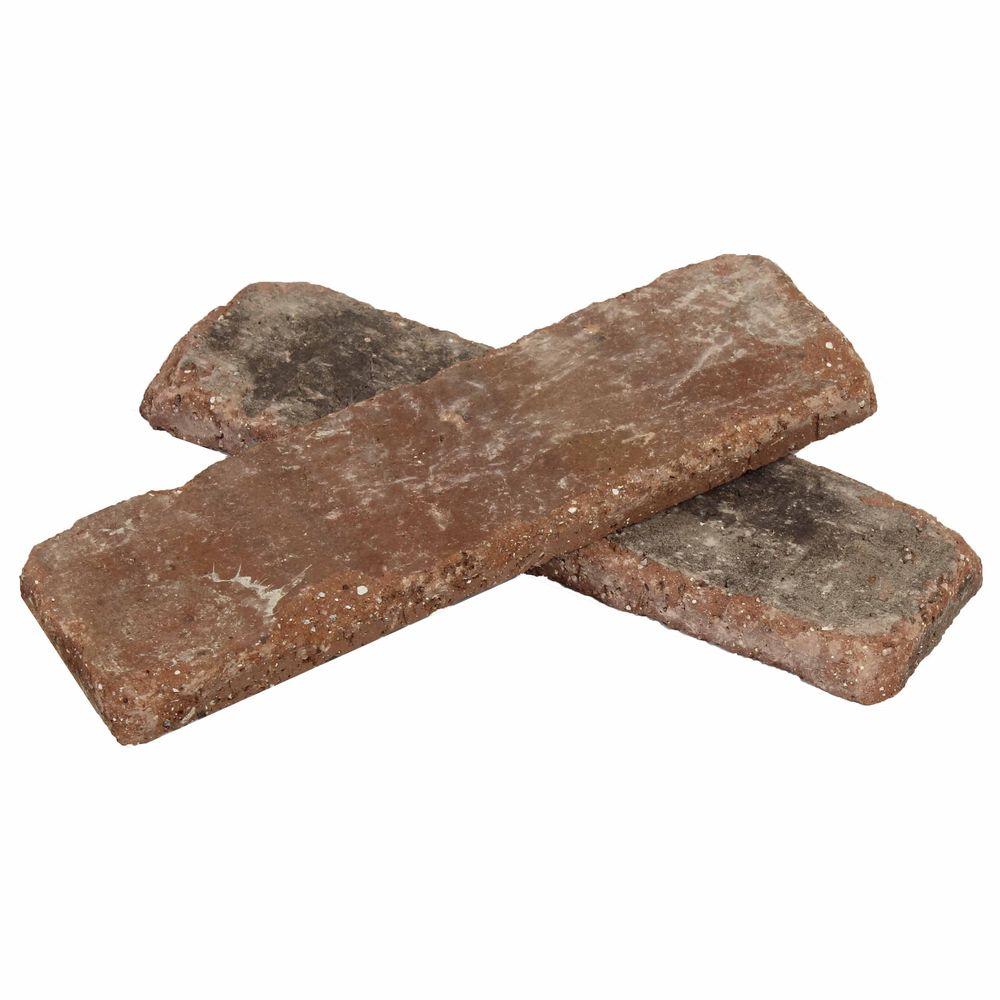
FAUX BRICK HDF PANEL VS BRICK TILES
The biggest difference for me: the HDF Brick panels are “high density fiber” boards so they are easily cut with a circular saw or jigsaw where as the real bricks require to be cut with something like a wet saw. The brick panels are very light and easy to handle where as the real bricks will require a lot of heavy lifting.
COST COMPARISON (The approximate square footage of the room is 58 sq.ft.)
Real Brick:
$8.38-11.28 per square foot (depending on single bricks or bricks on mesh
58 sq.ft. + 10% extra for cuts = 64 sq.ft.
= $542-727 in just brick material
HDF:
Approximately $0.90 per sq.ft.
58 sq.ft. + 10% extra for cuts = 64 sq.ft.
= $58!
(Strictly looking at the numbers, you would be able to use just two of the brick panels but for ease and to account for a little bit more waste, I bought 3 boards for $ 86.97)
That’s a savings of over $450!
If we include the Mortar I used also, it only brings the total for the whole room to $128!
There are some things that I will spend whatever I have to in order to get what I want. Sometimes I can get exactly what I want while also saving a ton of money, this is one of those cases! I am so pleased with how this technique turned out and would totally do it like this again!
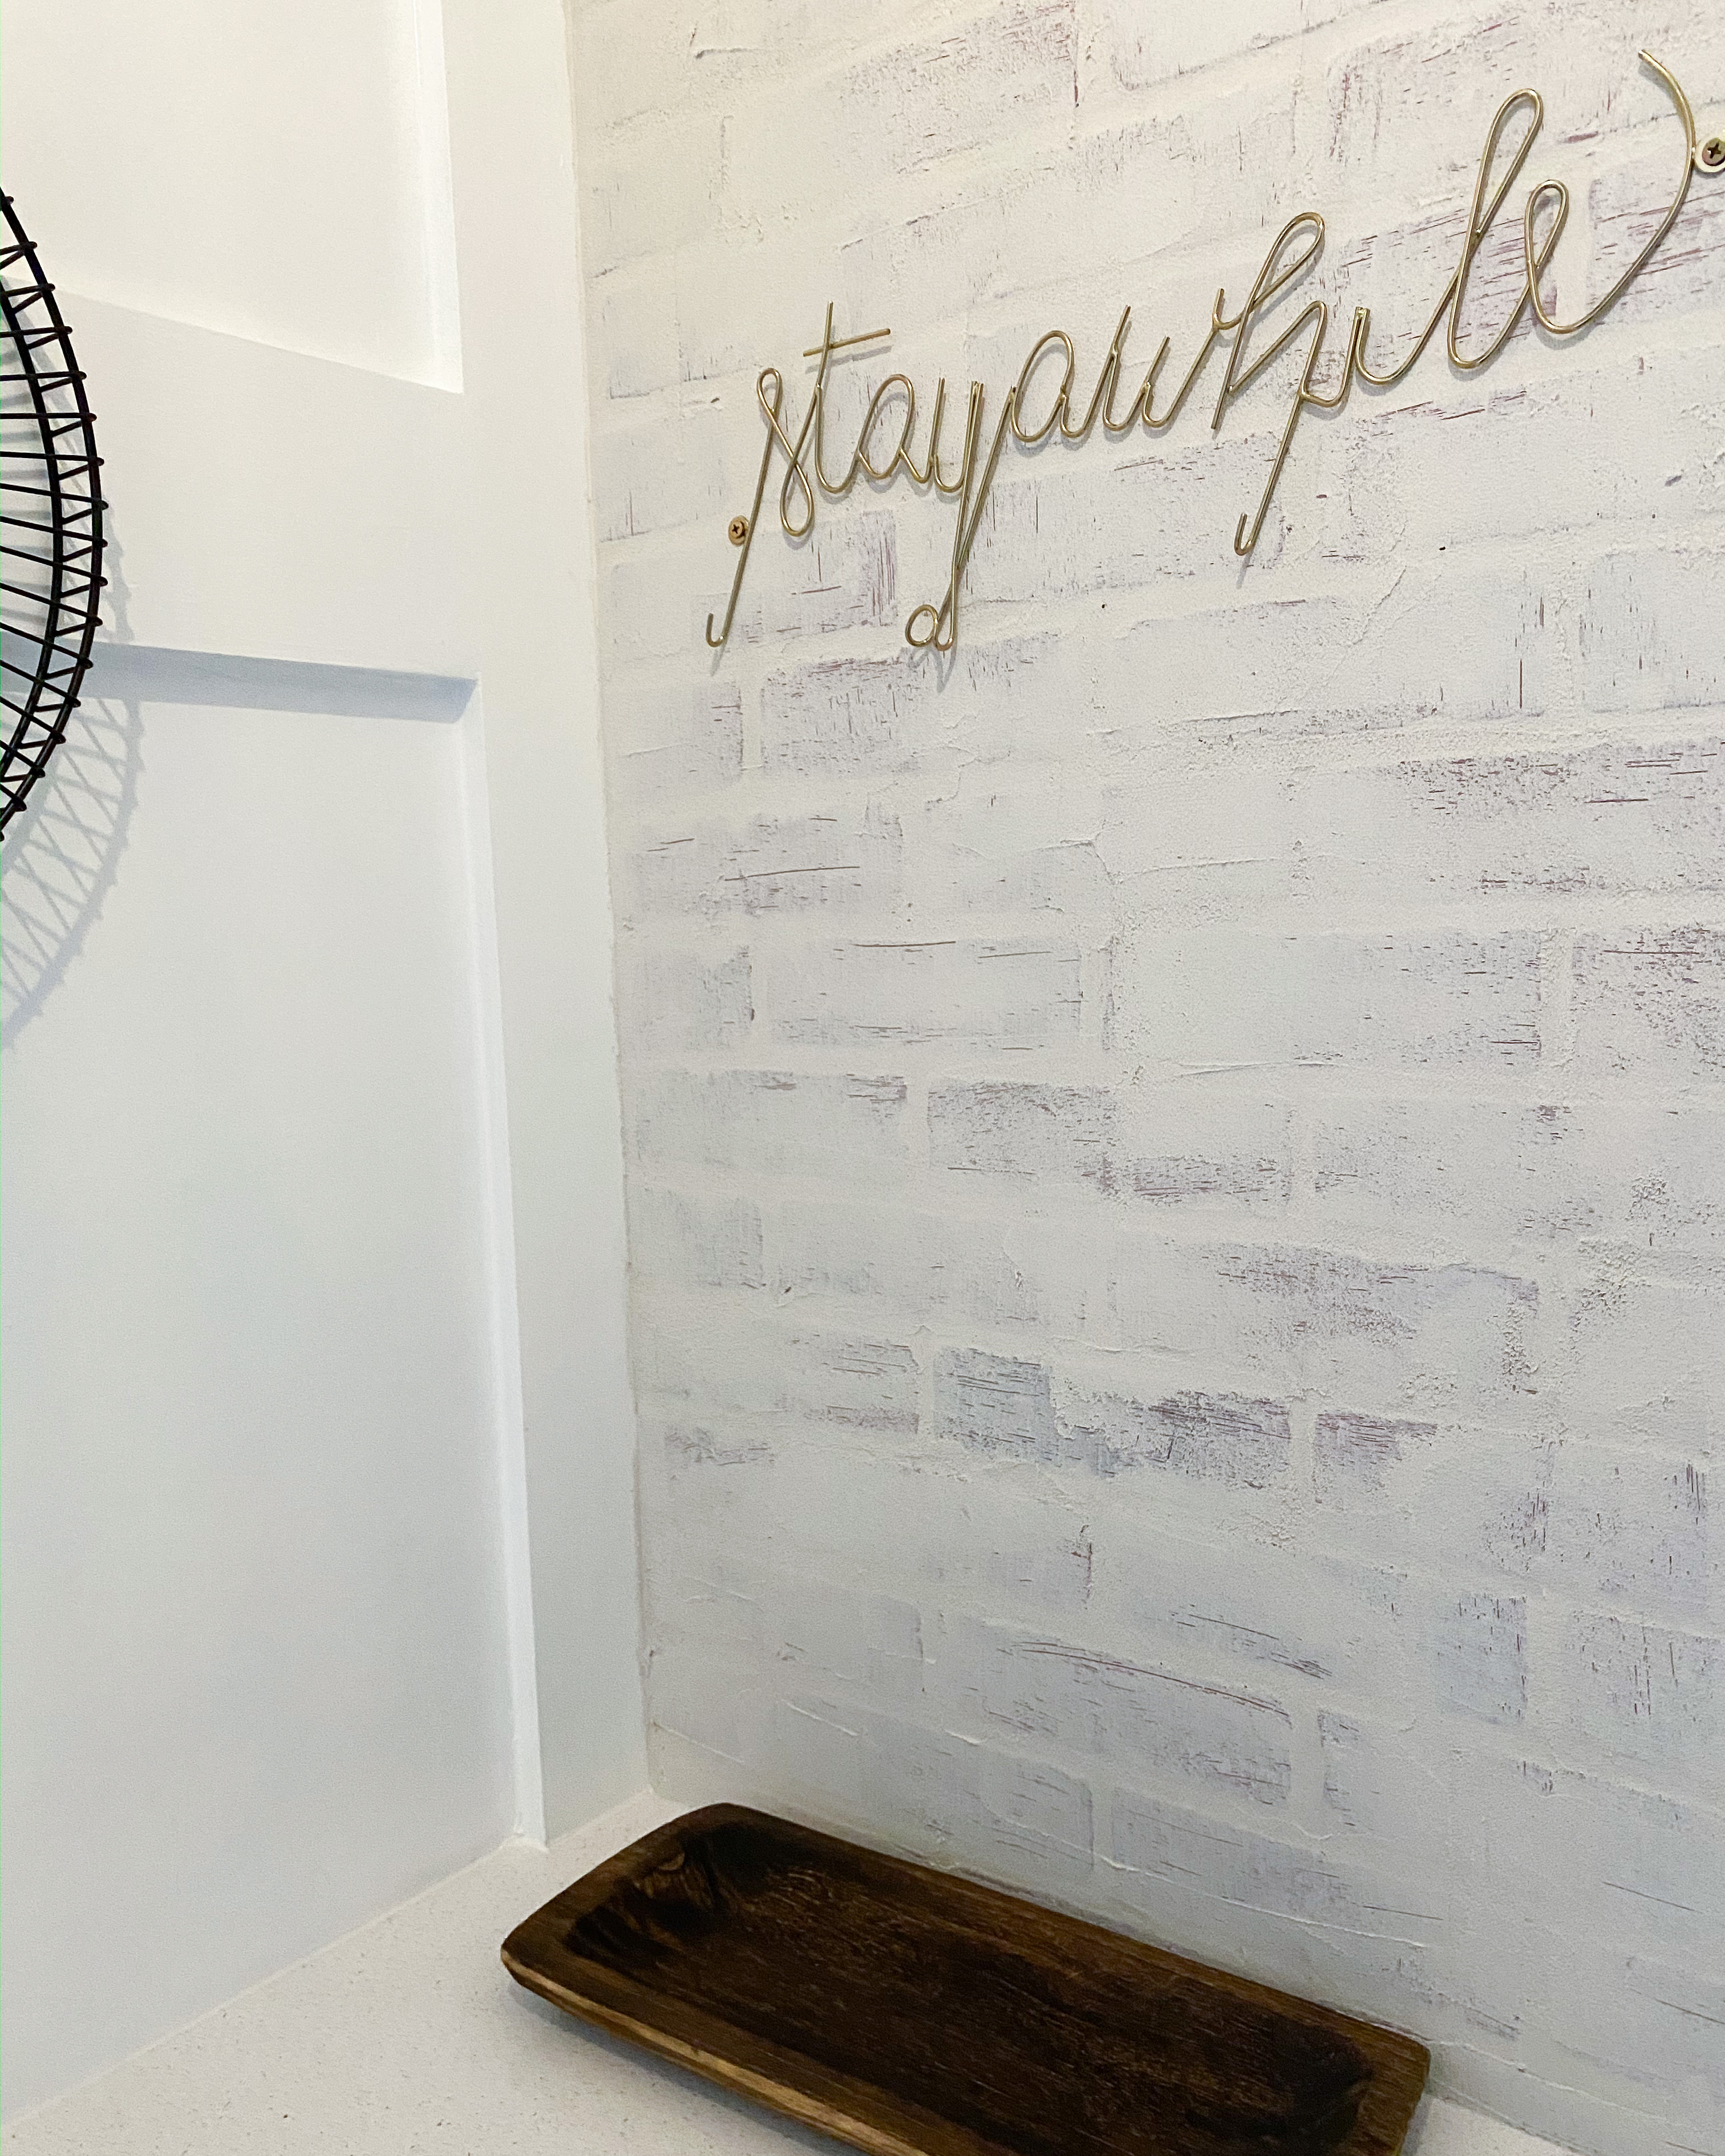
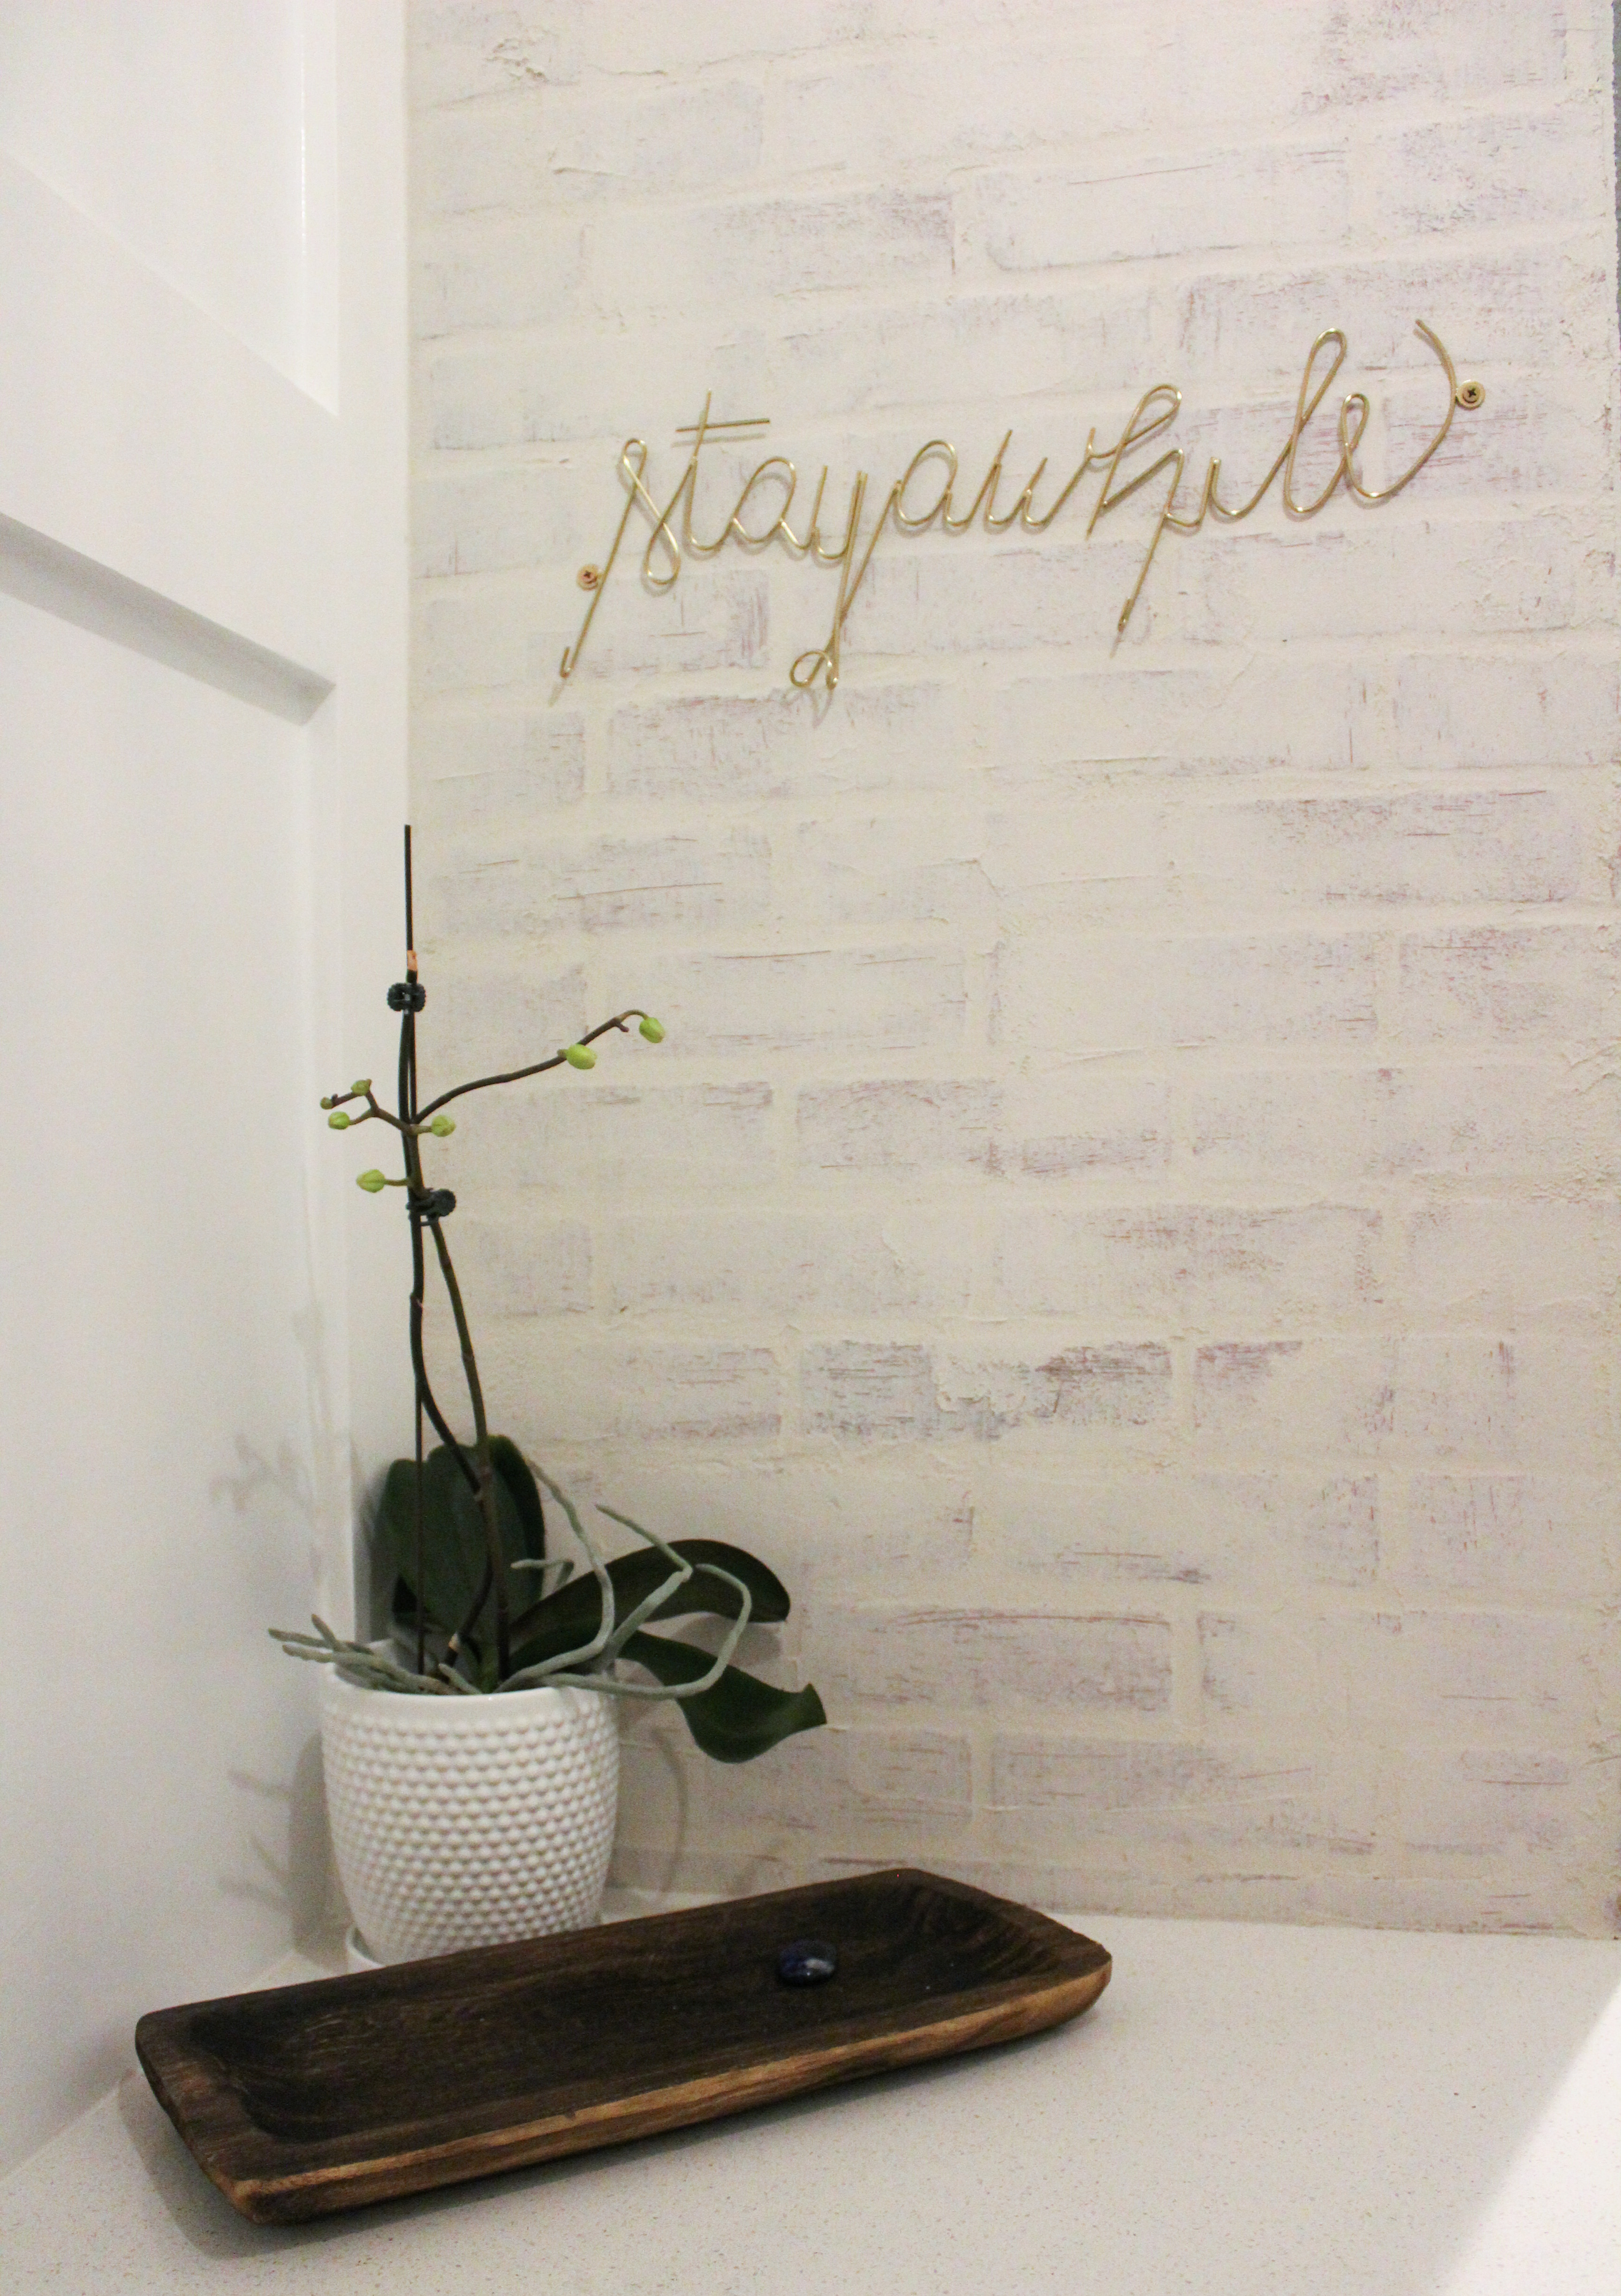
Fun fact: this is actually the first space in the house to be 100% designed and complete! I’ll be revealing the full details of the mudroom soon! Stay tuned…
Check it all out on my saved Instagram stories! @olivegreyavenue
Find us on social HERE!


