


DIY Fireplace Mantle & Board and Batten


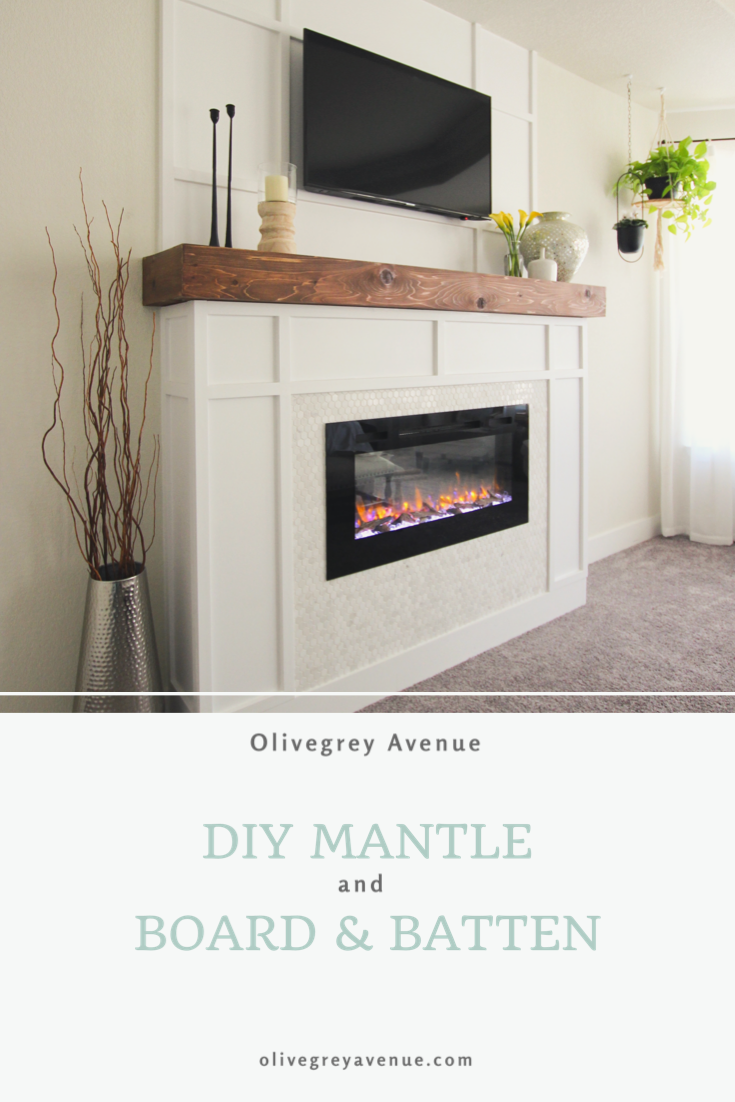
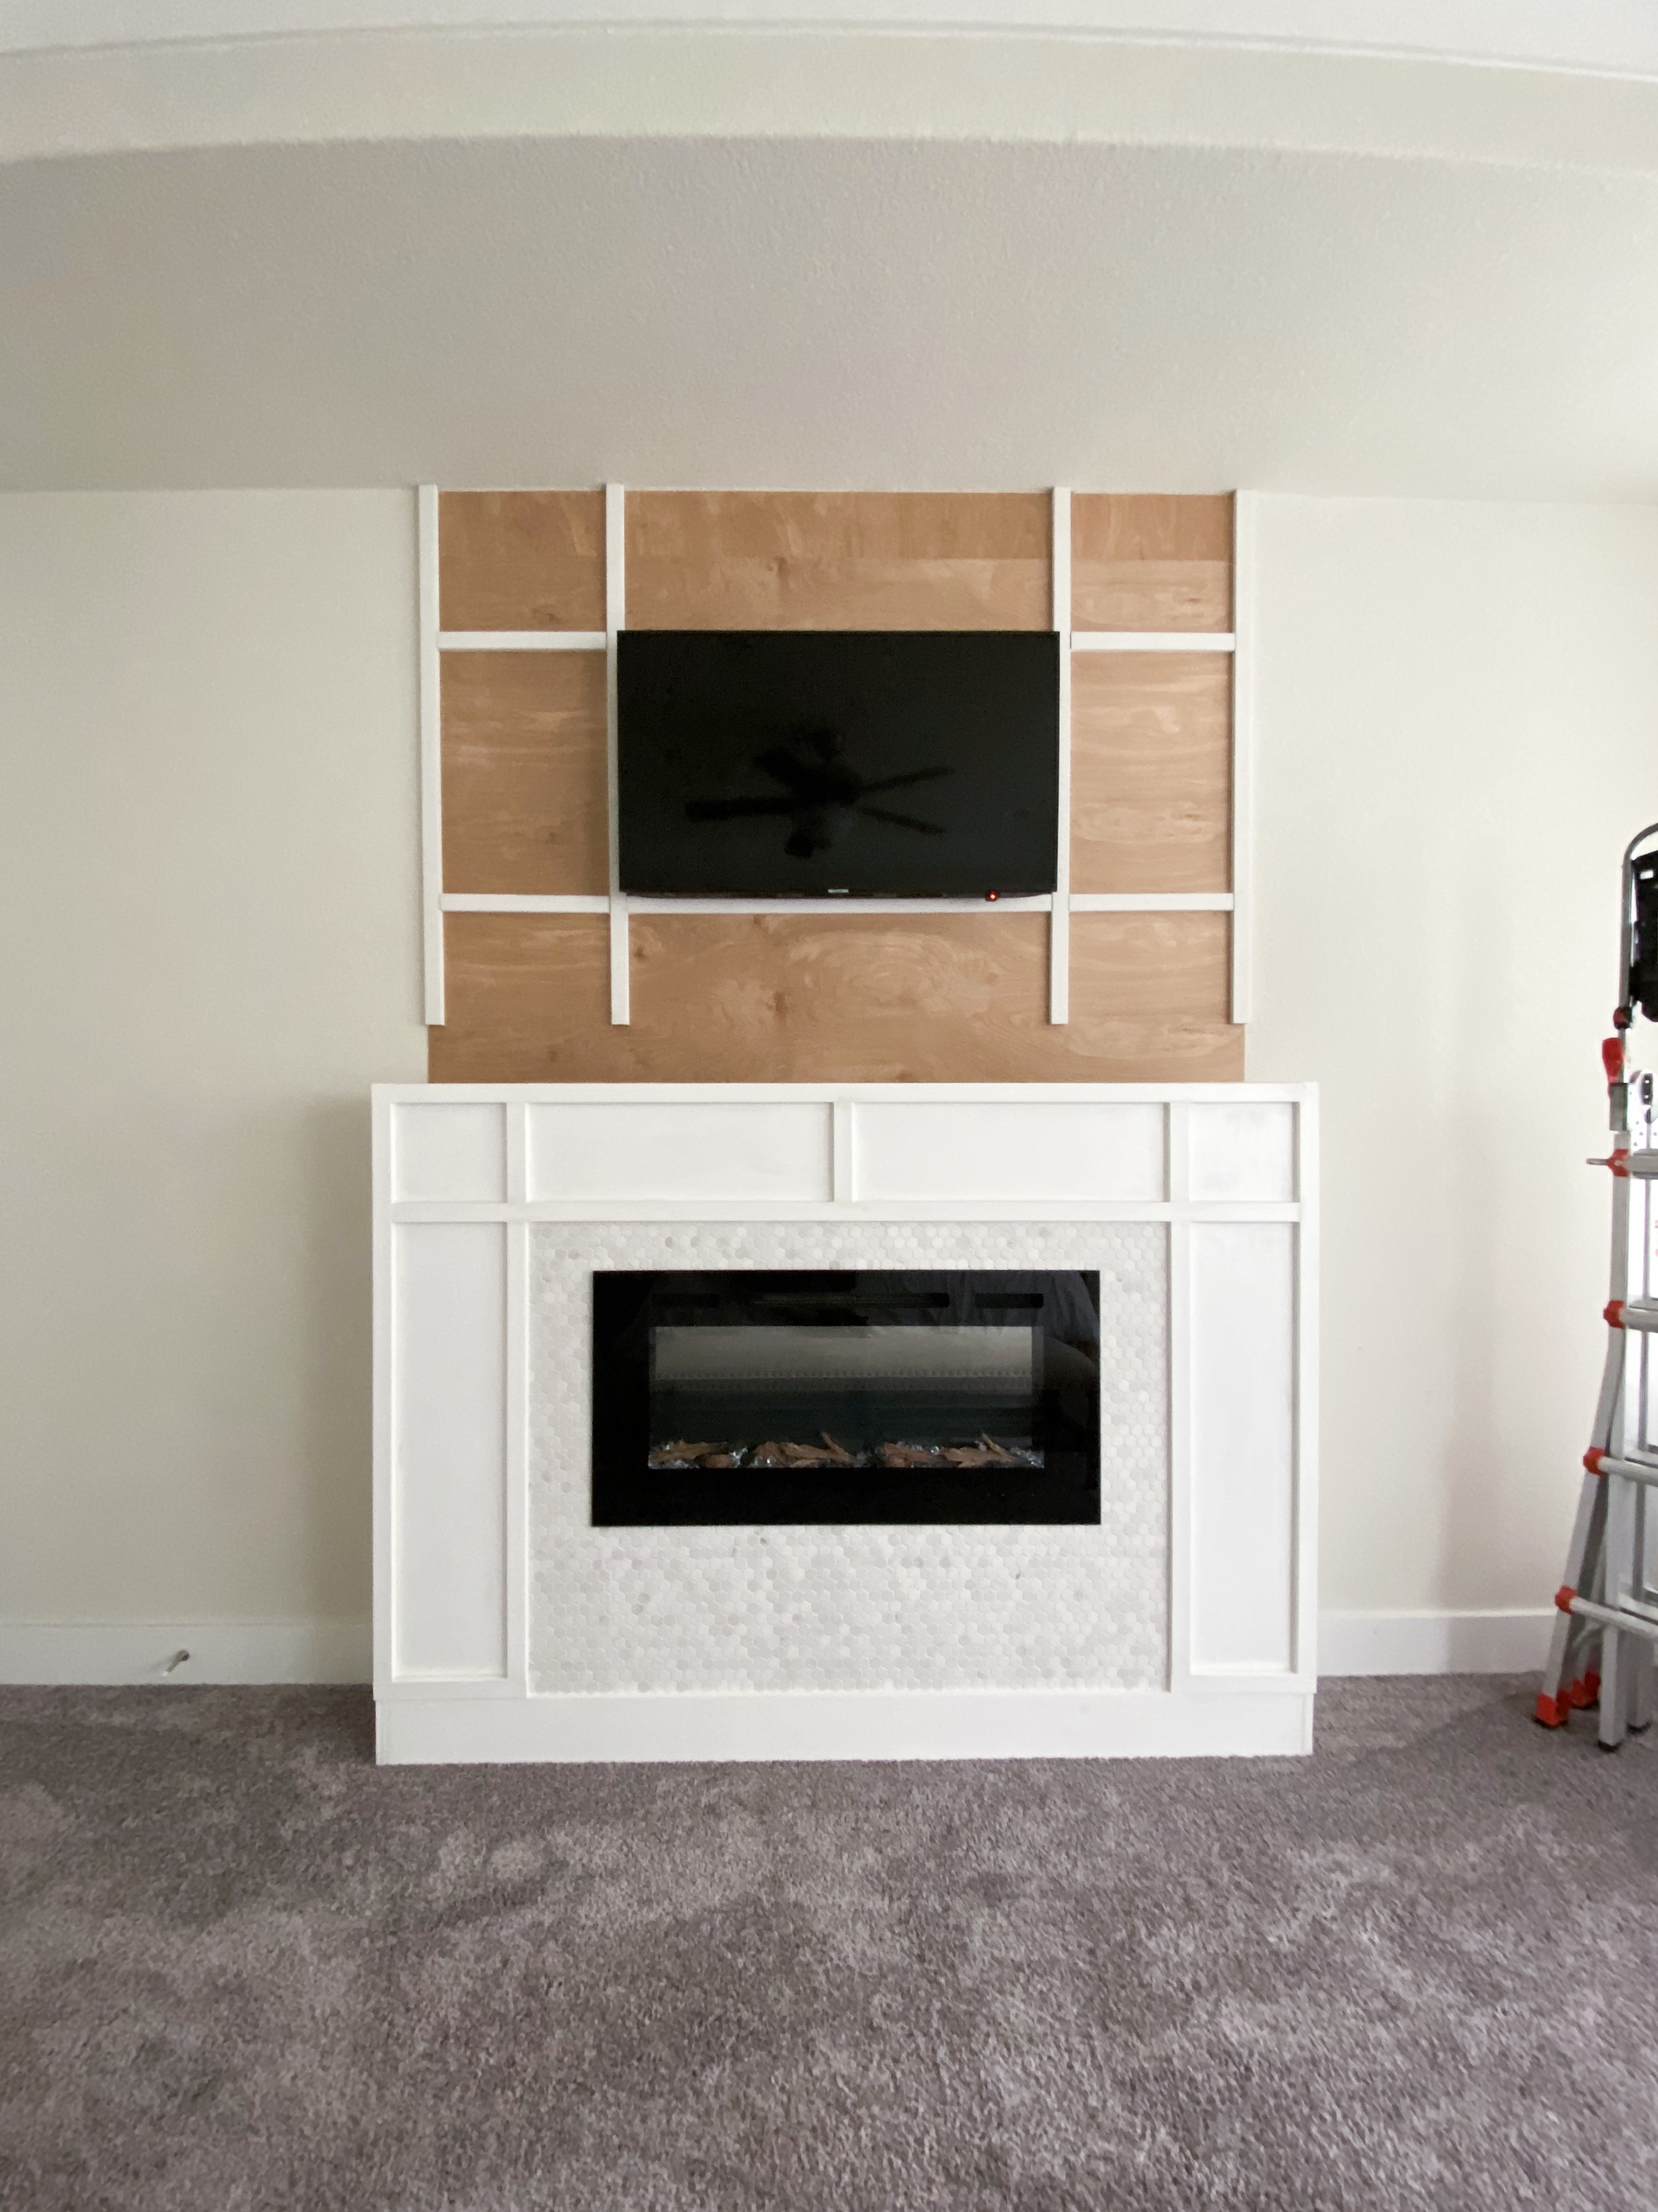
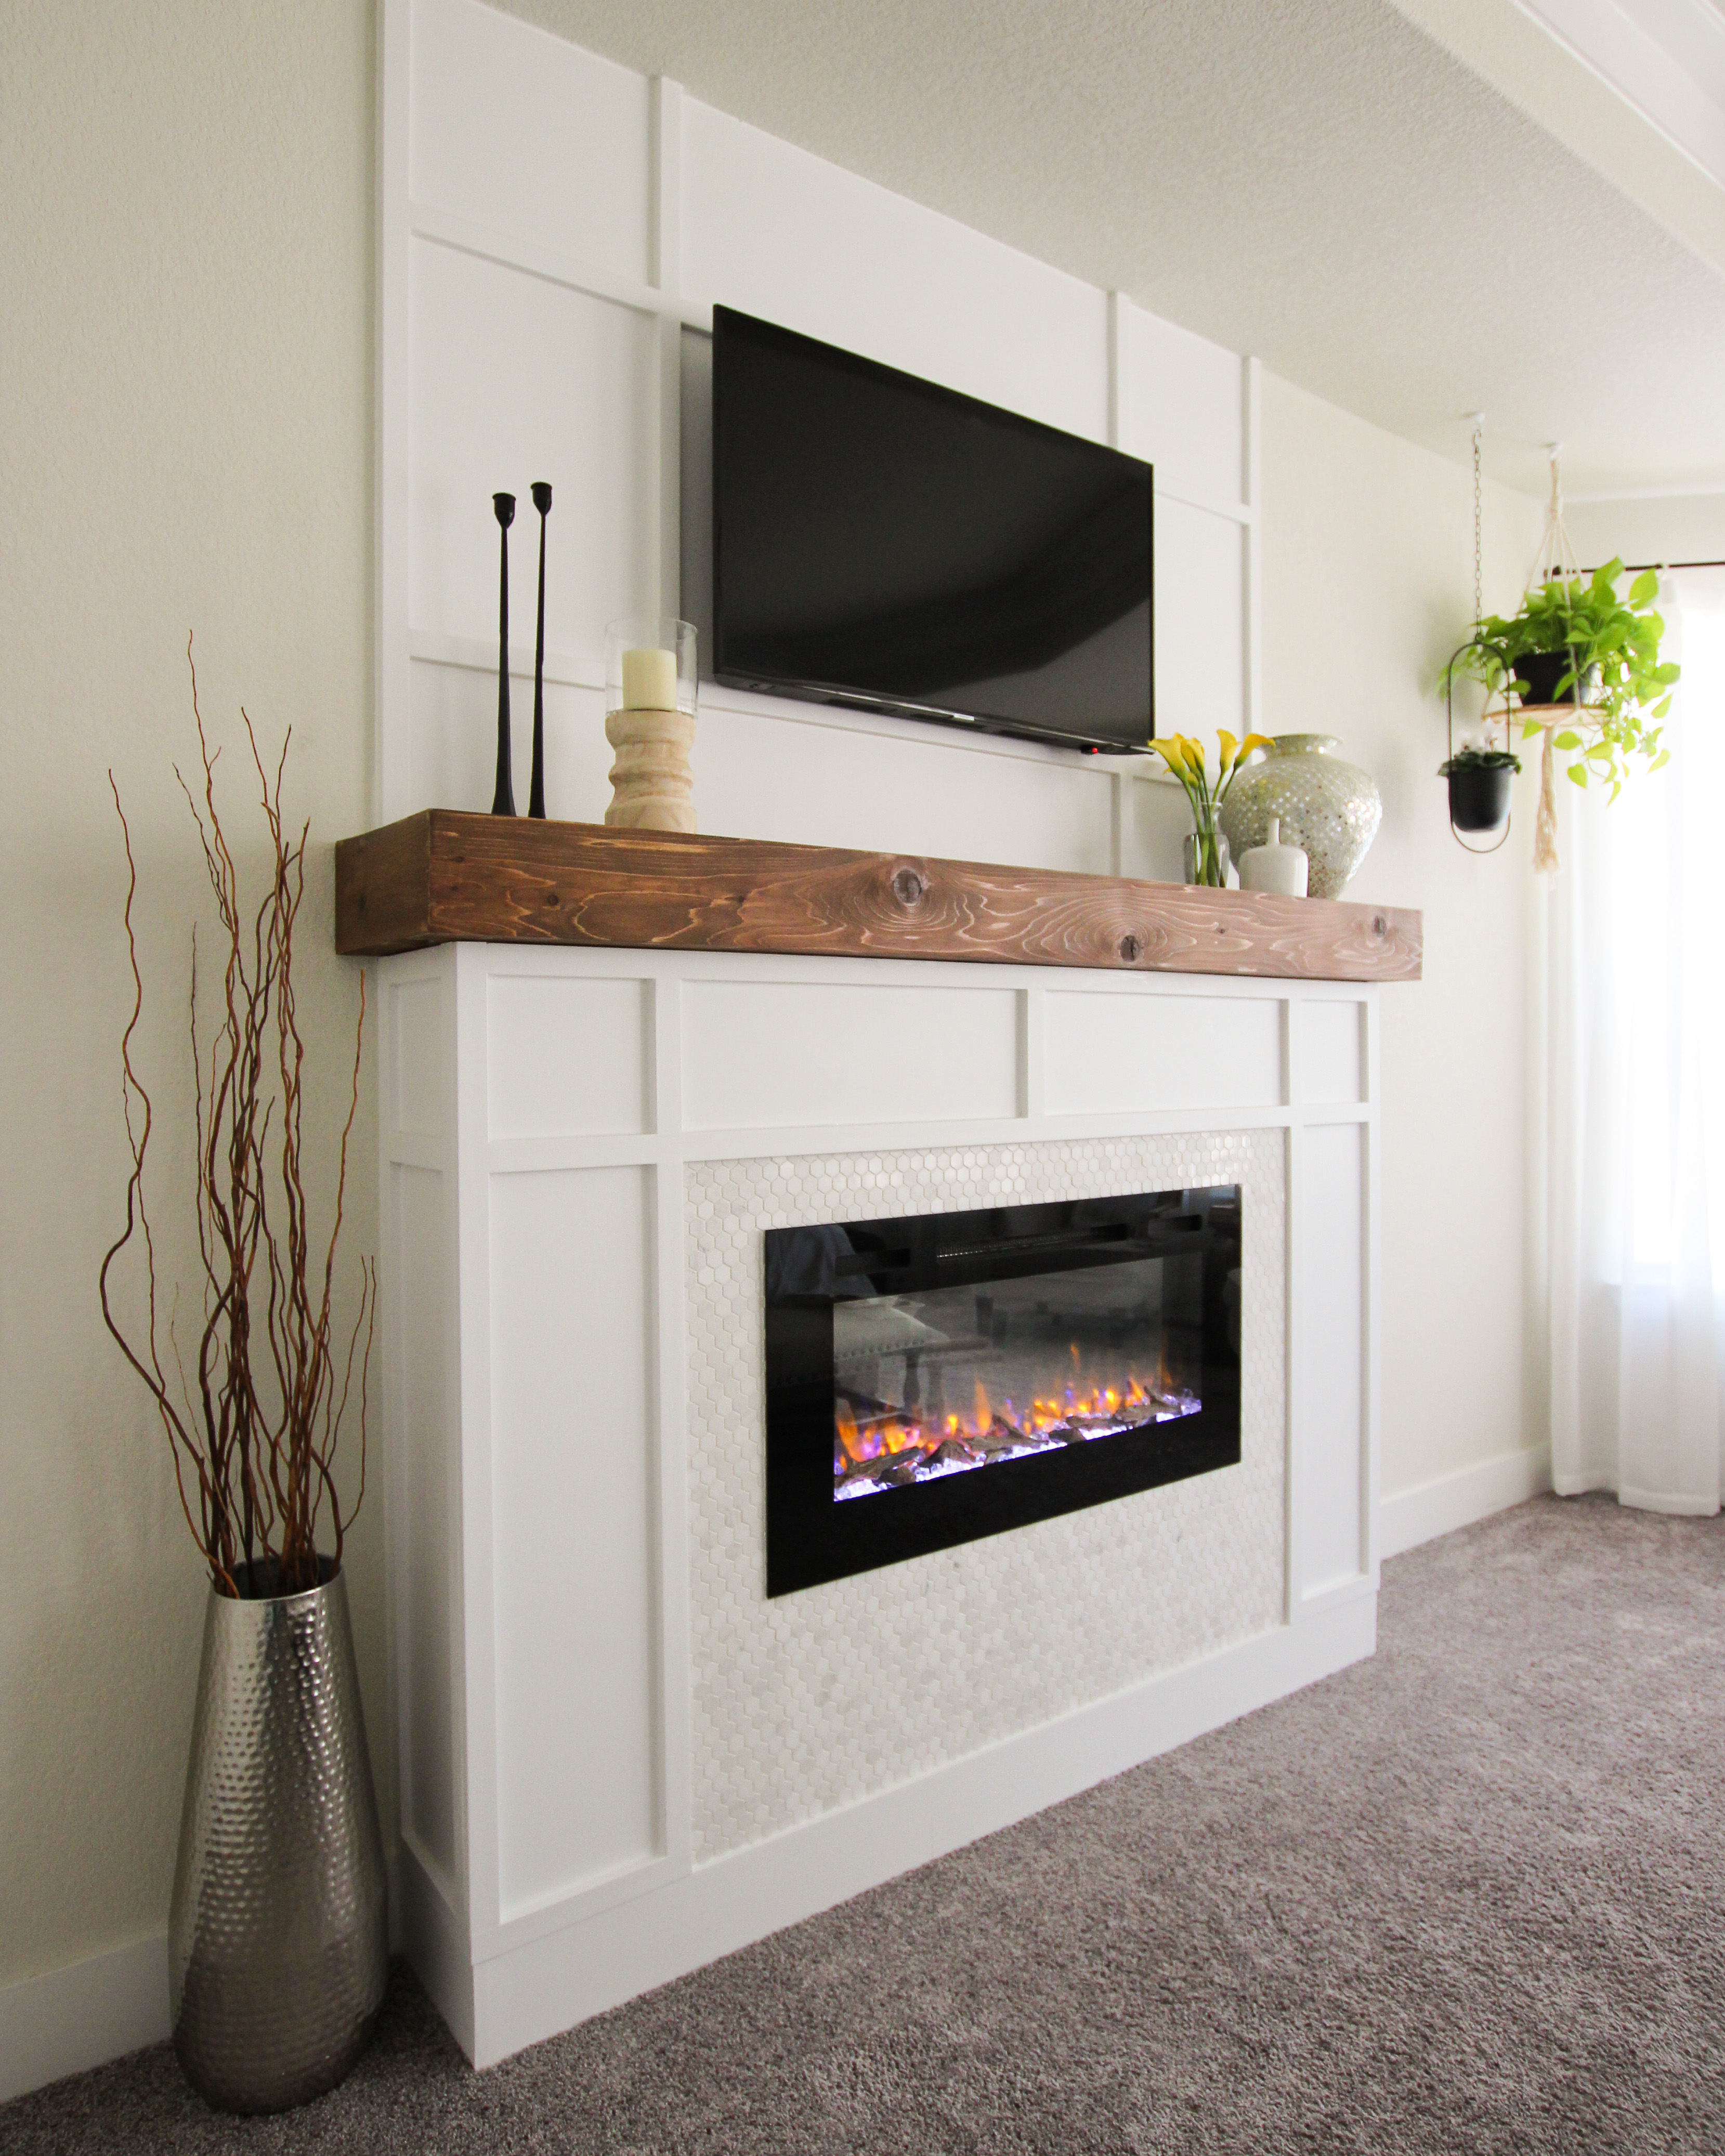
After building this beautiful DIY Electric Fireplace in the Master Bedroom, I knew I wanted to take the detailing to the ceiling and since the fireplace stuck out from the wall so far, I would have to build a custom mantle as well. The Backsteet Boys said it best, the thing about DIY is “I WANT IT THAT WAY” so thats how I’ll make it. (Thats right, as good as you sang that in your head is as good as I sound aloud). The temporary mantle I had for about a year was just two 4×6’s laying on the fireplace. I originally wanted them to be the mantle but they weren’t big enough to give the overhang I wanted. They became severely warped, making it pretty difficult to make flat. (See below for the before of this project).
SUPPLIES
– 1/8″ plywood
– desired trim
– construction adhesive
– brad nailer and nails
– wood filler
– paint
– caulk
– level
– tung oil
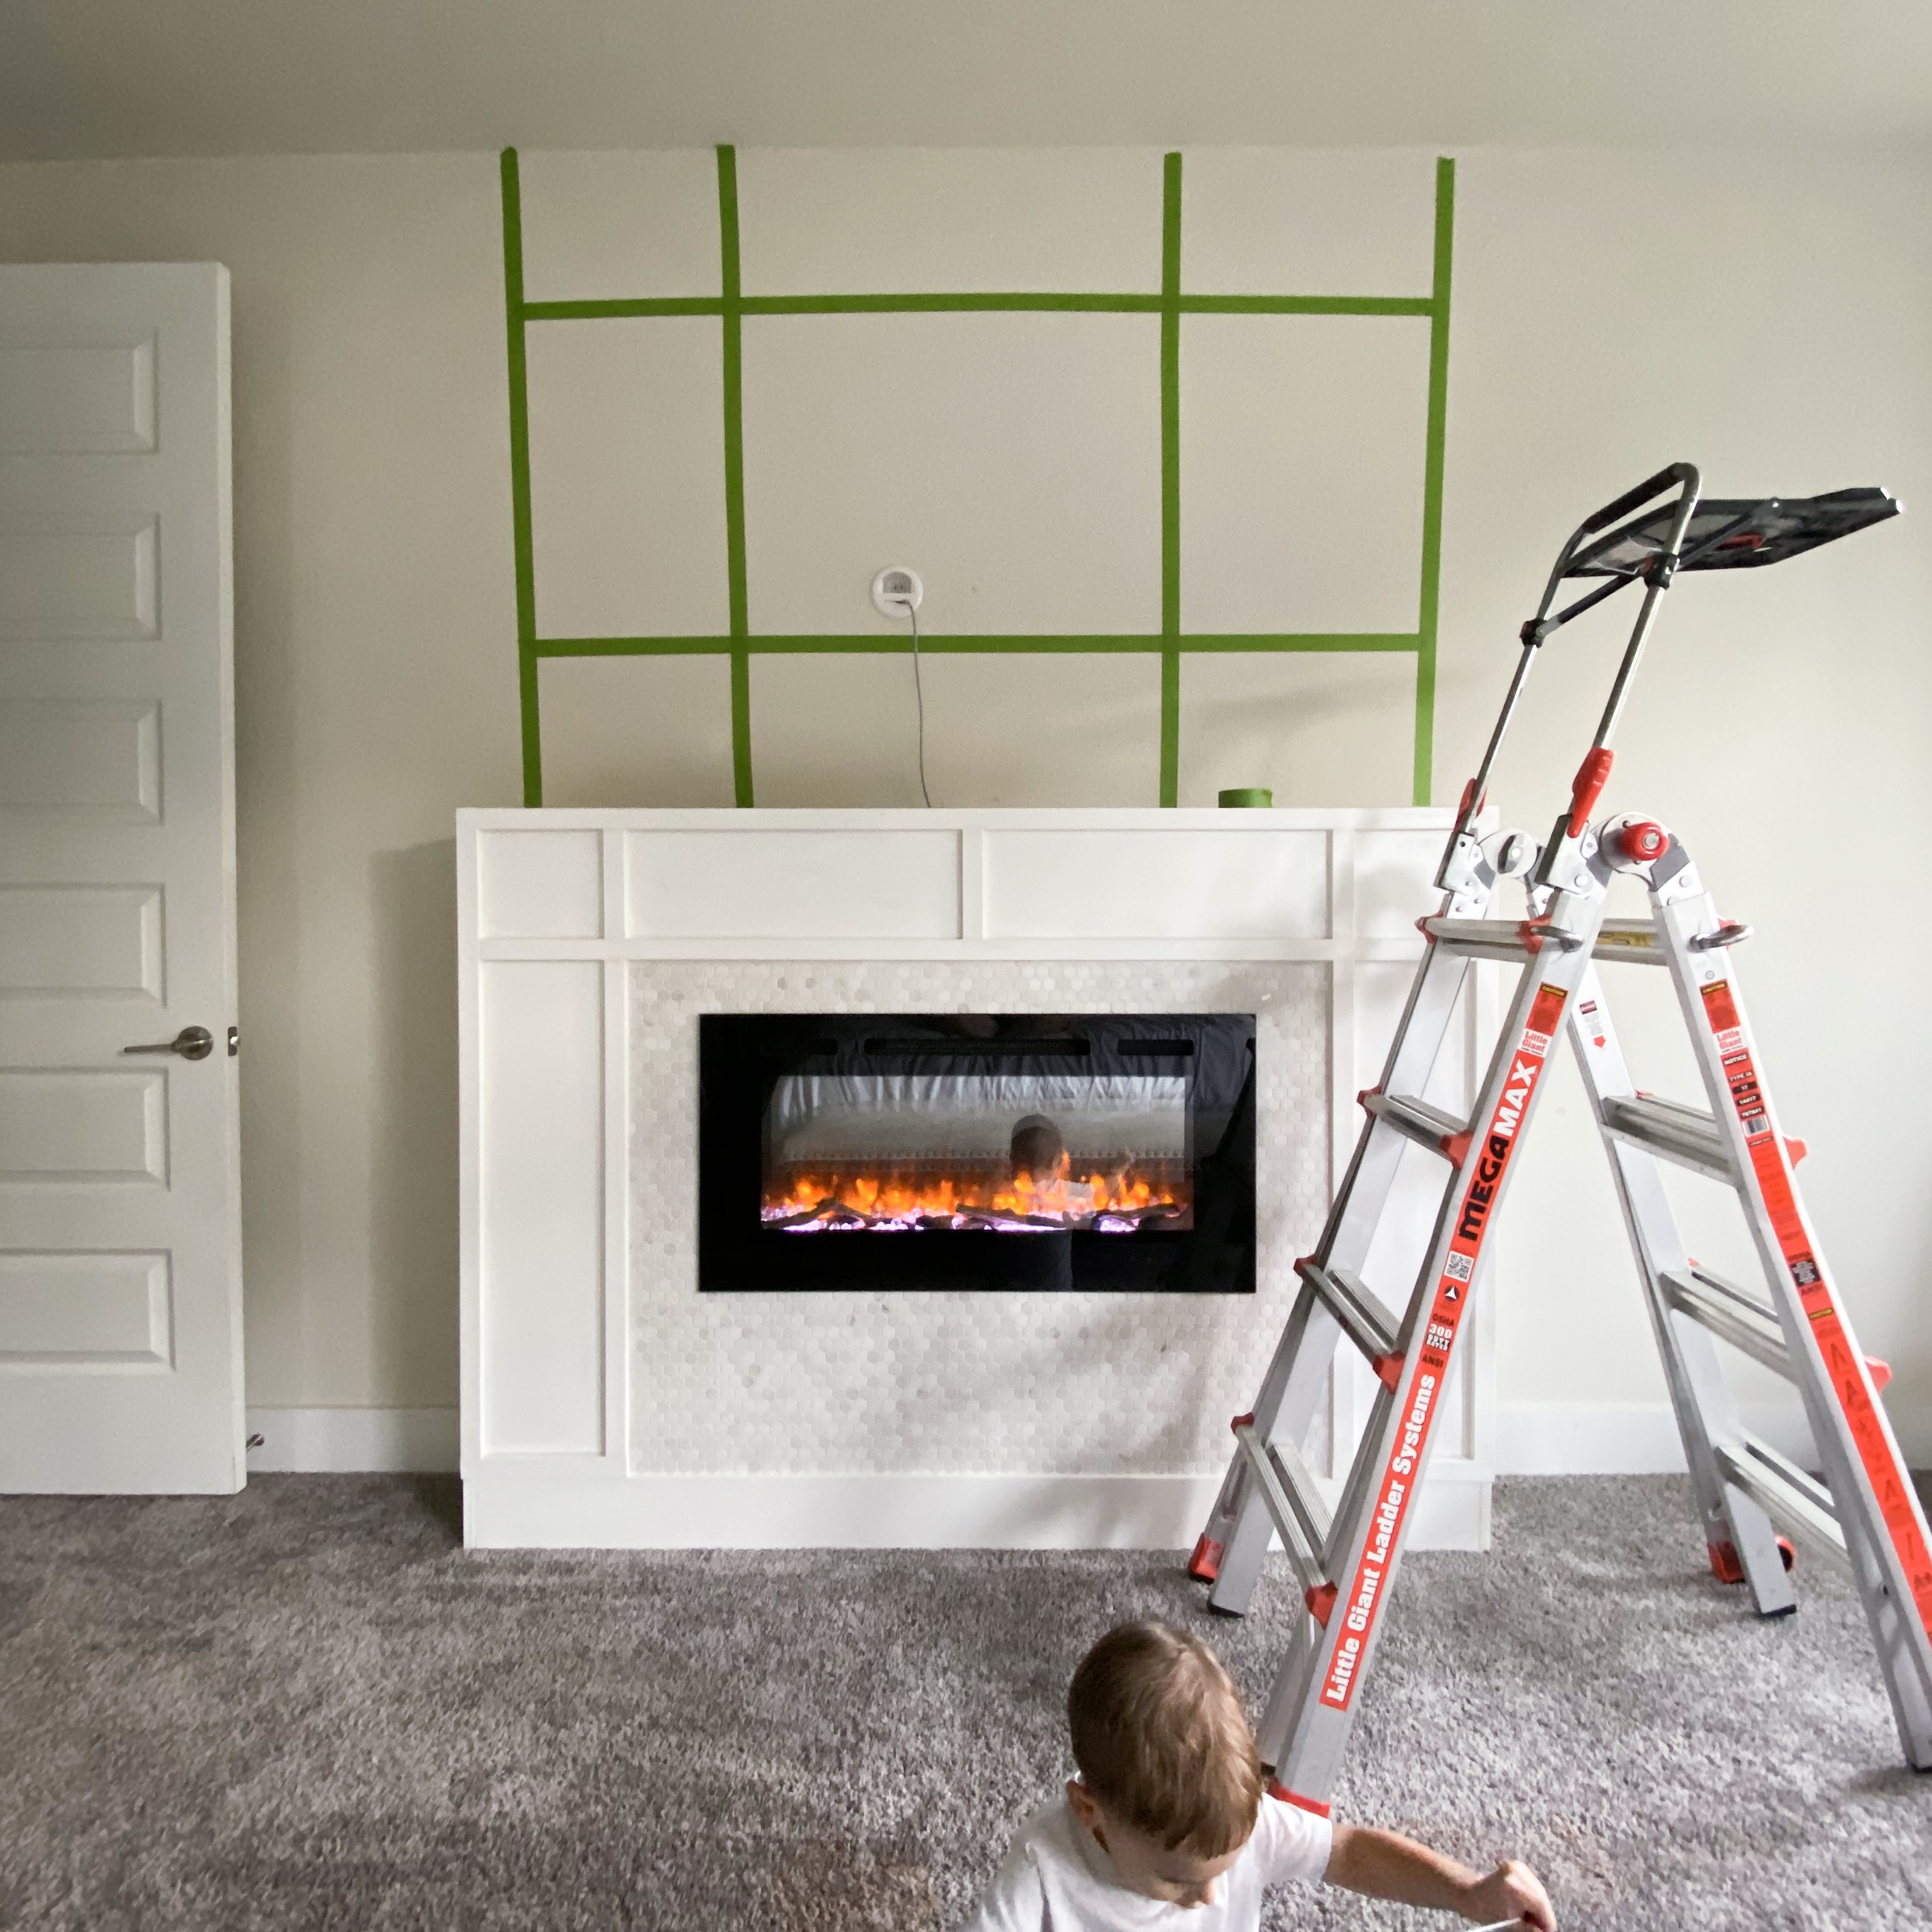
BOARD & BATTEN
I wanted to create the detailing above the fireplace. I decided that I wanted to do a board and batten type of accent piece to continue the pattern of the fireplace up the wall. The fireplace was beautiful the way it was but keeping it that way made the ceiling feel lower
Step 1: Plywood
To begin extending the detailing of the fireplace up the wall, I considered just adding the trim for the batten pattern to the wall. I wanted a smooth background. I didn’t want to do a skim coat on the wall to get rid of the texture. So, I used 1/8″ plywood cut to the exact size to cover the wall from the top of where the mantle will be to the ceiling.
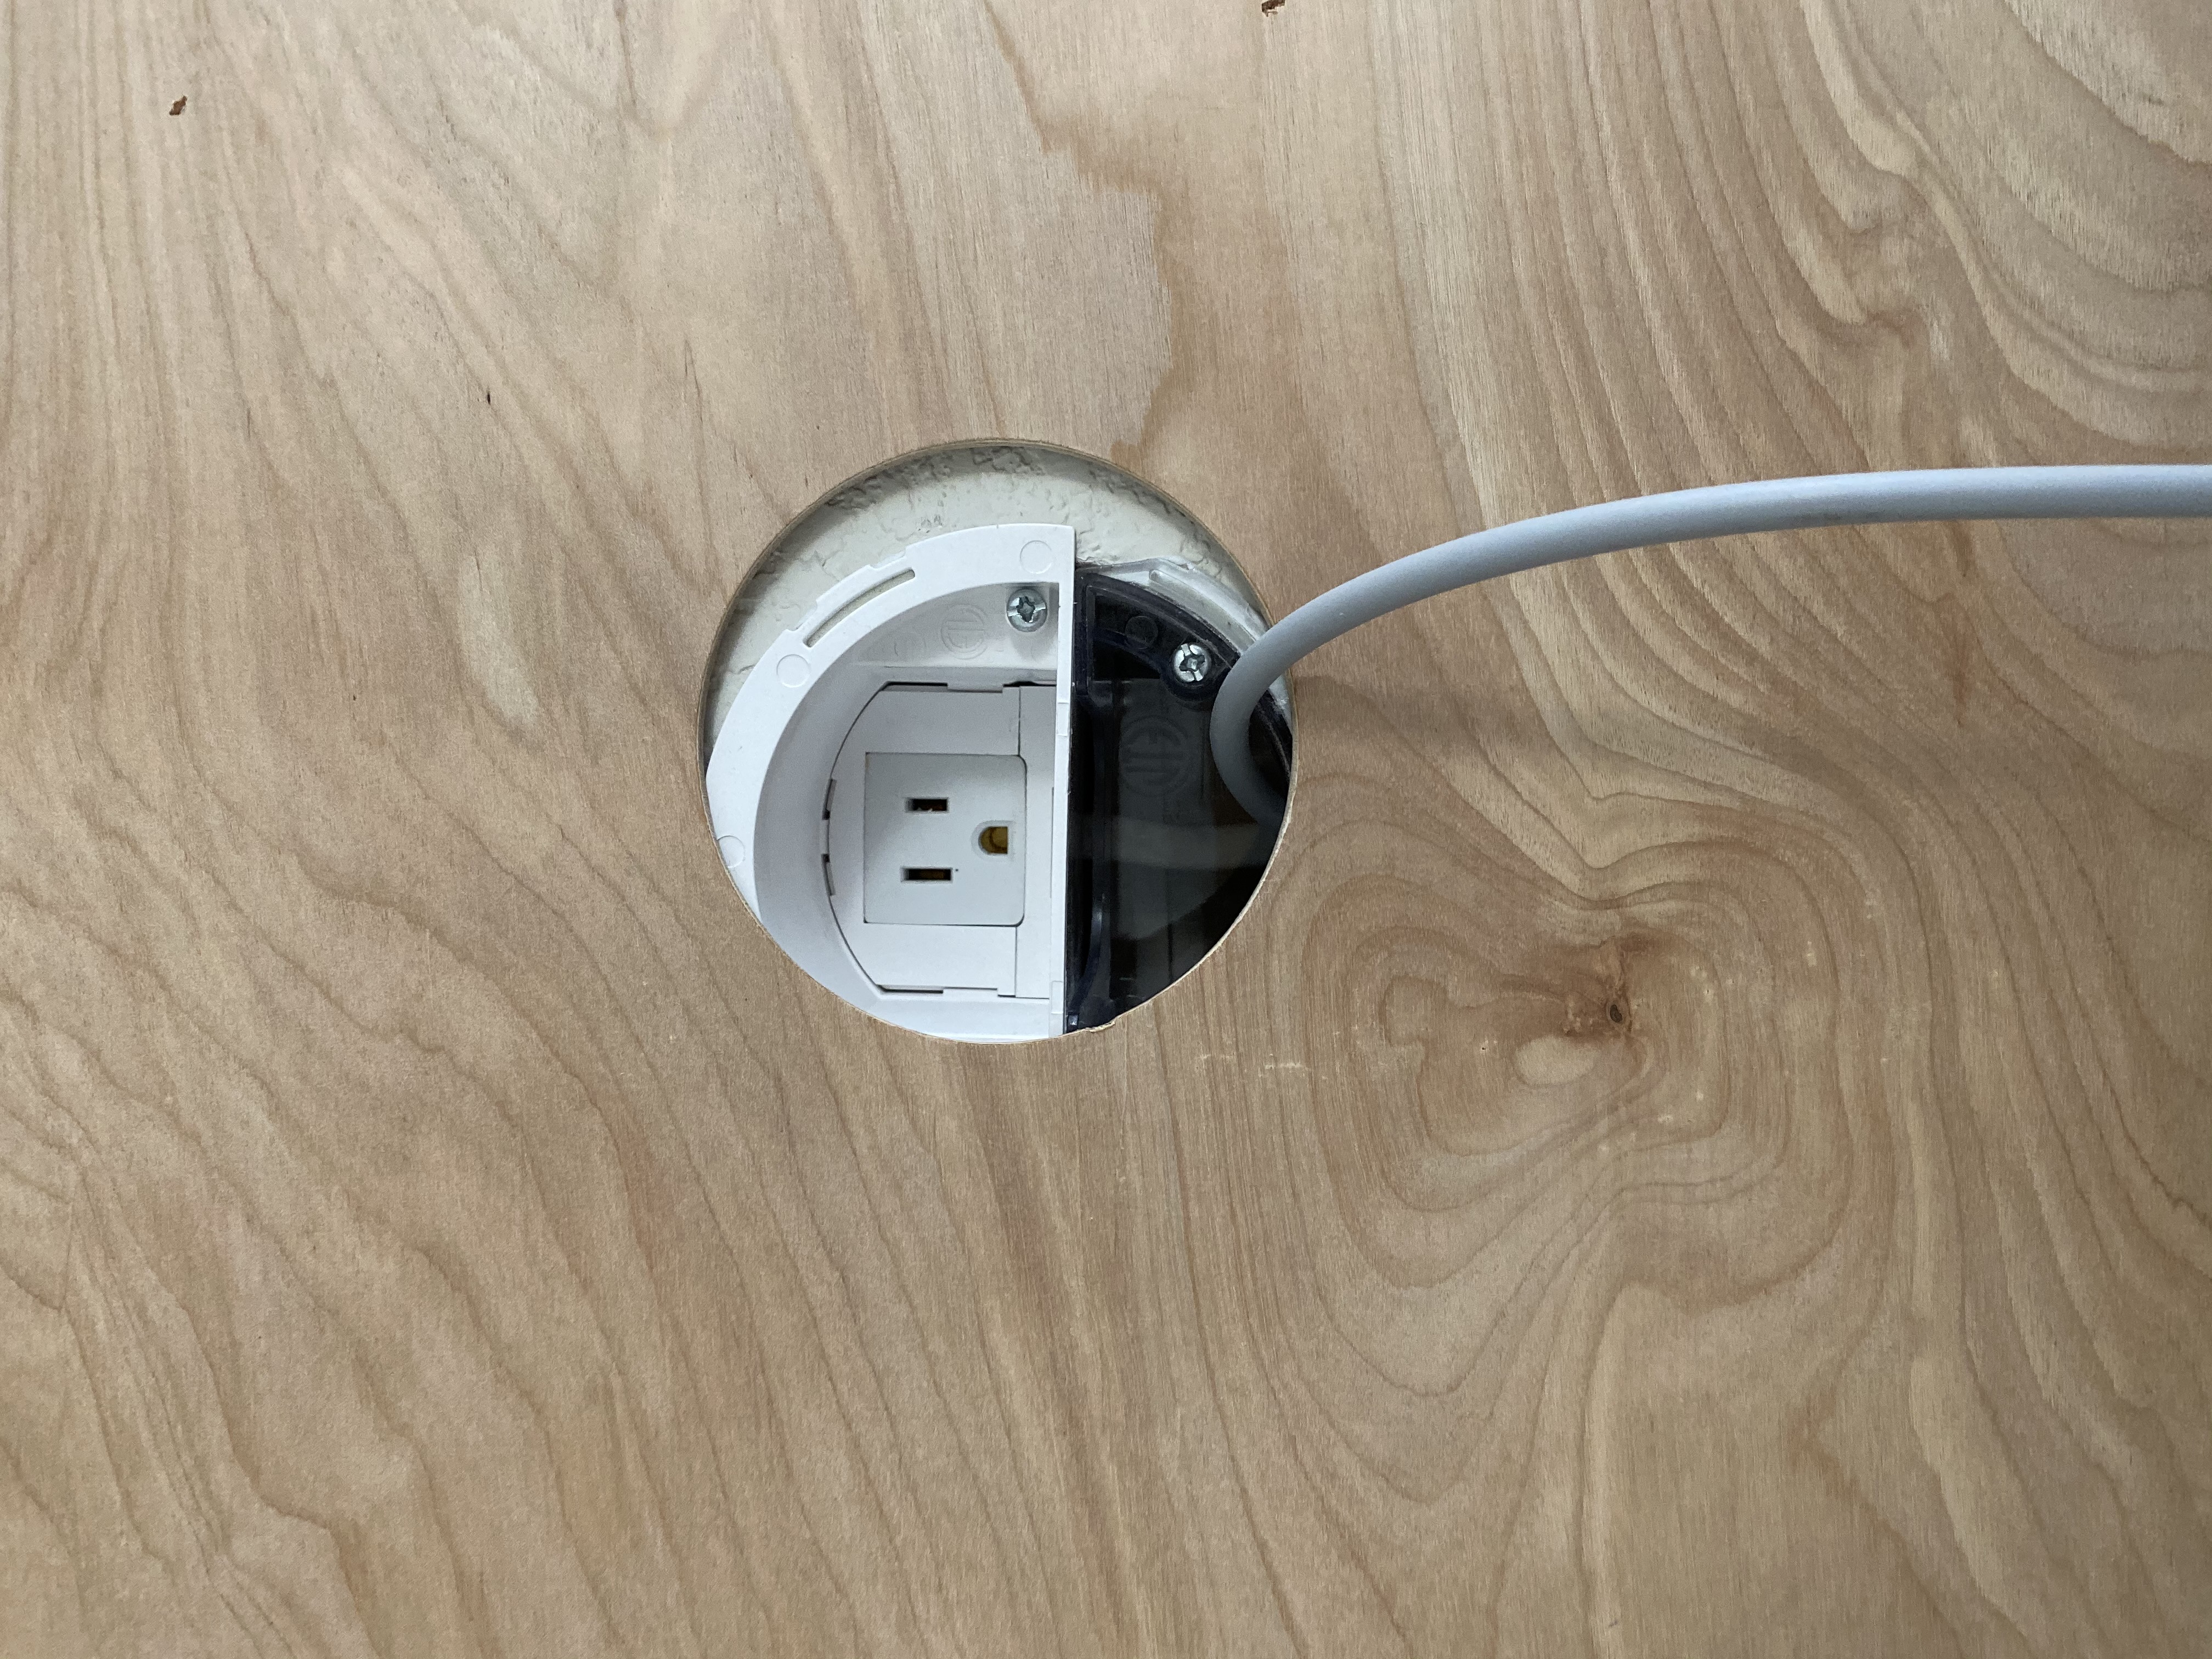
When we cut the plywood, we also cut out a hole for the cable tube that was already in the wall which helps hide the TV cables. I guess the measurements got messed up (measure twice and cut once). When I put the plywood up the hole in the wall and the hole on the plywood didn’t line up. This made the plywood lower than the mantle and not to the ceiling leading to some plywood patch work that I’ll mention in step 3.
To secure the plywood to the wall, I used a combination of construction adhesive and brad nails. Evenly spread the construction adhesive all over the board, place against the wall and secure in place with brad nails to studs to hold in place.
PRO TIP:
An issue I experienced in this step was the brad nails going all the way through the plywood (since its so thin). So, they weren’t holding it to the wall. Make sure to experiment with the power of the brad nailer so that they stick in the plywood. Also, don’t shoot all the way through it. Make sure you find and mark your studs where you will be able to see them when the plywood is over the wall. You can put tape on the ceiling to indicate where the studs go down. If you’re lucky you’ll have a stud on the edge of the plywood. Then you can just measure out every 16″ which is the standard distance between studs for newer homes.
Step 2: Trim
Next, cut down the trim to the proper lengths. Remember you have a mantle going in too, unless you do it first. I divided it into 4 long vertical pieces. Then cut the horizontal pieces down to fit in between the vertical strips. Secure these the same way, with construction adhesive and brad nails.
Step 3: Wood Filling
Remember way back in Step 1 where I told you the holes didn’t line up and had some patch work to do? Well here is what I meant by that. So the misalignment led to me needing to cut the bottom of my plywood and put it at the top. Basically I had to cut and paste this plywood to cover my wall. This meant that I now had a seam near my ceiling that spanned the entire area of the project (facepalm). Add to that some plywood that doesn’t want to lay flat. We have a sweet obstacle in the way of perfection. If you are able to use one solid piece of plywood, this won’t apply to you (you lucky DIYer you).
First Attempt
I tried patching the seam with just spackling. The main problem with this is that when it dried, the shrinkage made small cracks along the seam. This probably could have been covered with paint for the most part, but eventually it would crack more and then I would have to re-do it anyways. You also have to sand the spackling to smooth it out and the cracks become more apparent.
Attempt two
we had some mesh tape on hand which was used when taping and floating the backer-board onto the fireplace, so decided to give that a try. I sanded down the spackling that I already applied as much as I could. Then I applied the tape along the seam and then I meticulously spackled over the tape. I pushed the spackle in all the spaces of the mesh tape to ensure a strong hold and smoothed it as smooth as possible. After it dried, I sanded it just a little bit so that it was perfectly smooth but so the mesh didn’t show through. A small mistake leads to experience gained in another area of DIY.
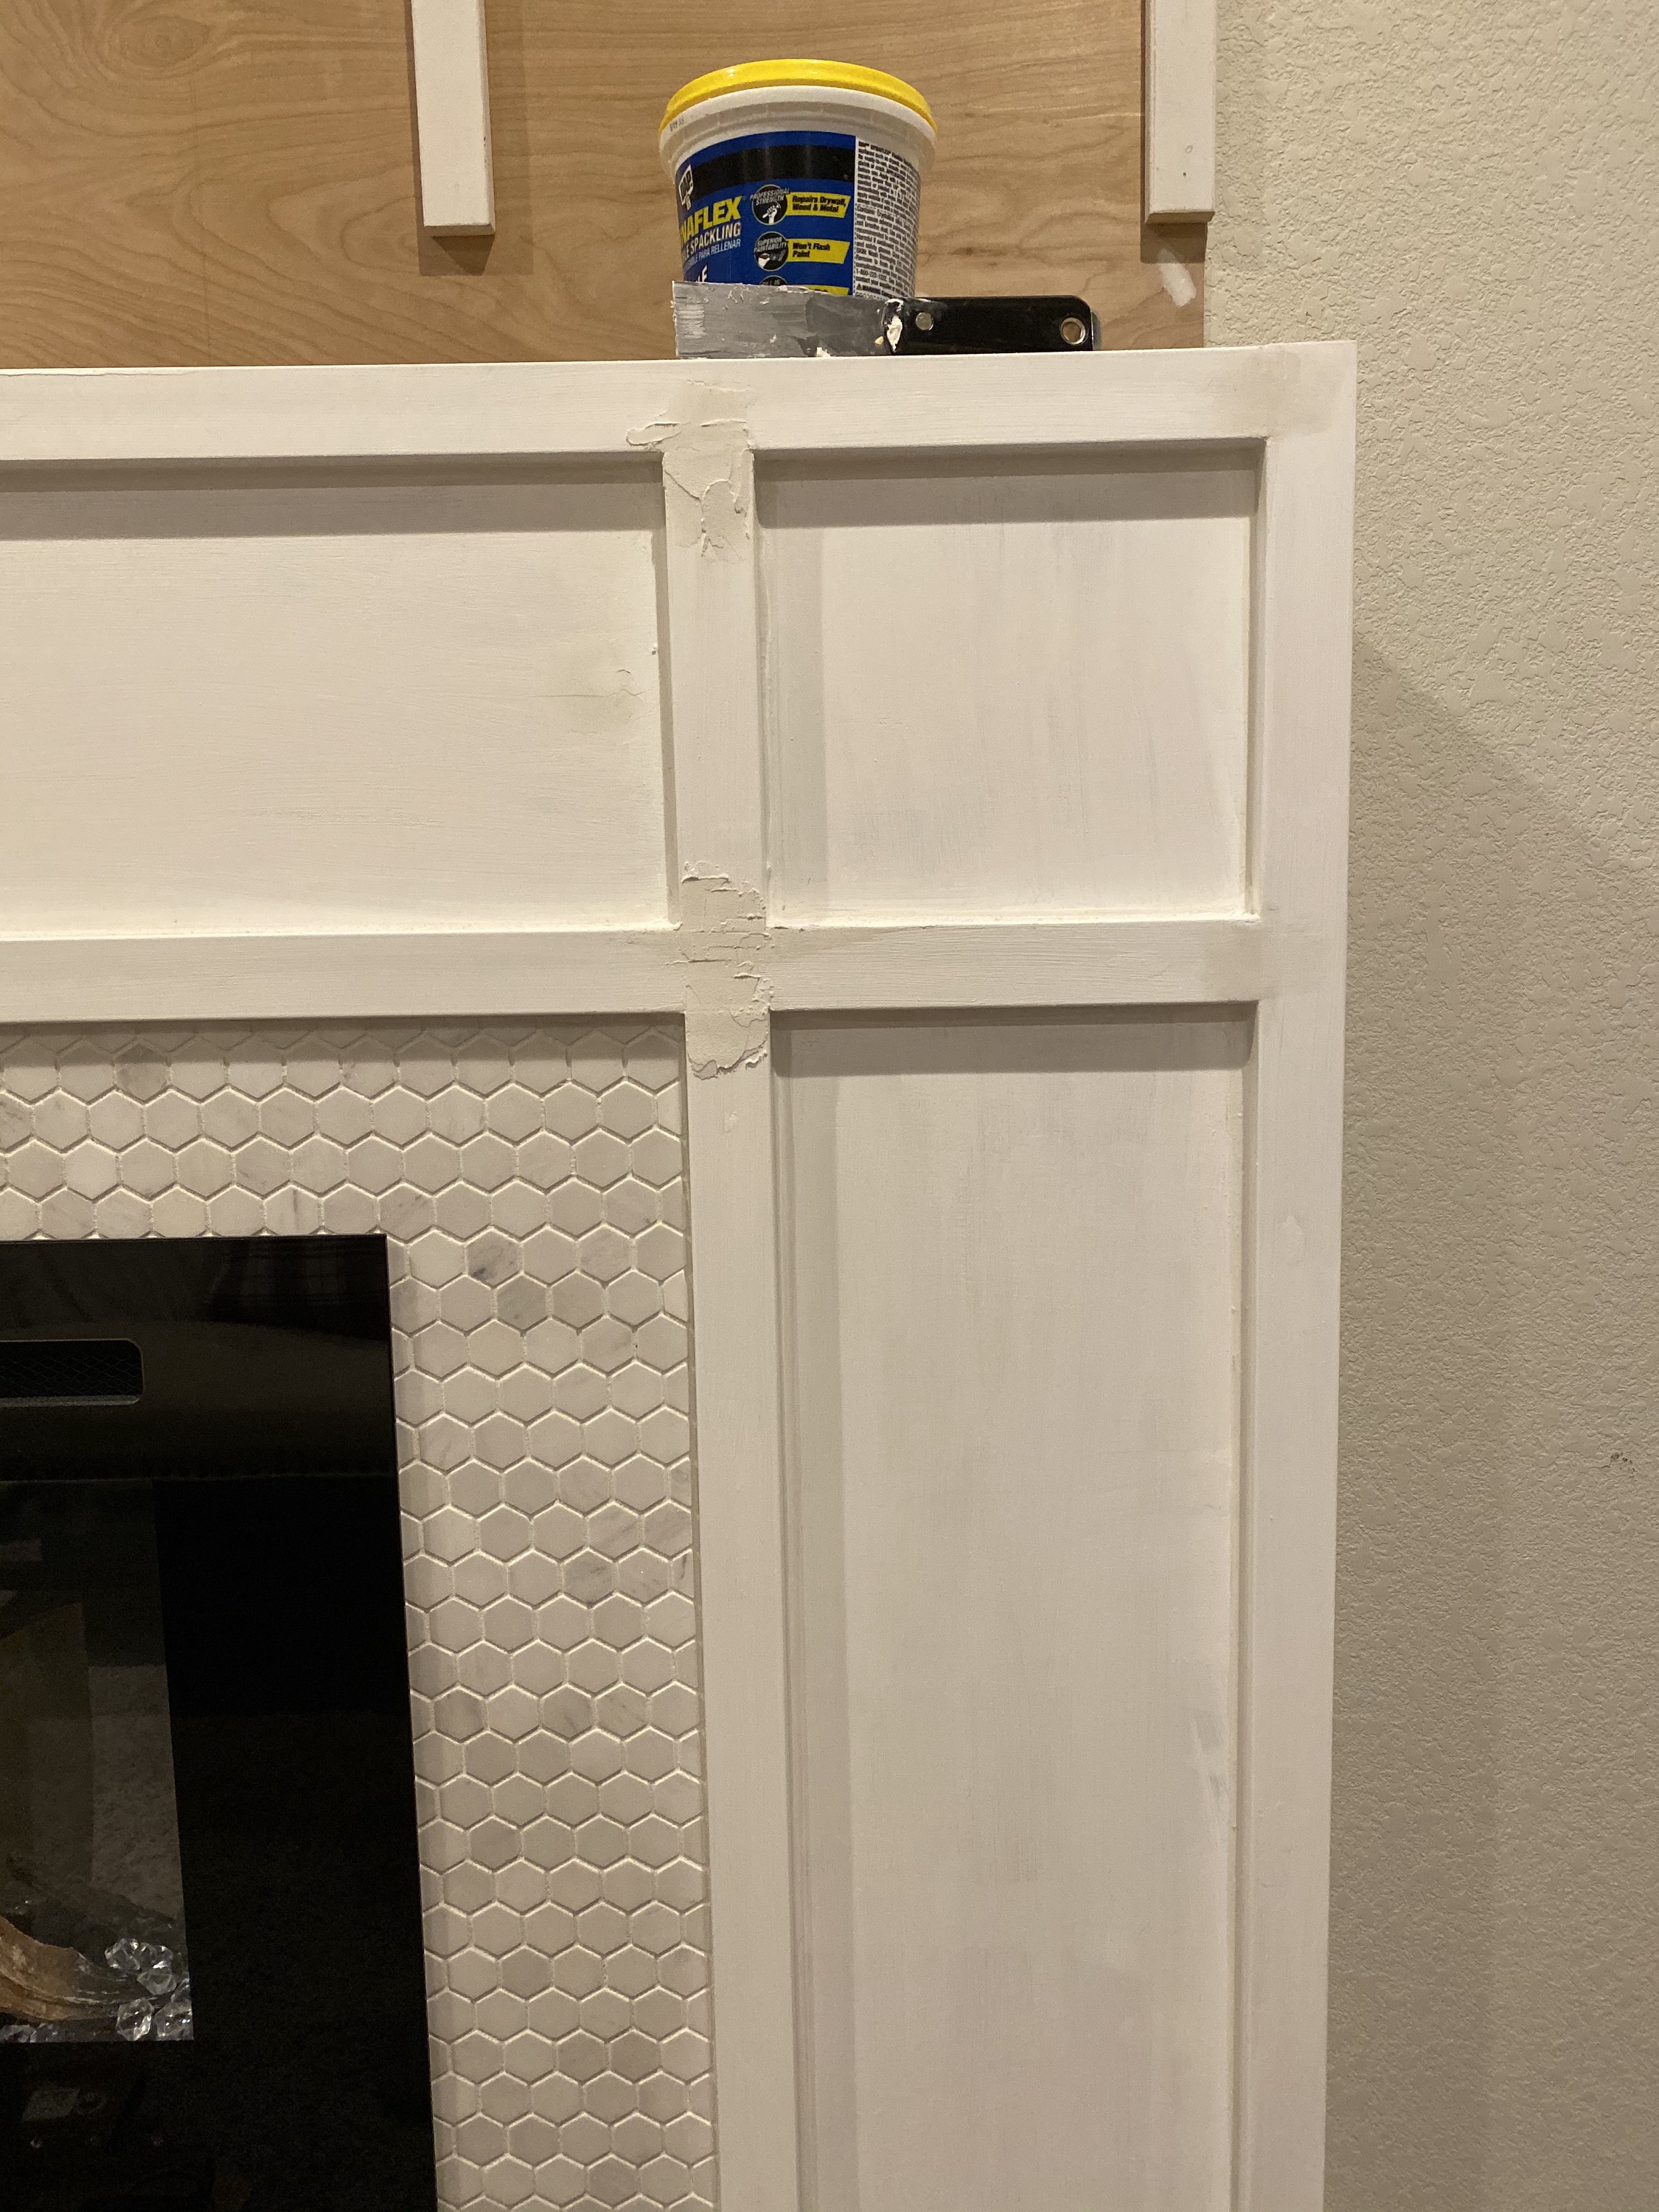
Once that was taken care of, I also used the spackling to cover the nail holes and well as the seams of where the trim pieces met. When dry I sanded it down until it was perfectly smooth and no gaps were seen. This leads to a really clean look that takes the project to the next level. It’s all in the details. Now we paint.
Step 4: Paint
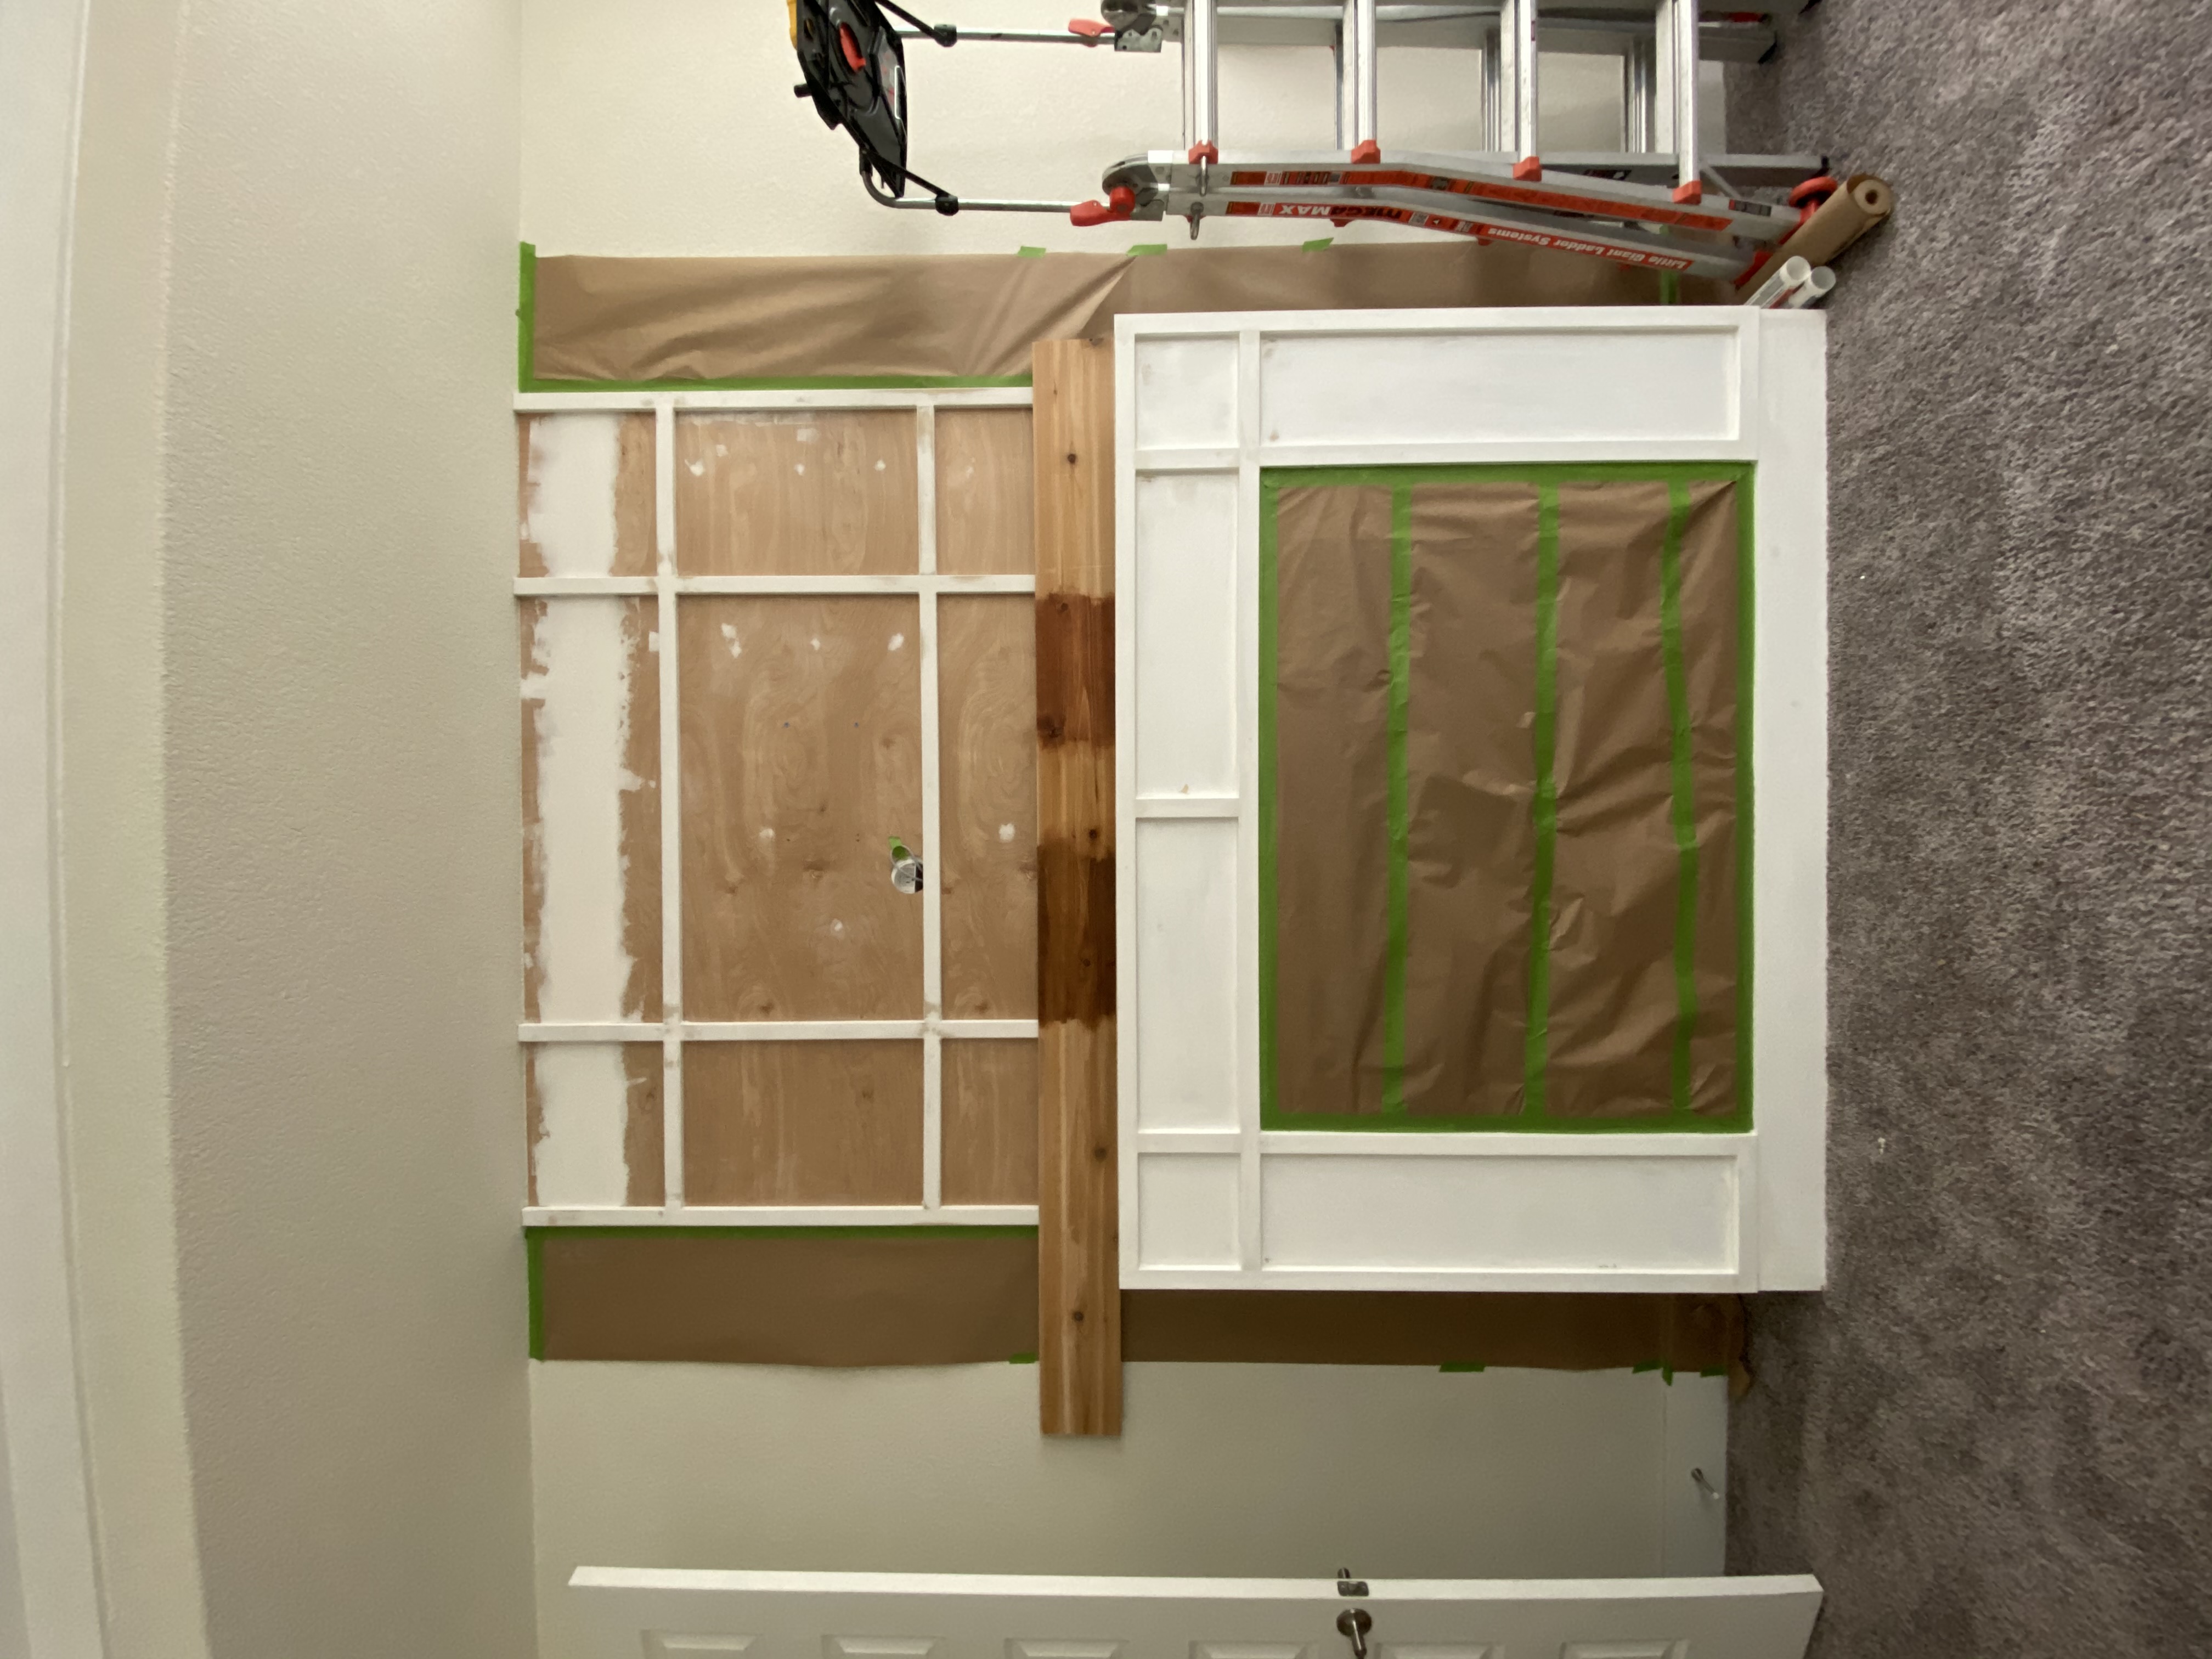
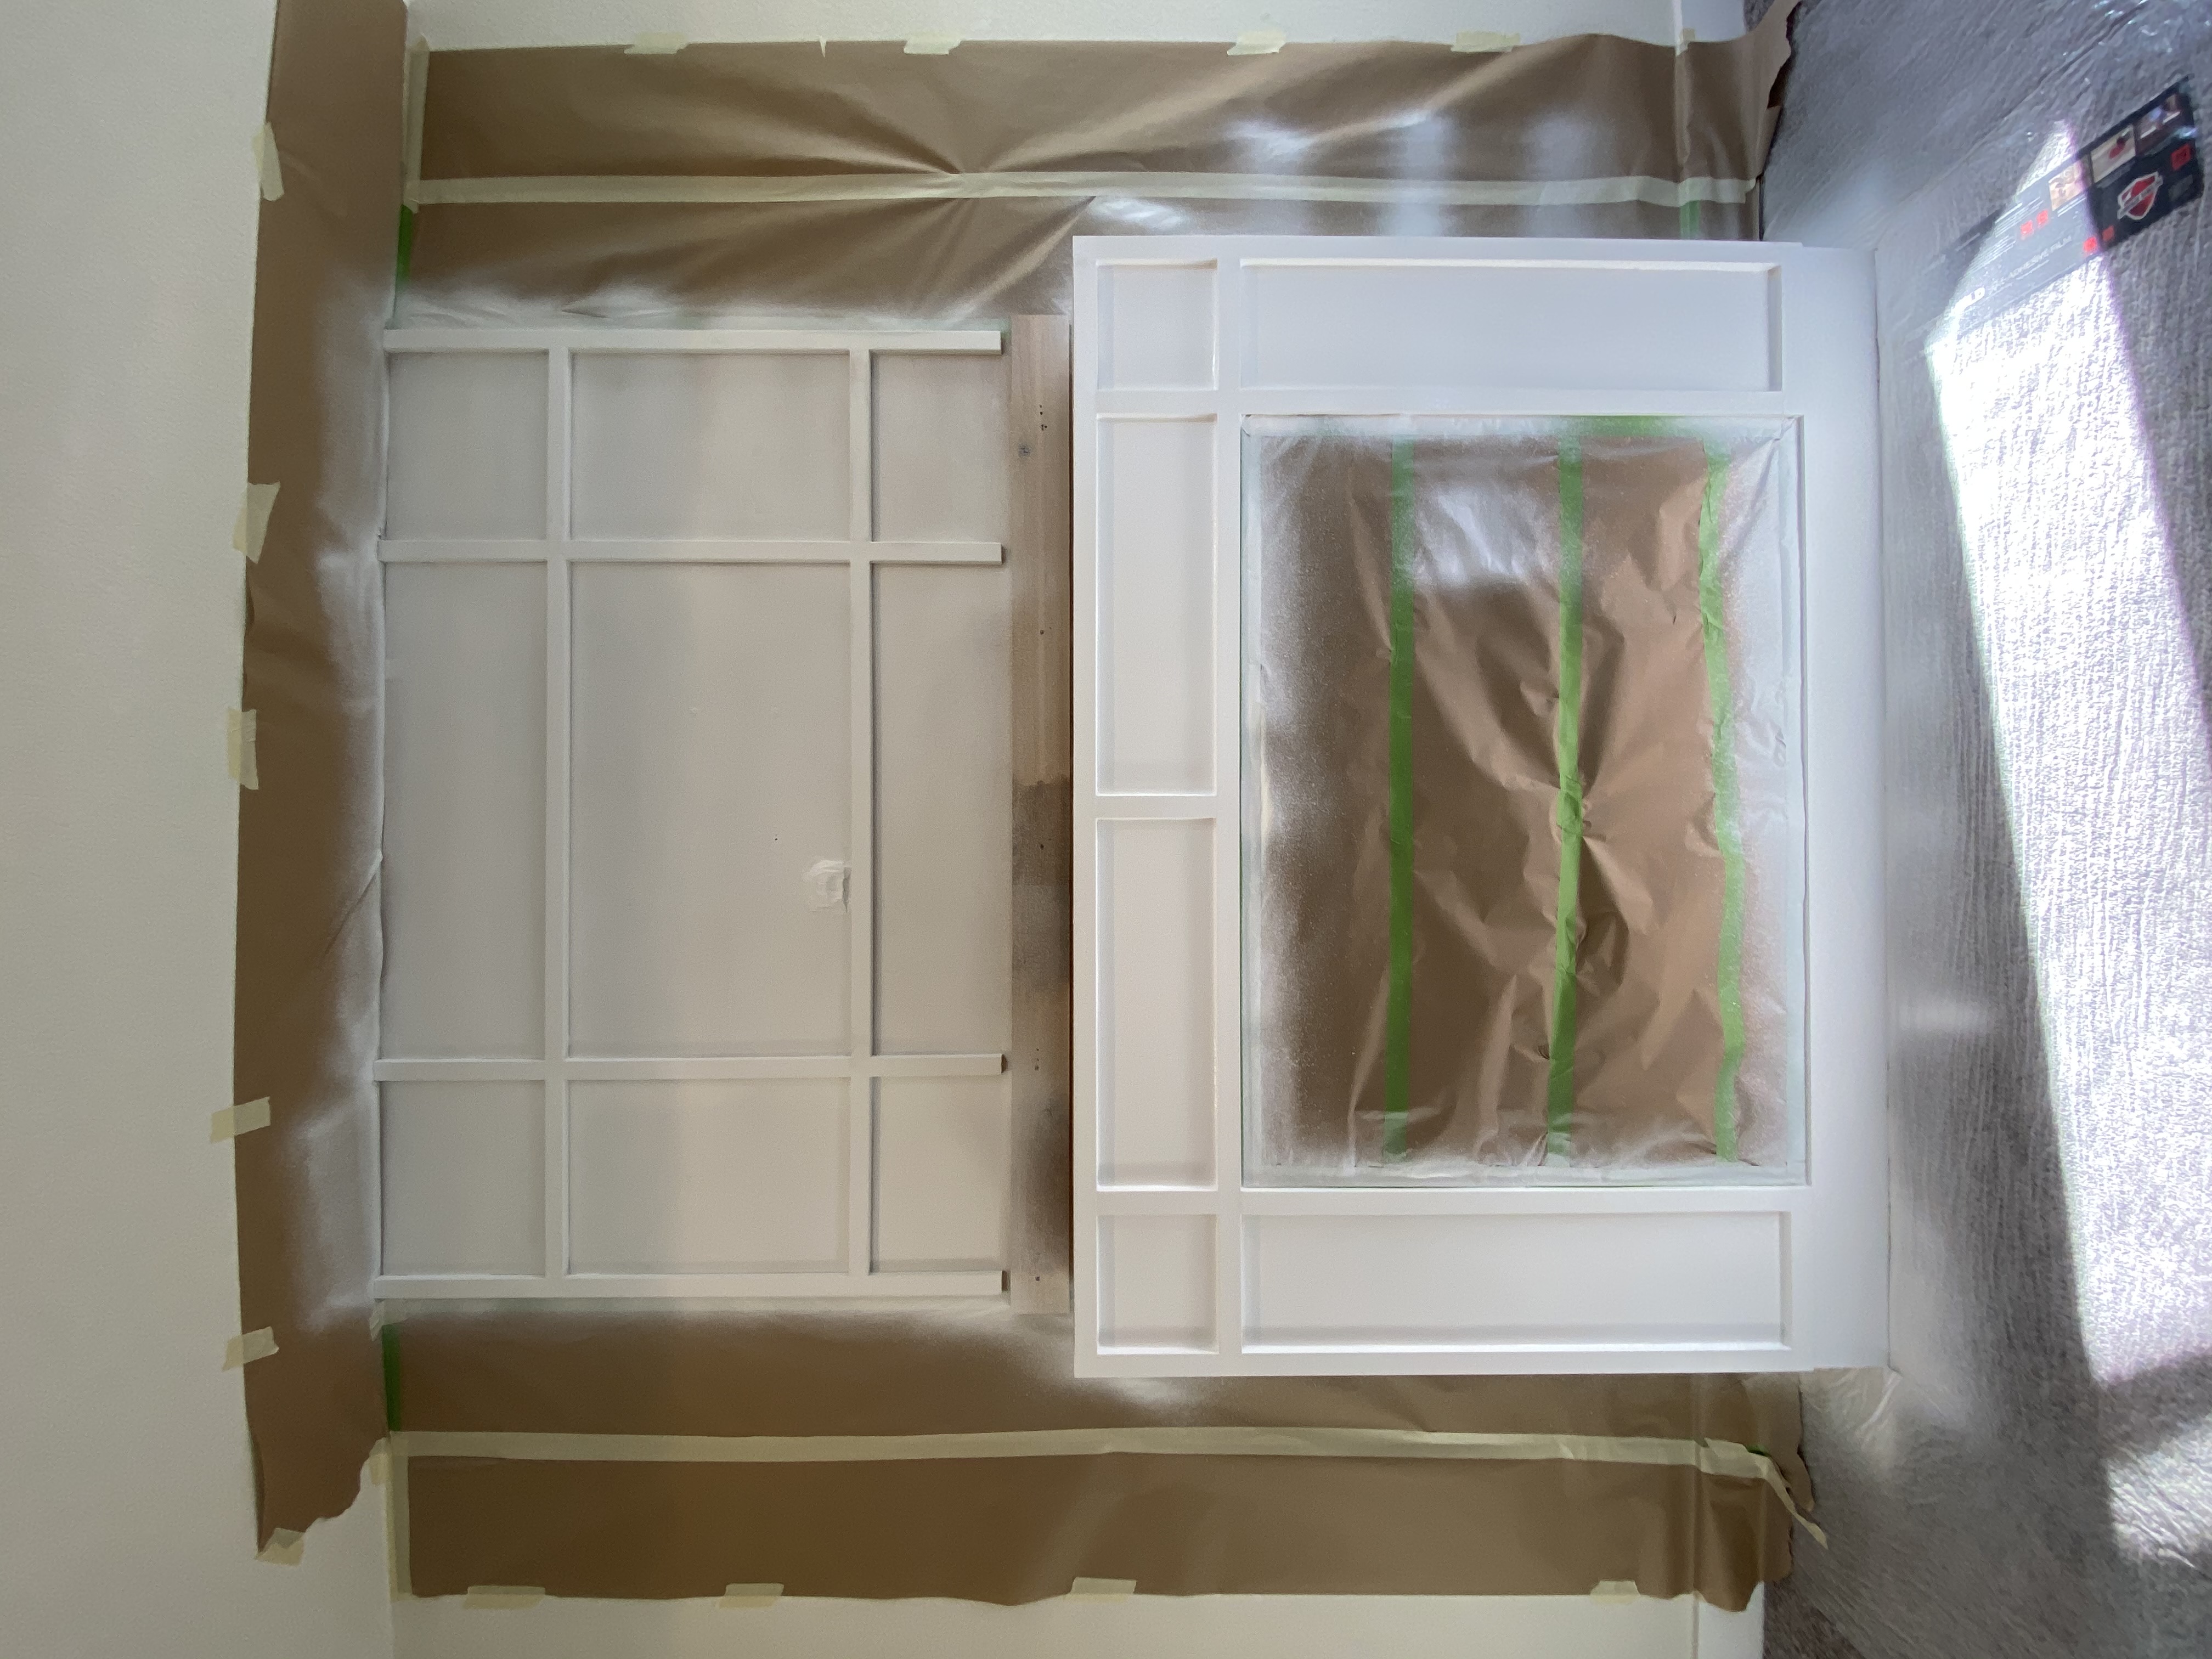
Painting was the most fun part for me. I used a paint sprayer so I had to tape off the carpet, the walls and the fireplace center tile. This was so nothing would get over-sprayed. My favorite paint prep product now is sticky plastic that you roll over your carpet and it doesn’t move until you take it off. It’s a miracle! So I ended up doing 3 coats of paint to ensure a really good coverage.
Something I’ve learned with spraying the fireplace is that you will expect to spray whatever you’re spraying and it to be perfect coverage, but it’s not at first. The first coat will have a lot of the underneath showing through. Then by the third coat, it’s perfect! There are different settings for sprayers to change how much paint comes out and how quickly it comes out. I kind of just tried something and it worked for me so I kept the settings. What you definitely do NOT want is to have too much paint spray out too quickly or to go too slowly while painting and create drips. That is no bueno.
SAFETY:
Don’t forget to wear proper protection equipment when spraying. Make sure you are in a well ventilated area, wearing eye protection, and a mask. The paint coming out of the sprayer will be in a fine mist and can be easily inhaled or get in your eyes.
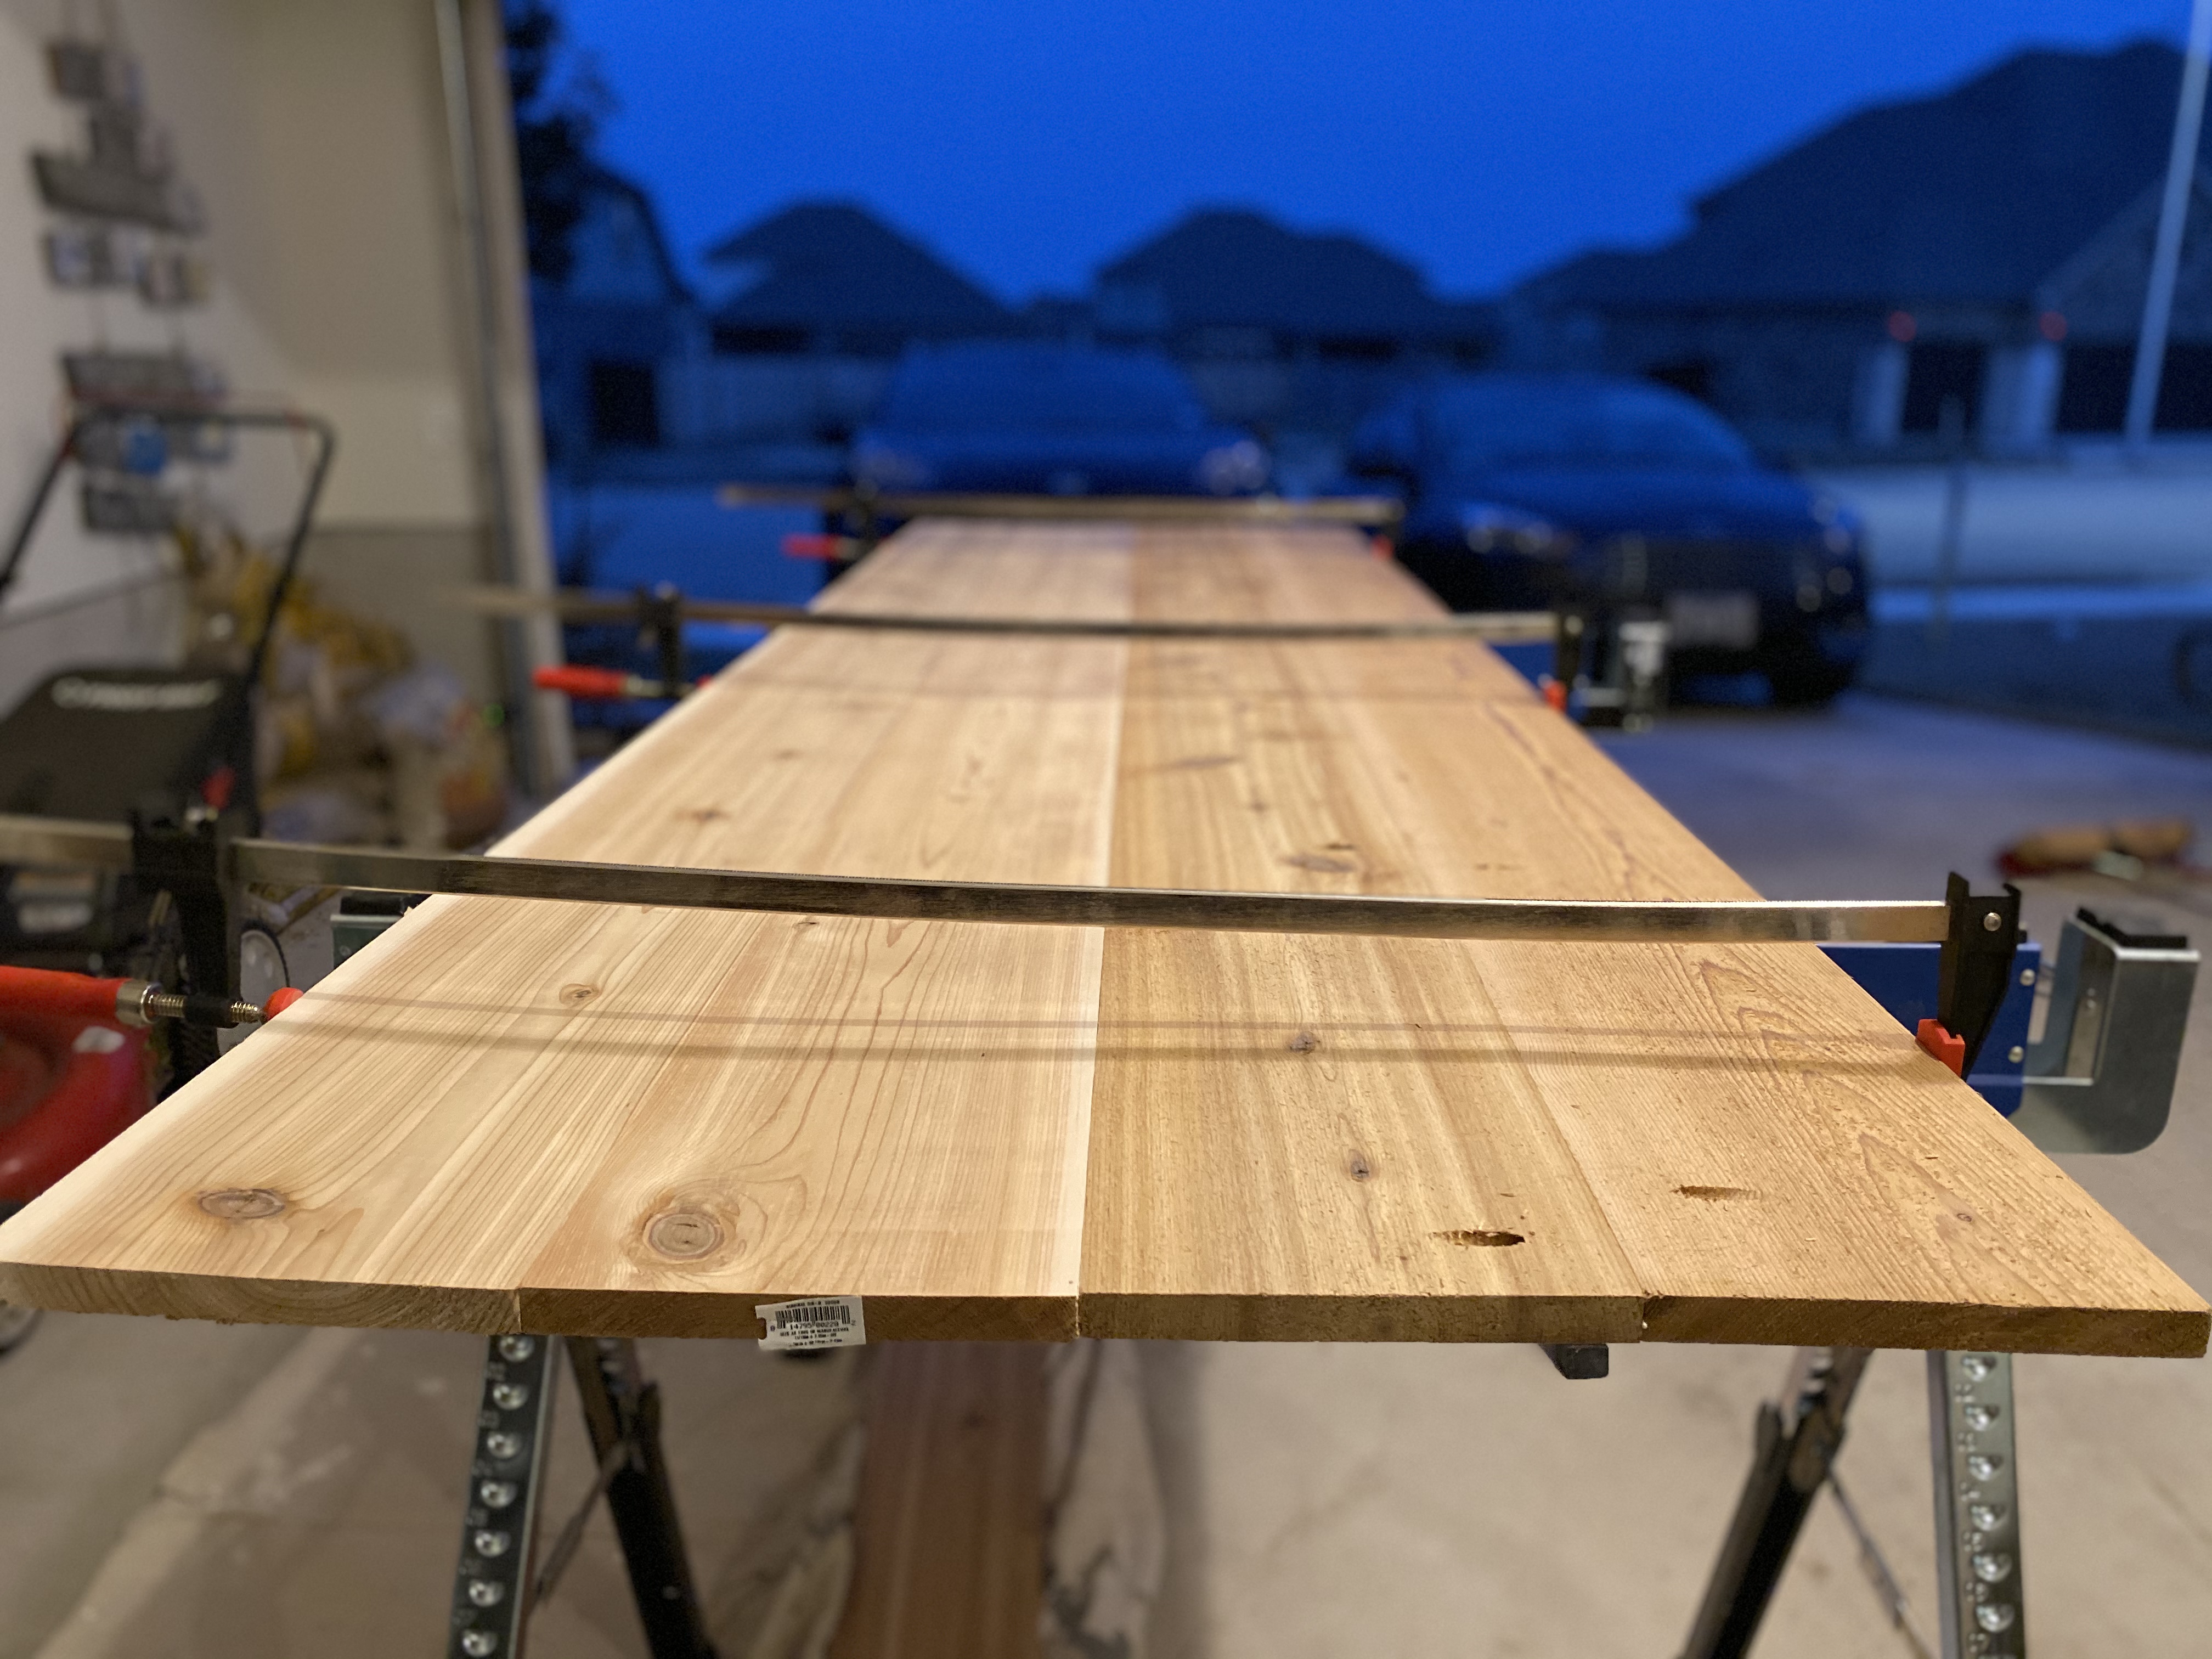
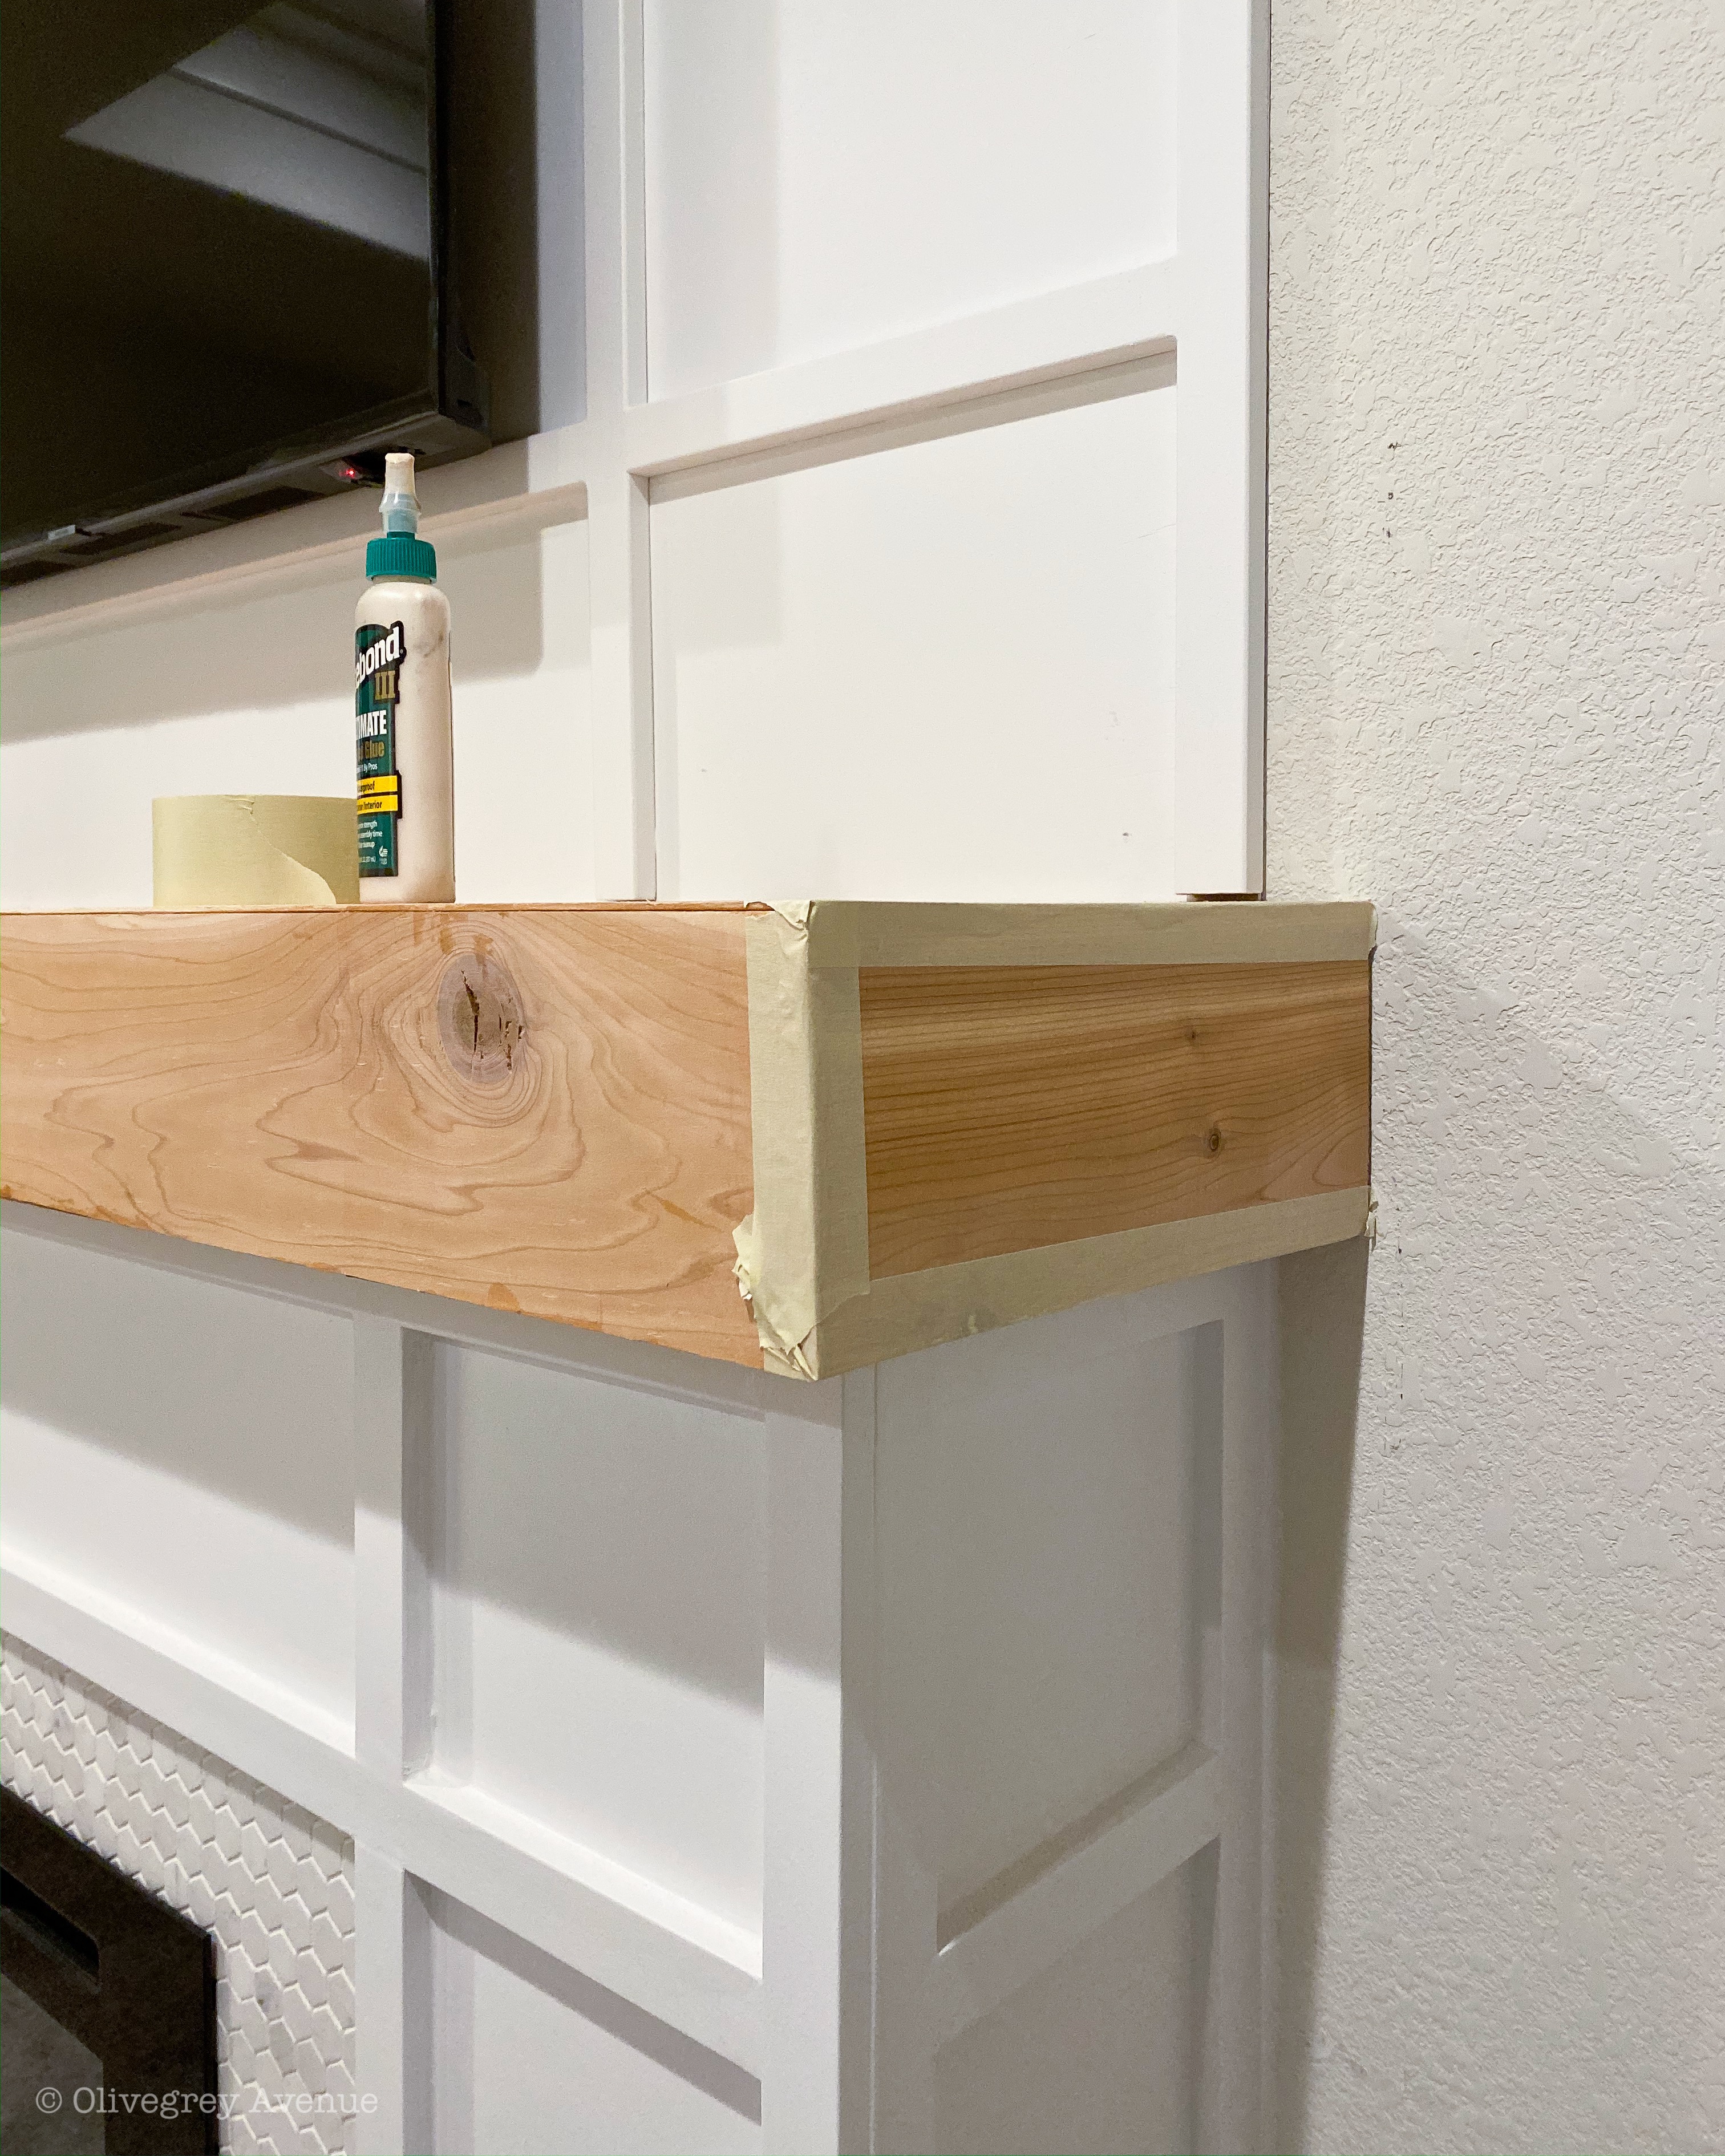
Step 5: The Mantle
Building the mantle was challenging because I’m not really a woodworker and wood can be hard to work with. The mantle over the living room fireplace has butt joints and I didn’t want to see the end of the wood so I decided on a mitered joint.
A mitre joint is a joint made by cutting each of two parts to be joined, across the main surface, usually at a 45° angle, to form a corner, usually a 90° angle.
That decision made things harder. Not only was cutting the wood was harder but putting it all together to match up perfect was HARD. We built 4 sides to the mantle and then attached the back piece of the mantle to the wall. So, that we would have something to attach the rest of the mantle to. We put the mantle together on the fireplace so that it would all fit instead of building it perfectly elsewhere and then having it not fit when trying to put it in place, dry fitting is the way to go.
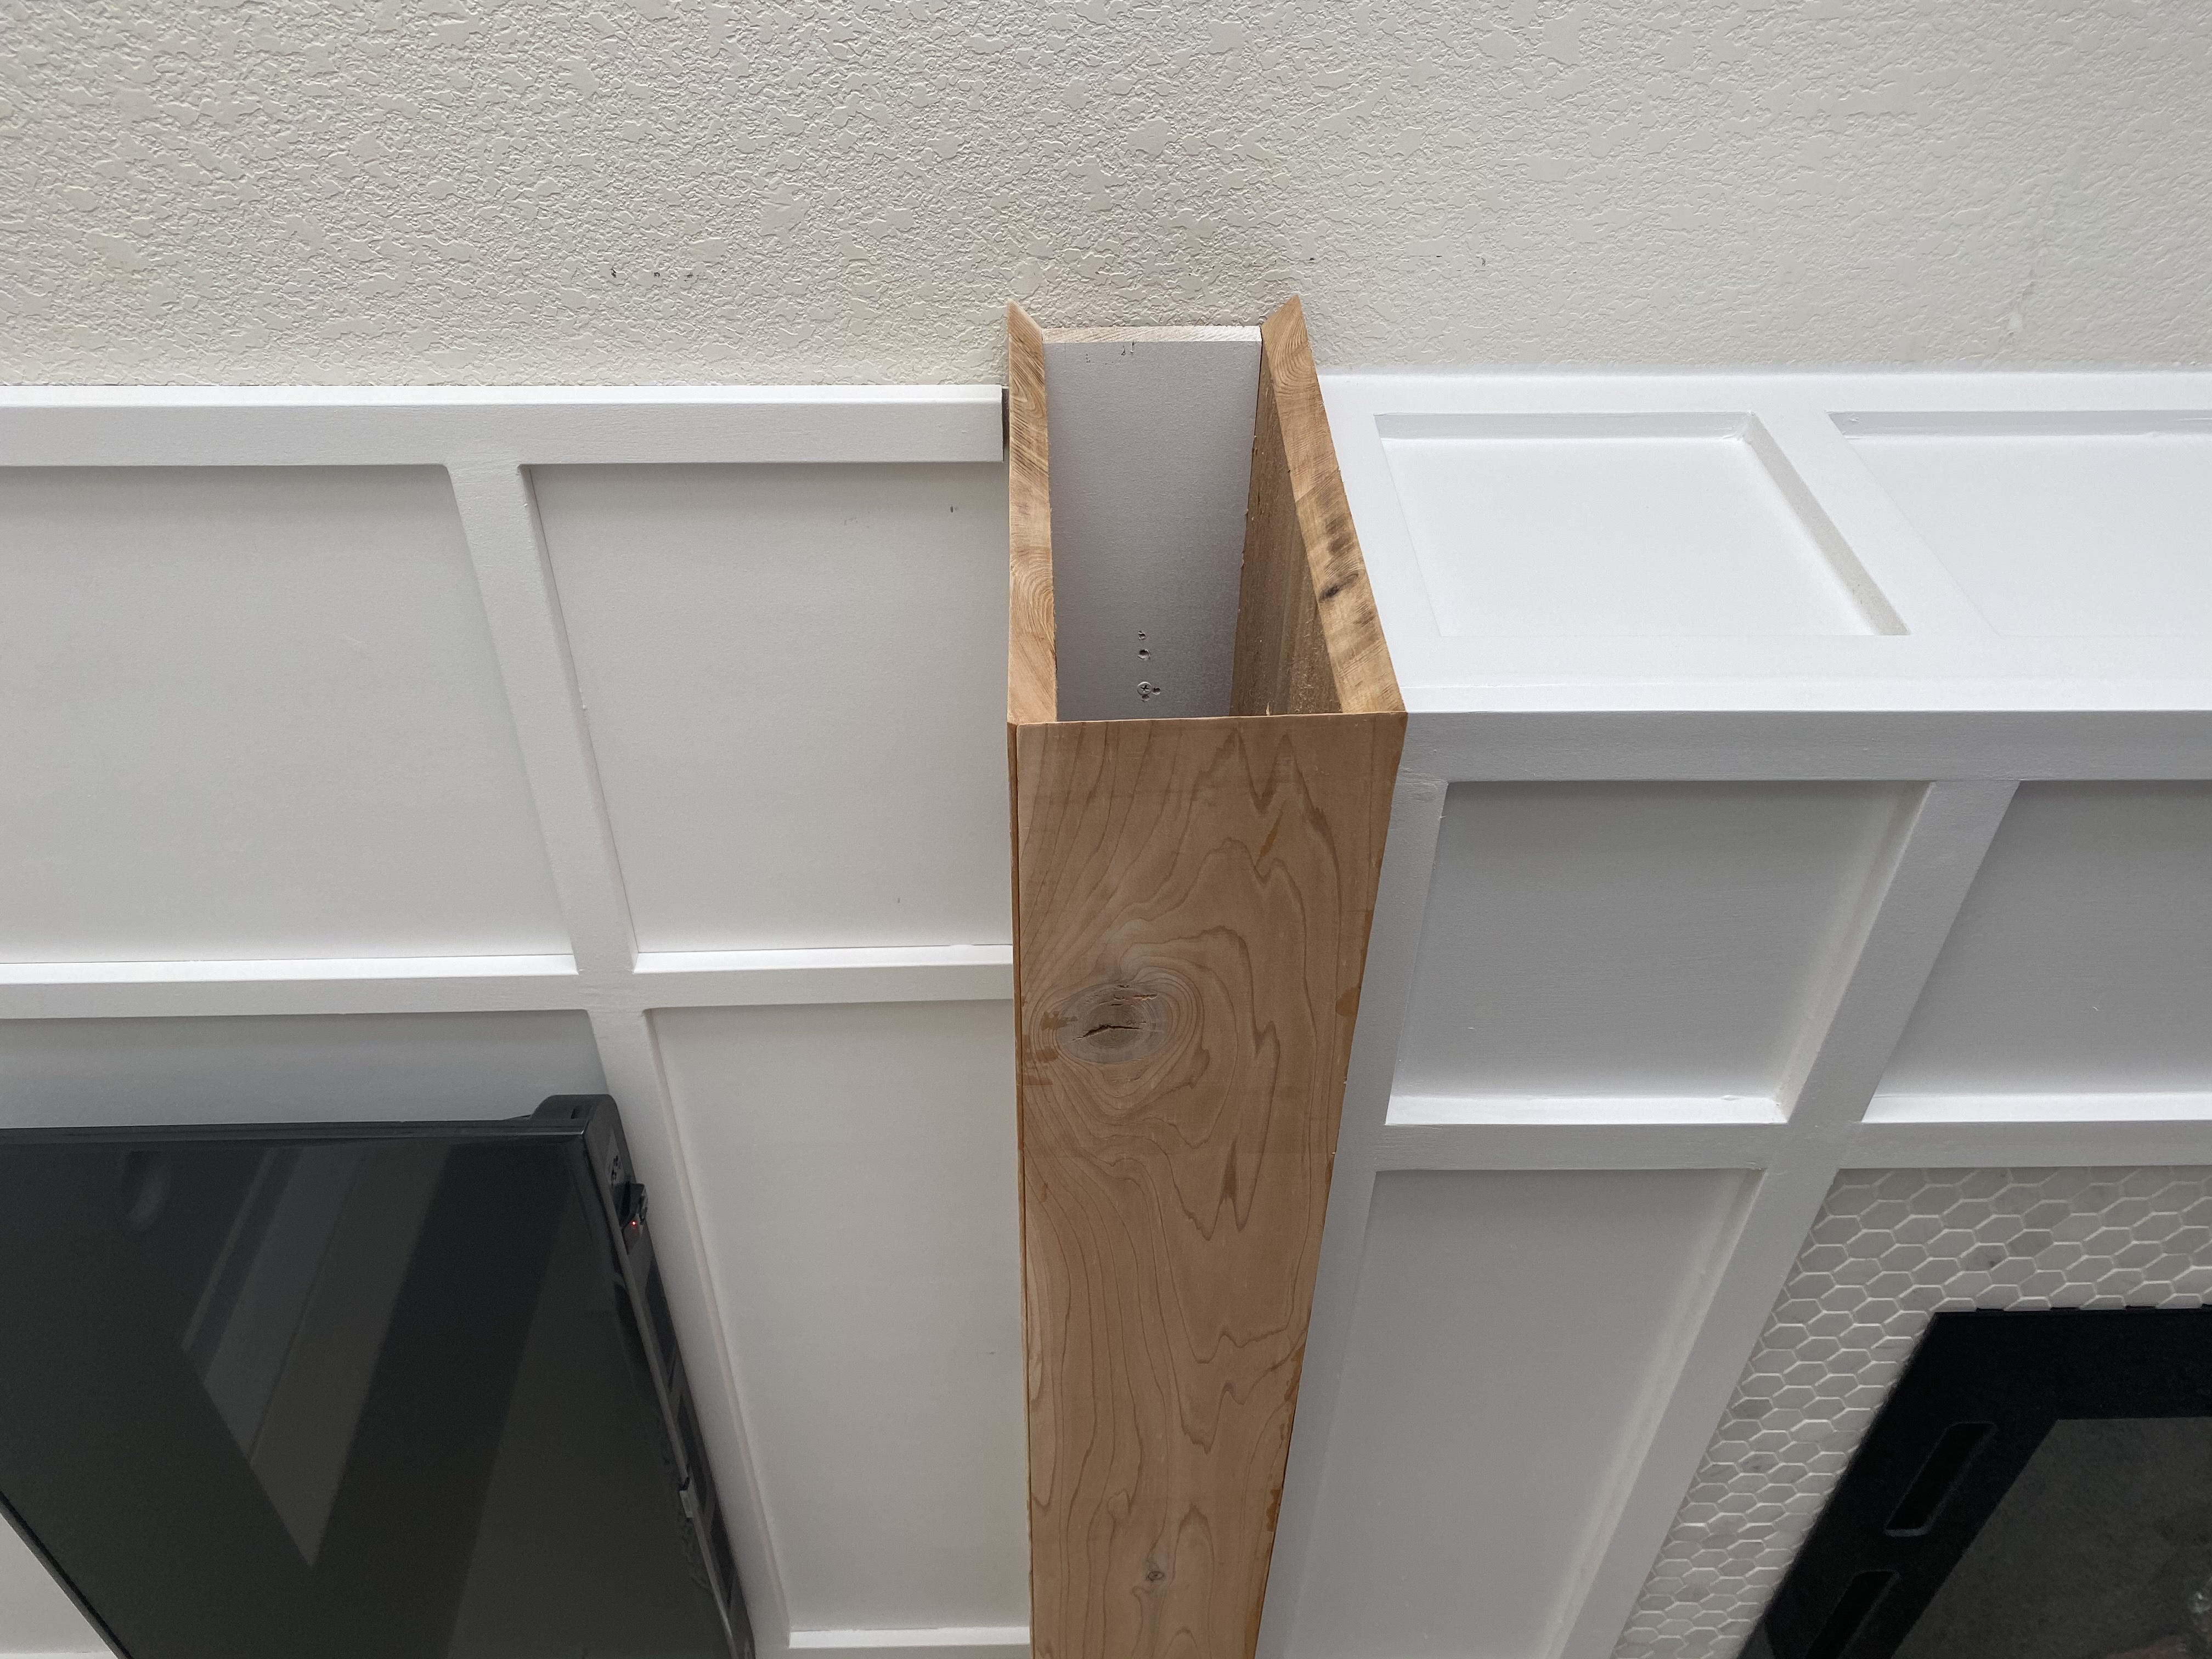
Cutting
Once you have the dimensions of the wood needed to make the size of mantle you desire. Then you miter cut each side that doesn’t touch the wall at a 45 degree angle. So, that when the ends of the wood come together you have a nice 90 degree corner (unless you’re just doing butt joints and then you do a straight cut). The only board with all straight cuts will be the one attached to the wall that all the others will fit around so that we can secure them to it.
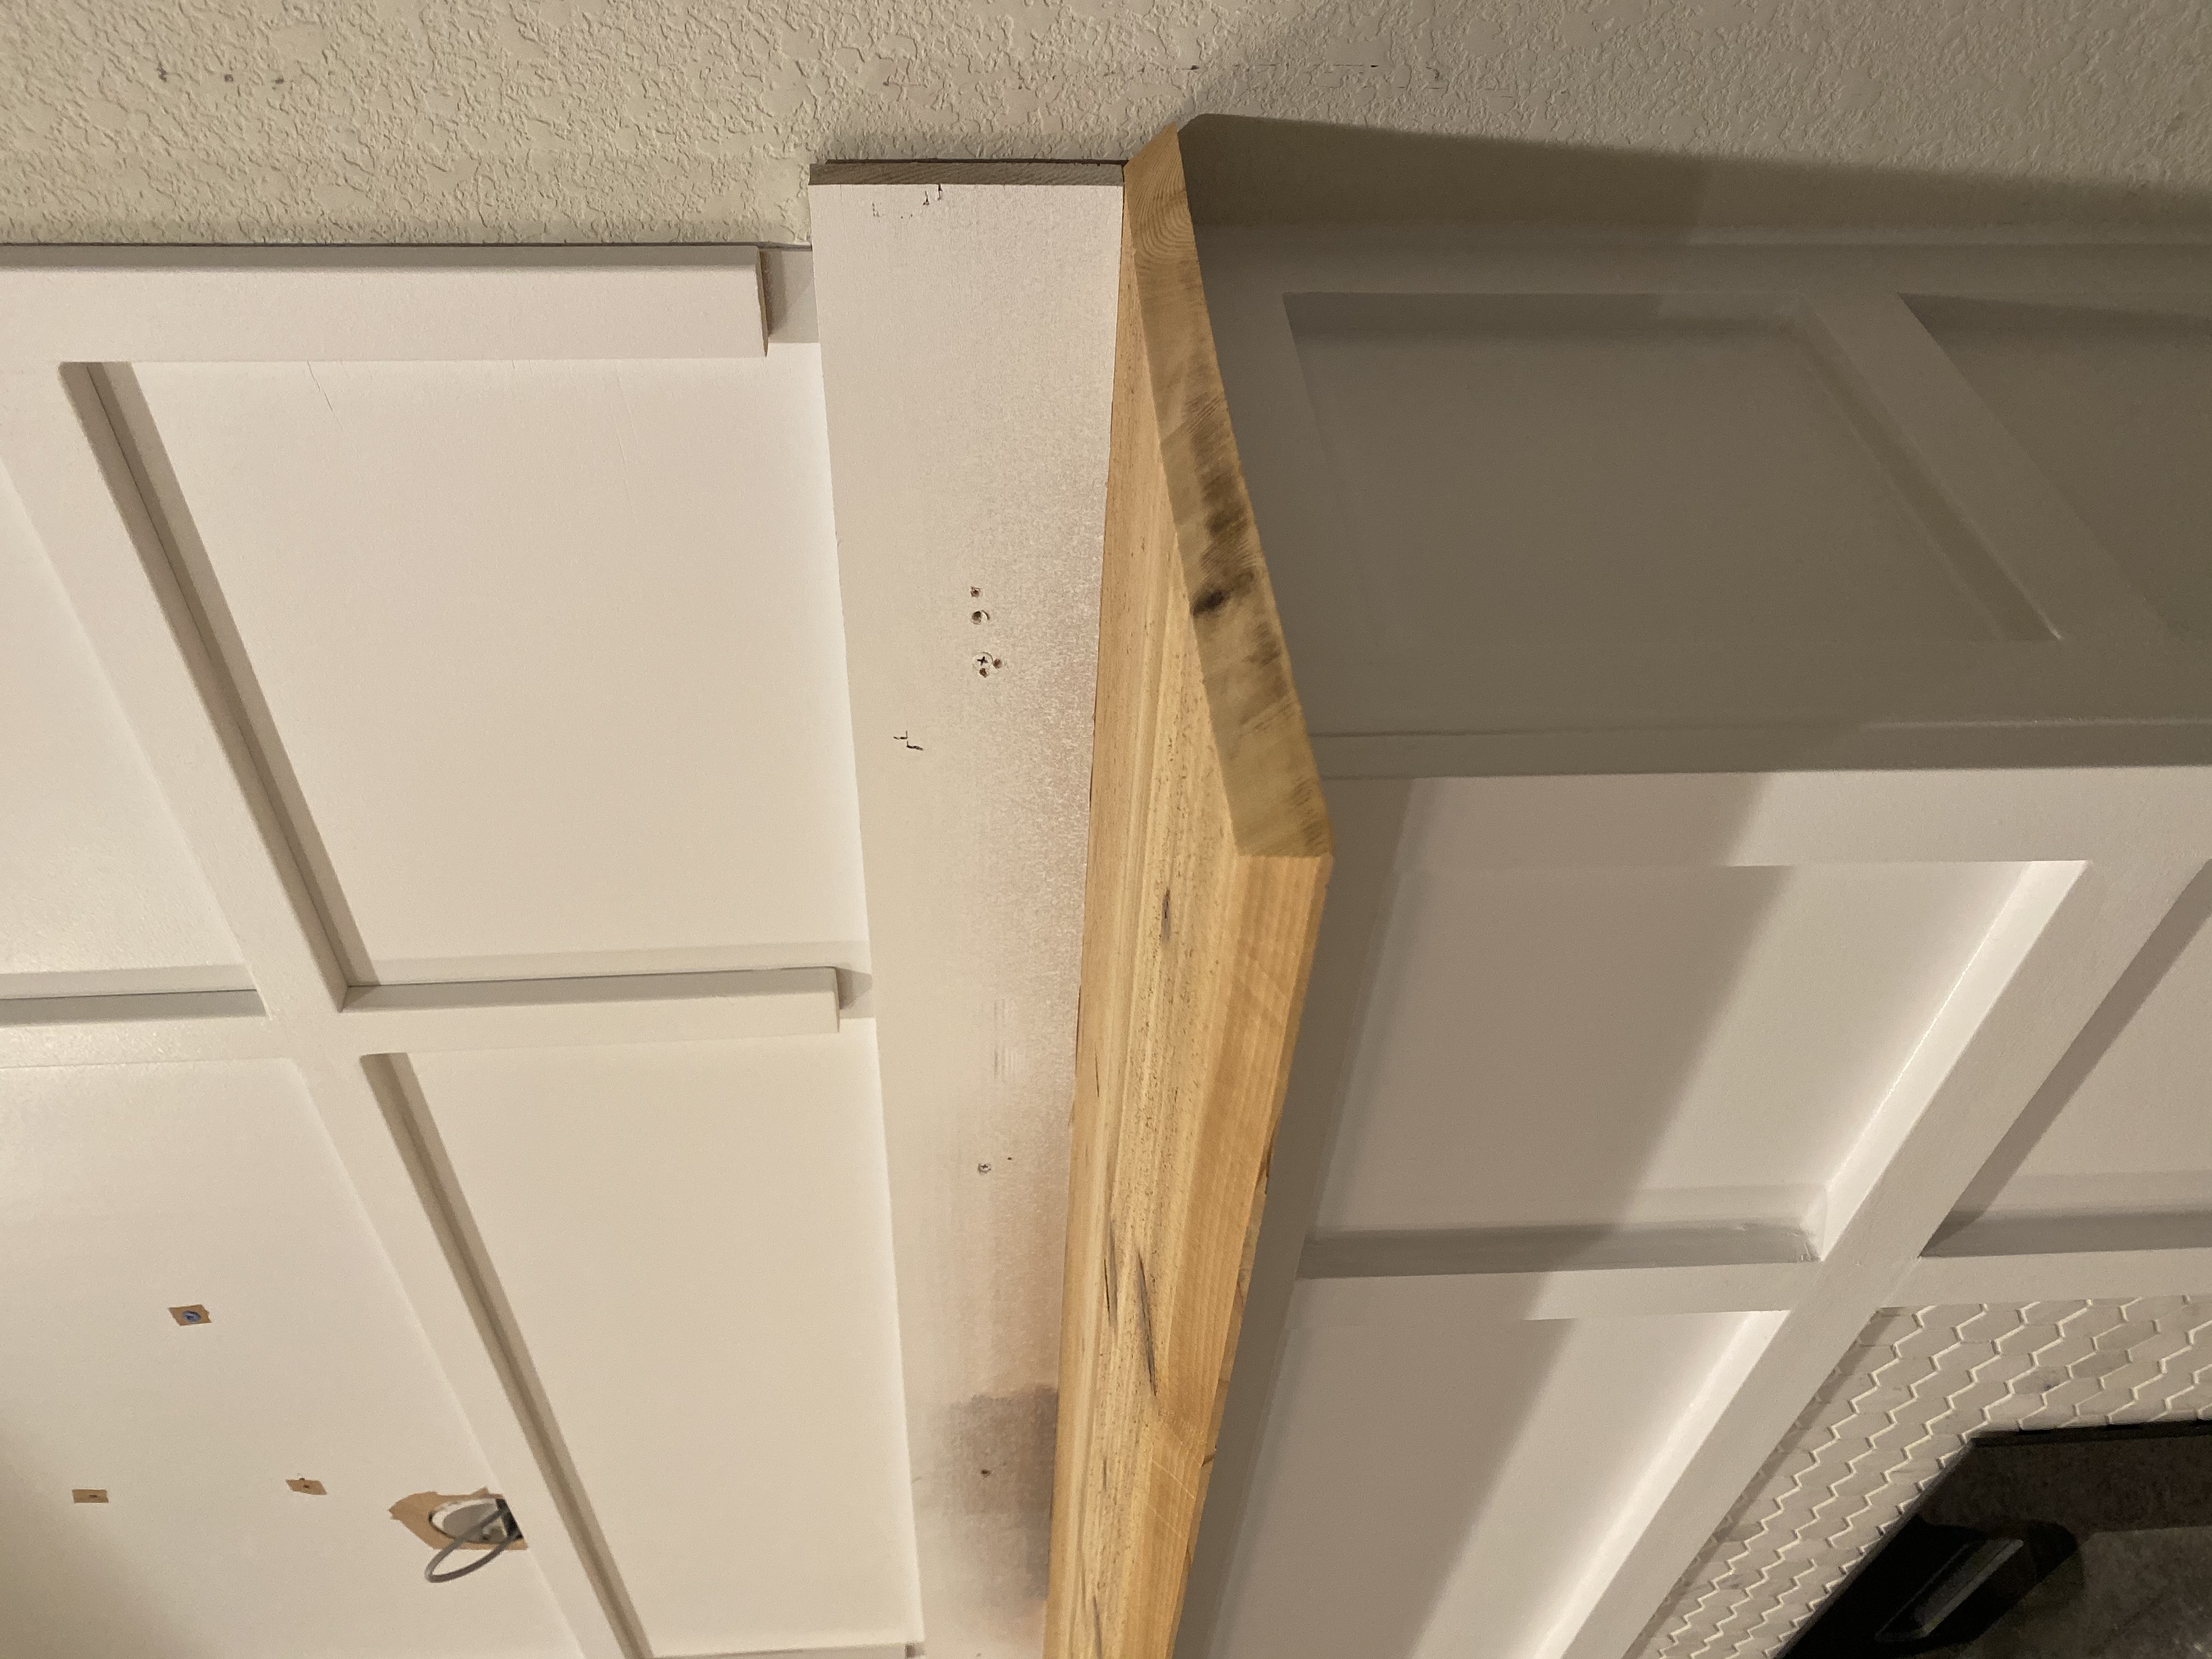
Assembly of the Fireplace Mantle
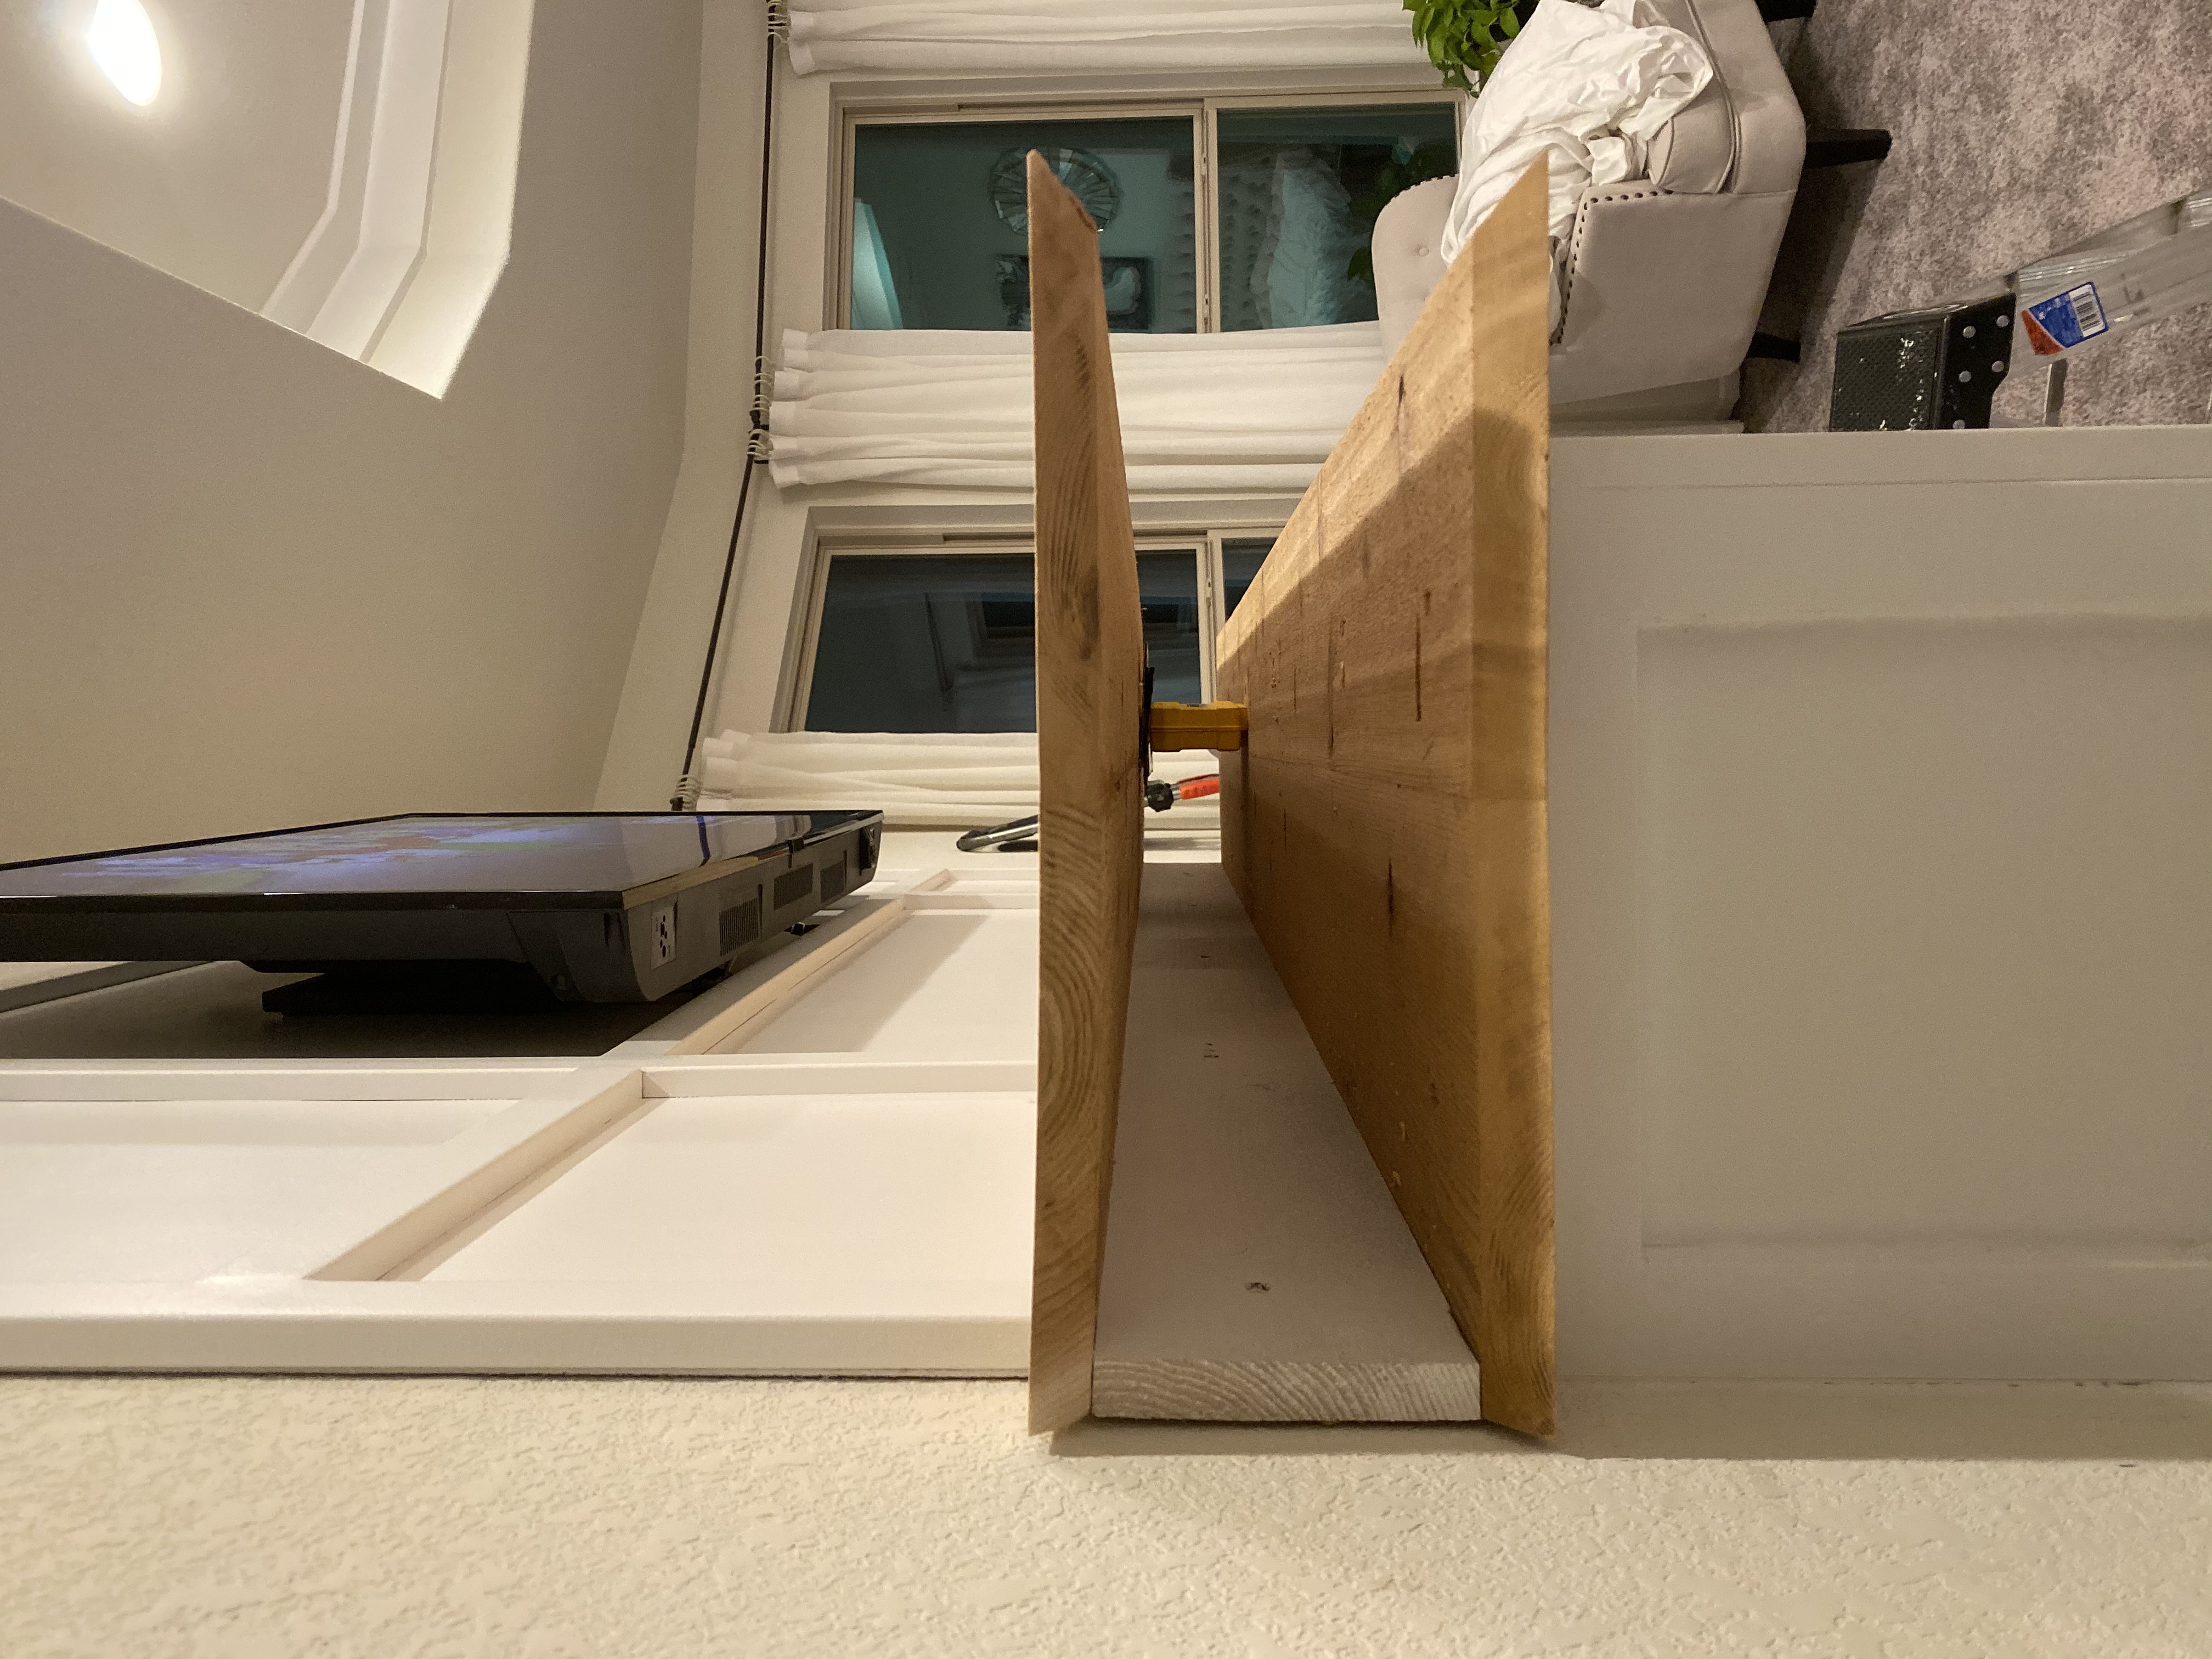
To make sure the back board against the wall was positioned right, we laid the bottom board in place and set the back board in place. Once it was measured into place, we put construction adhesive on the back and screwed it into the studs. This is probably pretty unnecessary but the bottom wood piece got screwed into the top of the fireplace so that sucker isn’t going anywhere either. Then the top went on, but to help hold it in place and to keep it from caving in, in the future, we cut down some 2x4s to sit in 3 places on the middle of the mantle. We screwed the top of the mantle to the back board. The front went on after the top and bottom. We put wood glue along the top and bottom edges and taped the front panel in place for it to dry.
Then for the sides. This was the most challenging part of the assembly because Steve had to go back and forth a few times to cut them to fit perfectly. They still didn’t end up perfect but we got them to a point that we felt we could finish them up with wood filler. We did the same with those and secured them in place with wood glue and tape. For a final measure to hold everything in place, we brad nailed everything together along the edges. When nailing the edges together be VERY careful, mitered edges can be very fragile and thin. The last thing you want is a nail to go through the side of the wood messing up your work so close to the end.
:: Side Note –
If you remember the garden beds, you remember that they had a disastrous meltdown during the first big storm and straight up BROKE apart! Now the smaller box had a 2×4 piece joining the two sides together every 6-12 in (not to hold the box together but for supports to place the planter boxes on). And this fireplace is attached to the studs in every possible way, even this very lightweight mantle is secured so well to the studs that people will never think that we added this after the fact. Jump back to the garden beds and the large one spans a length of 21 feet, yes TWENTY-ONE FEET, and for some reason, we thought that 3 braces with a distance of almost 6 feet in between them would hold 2+ tons of soil and plants…HA! We can laugh about it now, because it’s secured properly and withheld several storms since but I just thought that was a funny comparison. ::
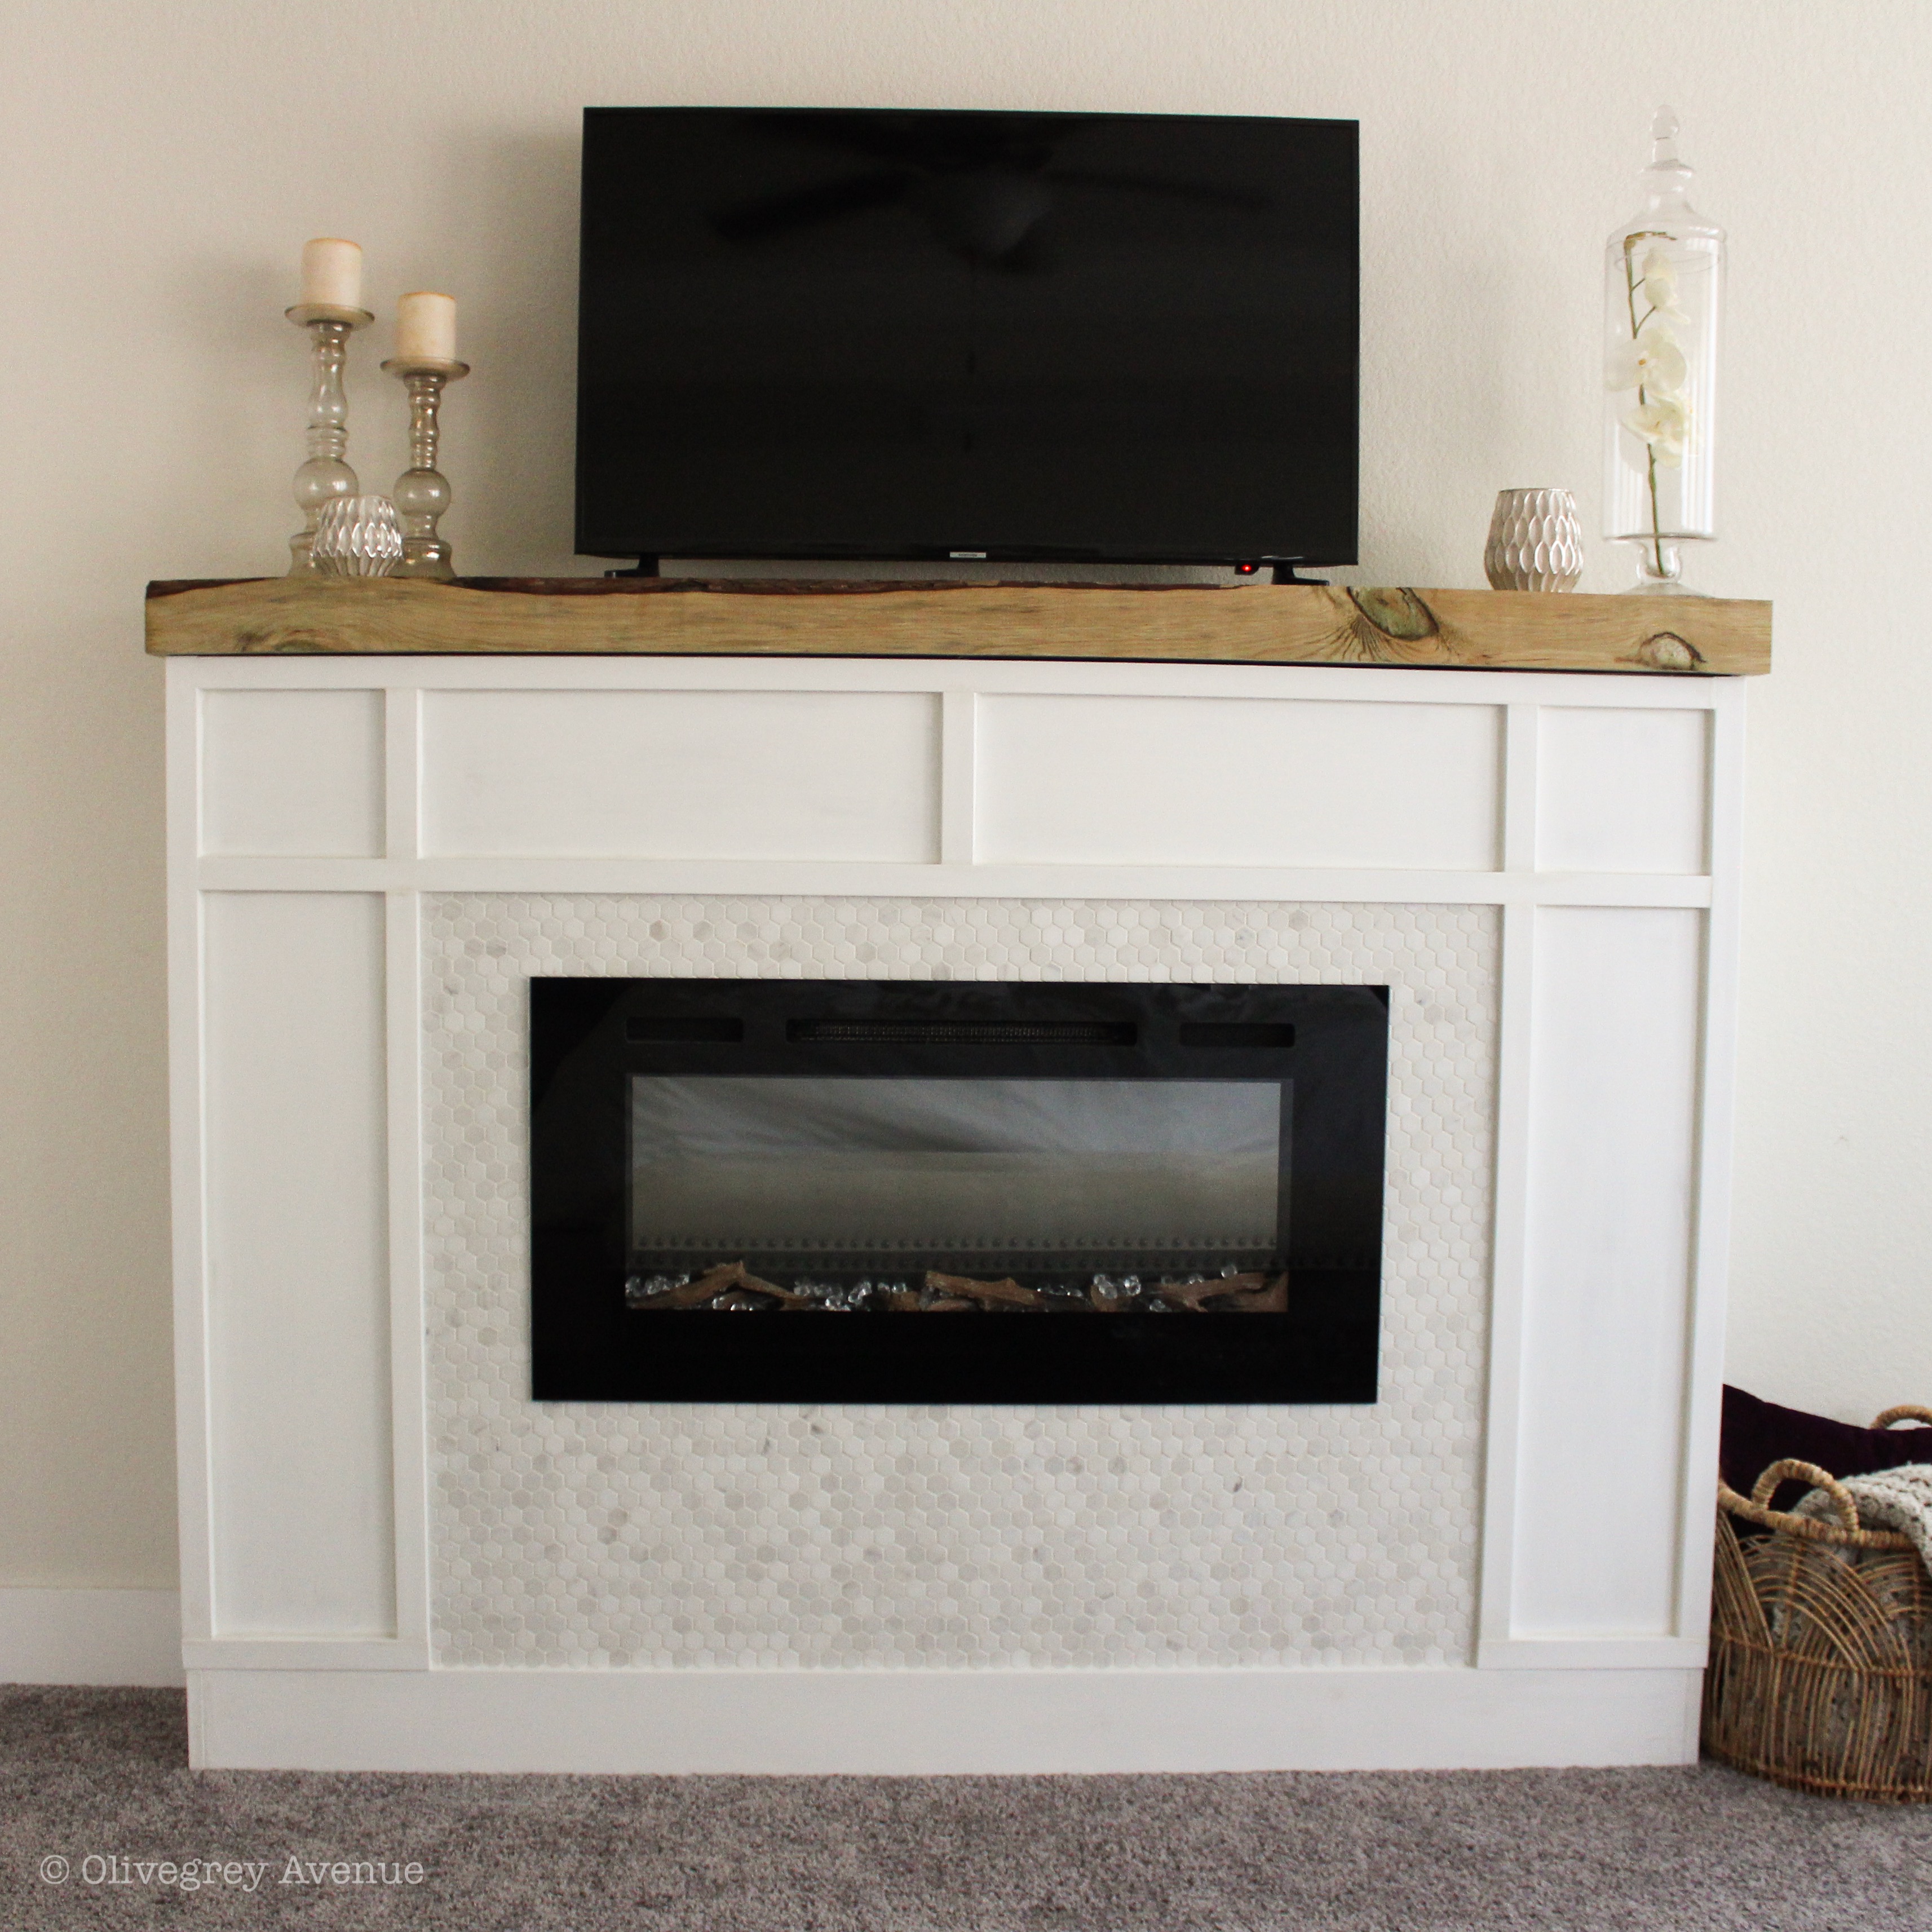
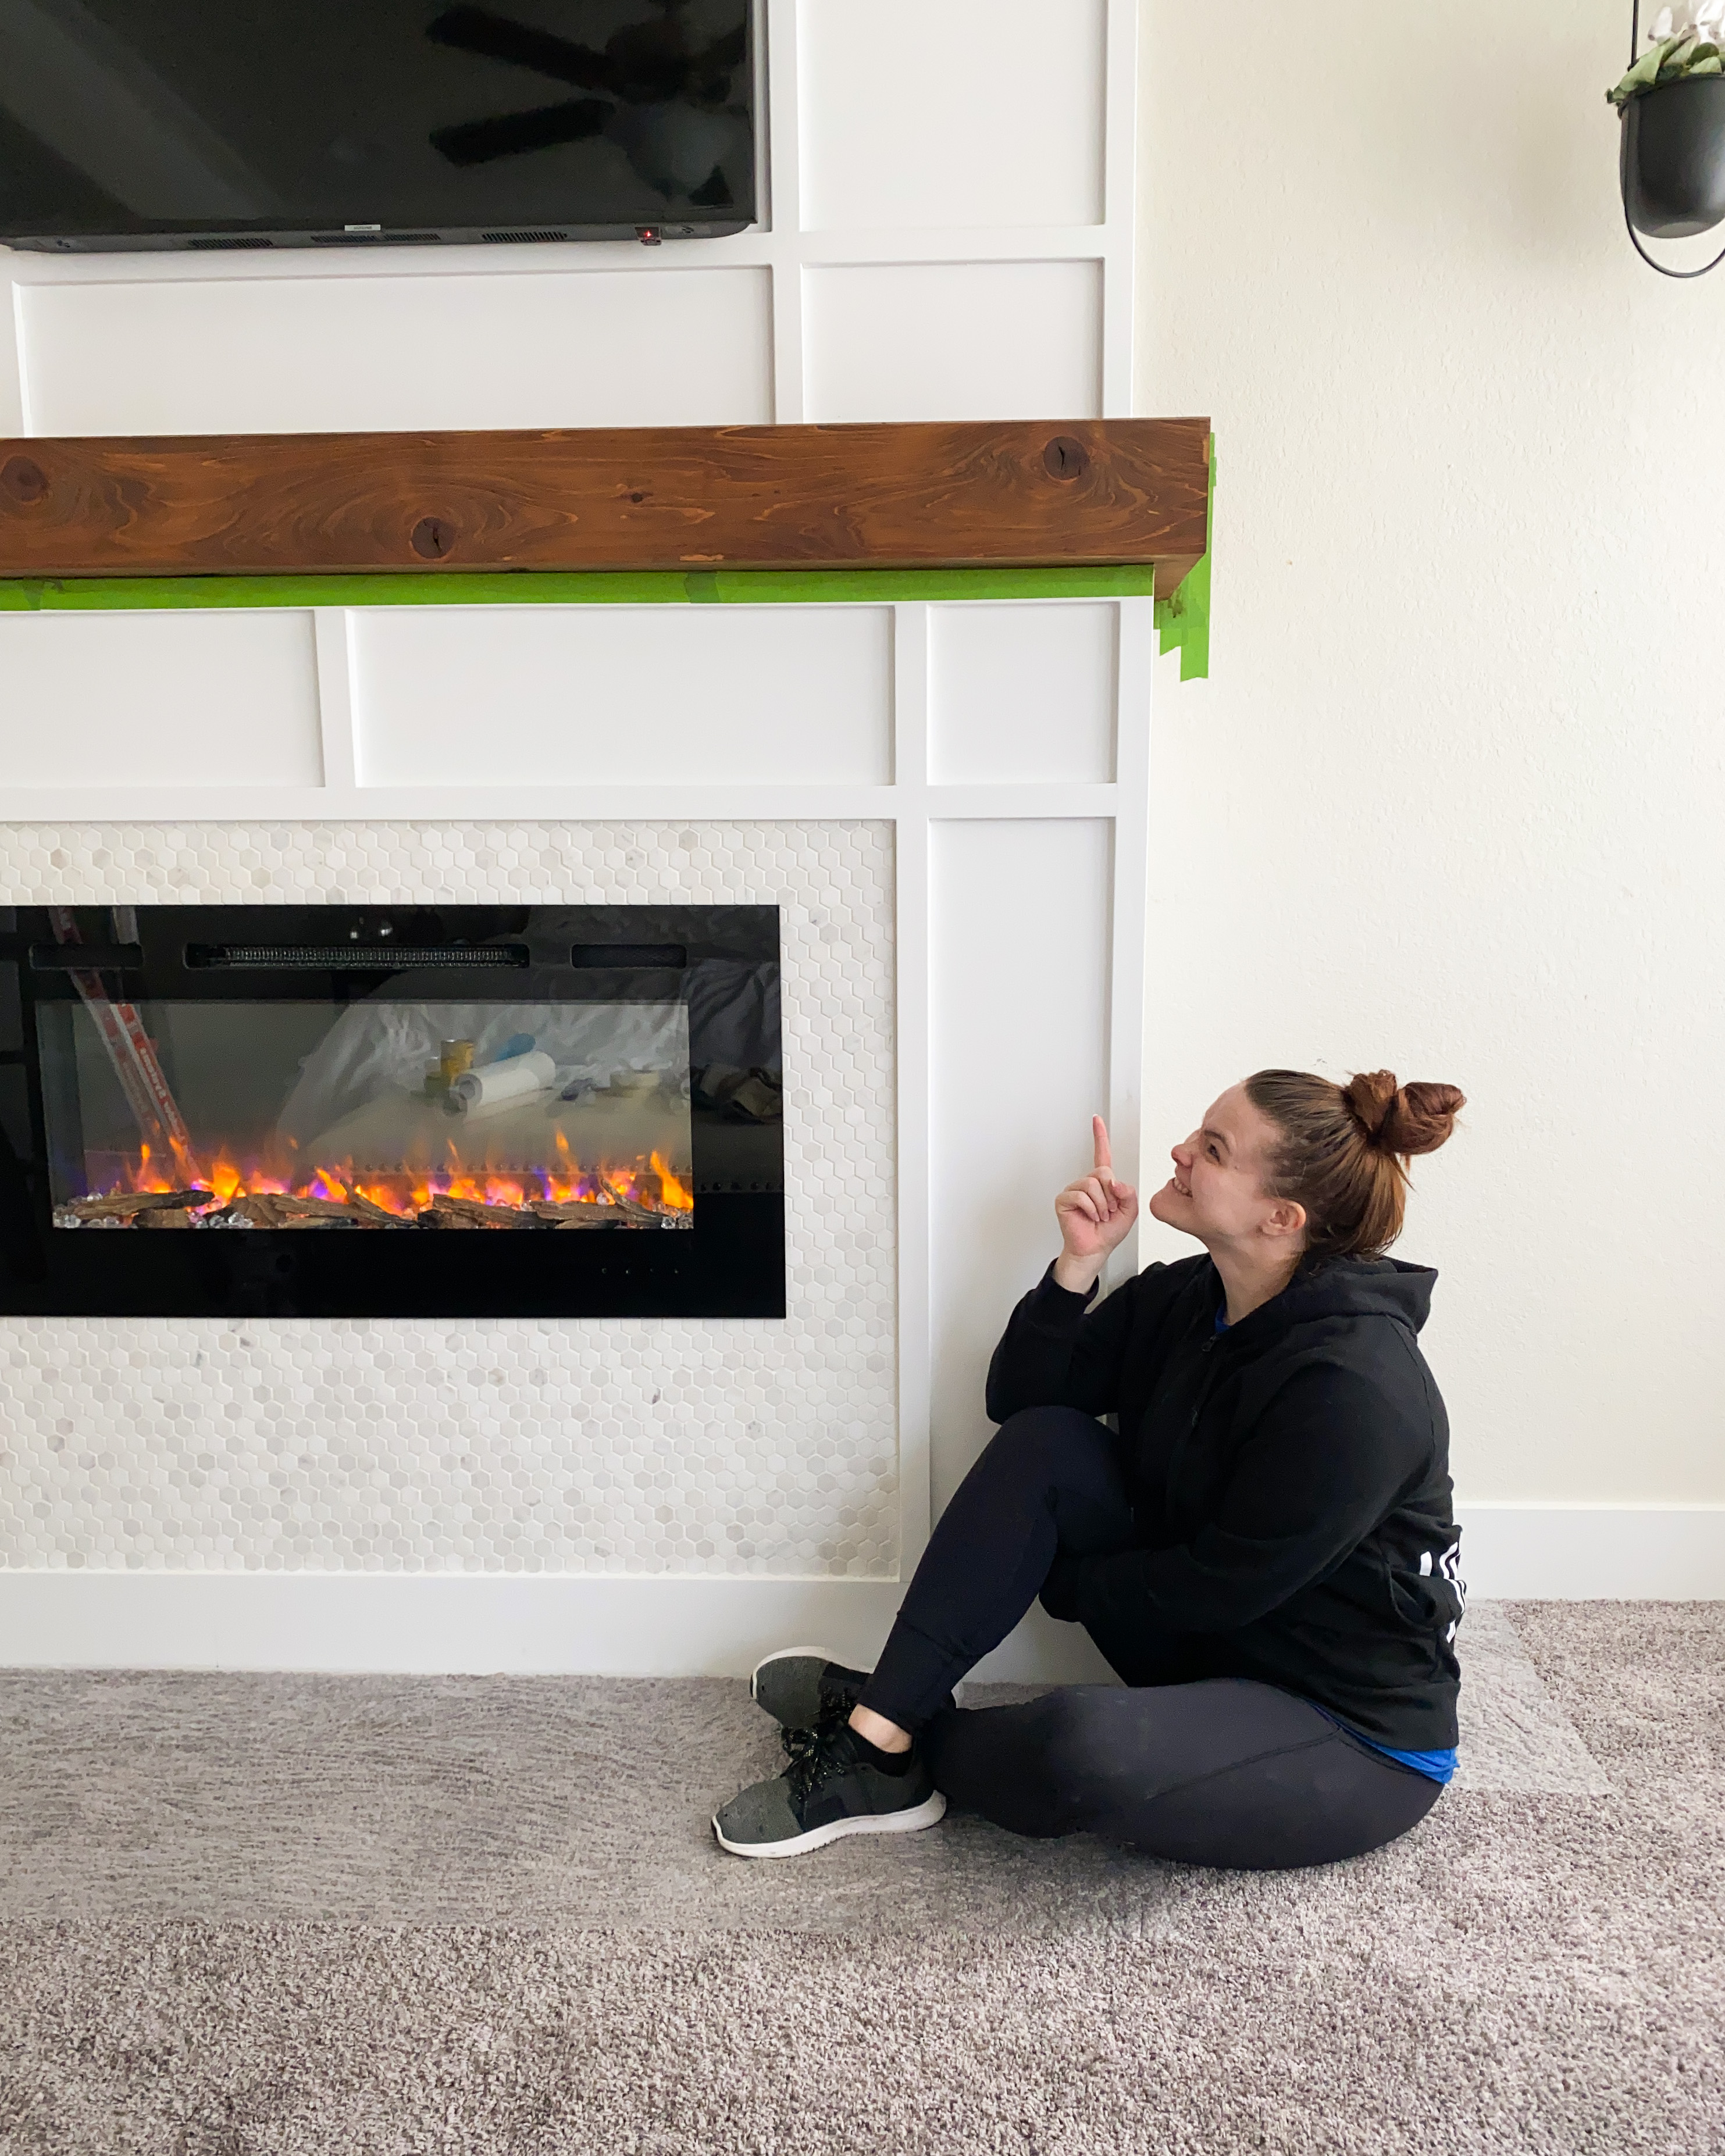
Finishing
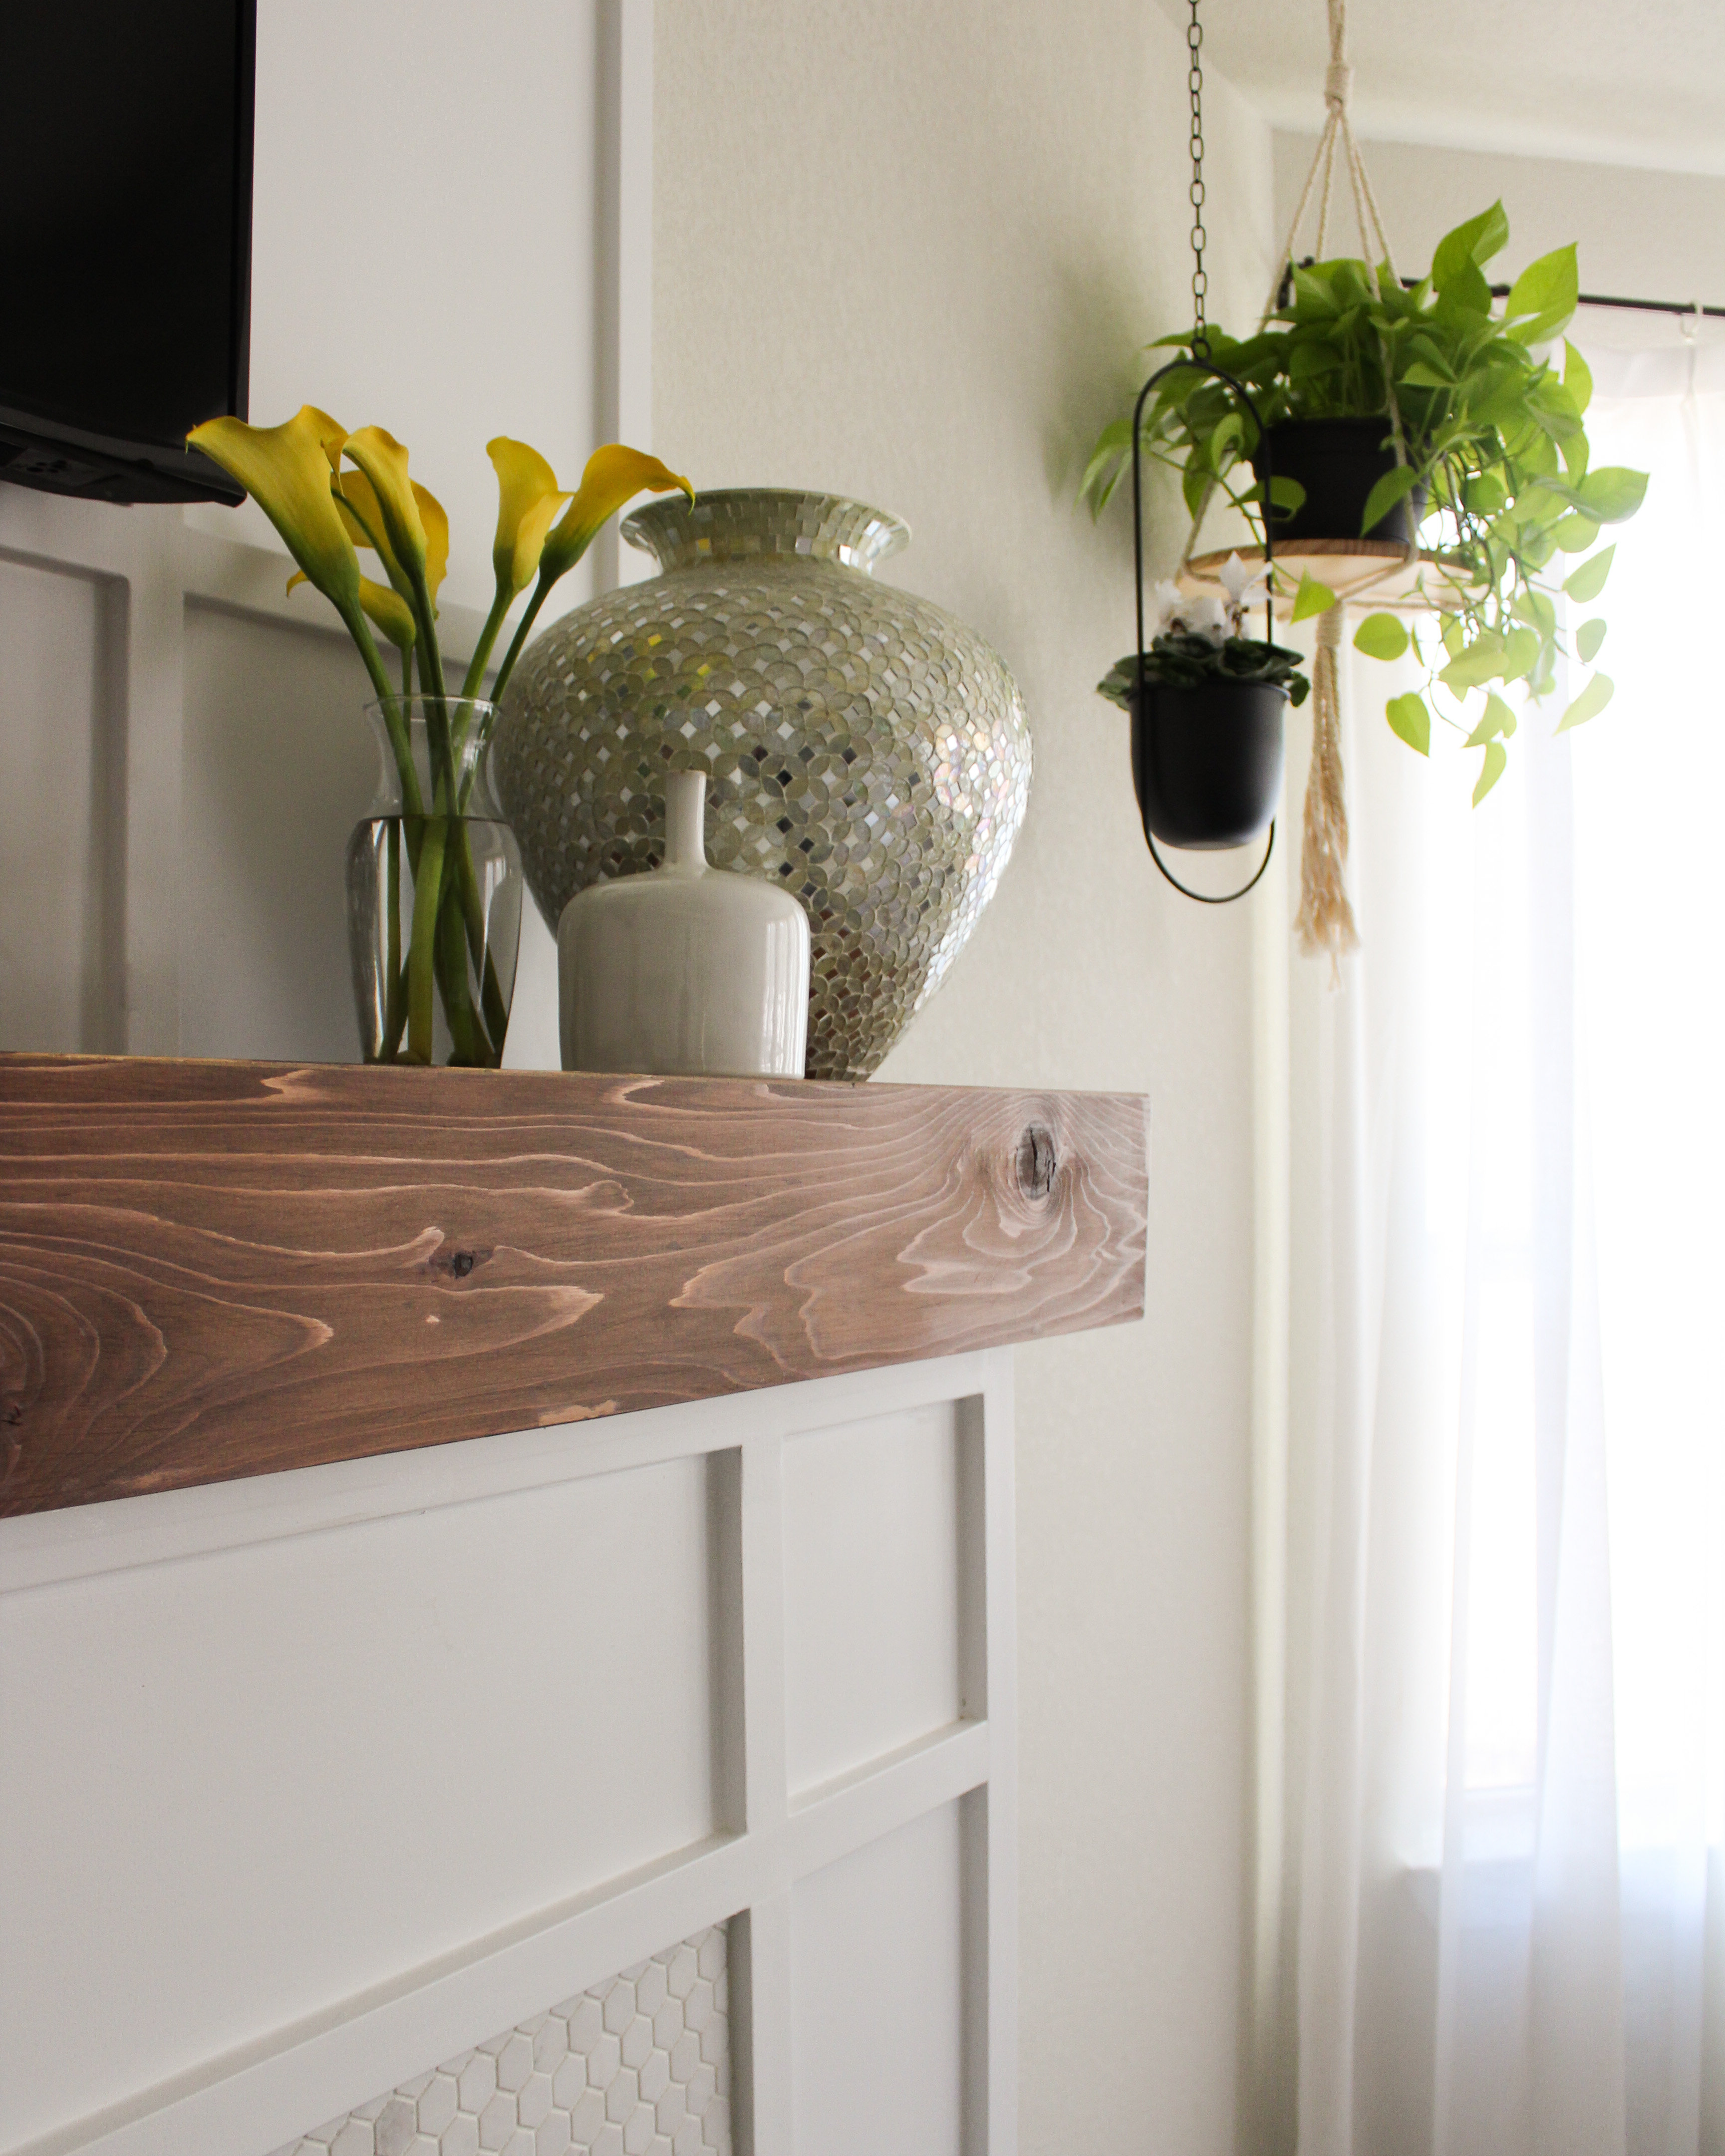
After the wood glue dries, you can remove all the tape and then do the finishing touches. Fill any wholes or imperfections with wood filler, let it dry and then sand it smooth. I first sanded with 60 grit then moved up to 120 grit to smooth it out. Then I was going back and forth about staining or just sealing the wood. I decided to stain to hopefully help cover up the wood filler. I did one coat of stain and once that was fully dry, I sealed the wood with two coats of tung oil that I just rubbed on and then off 10 minutes later. It gives the mantle a nice, natural and non-glossy finish.
Step 6: Caulk and Touch-ups
Last but DEFINITELY not least is the caulk. These final details in a project are what take amateur-projects and turn them into DIY-Pro projects! On each side of every single trim piece I put caulk. I also caulked the whole width of the board and batten that touched the ceiling and that touched the mantle.
Something I would do differently with caulking, if I did it all again. I would tape off the mantle so that none of the caulk would smear on the mantle while spreading it. It would only go where I wanted it to. It’s not a big deal since the mantle is so tall, hardly anyone can see up there. It not super noticeable anyways so its fine.
Okay now the last-last thing to do is any touch-up paint. I had some touch-ups to do on the board and batten and on my wall. So, I got out the paint and little brushes and just perfected all the lines.
LESSONS LEARNED
WHAT I DID RIGHT: There are two parts of this project that stick out to me: painting and wood filling. The painting turned out so well using the sprayer. The finish is just beautiful and it took relatively no time at all to complete.
WHERE I GOT LUCKY: The mantle was a difficult build and it feels like a miracle that it ended up so well. The 45 degree mitered edges didn’t line up at all. So, a lot of wood filler was used. Luckily the side of the mantle that looks the roughest is on the side that’s hardly ever seen.
Now I’m going to cozy up in front of my fireplace to enjoy all the hard work. The best part is you can too!
Follow along with all the projects @olivegreyavenue.
Find us on social HERE!


