


DIY Window Seat IKEA Besta Hack


Another week has come and gone with 2 kids and man, the time just goes quicker and quicker with kids, age, and, doing things you love! This week is all about the window seat I built in our office. I have been dreaming of a window seat and built-ins for years and now my dreams are a reality. You know what the most empowering thing is about all this? I built these babies all by myself! I know I’m capable and as much as I love doing projects with Steve. There is a different feeling you get when you built something you’re proud of 100% with your own two hands. It’s like ‘I can do this and I can do hard things’.
Advice for DIYing
I’m being a bit introspective this week but something that I’ve learned over the last few years of DIYing and building is that your ability to DIY has nothing to do with how much you know about woodworking or how good you are with a particular tool. It really all comes down to problem-solving. Because eventually something will go wrong, whether it’s a mistake you made or just a crooked wall that’s out of your control. And the quality of your project and to be frank, the completion of the project is dependent on your ability to overcome the things that go wrong and figure it out. I had an experience with someone who wanted to be a DIYer but they got so discouraged when things didn’t go according to plan that they just abandoned ship. DIYing really teaches you so much about going with the flow, over coming obstacles and keeps you learning constantly. I wouldn’t have it any other way.
SUPPLIES:
One Room Challenge-Window Seat
Back to the One Room Challenge. If you remember from the first week of the One Room Challenge when I laid out my plans for this room, it has been morphing into what will be the ultimate sanctuary. While planning for this challenge, the window seat is definetly a centerpiece for me. It will complete the room and make everything feel intentional and connected. I wanted built-in cabinets but realistically, there’s just no space for them. The window in the room is off-center on the wall. I didn’t realize just how off-center until I started measuring. The side of the wall that I wanted to put built-ins is just too narrow. So, I’ve decided to go a different direction than building shelves all the way to the ceiling, for now. I have taken inspiration from a bench seat that Jennifer from Making Pretty Spaces built in her home.
Planning the Window Seat
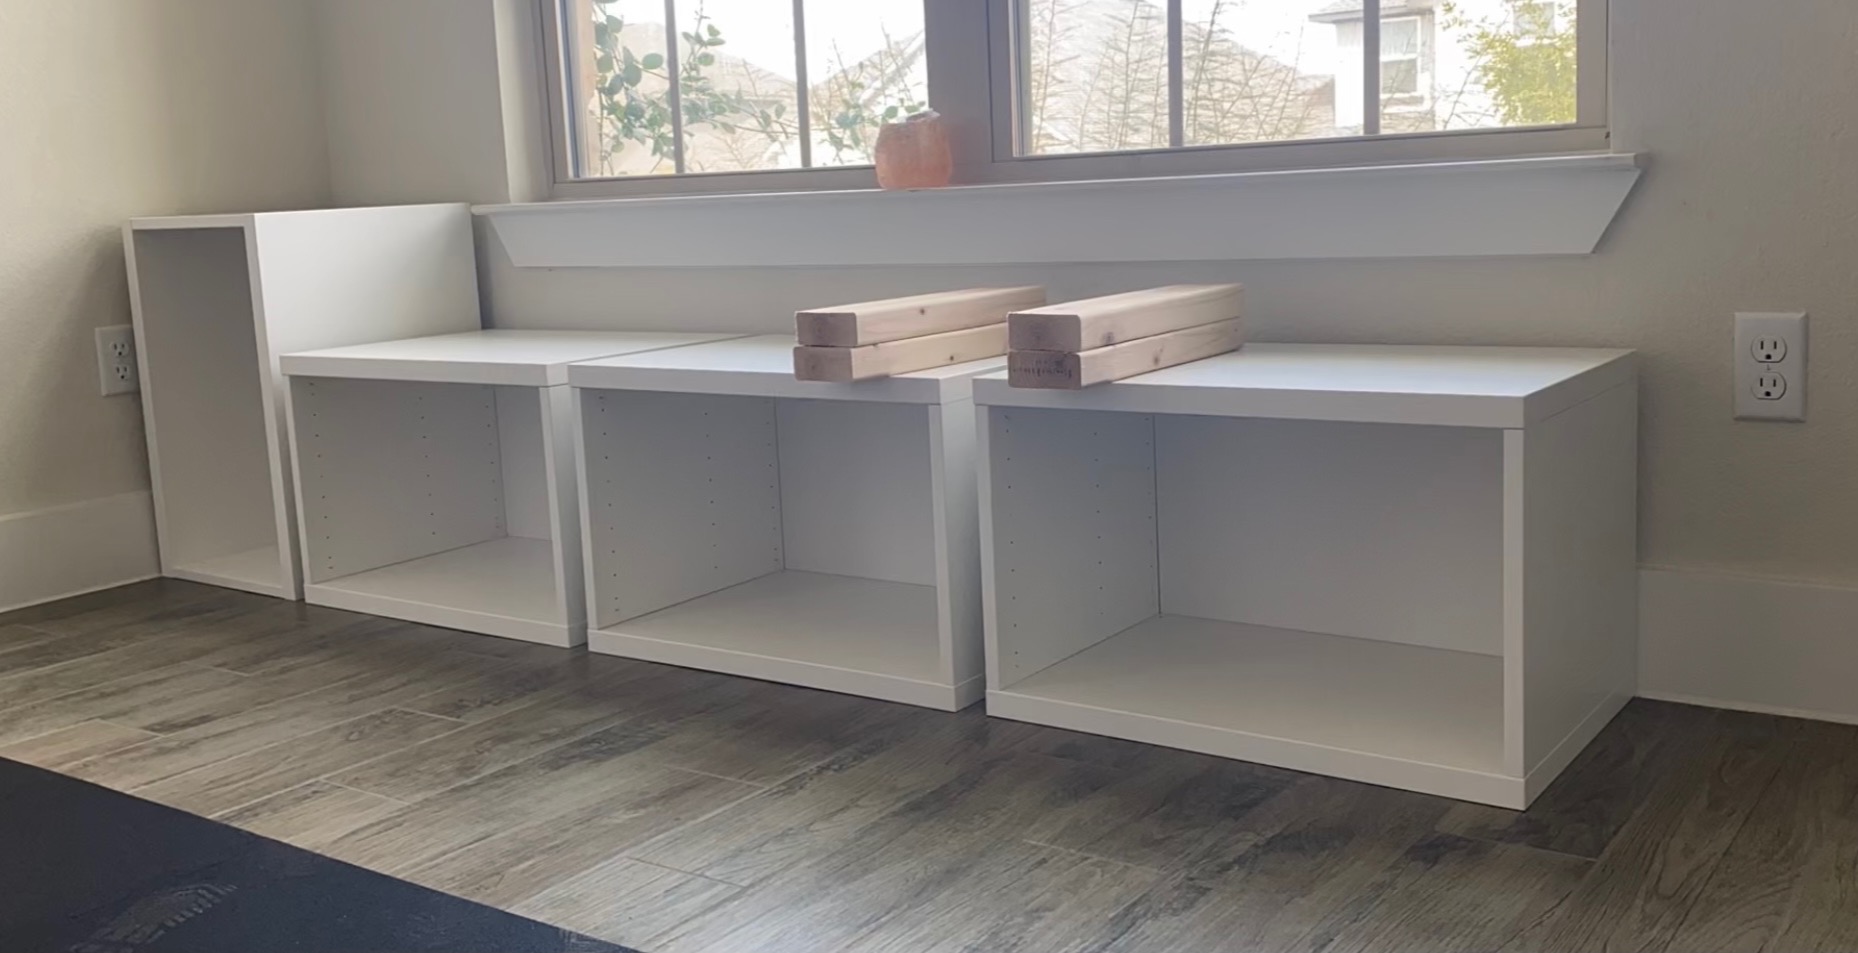
So to build this window seat, there are two options, build from scratch or buy pre-built cabinets and customize them. I went back and forth on this but ultimately decided that I would get a better finished project if I didn’t have to worry about building custom doors for the cabinets. I have some IKEA Besta drawers in my home already and there are a ton of different door options so I felt comfortable with buying those to make my window bench. Now the narrow wall on the side of the window seat didn’t fit any traditional cabinet frame. I also wanted to make sure I’d be able to get matching doors. So, I figured out that if I turn the Besta cabinet on it’s side, it’s the perfect size for what I need.
Building the Frame
The frame is simply built out of 2x4s. I wanted mine to have a taller base so I stood the 2x4s on their sides. Between each cabinet there are three 2x4s. So, each cabinet has a base and the 2x4s in between the cabinets also has something to rest on because they are also for support, not just spacing.
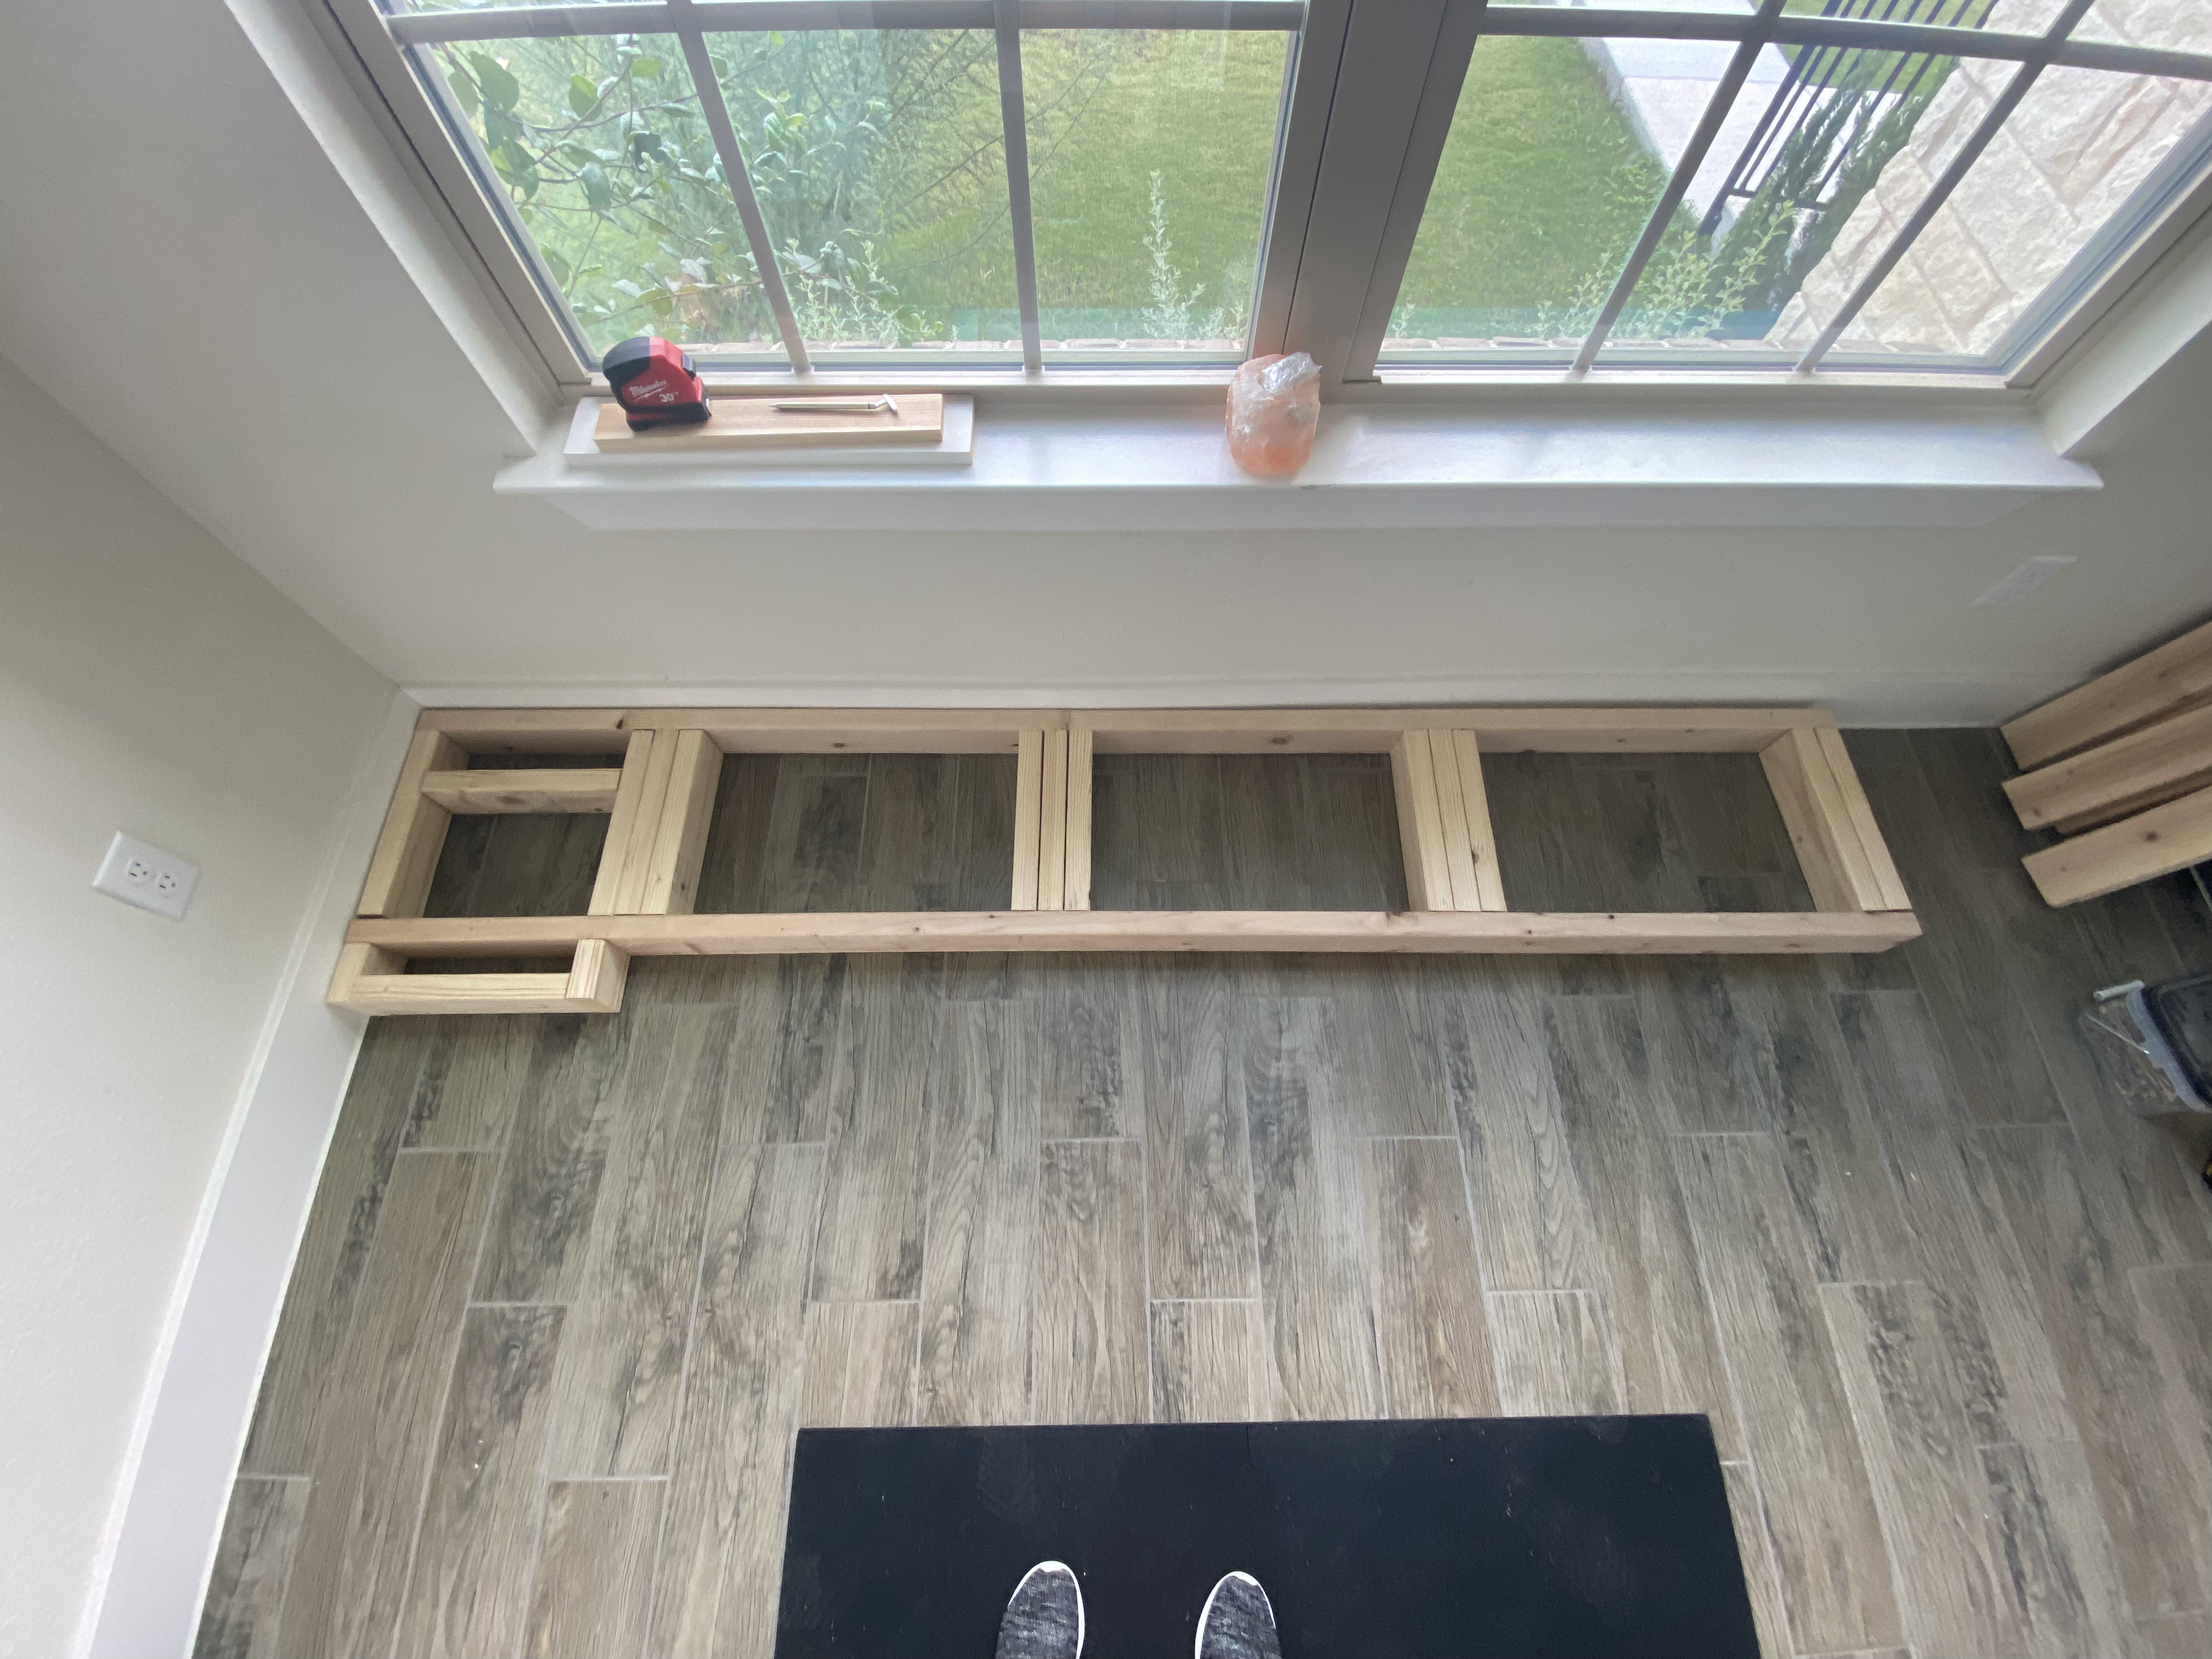
To put all these together, I used 2-1/2″ screws and pre-drilled pilot holes so none of the boards would split.
To finish off the frame, I lined the edges with 1x3s for a couple reasons: 1. so the frame was built up for the plywood to rest on and 2. for the trim to attach to. These boards plus the 3/4″ plywood means that I will be able to use 1×2 trim in between the cabinets and above them. The bottom will have a thicker 1×4 for trim.
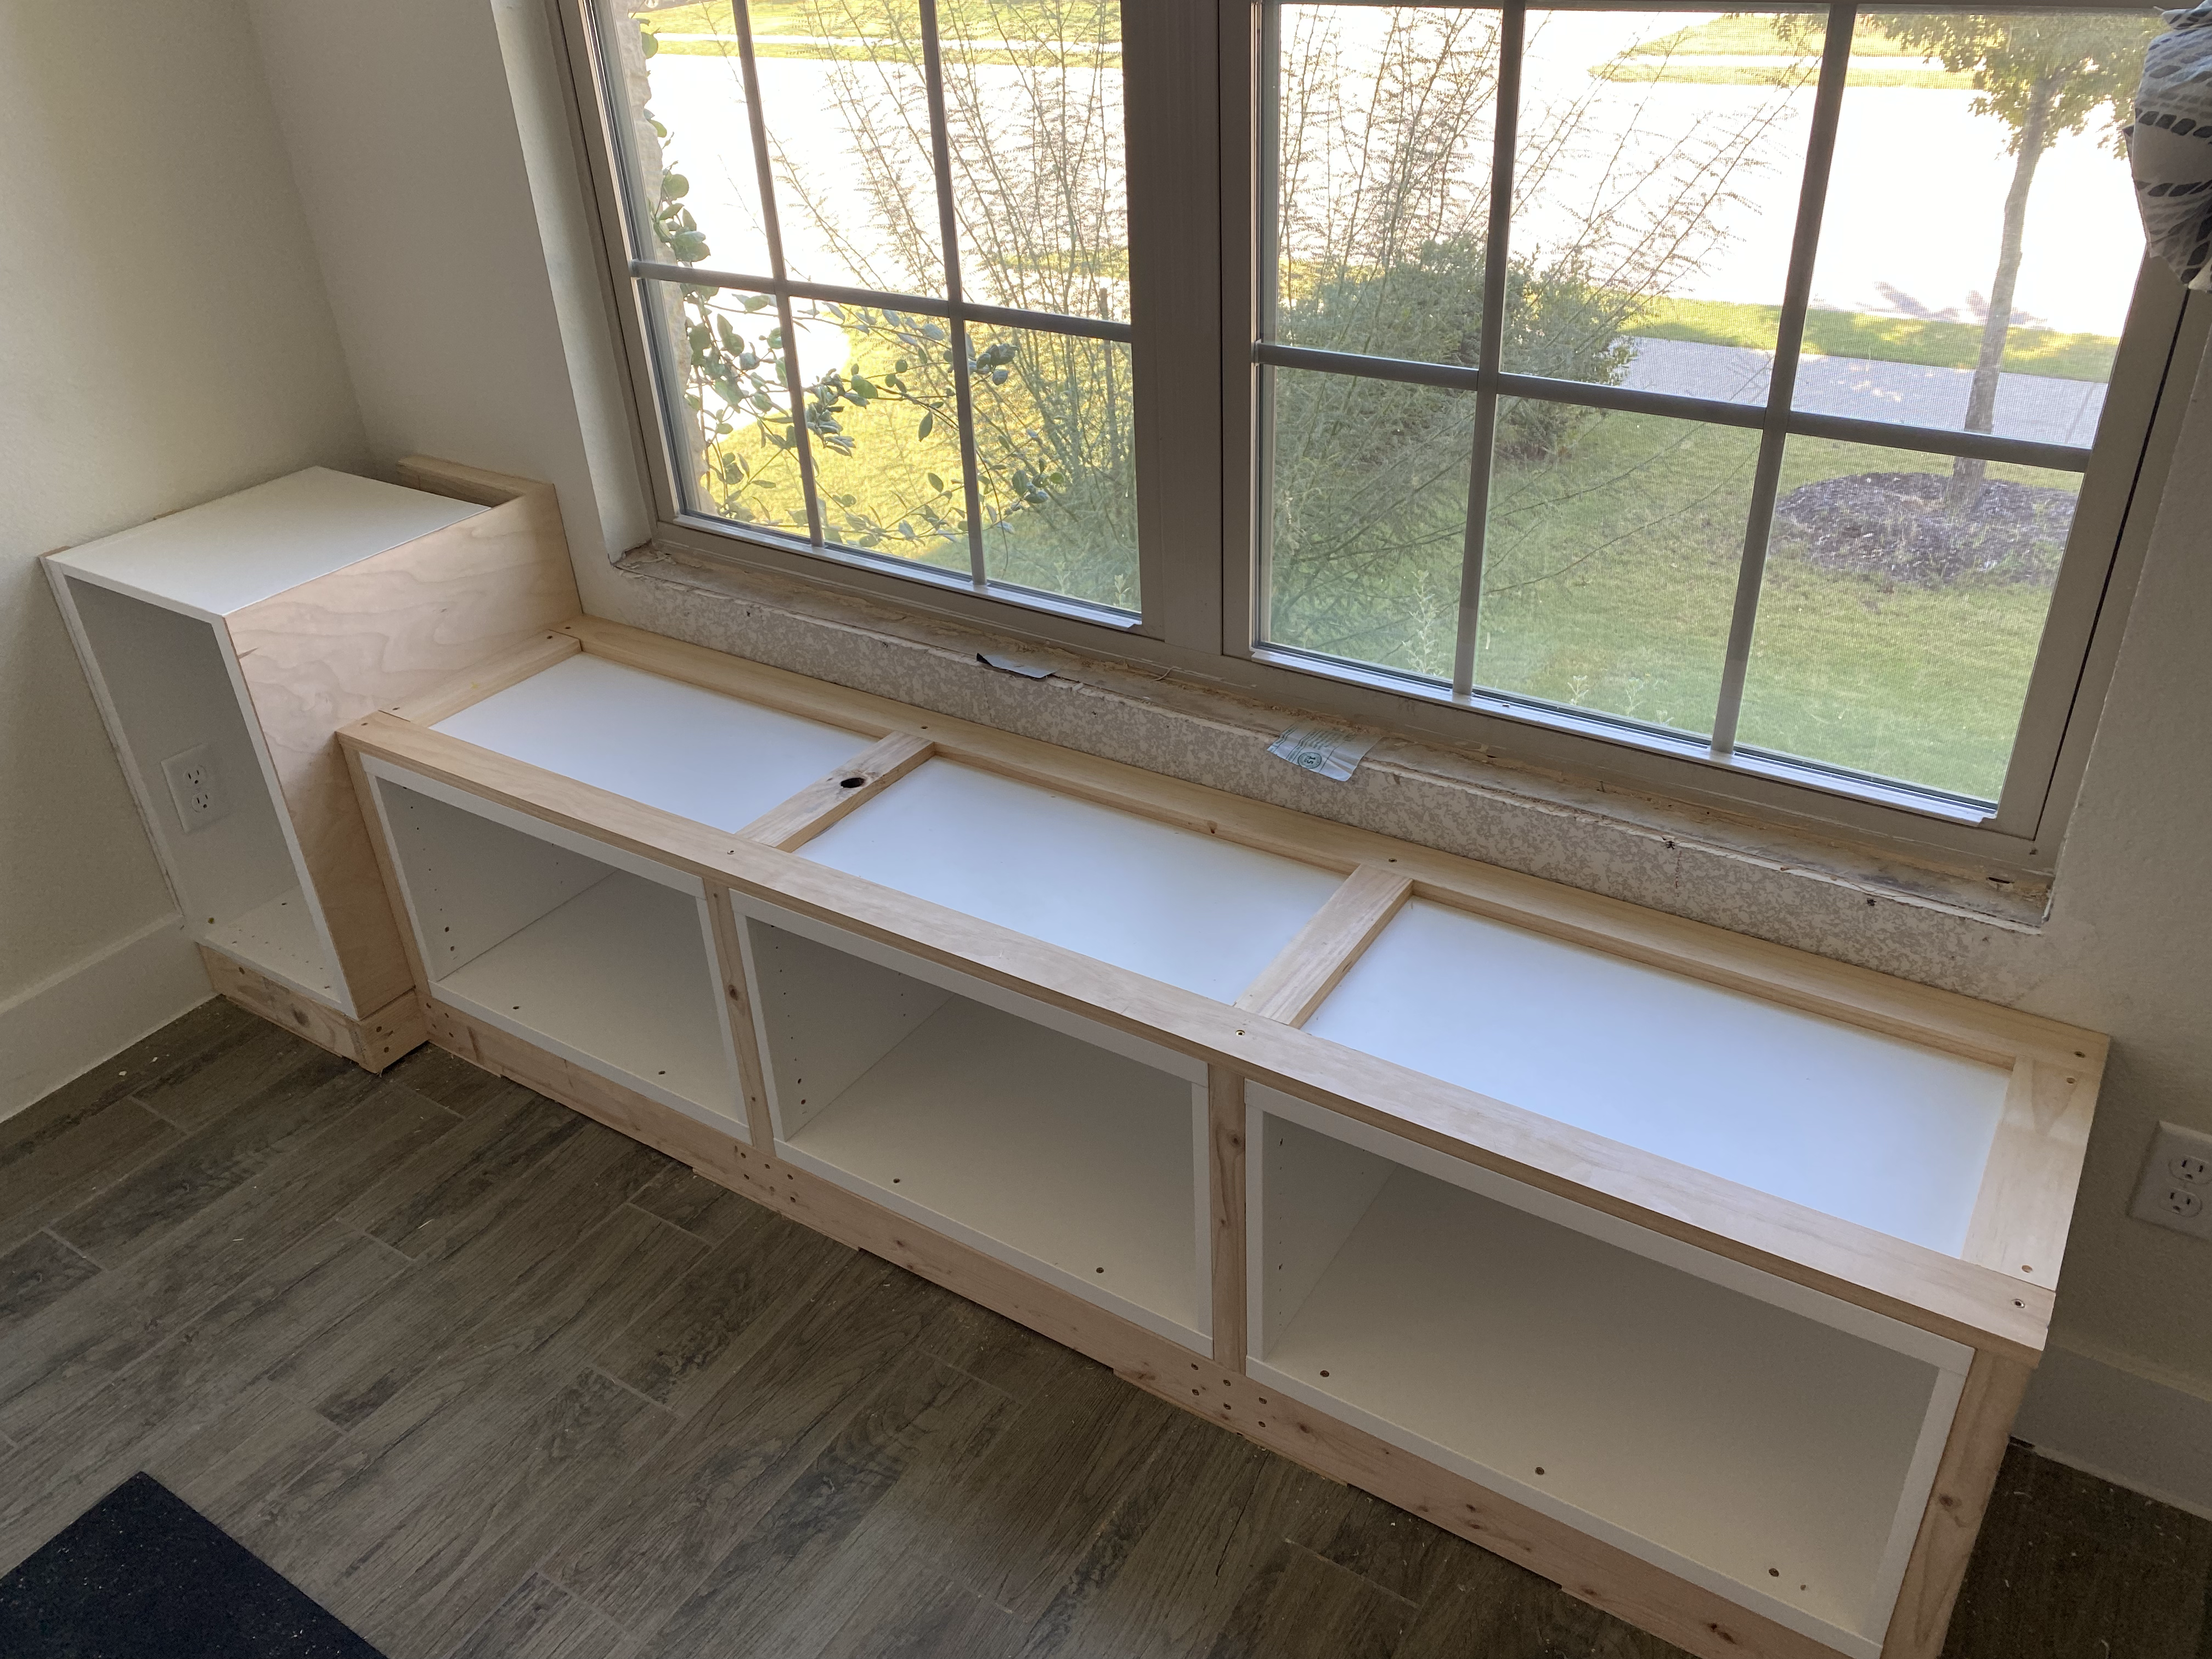
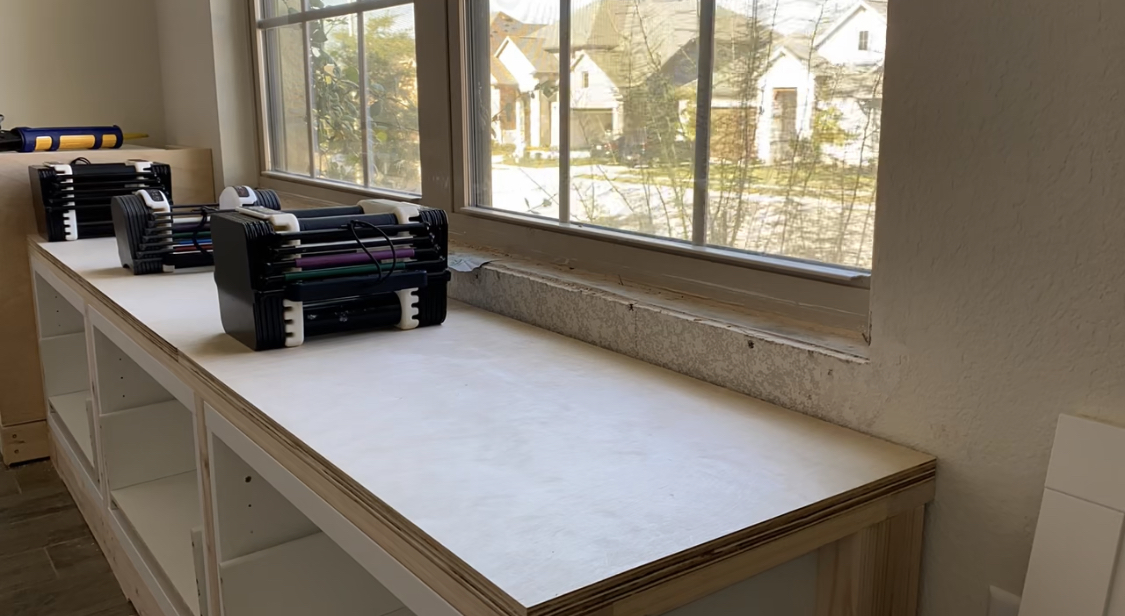
Finally, the 3/4″ plywood is just glued to the 1x4s with construction adhesive and I put some weights on top while it dries to help it dry flat.
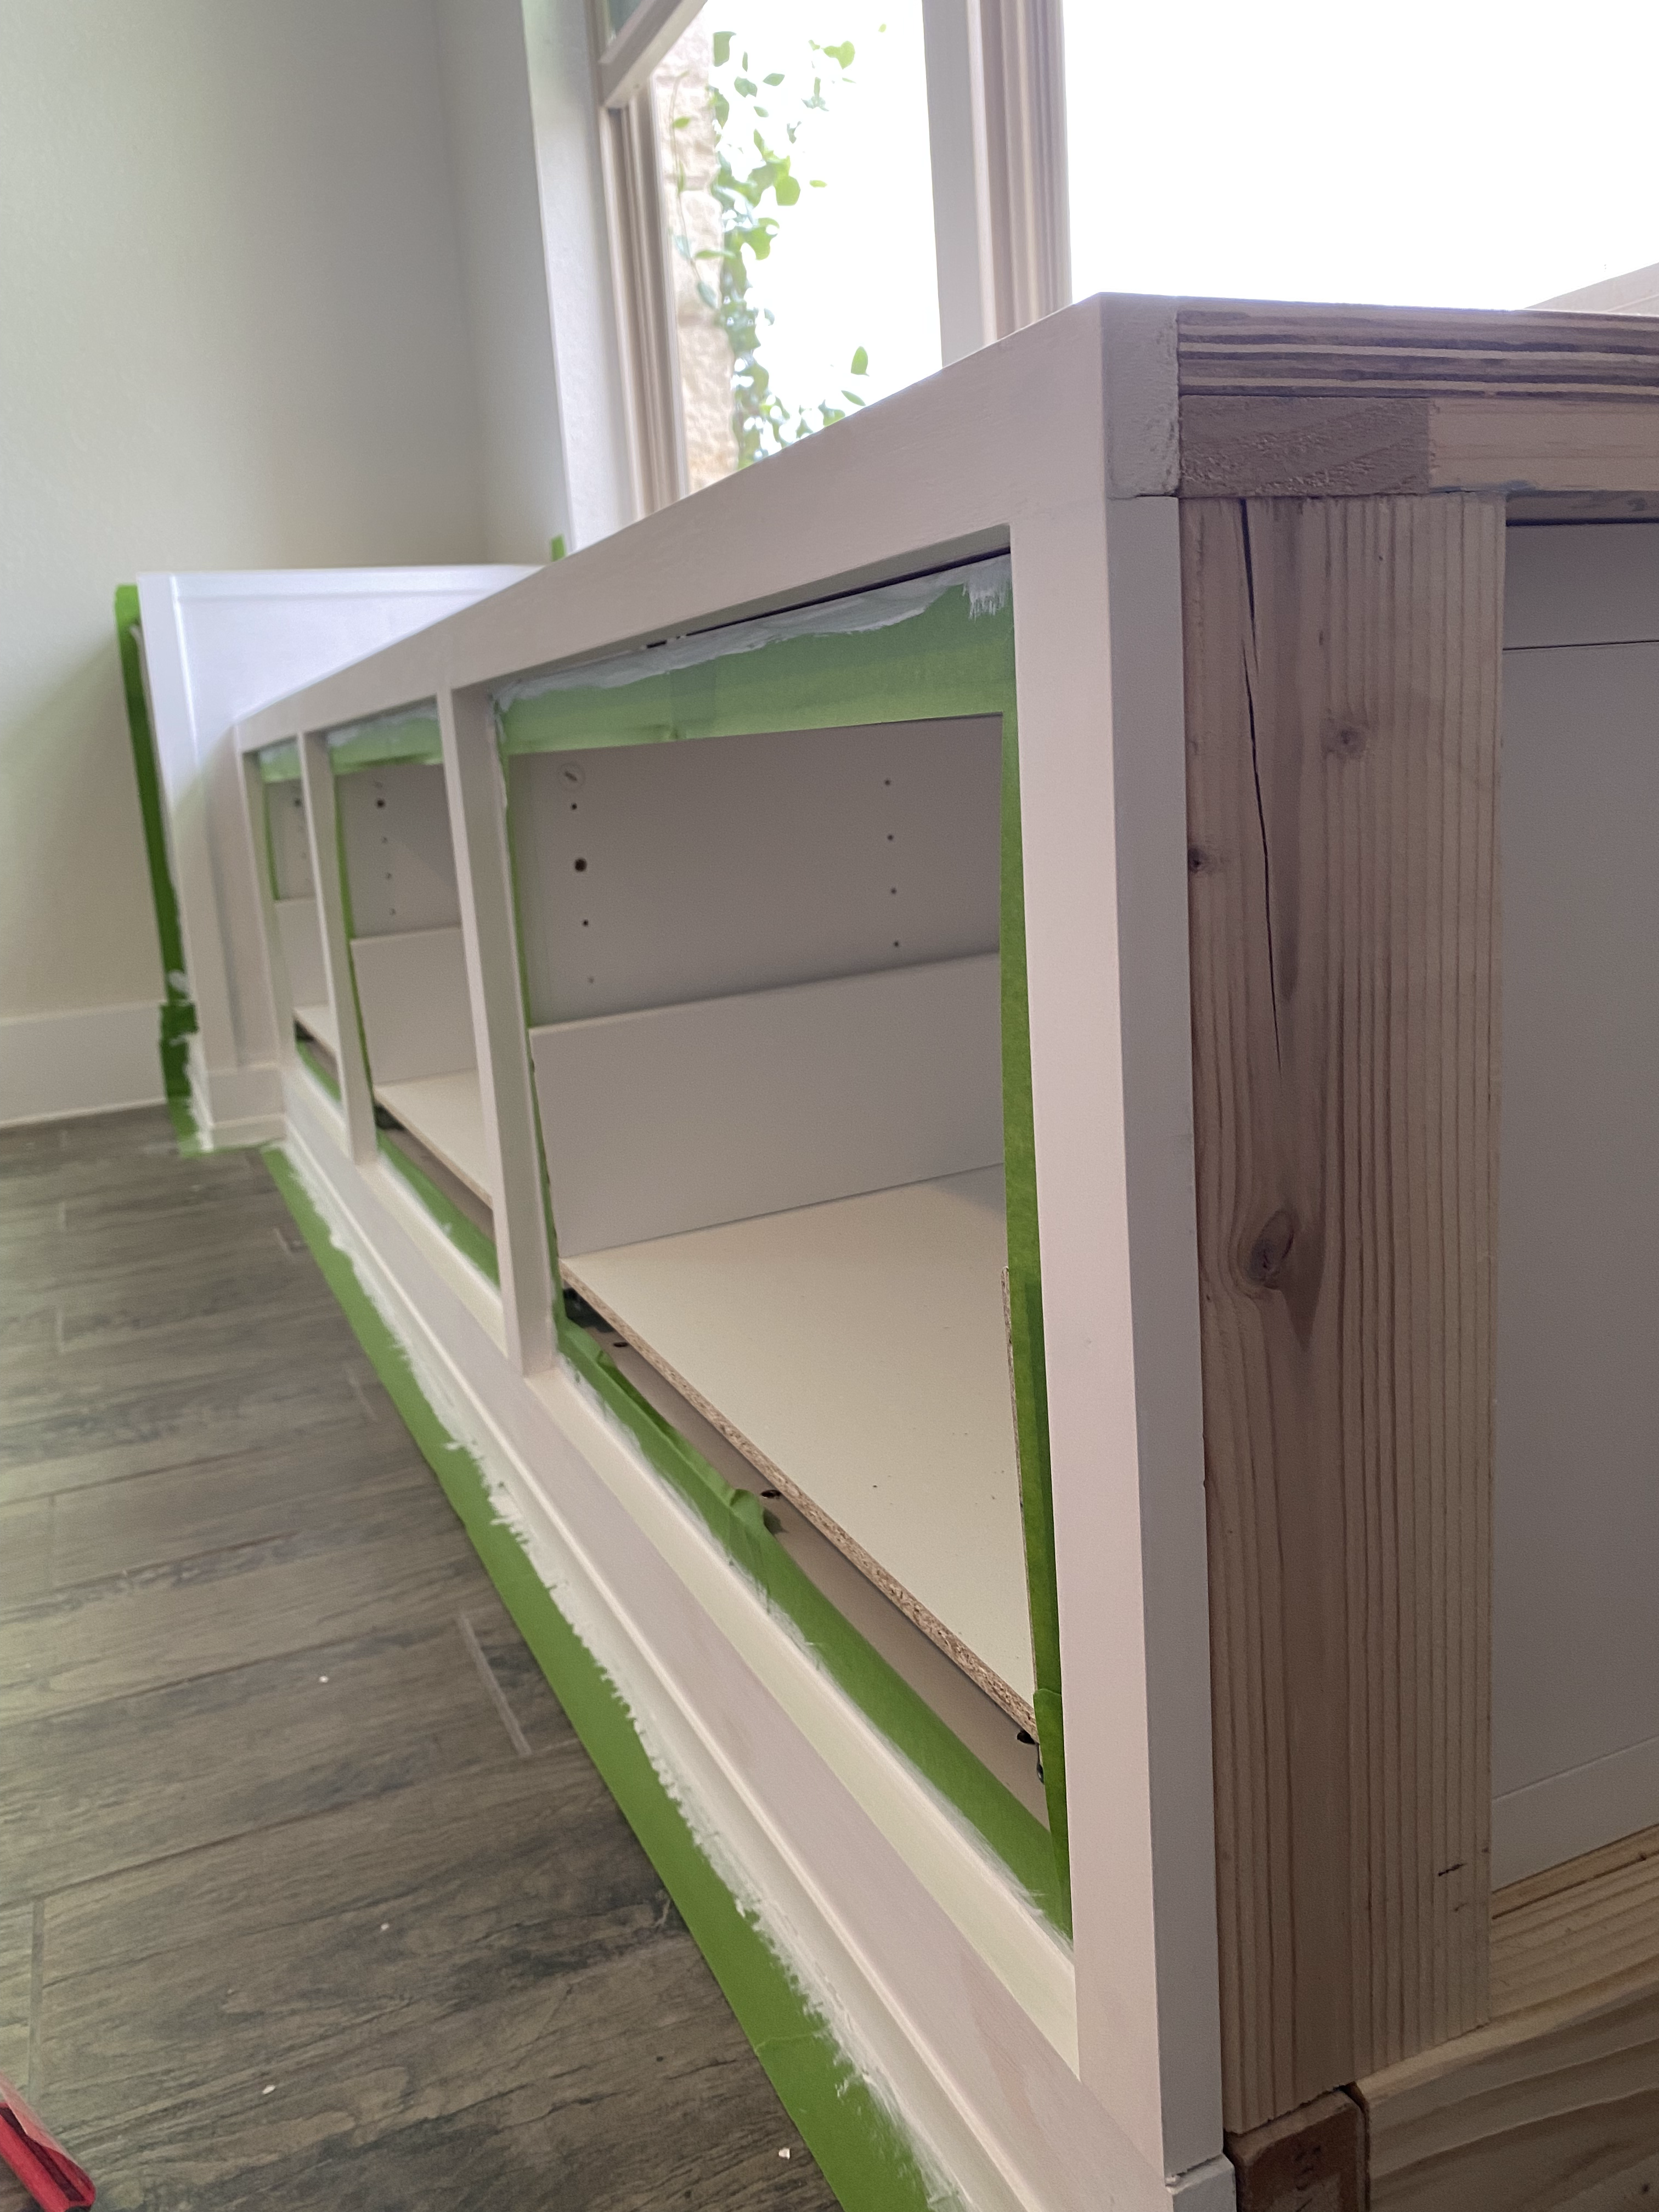
The Trim Work
Everything up until this point should be flush. All of the framing is completely flush with the Besta cabinets because I want the doors to be inset which makes them look more like custom cabinetry. The Besta doors are about 3/4″ thick so using 1×2 trim, is perfect to line up flush with the doors once they’re installed because a 1×2 is actually 3/4″x1-1/2″ so it perfectly covers the edge of the 2×4 that’s exposed and pops out enough for the doors to set into.
So along the bottom of the cabinet, I used 1×4 pre-primed trim and in between and along the top of the cabinets, I used 1×2 pre-primed trim. The small pvc trim along the very bottom, I don’t actually know the size but it’s true size is about an 1/4″x1″.
It starts to take shape really quickly when you add the trim with construction adhesive and brad nails. I added a thin piece of trim at the very bottom which I think takes it up a whole level and makes it look so much more finished and custom.
The last steps before paint is to wood fill (this is my absolute favorite wood filler ever), sand and caulk the seams. Anywhere the trim meets on the faces I wood fill. Then I caulk in corners and along seams. Also this is the best tape you will ever use when painting, prepping, or doing anything and you will always be thankful you have it on hand, THE BEST TAPE.
Painting
I taped off the interior boxes and the floor for paint. Even though I used primed trim, I still primed the whole thing because I wanted a seamless look between the raw plywood on the top and the primed trim on the face. After priming, I lightly sanded everything with 220 grit sandpaper. Then in between each coat of paint, I lightly sanded with the same 220 grit sandpaper. This gives you the absolute best finish possible.
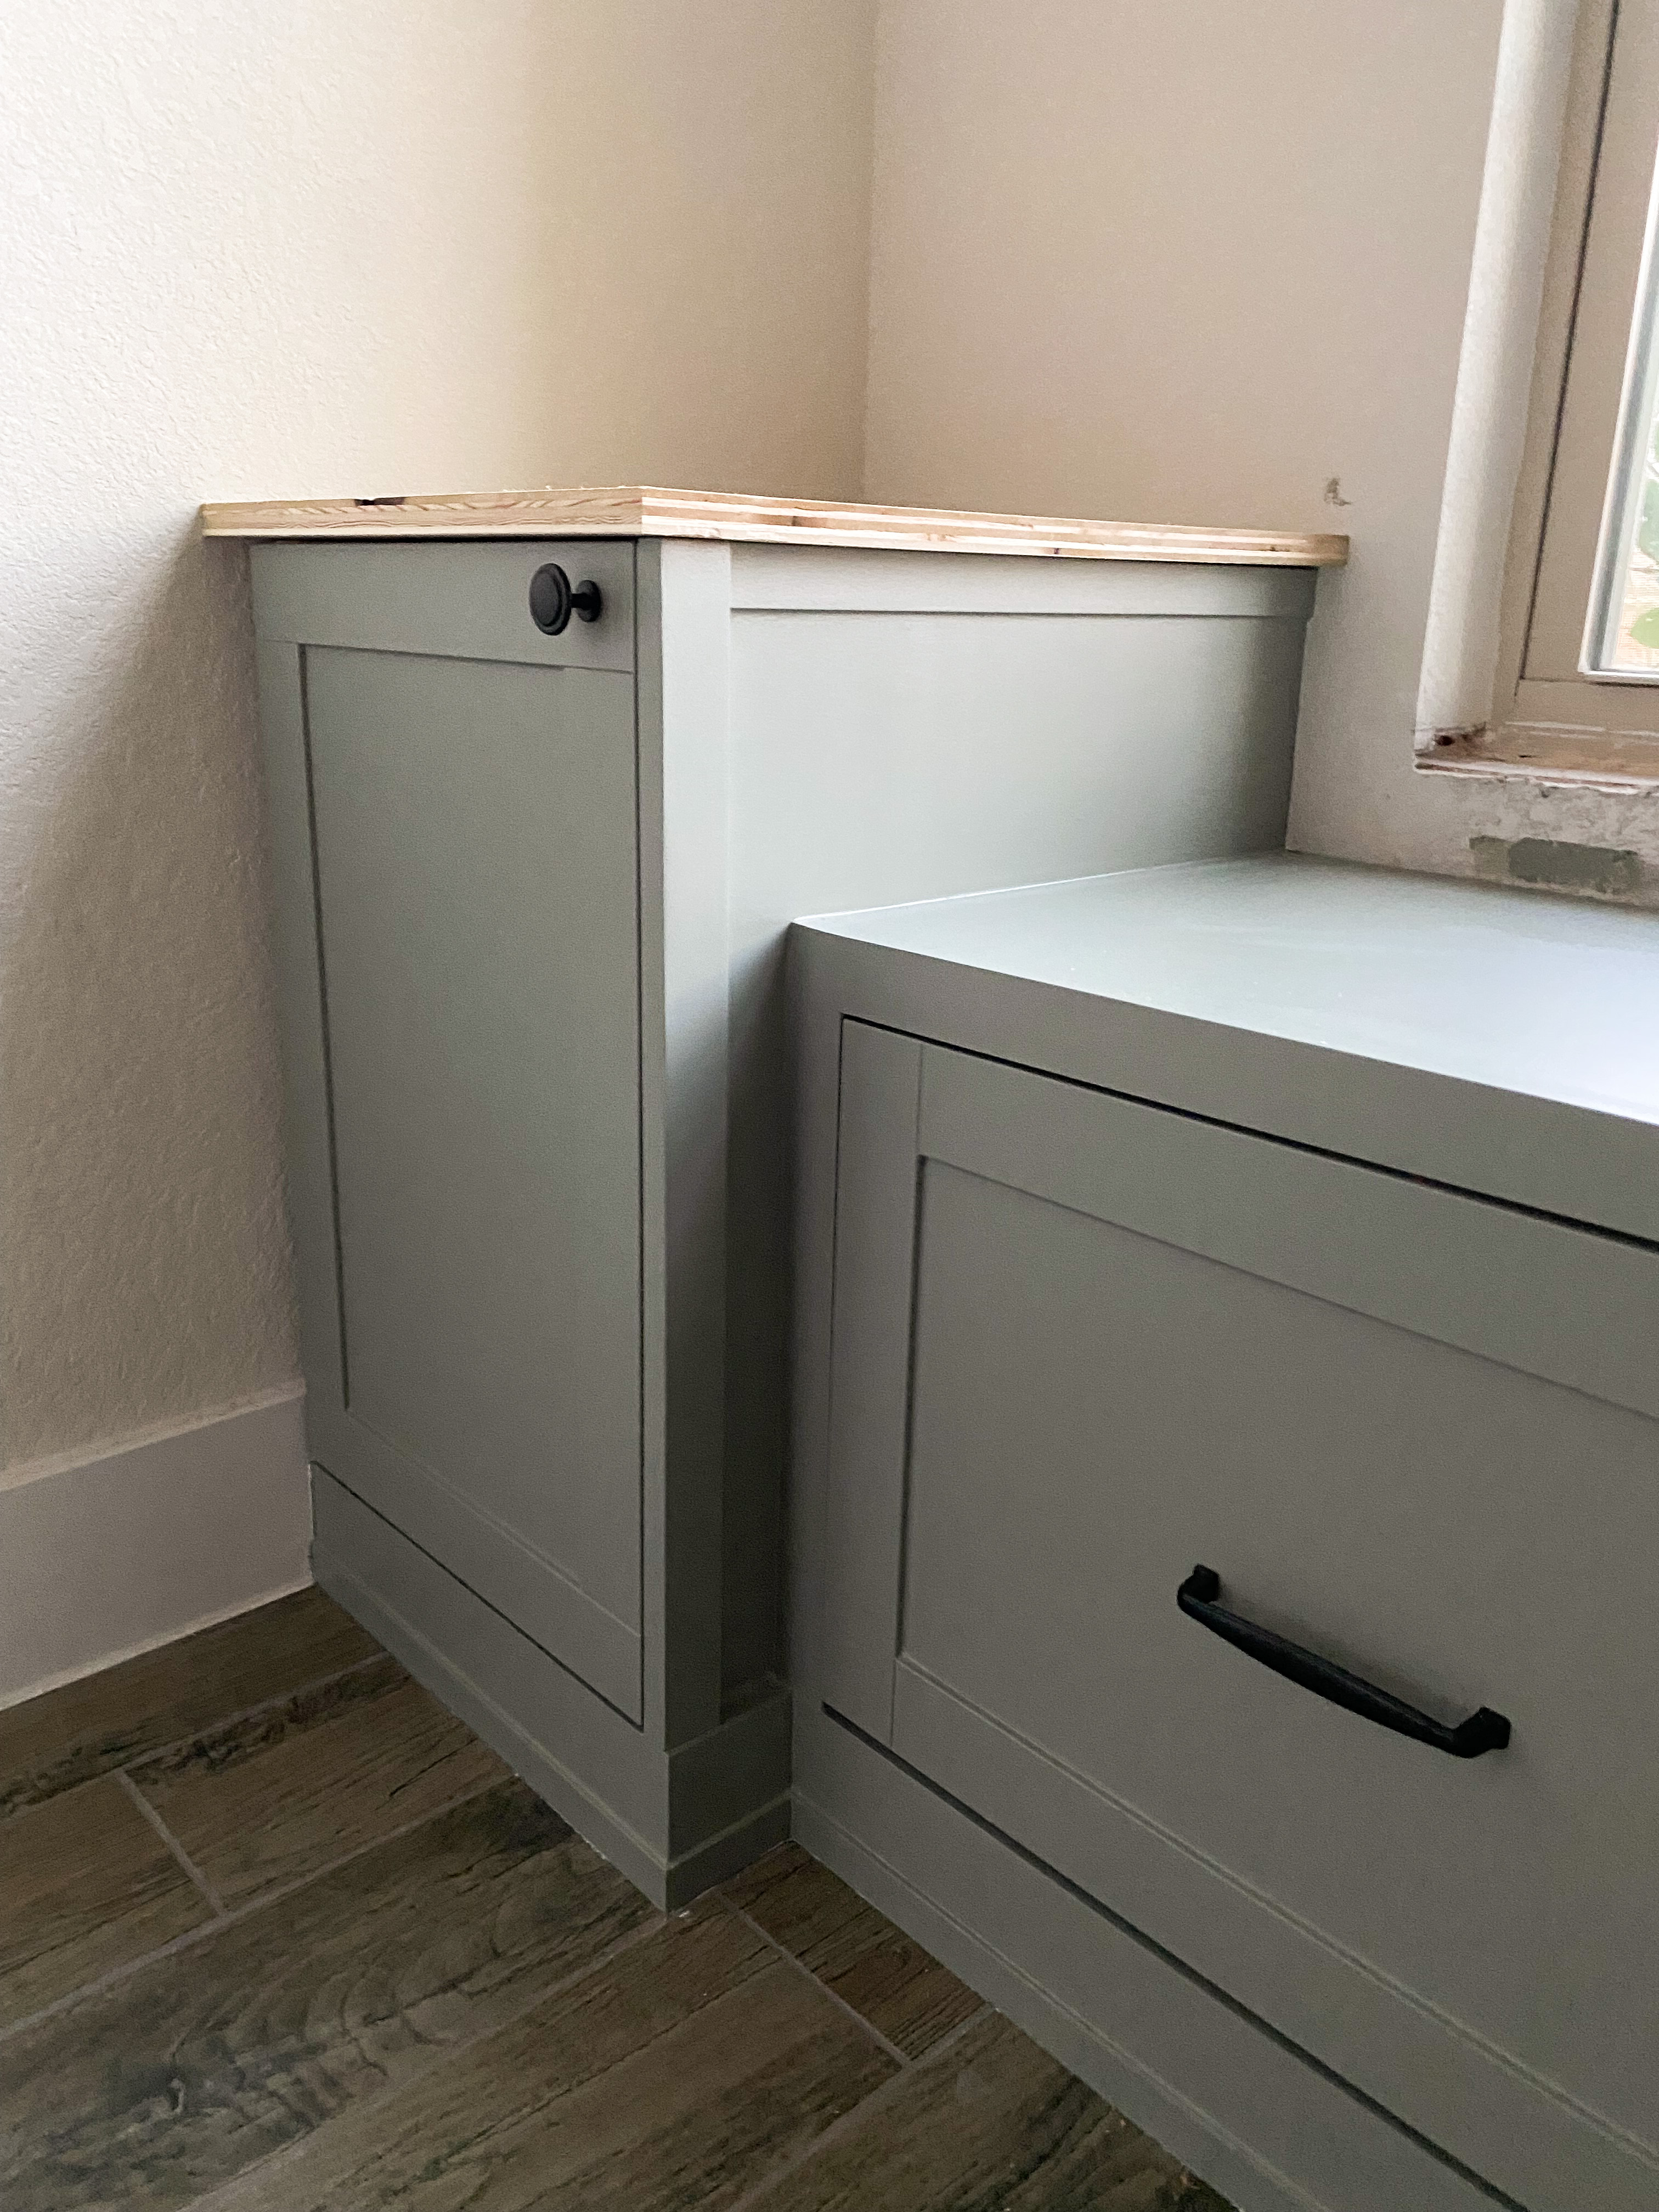
Now are you ready for the finale of this project?? I immediately fell in love with the Sherwin Williams Color of the Year as soon as I saw it. So, I knew that it was the perfect color for the window seat. I didn’t ever get a sample of the color before ordering a gallon from my local Sherwin Williams.
I now present, my IKEA Besta window seat hack in Evergreen Fog.
Feast your eyes:
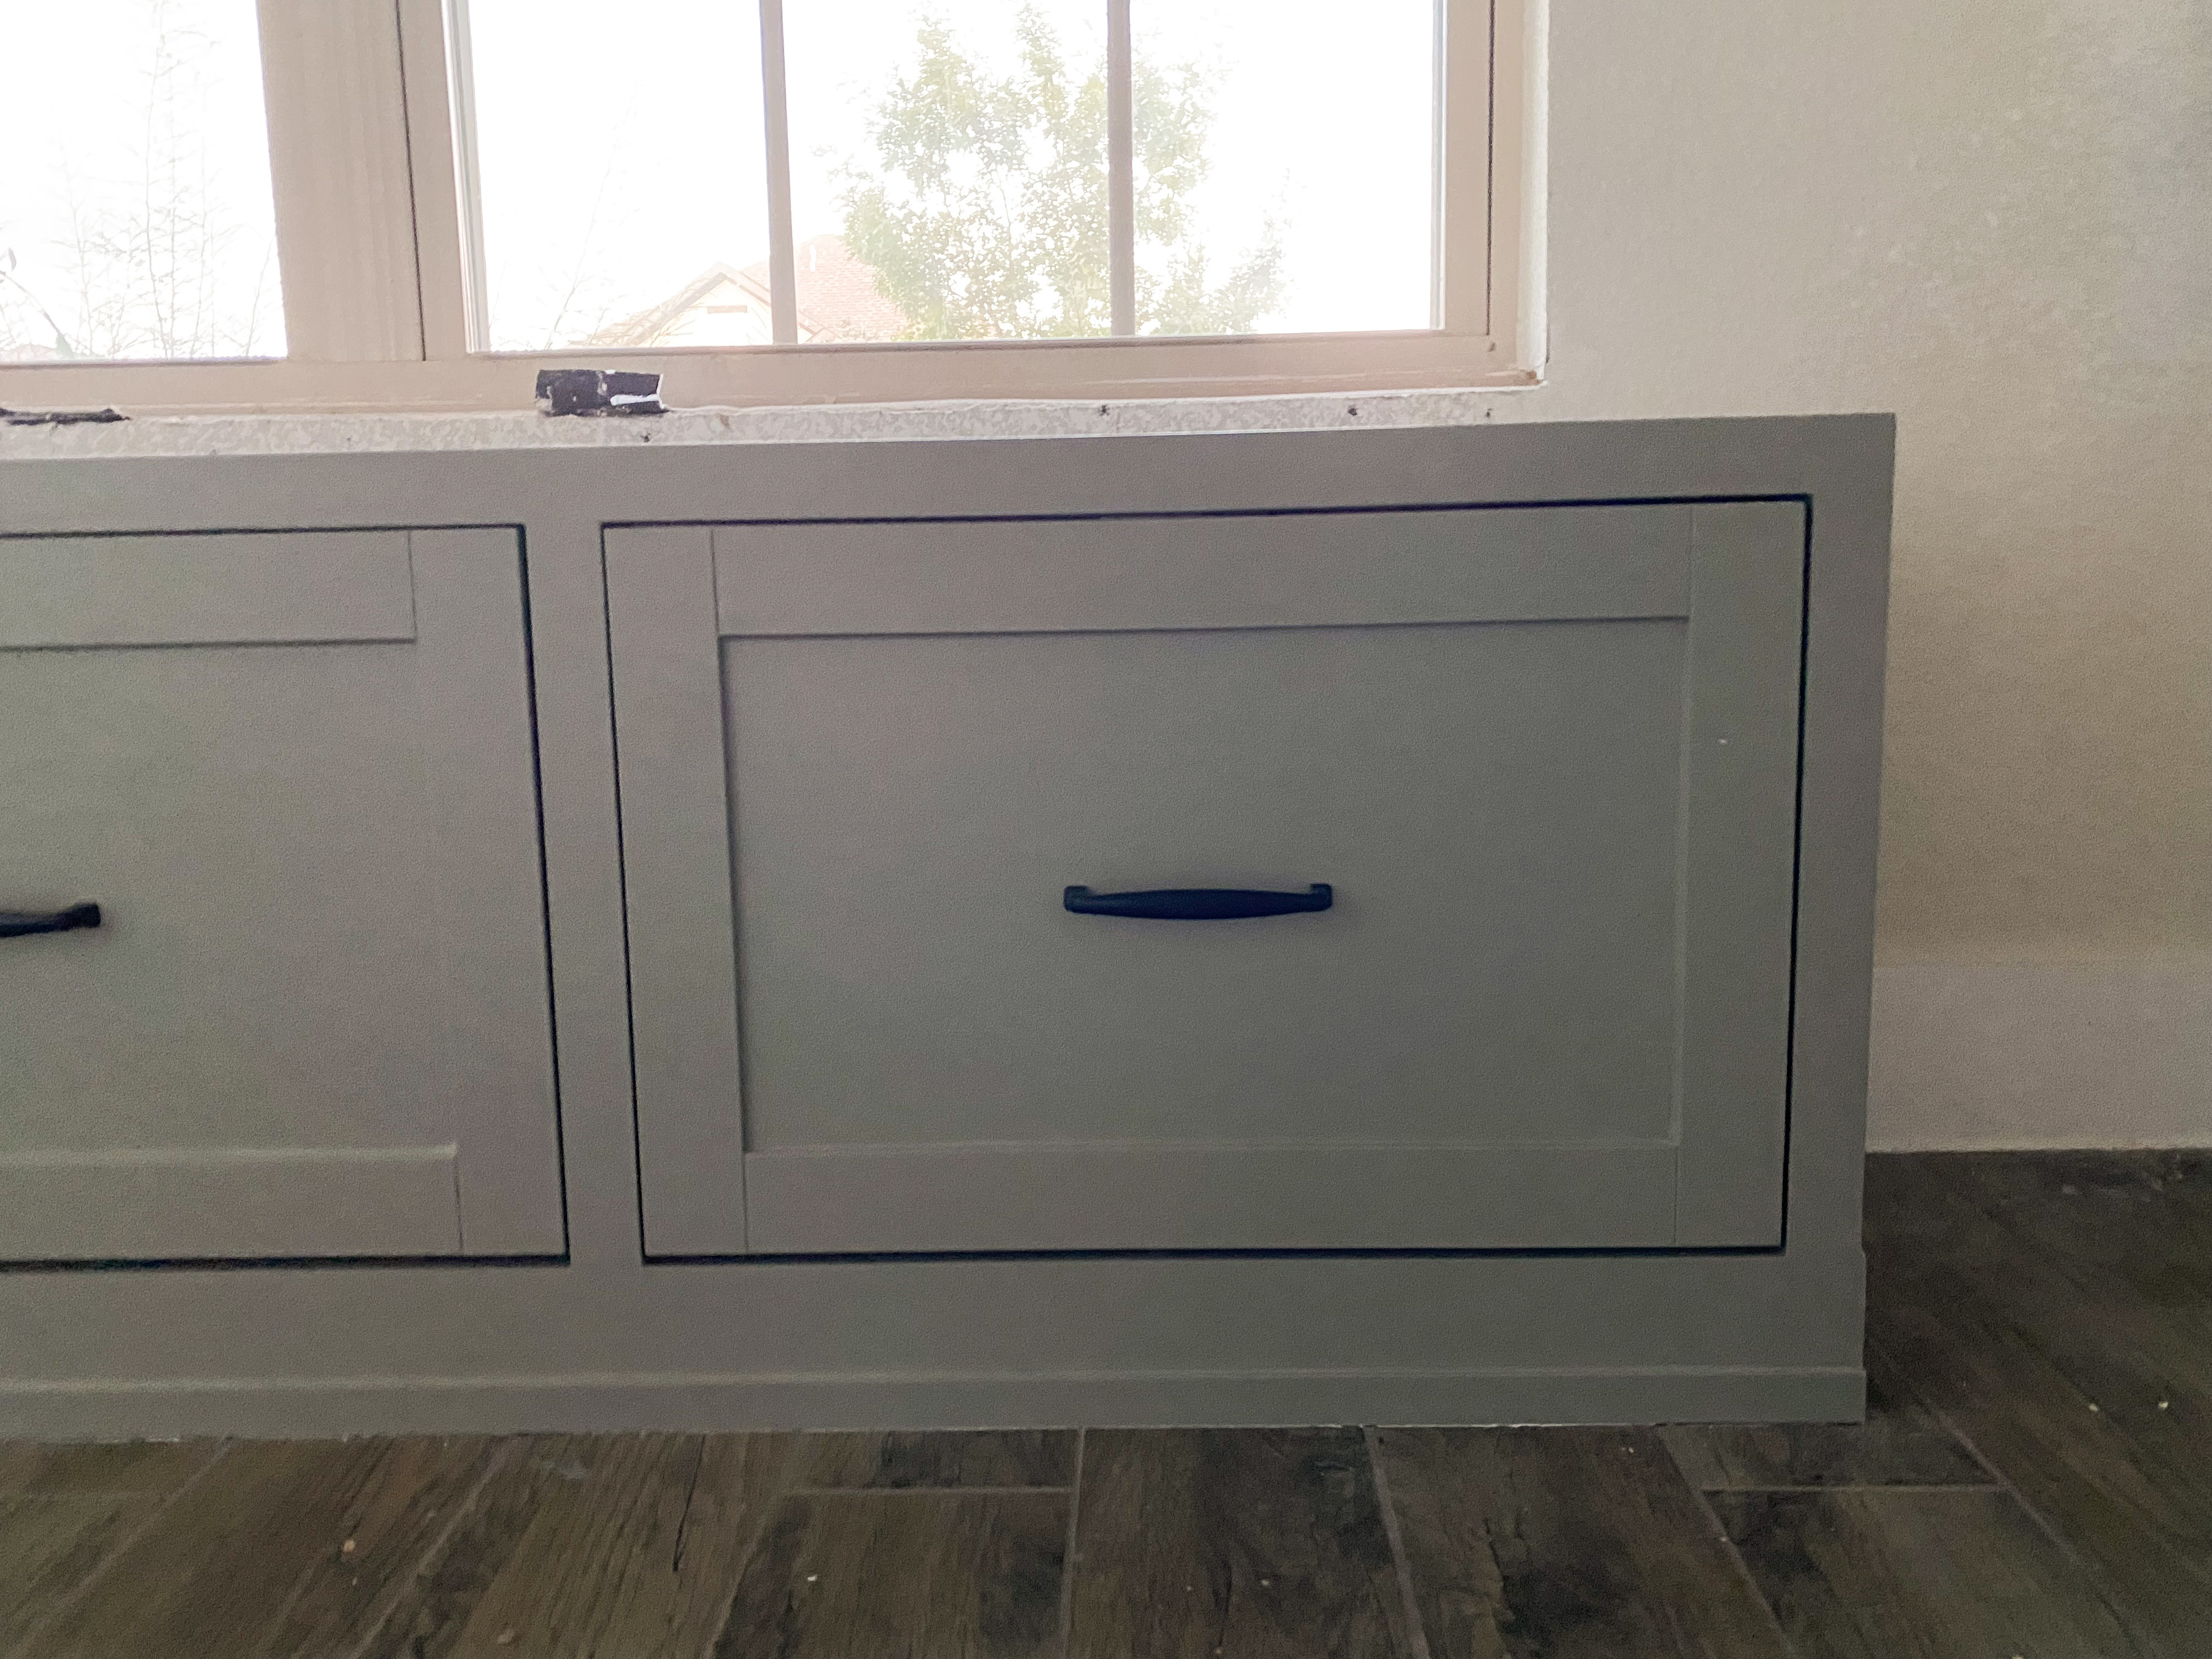
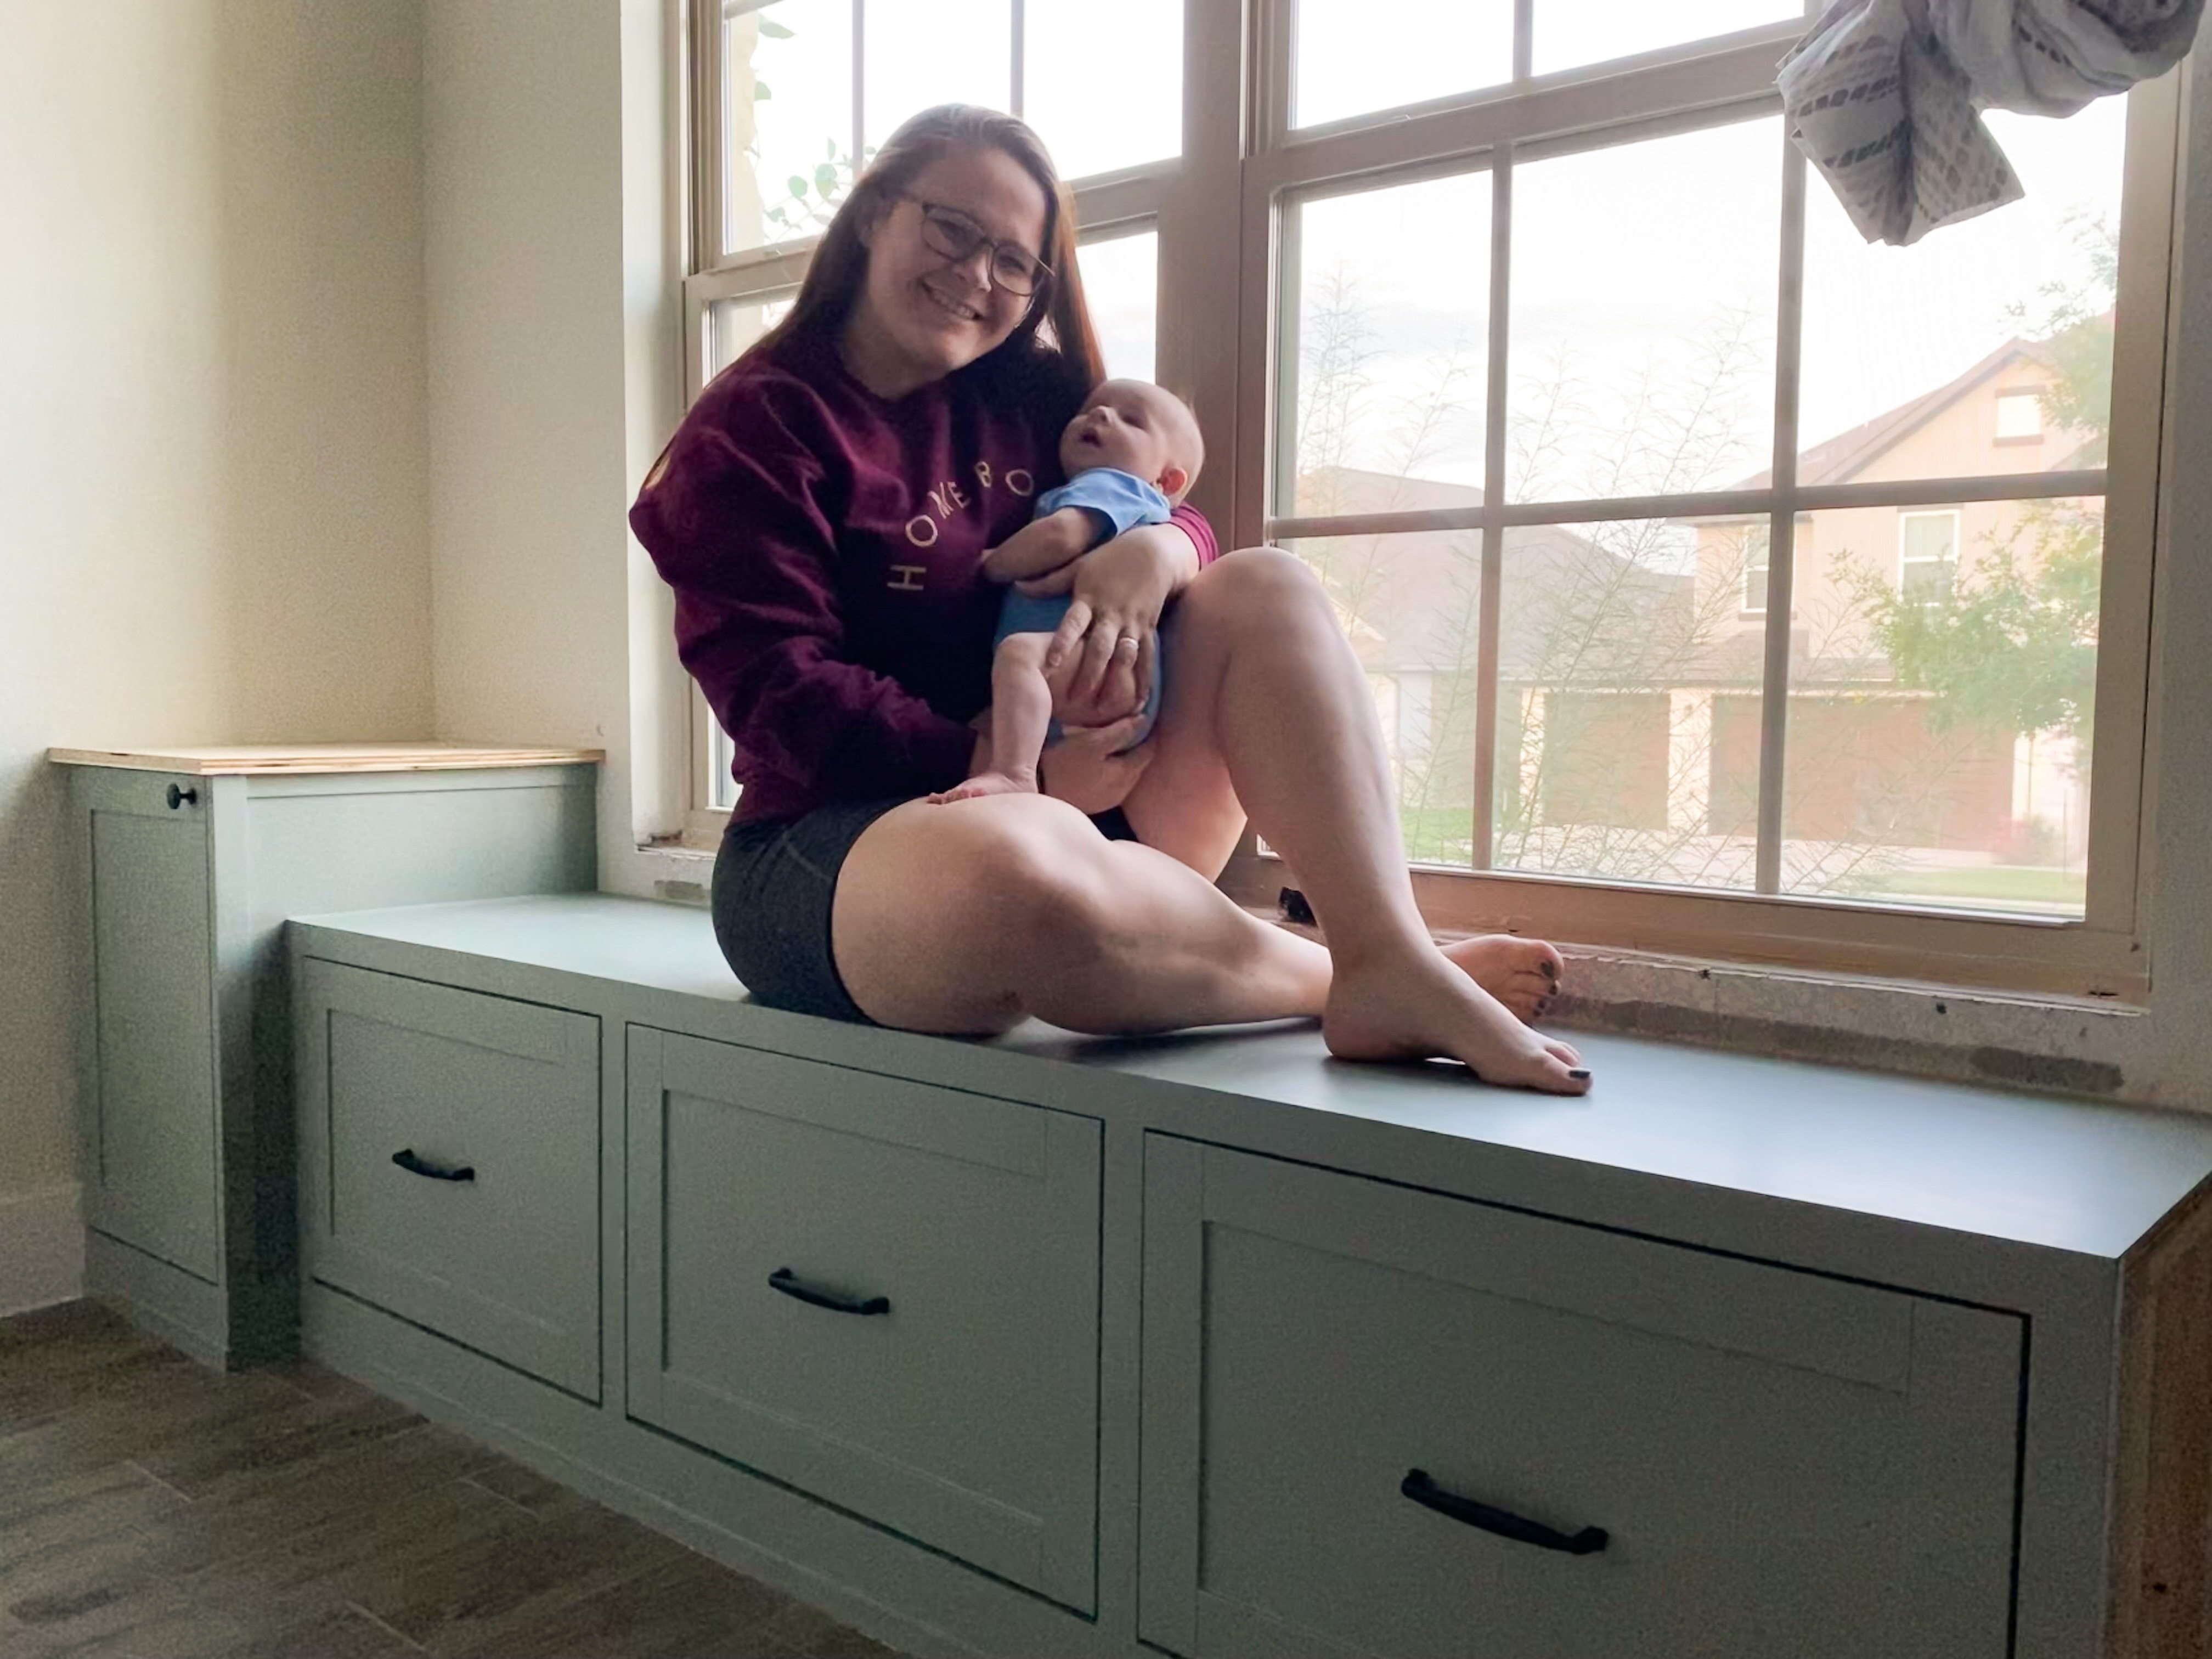
This is definitely going down in my books as one of my all-time favorites. I adore this window seat and it’s just going to get even better with a waterfall desk beside it. Coming next week! make sure to subscribe to our blog and YouTube channel for a more in-depth tutorial of every step I took to build this IKEA Besta Window Seat!
SOURCES:
Find us on social HERE!

Shop our DIY favorites:


This is amazing! Looks so custom and flawless!! I want to do something similar in our mudroom/laundry room. Which Besta boxes did you buy from Ikea? I see wall mounted and another option is tv stand. Thanks!