


Ultimate Guide for DIY with Concrete


So, you want to make something out of concrete but you’ve never worked with it before. Let’s get you a foundation of knowledge on concrete: Yes, concrete or mortar mixing can be intimidating or daunting, but there really isn’t that much to it. Concrete is basically just rocks, dust, and water that when you mix it in the right proportions it solidifies.
A little back story
A couple years ago, we first ventured into concrete work and while there are some tips out there on the basics, most of the specific knowledge is scattered in the winds; or in the minds of tradesmen who have been doing it for years. I had so many questions on exactly how to do it. How much water do I need? How long do I let it dry? Do I really have to reinforce it? How do I reinforce it? What PSI do I need? Do I need a level floor to get started? etc etc etc. The list of questions was long and the more I searched online the more questions that popped up. This lead to an uneasy feeling as we got started on a huge project in the backyard. What’s worse is that I thought “well if we mess up its only set in stone” -_-
Don’t fear the concrete!
Well fear not fellow DIYer, I’m here to set your mind at ease and throw a couple tips your way. Concrete work can really be broken down into 5 main steps; Position, Forms, Mixing, Pouring, Finishing. If you are more of a monkey see monkey do kinda learner like I am then you might need to either read this and then just get your hands dirty (but not with concrete thats actually bad for you) or check out some youtube videos on each of these main steps. Since you’re already here just keep reading anyways. The steps are basically the same from big projects like 3’x3′ pavers or a 1″x18″x34″ concrete countertop like this one. You just have to adjust for size and add more support to something larger.
Caution: Wet concrete on skin can cause everything from mild redness to third-degree, permanently disfiguring chemical burns. Always take these steps when working with concrete:
- Wear eye protection
- Wear long pants and long sleeves
- Wear tall rubber boots if you have them and plan on wading in.
- Wear rubber gloves
- If your clothes get saturated with wet cement, remove them, thoroughly rinse your skin and change into clean clothes.
Position
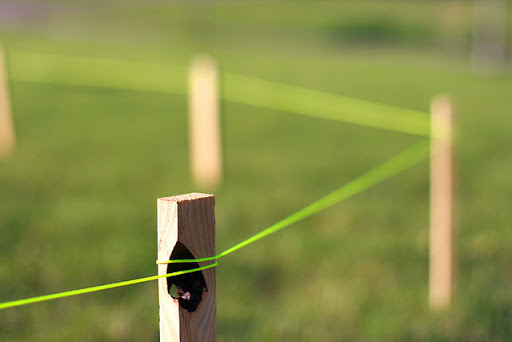
Positioning means to pick out the spot you want your concrete work to be in. Remember its concrete so once you’ve poured it out and it starts drying it’s too late to change your mind. If you’re making a slab or a paver that will be poured in place (that means you pour it and thats its home forever). You’re going to want to make sure you like where its going to be.
positioning ideas
To help with positioning get some stakes or spray paint, or even a hose to mark out the area you think you want the concrete to be in. Trust me, I’m not a very creative or visual person. So, unless you can draw it out for me I can’t just IMAGINE how it will supposedly look. You can take the stakes and mark out the area to make sure its not too close to something else or that its the right size. The size is important because it will determine how much concrete you need buy.
If you go with stakes its a pretty good idea to get a line level and some string. The string can be used to make sure is at the exact height you want your concrete to be sticking out of the ground and set the grade (slope). You don’t want some wild slope or else when you pour the concrete it will pool on one side of the form and flow over. You also NEED some slope to help keep water from pooling and flowing away. The recommended slope is 1/4″ per foot in one directions. So, use the line level to get it perfectly level. Then for every foot that you travel towards where you want water to drain you will need to drive in the stake 1/4″.
Tip for positioning
Let’s say you have an area that is 3’x3′ marked out for your concrete and you want the water to drain to the south. Set up your stakes and level your string around those stakes to where you want the concrete to be. Then because the stakes on the south side are 3′ away from the north you know it need to be driven down 3/4″ (1/4″ + 1/4″ + 1/4″). Do this do both and you have the slope you need.
If your area isn’t the most level don’t worry about it. Remember you can always build up the low side or dig out the high side. To make sure you have an area that allows for at least 2 inches of concrete. Leveling out an entire area to be perfectly flat is A LOT of work. So, don’t do it if you don’t need to and save that strength for carrying bags of concrete. Once you have your heart set on the location, the stakes in place, and the slope set, it’s time to build a form.
Note:
For a larger area slab (like over 6′ long) it is recommended that you build it on solid, well drained soil. This means that if you have sandy soil then just scrape off the sod and topsoil and your done. Now if you have clay like we do in Texas you’ll be better off removing enough to allow 6-8″ of compacted gravel under that big ole slab so reduce cracking and movement.
Forming
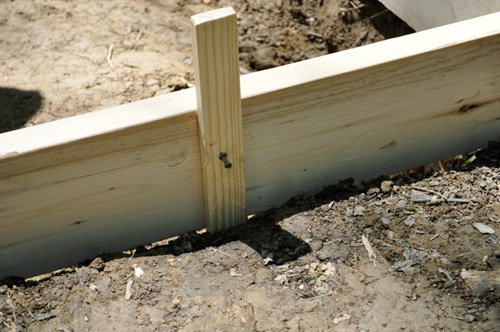
Forming is making the shape of your concrete masterpiece out of boards. You only need to make the walls. Imagine making a cake, the form is your cake pan. (mmmmmm cake). If you went ahead and used stakes and string as mentioned above you know exactly where you need to put the forms. Just take some boards that are the length and height that you need to support your concrete. The boards should just kiss the string on the outside and then be staked in place for support. The larger the area the more support it would need, remember concrete is heavy.
Lets say the slab you are making is 4″ thick or less, this means that the forms (boards) can be 32″ apart. If you decide to make a beast of slab thats thicker at like 6″+ you’re going to need to make sure that you have boards inside that are no more than 24″ apart for added support.
Now you have boards in place but need to make sure they are supported. Attach the boards to the stakes you have. Also you should place more stakes along the side of the boards at no more than every 24″. You don’t want the edge of your concrete to have a big outward bow that you cant fix. You can also pack some dirt/soil behind the forms as well for added support.
Questions answered
One of the questions I kept trying to find the answer to was “do I need reinforcing rebar or mesh in this thing?”. The answers were always vague. There wasn’t any concrete answers (ha get it). Doing some more internet sleuthing and collecting various other concrete tutorials and beginners guides. I finally found the answer I came to for this questions was surprisingly almost kinda simple. Check your state and local building codes to see how much rebar, mesh, reinforcement, etc to use. Just reach out online or to the local government in charge of city planning and housing to get the information. This is why it was difficult to find an answer, it’s because it varies by location. Some cities and locations will have varying building codes and these also update periodically.
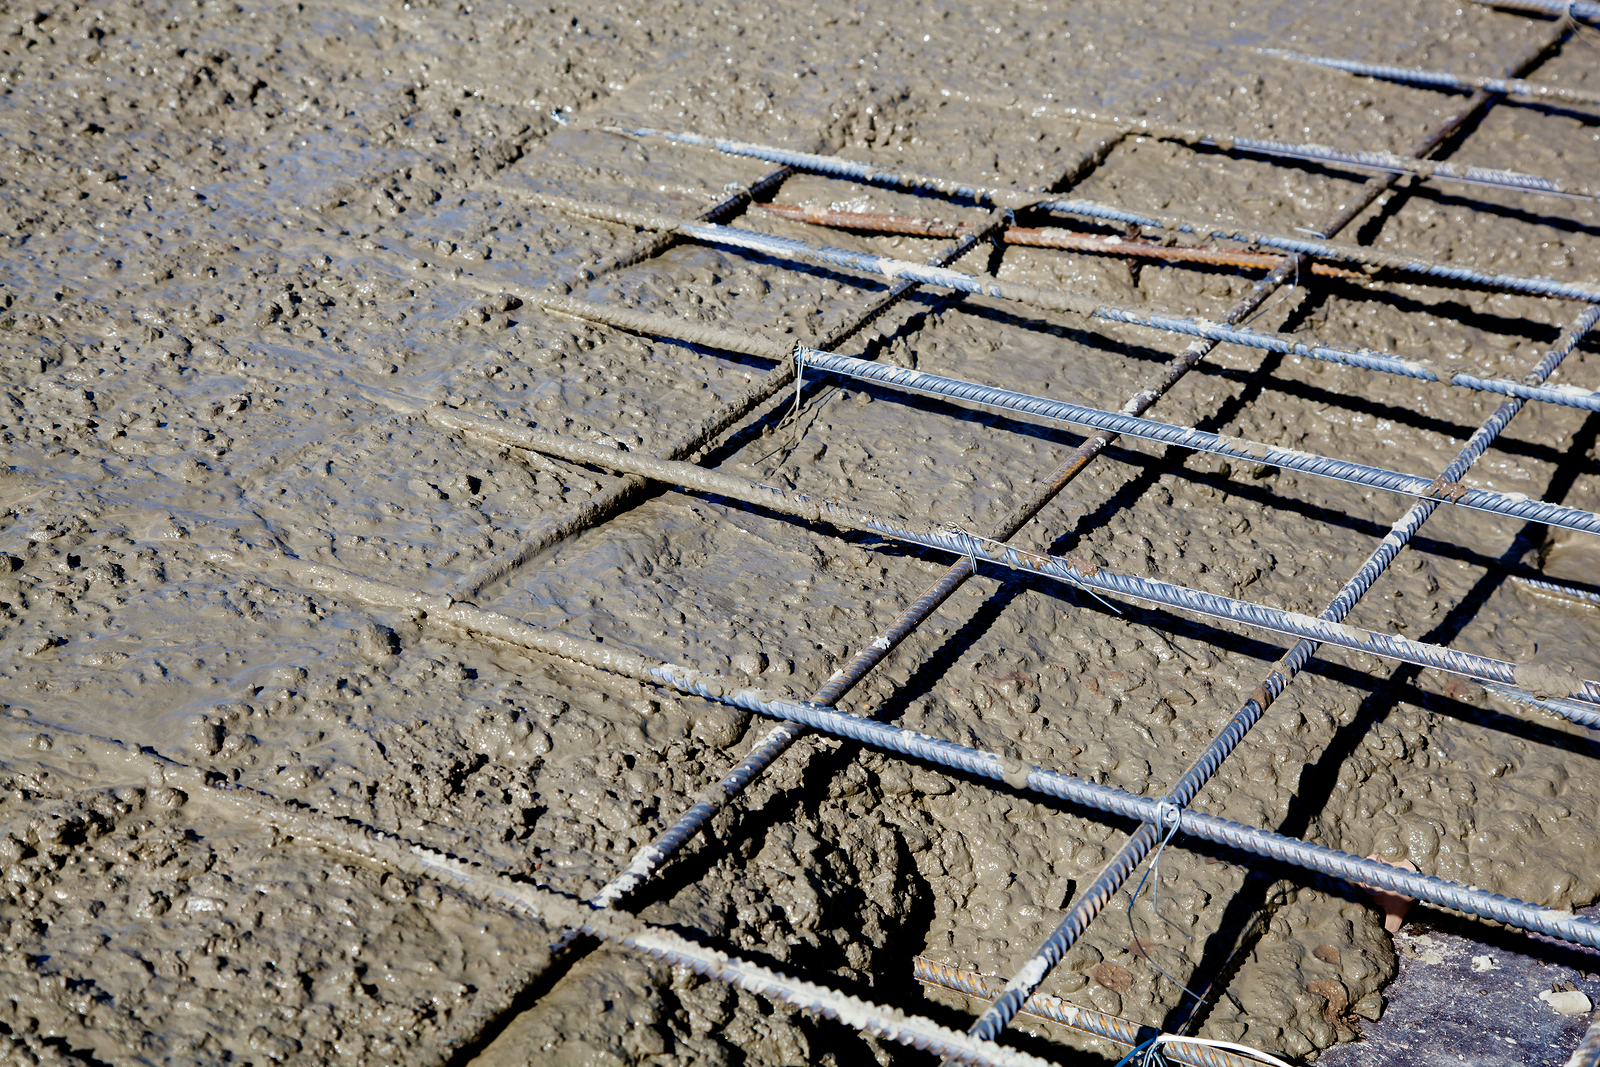
If you’re building something small or out to the side, like 3’x3′ pavers that are 3 inches thick, then its up to you. This isn’t usually covered under building codes because its not attached to your home. In these cases I say do what feels right. If you would feel better to use some mesh, rebar, or other reinforcement then I say go for it. When we did it for our outdoor fire pit we didn’t use it for the huge pavers. We did use it for the fire pit itself. We made sure to prep the area below it really well and that made us feel ok without using the rebar or mesh. If that little foremen in your head says “should we use some rebar/mesh?” then just ease your mind and do it. It’s better to use it and not need it than need it and not use it. Thats how you end up with cracked concrete that doesn’t last.
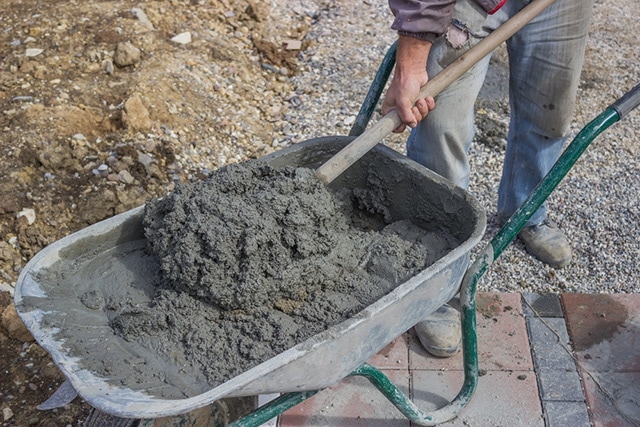
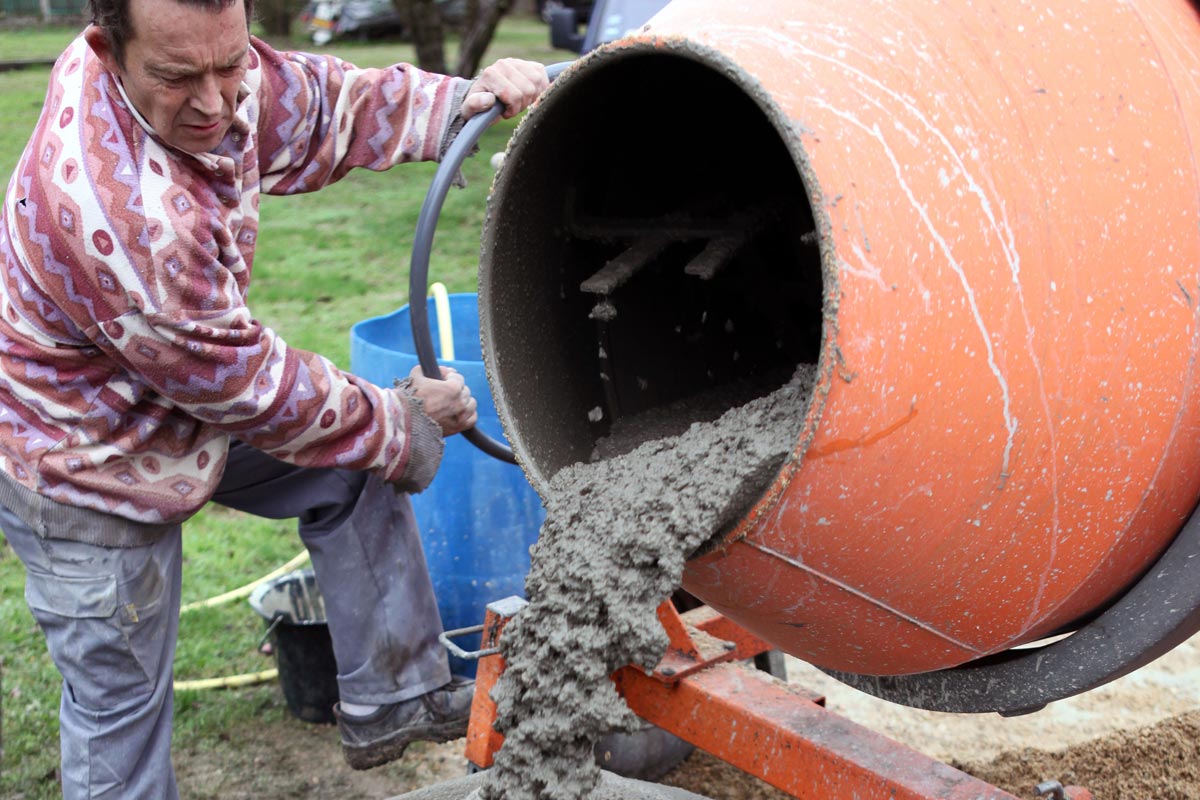
Mixing the concrete

OKAY! So at this point the site is prepped and you’ve built up the forms; now we get to mixing up concrete. This step is pretty easy, its just concrete and water right? Yes and no. So, yes it really is just the mix and water. It also depends a lot on the type of concrete and how you’re using it. This effects on how much water to use. Most of the time the concrete you get will have instructions on them telling you how much water you need per bag for the application. Some applications need to be a little dryer and some a bit wetter. Well, because I don’t know what you plan on making just follow those instructions. (Let me know what you are making below in the comments so I don’t use that as excuse again).
Recommendations
If you are making quite a bit of concrete then I definitely recommend going to Home Depot and renting one of those small mixers. You just dump in the concrete and then the water and it mixes it for you. Then you just tip it over and pour. If you’re just mixing like 3 or 4 bags of concrete then don’t worry about that and just mix it in a wheel barrow. Mix it in small batches with your shovel then pour it out. That’s it, thats mixing….. you mix it. It should have no dry powdering concrete left and have a dough-like consistency almost like peanut butter.
Pouring the concrete
As I just mentioned, you mix it, you pour it. Before you pour it make sure you wet the area you are about to pour in thoroughly. The reason you do this is because if the incoming mix is wet but if you are pouring onto a very dry surface then it will be sucking the moisture out of your concrete. You may think, “but Steve, isn’t that the point? Concrete dries, don’t I want it to happen faster than slower?” and the answer is nah. Concrete does dry but it shouldn’t dry too fast because it will lead to cracking. Most of the time you want to keep the concrete moist for a day or two. This is called wet curing and we’ll get to that.
After the pour
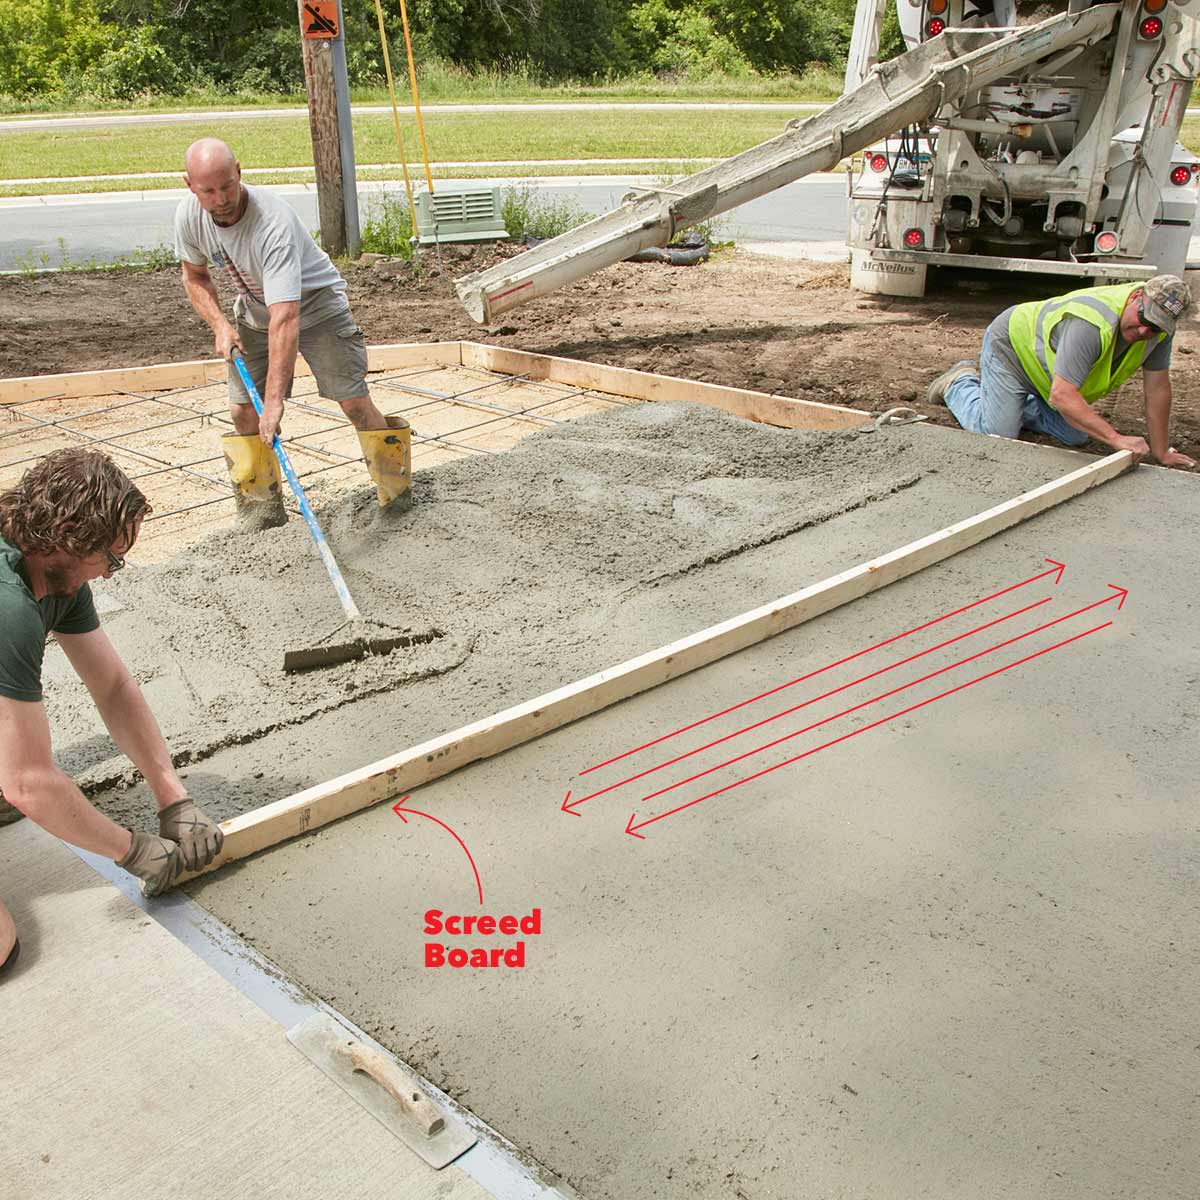
So after wetting the ground you can pour in your concrete. I try to pour in from the center out to try and avoid making huge air pockets. You will have some air trapped in there anyways but why make extra work. Once the concrete reaches the top of the forms you can use a long 2×4 (screed) to scrape across the top of the forms like a saw. This will level the concrete to the top of the forms. If you go past an area and it has a hole just fill it with some more concrete then go over it again. Again you want it to be as close to level with the forms.
Getting pockets out of concrete
Then we try to get the air pockets out. If you’re making a small slab or paver you can use a hammer or a power sander to vibrate the forms. These little vibrations will allow the air bubbles to make their way to the top of the concrete. Air bubbles in the concrete are no bueno. They are like little weak points or time bombs just waiting to deform and crack your concrete once dry. The concrete is now poured and ready for finishing.
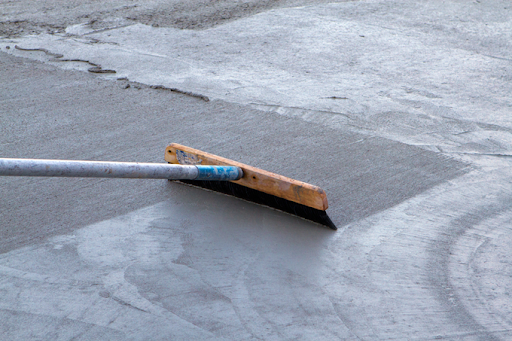
Finishing
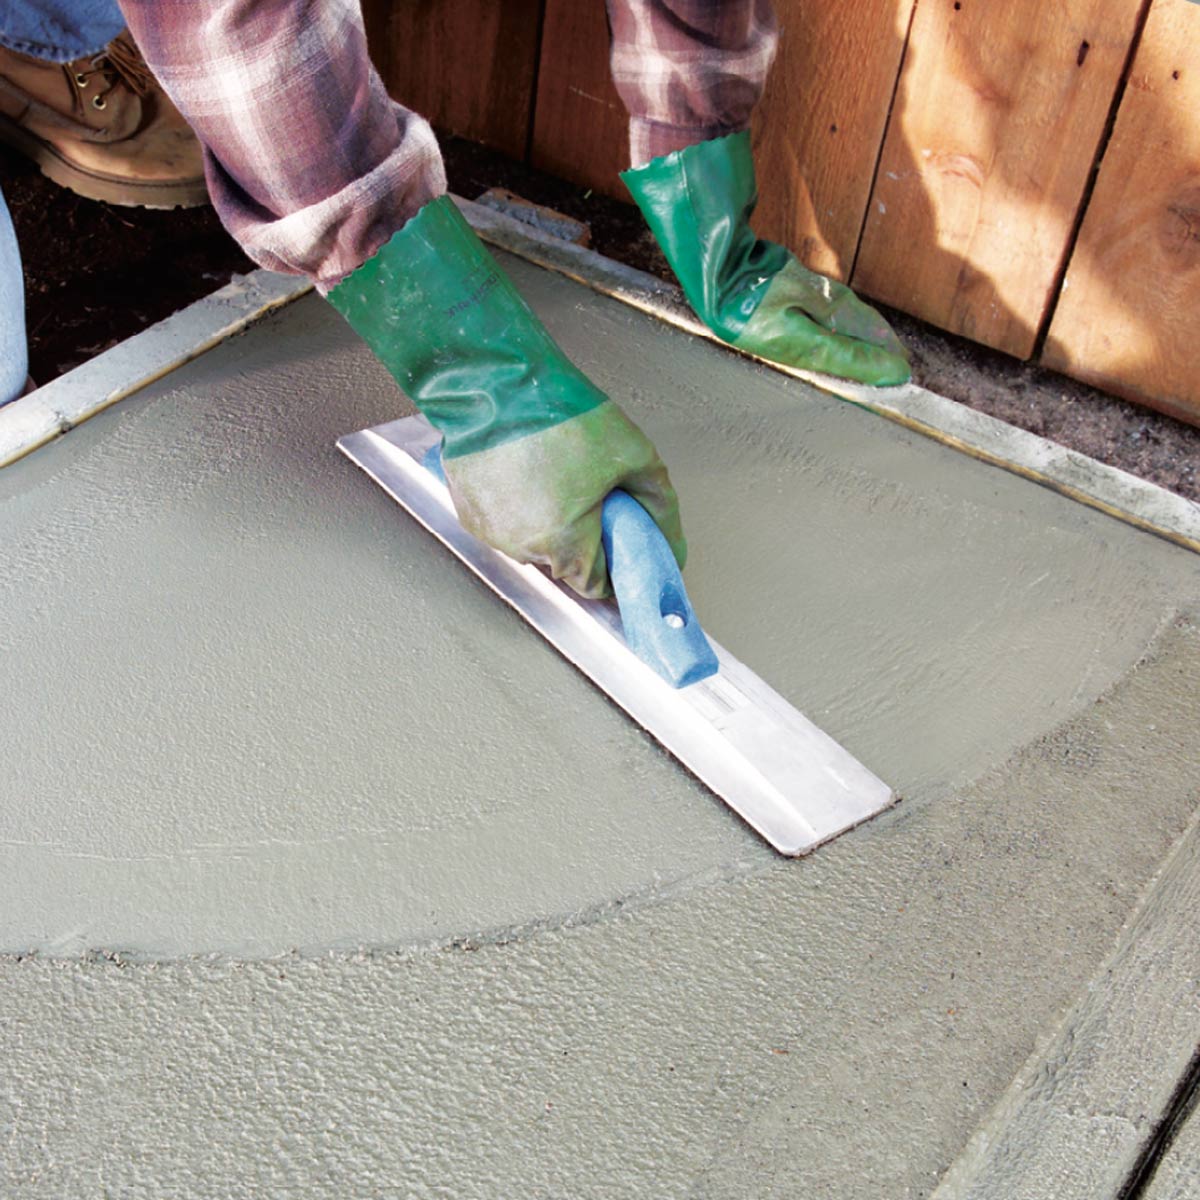
You may think you are done at this point but you aren’t, not quite yet. So now the concrete is level with the form but not as smooth as you want. This is when you need to get a float to smooth out the top of the concrete. If it’s a small area a hand float should be fine, but you can also get a bull float at the store for hard to reach areas. Just like smoothing icing on a cake, keep the leading edge slightly elevated and the back end will smooth out the concrete. This will also push down the rocky bit of the concrete and bring out water. You may be tempted to try and get an area just perfect but this can lead to over working and pulling out way too much moisture. If you do this you’ll end up with over worked concrete that ends up prone to cracking.
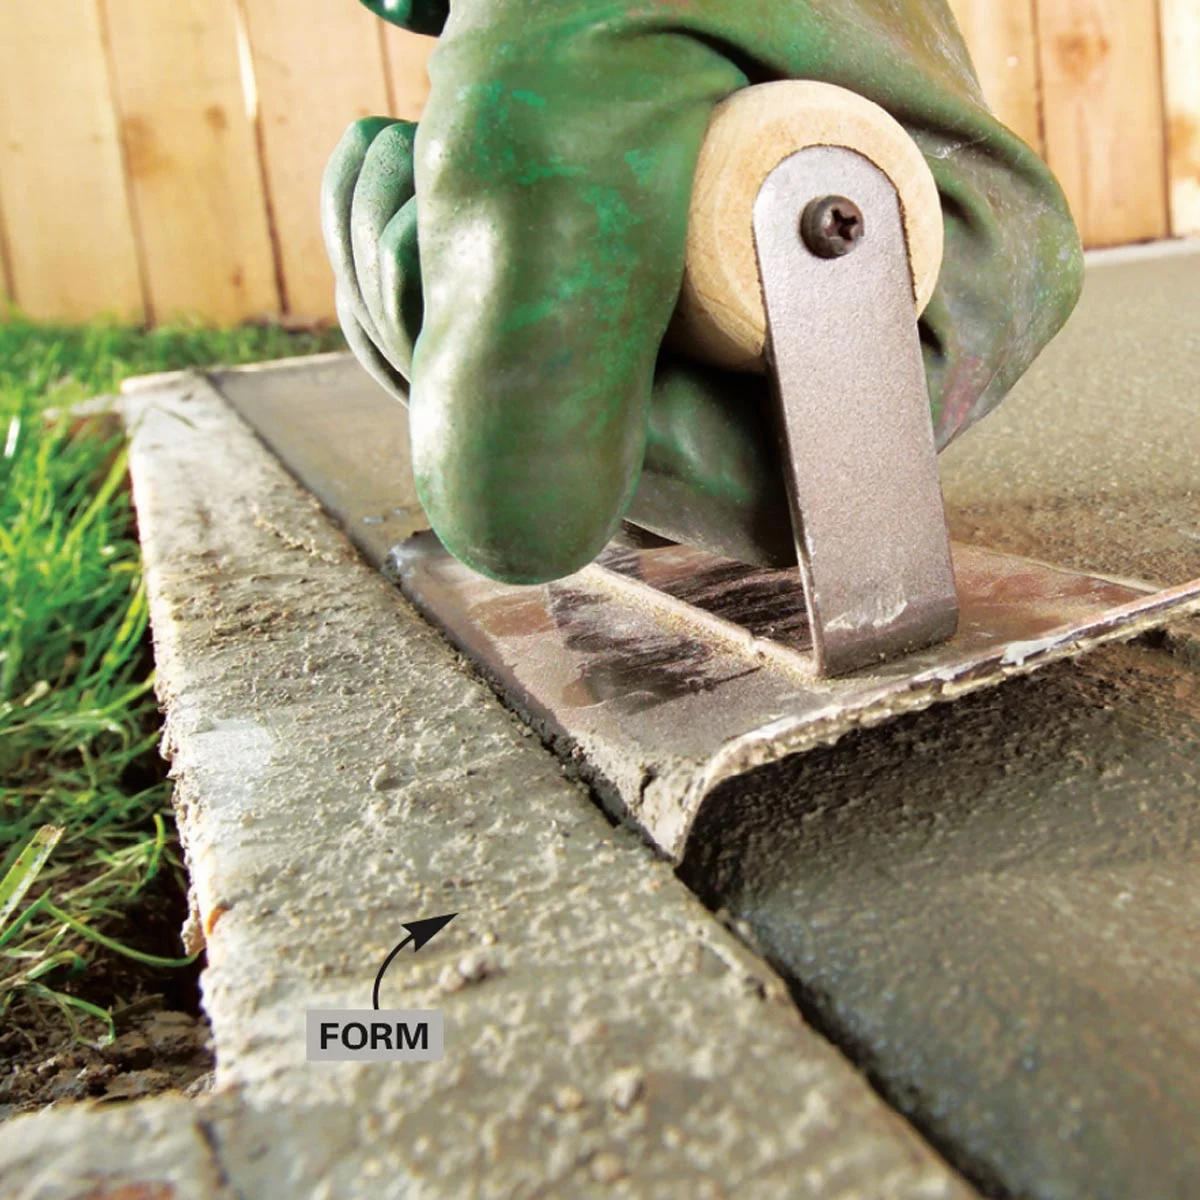
Smoothing
Depending on what you are doing you also will want to smooth the edges. The tool for this will look like a float, but for a corner with a rounded edge, I don’t know how else to describe it. You run this the same way you do the top float but along the edge between the form and the concrete. This will create a smooth nice finish on the edges and separate it from the forms. This way form removal doesn’t create too much damage.
So smooth an area and move on to the next and then you wait. After smoothing with the float you have all this moisture on top of the concrete, don’t get rid of it. You need this moisture to go back into the concrete and evaporate slowly. So if you don’t plan to add a texture, like sidewalks, patio slabs, or other areas with textured surfaces then cover it with some plastic to allow it to wet cure for at least 2 days. If you do need it to have some surface so that its not a slip and slide when wet then you wait for the “bleed” water to evaporate without covering it. To add some texture you can use a concrete broom and lightly drag it at a 90 degree angle to the surface to create traction ridges.
Precaution
If you are making a very large slab like a foundation for a house, patio slab, sidewalk, driveway, etc then you will need to put in control joints. These grooves in the concrete allow for movements in the concrete caused by temperature changes and drying shrinkage. So if you’re concrete decides to crack you can help control the location of where it happens with these control joints.
If you are simply making some pavers or a small slab for a shed then don’t worry about it because these control joints are usually placed no more than 2-3 times the slab thickness. So a 4″ slab should have joints 8-12 feet apart. If your slab is barely 10 feet then you don’t need to do this, get it?
Final steps
The final steps are to wait and keep the concrete moist. This can be done by using a plastic tarp to control the moisture evaporating , especially in this Texas heat, but you can also keep it moist by spaying the surfaces with water about 5 – 10 times a day depending on the heat in your area. If you use the tarp instead of manually watering then the surface of the concrete may be a little discolored. This is to control moisture in the concrete to keep it from drying too fast and leading to cracking.
So after about a night or so you can carefully remove the forms. If you can disassemble the forms and pull them off then thats the way to go, otherwise you can use a shovel to pry up a corner and then carefully slide it all up. The concrete will be soft and easy to chip so once again be very careful. A technique I used was driving in screws into the corners of the forms and then using them as lifting points to pull all the corners at once. It worked.
All done with the concrete!
So there you have it. You now have a new fresh piece of concrete for whatever it is you’re making. The concrete is still fresh so treat it nicely for a couple days (like 10-14), don’t go putting an excessive amount of weight on it or scraping at it as you will leave marks. After about 2 weeks you can go ahead and paint it or seal it if you want and make it the way you want it.
Also don’t forget your wet concrete sign.
It sounds like a lot but once you do it, it’s like riding a bike. You just go with the flow and the steps make sense. Now if you really want to make a concrete countertop then check this out because we go into that and its very easy. Let me know what you think, or if you have any questions on these steps or problems you ran into. Hit us up on any of the socials or just leave a comment here and if its a question that has a lengthy answer then I guess I’ll write another post to answer all those questions.
Stay handy,

Find us on social HERE!


