


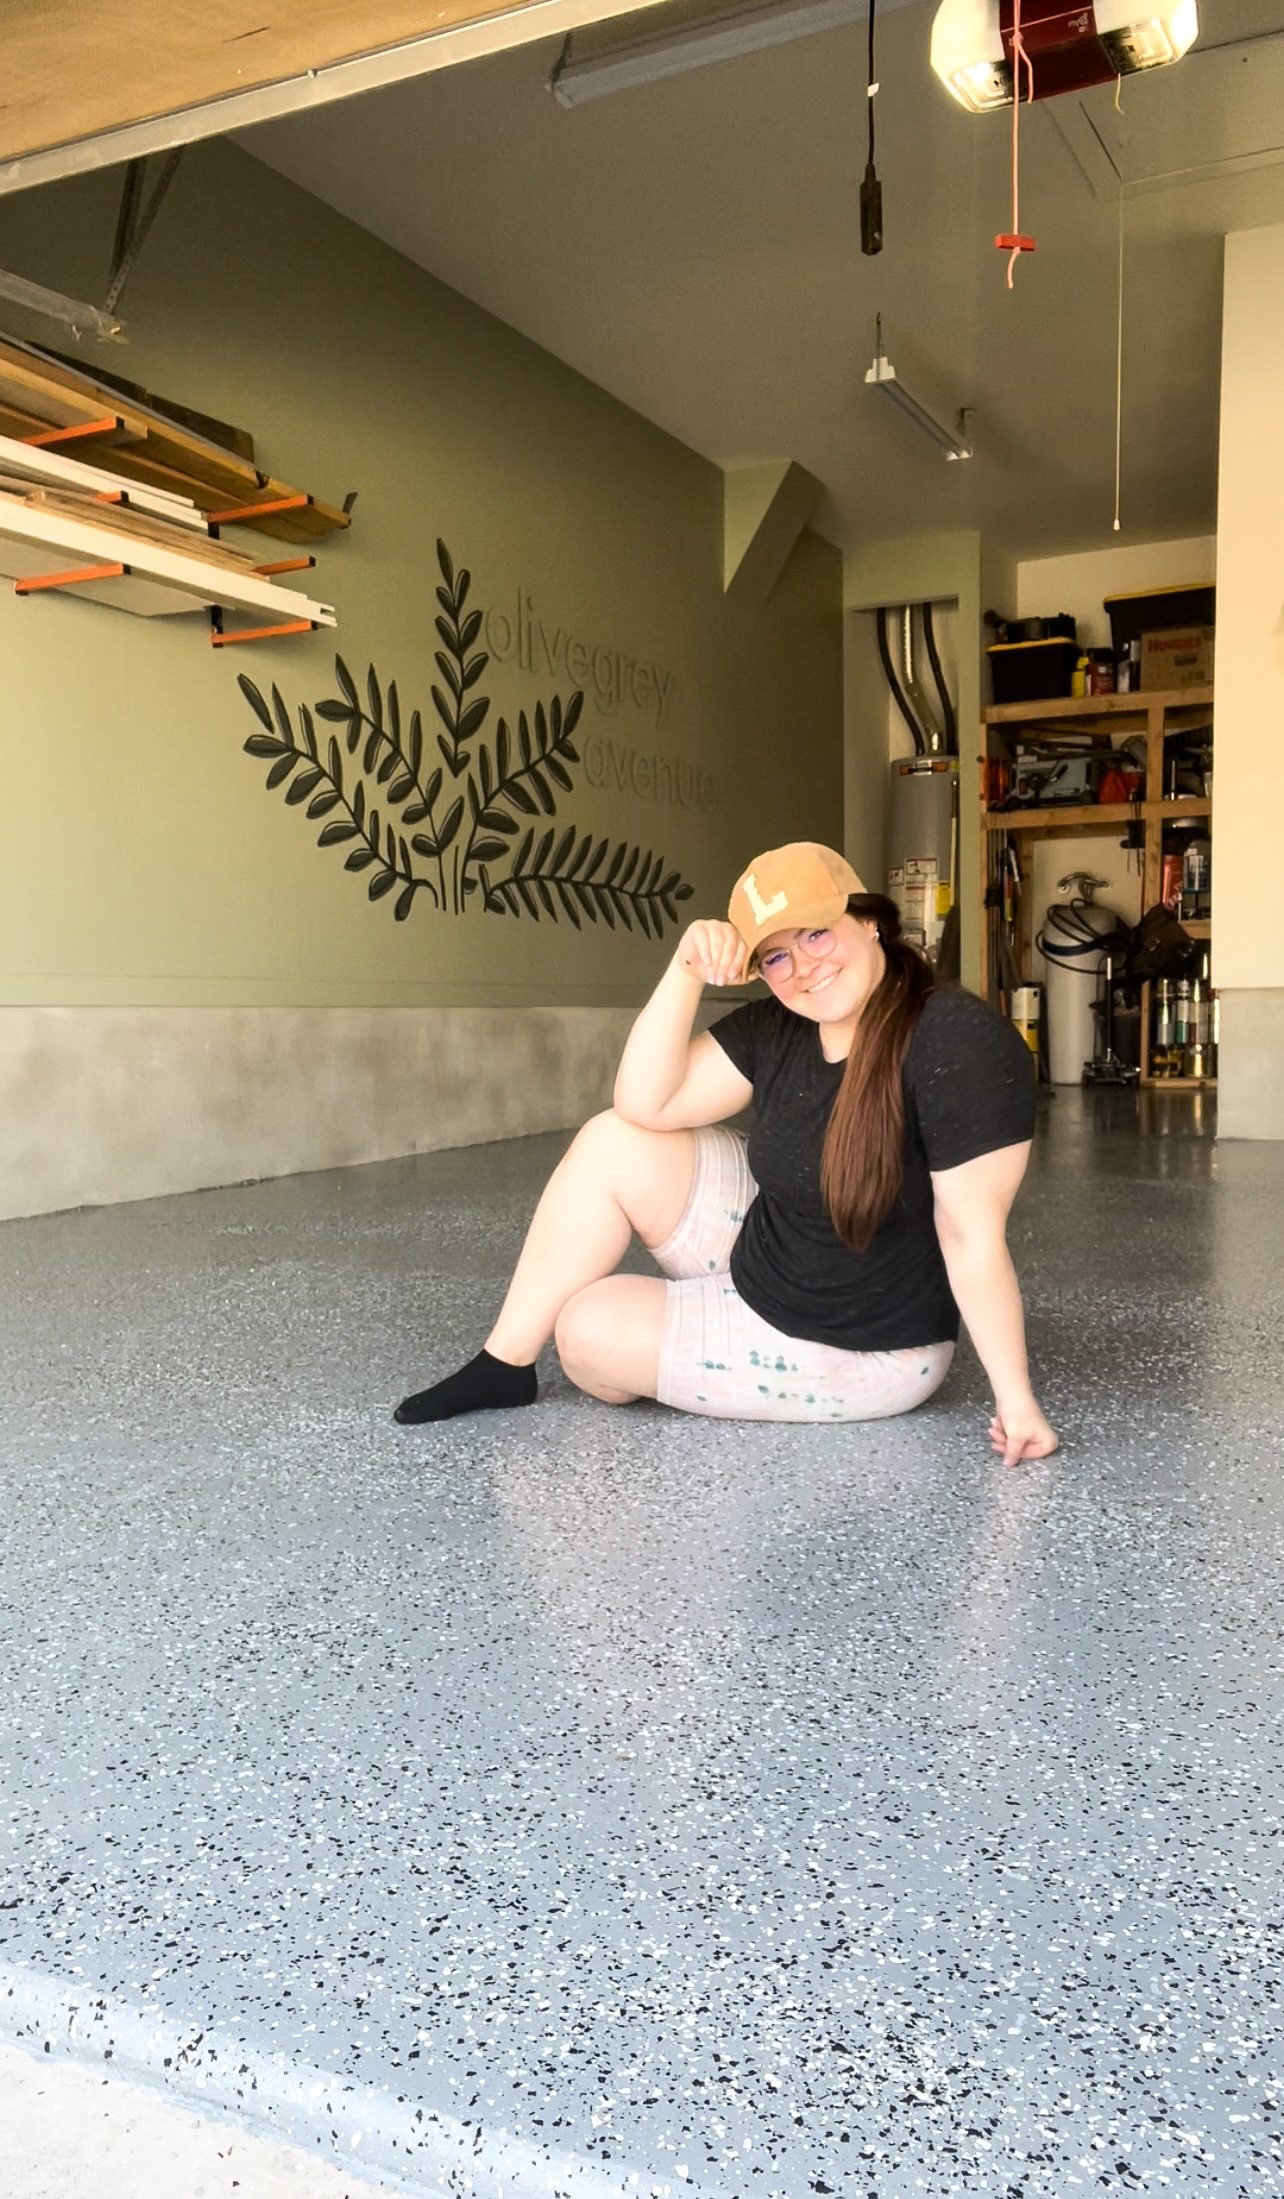
We Epoxied our Garage Floors!


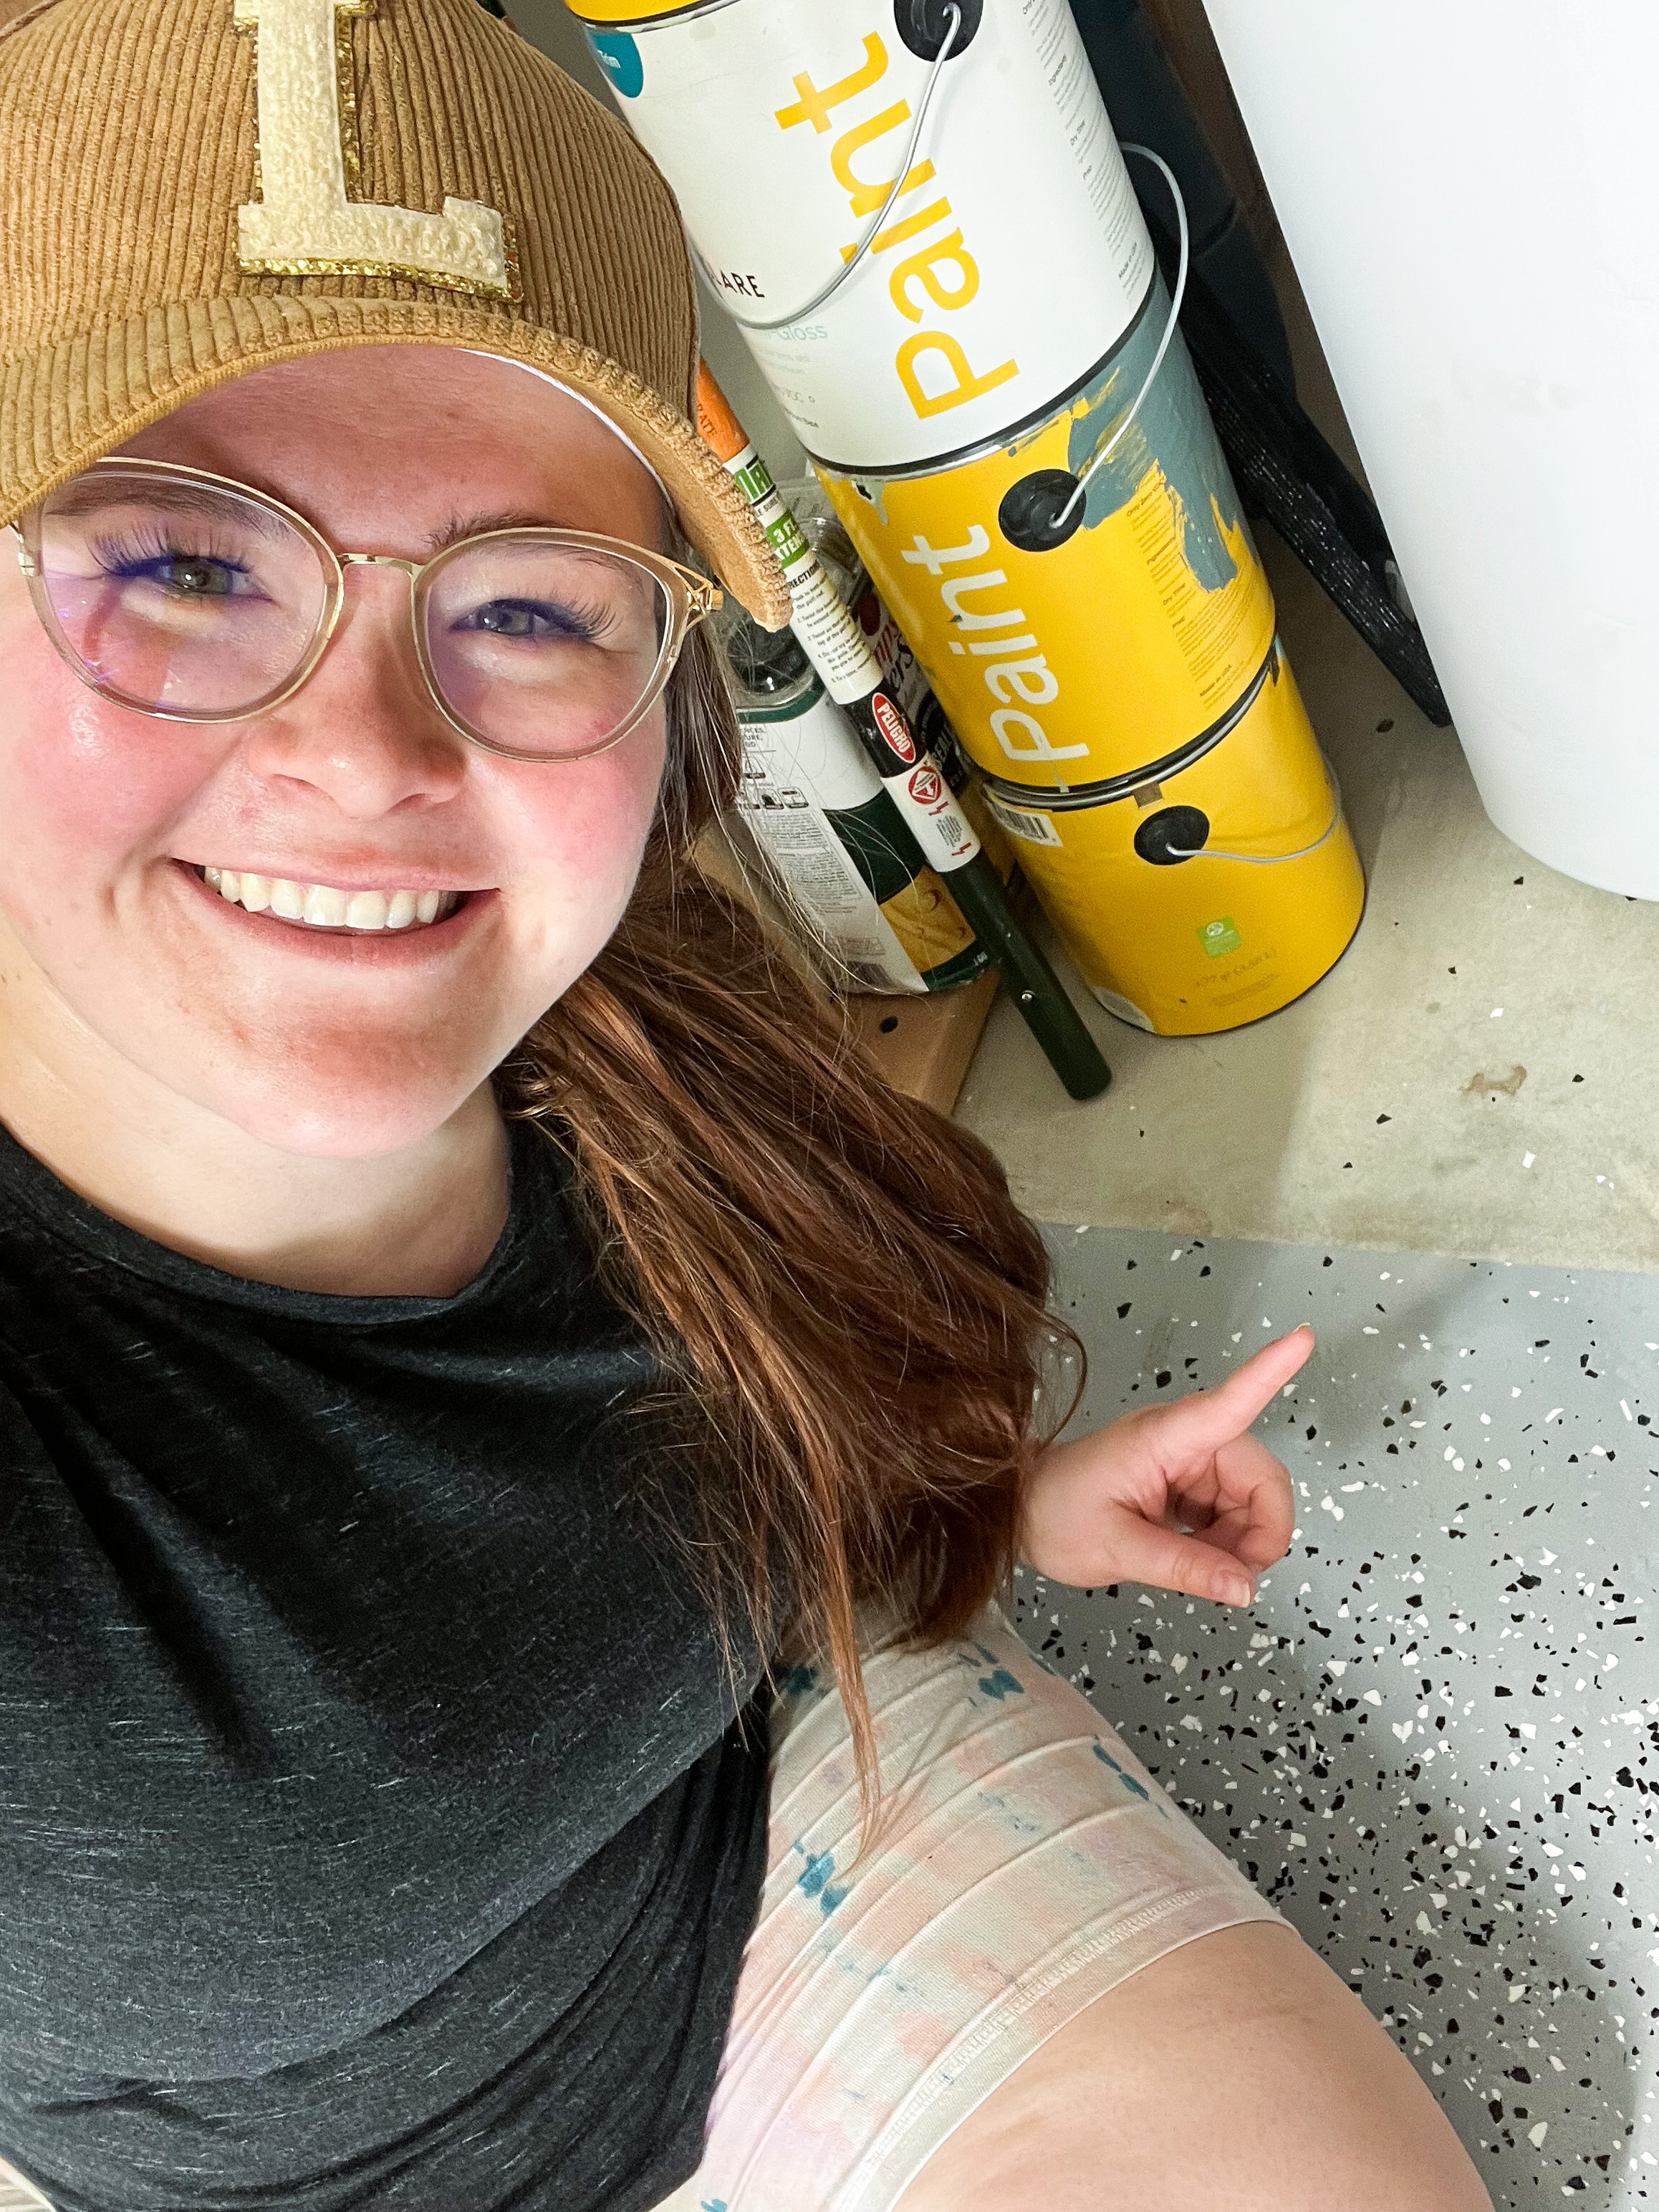
We’ve had our Rustoleum kit sitting on a shelf in our garage for well over a year and this weekend, it was finally time to do it! We definitely learned quite a few lessons while we epoxied the garage floors and our IG community had some great questions so we wanted to answer them all!

I would say that some of the lessons we learned with this process is one: don’t overthink it! It wasn’t that bad once we jumped into it. If you can paint, you can epoxy! It’s true what they say, when throwing the paint chips, throw them as high into the air as possible and that’ll give you the best (even) coverage.
The hardest part, besides getting all our stuff out of the garage, was the clear coat. The disappointment was real… the minimal coverage that clear coat provided (there barely was enough). It was near impossible to see where I had already rolled a coat on the floor. This left me with some really uneven coverage and spots that didn’t get any clear coat. I was tempted to do another layer in order to hit the spots that were missed. Honestly the cost of buying another whole kit vs. benefit of a little more coverage was iffy for me.

I got so many great questions about the epoxy that I wanted to answer them for you all in detail! So here we go!
All your questions answered!
What are the benefits of epoxy?
Epoxy is a paint-like substance (but not paint)! It’s incredibly durable and easy to clean. You can compare a normal, un-sealed concrete floor and one with epoxy. If you spill a can of paint on un-sealed concrete, it will absorb and likely stain your concrete. With epoxy, you simply wipe it up. Simply put, concrete is porous and epoxy is not!
How long did the process take?
We finished clearing out our garage on a Sunday morning. Then we used the 3-in-1 quick etch to clean the floors which took about 1.5 hrs. We had to let the floors dry and the time for that will depend on your location and heat. We’re in Texas and it was a warm day so it only took a couple hours to dry. You can expedite this with heaters or fans. After the floors had dried we started the epoxy process. It probably took about 45min-1hr to cut in all the edges, roll the whole floor and throw the paint chips. We let that dry completely over night (but it needs 8-12 hours to dry). Then the next morning I did the clear coat which was about 30-45 minutes.
How is the coverage?
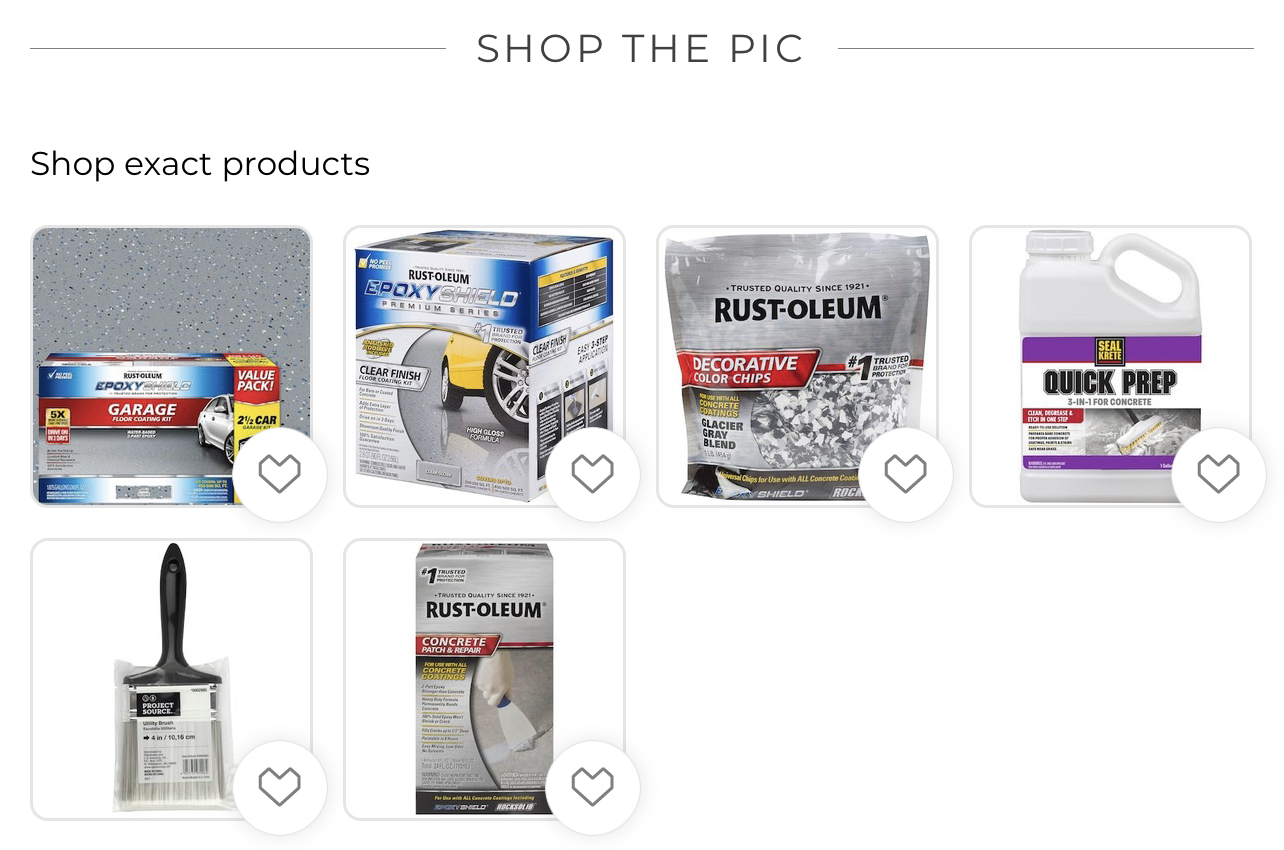
We bought the 2.5 car garage kit and that is the true size of our garage. The kit comes with 2 epoxy bags and we barely had to open the second bag. So I’d say we had a plethora of epoxy. The clear coat on the other hand was also a 2.5 car kit and I struggled to get it to last to the end.
How long does it take for epoxy to cure?
We followed the instructions from Rustoleum and the kit we had said to wait 8-12 hours before light traffic could walk on the floors. You want to not wait too long if you plan to do a clear coat (which I do recommend doing). You have to do the clear coat before the epoxy is completely cured. So, your window is 8 hours after application until about 4 days after application before it’s fully cured.
How many bags of paint chips for 2.5 car garage?
I used 4 bags of paint chips! The chips that my kit came with had blue in them and since I just painted the garage green, I didn’t love the blue in there. I wanted it to be more neutral so I didn’t use the chips that the kit came with and just bought the ones that I wanted!
Did I use the anti-skid in the clear coat?
I did…It was ok. 2 bags for extra anti-skid is what I used. It said you can do bags on the kit but my only issue with it is that while I was applying it, all the anti skid sank to the bottom of the bucket. I don’t recall it saying anything about periodically stirring so I didn’t. When I got to the end, it was in a big clump at the bottom. I think anti-skid is important so I’d just say to be prepared to stir it!
How long does it take to dry?
The Epoxy coating takes 8-12 hours before it can have “light foot traffic”. That is the timeframe in order to start the clear coat. Which you want to add the clear coat before it fully cures in 4 days. The clear coat says it is drivable within 24 hours so once we hit 24 hours, we started moving some things back in the garage.
Can you epoxy an old stained floor?
YES! Mine is newer with no previous stains/paints and minimal oil (since it usually contains DIYs and not cars) so I didn’t have to do too much prep work besides cleaning and etching the floors. But you can definitely epoxy over previously painted or stained concrete. You will have to do more extensive preparation. A great benefit to epoxy is that it bonds to the actual concrete so you want to make sure it can bond to the surface. If you are refinishing floors like this, I would recommend renting a concrete grinder from The Home Depot’s tool rental instead of using an etcher to just clean the floors. If your concrete is heavily soiled with oil or whatever else that would prevent the epoxy from bonding, renting a grinder would be helpful.
What if you have cracks/chips in the floor?
As long as they are not of structural concern, you can definitely just epoxy over them. I have some hairline cracks running through my garage but they’re not structural or large enough to be of concern. If you have larger ones, I would recommend using Rustoleum’s concrete patch and repair before you epoxy.
How difficult was it really? DIY or Hire out?
It’ll all depend on you but I’d say that it’s as easy as just painting a wall! We dedfinitly have some imperfections in the floors and mainly I’d say that’s from the clear coat because I couldn’t see anywhere I’d been.
Make sure you’re subscribed to our mailing list to get our weekly newsletter with all the stuff we’re working on and planning!
Find us on social HERE!


