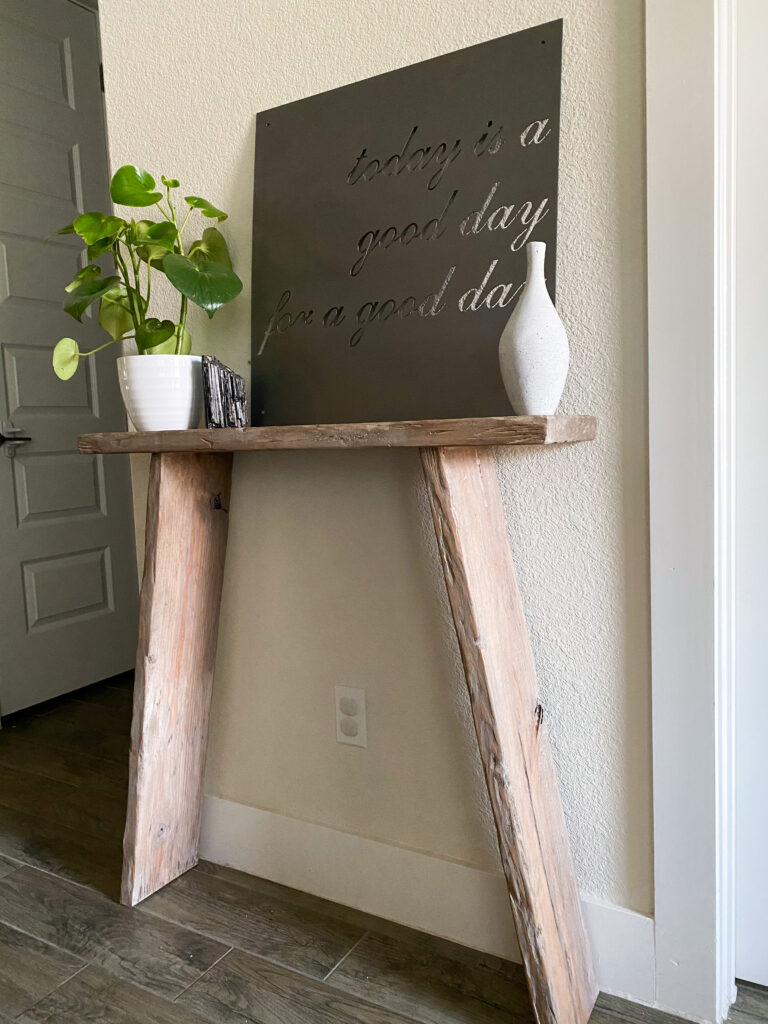
DIY Entryway Table for LESS than $20!


The entryway of your home is what first greats guests when the come to your home and mine has been lacking for 2 years because other projects have taken priority. I was so unsure of what exactly I wanted there. That is until I saw this beautiful entryway table from Restoration Hardware but one problem, IT’S $2,150 DOLLARS. No, that’s not a typo. Okay, so I’ll make it for wayyyyyy less! Besides the fact that I’m going to save so much money by building instead of buying, I also get to make my own dimensions to best fit my space. See what I’ll be recreating below.
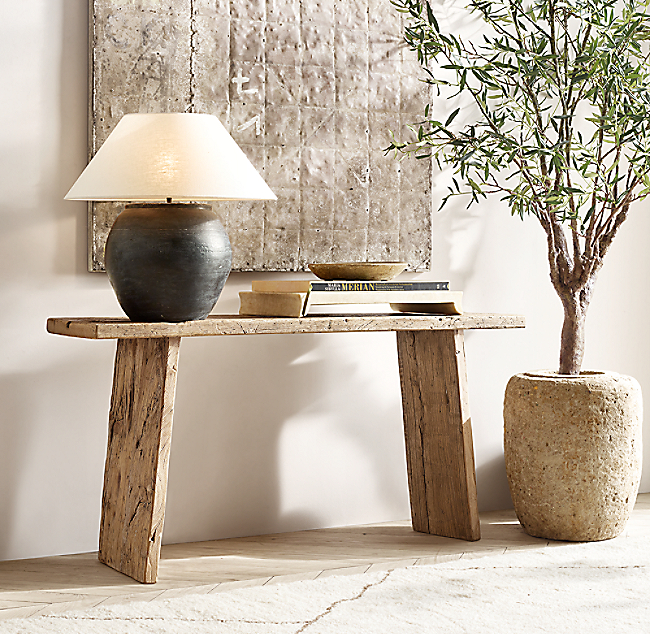
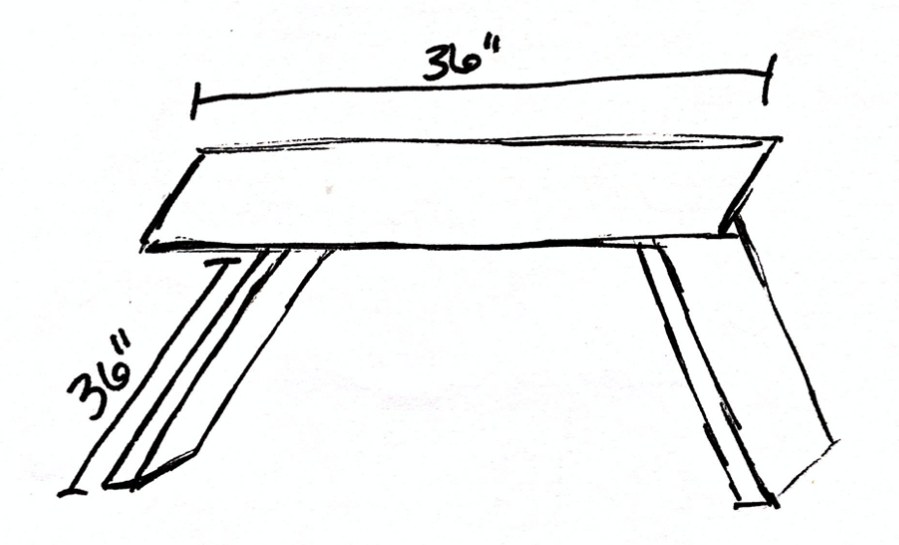
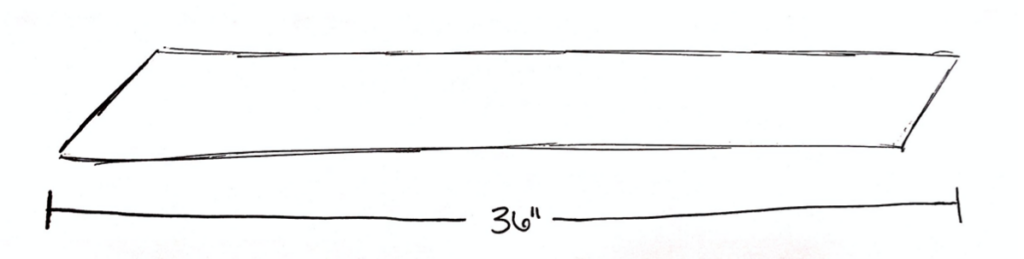
Entryway table measurements
The best thing about recreating this entry table is that it’s a very simple design. I didn’t actually look at the dimensions of this table because I wanted to make my own dimensions for the wall this table would be going against.
SUPPLIES for Entryway Table:
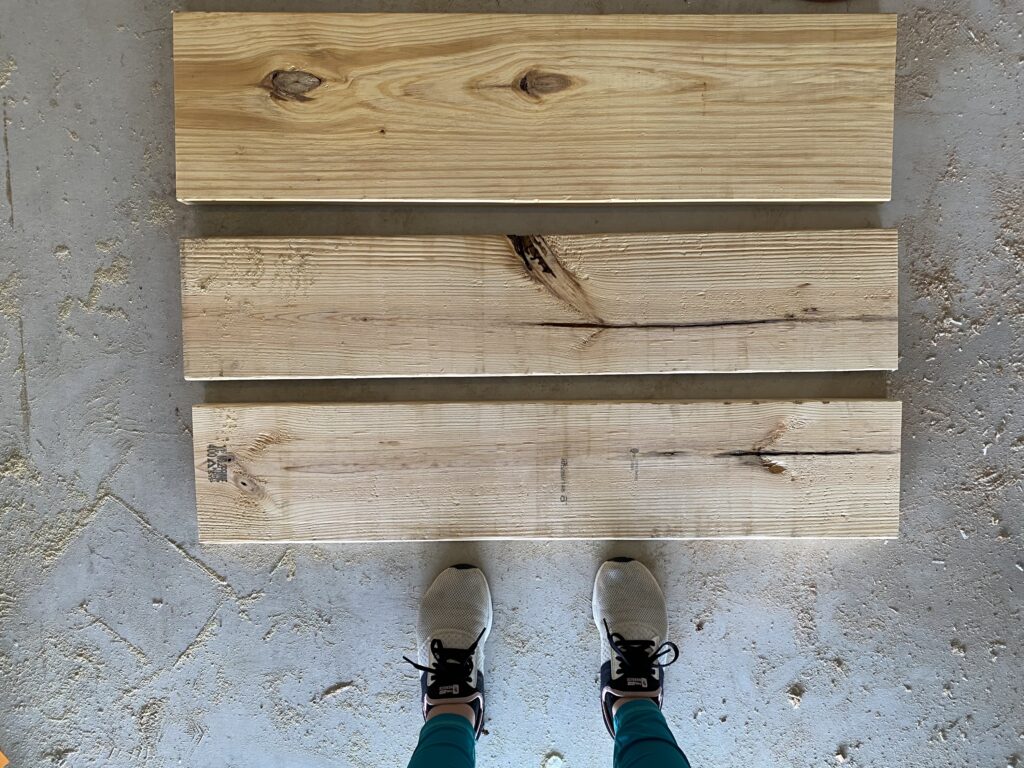
- (1) 2x10x8 pine board
- (1) 2x8x8 pine board
- Kregjig
- 2-1/2″ Pocket Screws
- Drill (and impact driver)
- Circular saw or table saw
- Wire brush drill attachment
- Hammer
- Chisel
- Sandpaper (80-120 grit)
- White wash (white paint)
- Stain (I used Weathered Oak and Early American)
- Wood Glue
- Level
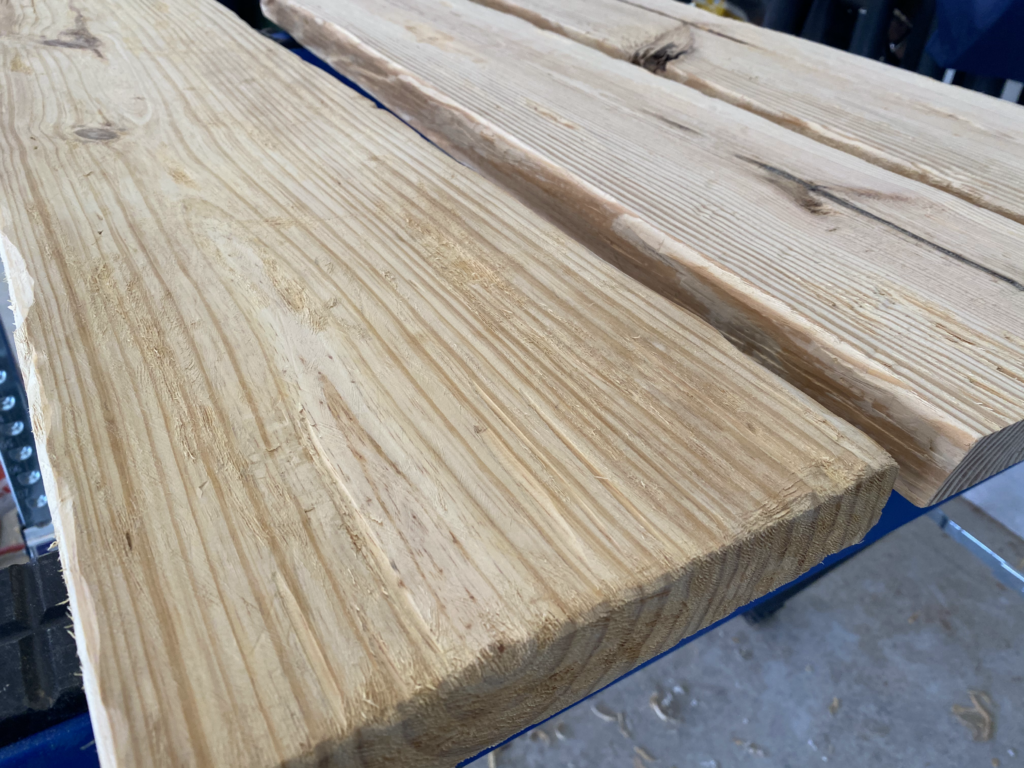
STEP 1: MAKE YOUR CUTS
The first thing I did was to make the cuts in the wood to the right lengths. I cut the 2×10 into (one) 36″ board and the 2×8 into (two) 36″ boards. These were all straight cuts and now I’ll make my angled cut.
For the legs, they will sit at an angle so so we will cut both ends of the board to a 10 degree angle. You can easily cut this angle with a table saw on either side of your legs. See below:
Of course, this is DIY so you can change any of the angles or measurements I’m giving you but these are what I thought to be best for my table!
STEP 2: DISTRESS THE WOOD
Distressing wood takes some time but it’s fun because this is something that is difficult to ‘mess up’. In distressing, you make the board imperfect so scratches and dents and imperfections in the wood are a good thing!
Before I started distressing, I did sand each side of the boards to have a fresh clean start and to take off any “yellowing”, film or lumber stamps from the boards.
There are a number of tools you can use to distress wood but what I ended up liking best was a chisel and a wire brush attachement. I also used a hammer and an electric sander here and there.
The more and more I worked on each edge of the boards, the better my technique was and by the end of it I was super happy with the results. I started off with a more random method of making dents and scratches but the more I went on, I learned that it looked most natural when I distressed with the natural grain in the wood. I still took some chunks out but the wire brush I would run over the knots especially hard and it would make the grain very pronounced. Then the chisel, I ran up along the edges with the grain to create almost cracks in varying lengths. I also ran the chisel up and down each edge to make the edges less than perfectly cut.
I should mention that I lightly hand sanded the table after all the distressing with a fine grit sandpaper (120) just to soften all the distressing and make sure it’s still a nice usable table once it’s all complete.
STEP 3: ASSEMBLING THE ENTRYWAY TABLE
Once the wood is distressed to your liking, it’s time to assemble.
First you need to create pocket holes in your legs. You’ll want to put 4 of them on the top inside of the leg to attach to the top. I set my kregjig to 1-1/2″ hole depth.
I then measured on the bottom of the table top, the center of the top and the center of the leg to match up and about 12″ in from the edge of the table so both legs are even.
Put a line of wood glue where the leg meets the table top, put the leg in place and then screw the leg into the table top with 2-1/2″ screws. Make sure the leg is laying flush against the table top while you’re drilling in the screws.
Stand the table up and make sure the legs stand to make the table level. You can let the wood glue dry but I went straight into step 4, staining.
STEP 4: STAINING
This can be very dependent on the look you want for your table but here are the methods I used:
I first prepped my wood with wood conditioner. This isn’t required but wood conditioner is nice when you’re staining because it helps the stain apply to the wood evenly so there aren’t sploches.
Then, since my wood looked very yellow, I wanted to neutralize that color and made a white wash to go on before the stain. I took standard white paint and mixed water into it, at about a 50/50 ratio. I would brush on the white wash and then wipe off with a rag quickly.
After the white wash, it was time to stain. My favorite stain combo right now is Weathered Oak and Early American. I did a quick “wipe-on, wipe-off” with the weathered oak and finished with Early American.

Tip: Use a ‘flat’ paint and not one with gloss to it for a better white wash finish.
At this point you would want to seal the wood at this point, there are many sealing options depending on the use of your wood piece. I will be using a Tung Oil on mine (yes that’s correct, I haven’t sealed it yet…95% club!) because this will be a table that will not (or should not) come into contact with water. If you need to protect yours from water or other things, you should consider something like a clear coat to go on your table. Just make sure you get a matte or satin finish so it doesn’t turn out glossy.
And you’re done! Now wasn’t that so easy and worth saving $2080 rather than buying the real thing? Comment below if you have an idea for our next DIY dupe!
Subscribe on YOUTUBE!
Follow us on social HERE!