


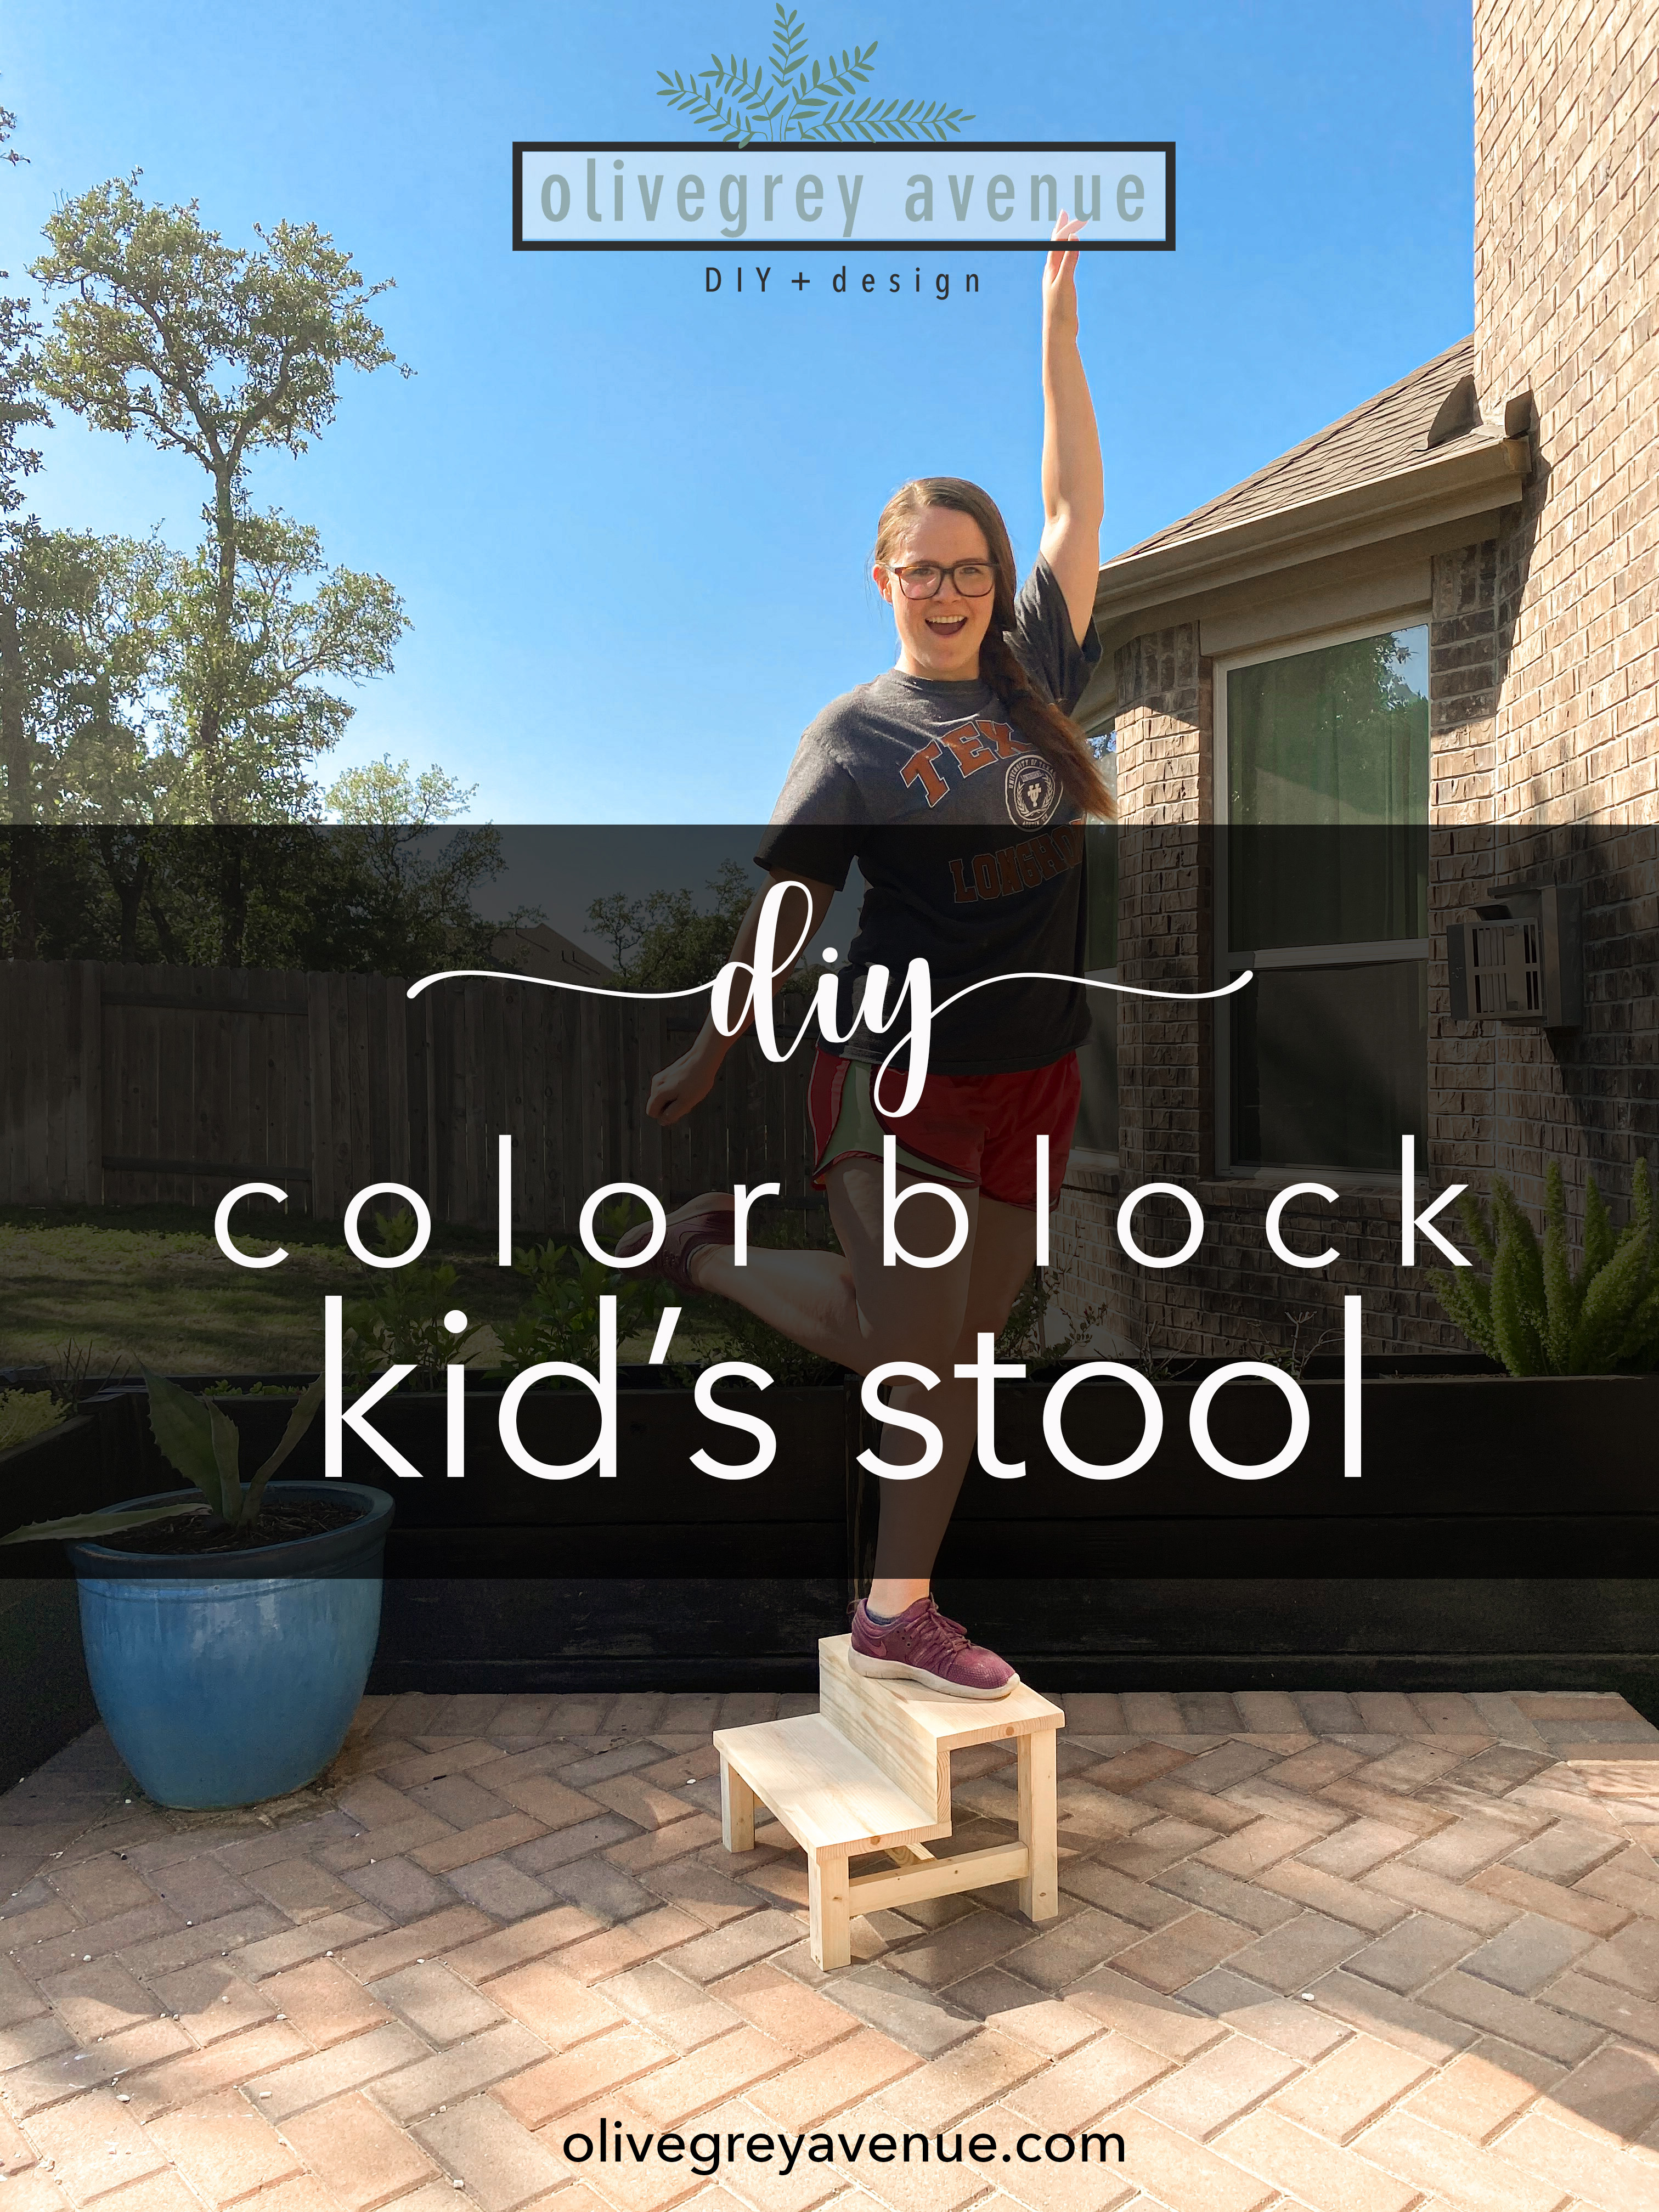
DIY Color Block Kid’s Stool


Being in month 2 of quarantine (I think–I can hardly keep track of time these days). I am finding new and creative ways to use what I have on hand. Instead of running to the store multiple times a day for a project. Or even all the things I need or forgot. This led to ‘No Money May’ as a sort of friendly challenge. If you’d like to see more about this and the other ladies I’m participating with, make sure to check out my instagram @olivegreyavenue. So let’s get this color block kid’s stool started!
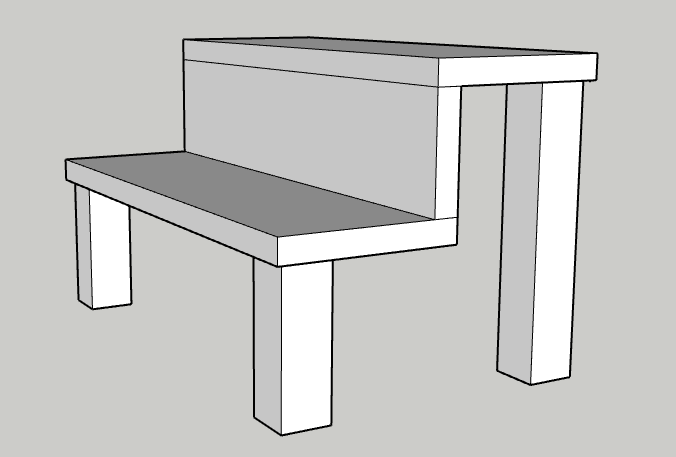
The Idea of a Kid’s Stool
The reason this stool was chosen as the project I wanted to start off May with is because our son is getting bigger and bigger. He is still little so he’s been dragging a squatty potty all over the house to help him access places he wants to go. Yes, you read that right, a squatty potty. If you’ve ever seen one of those, it’s not very stable. It’s also something from the bathroom that you don’t really want drug all over the house. So, I went into our scrap wood pile and looked for the perfect pieces to make the stool I had envisioned in my mind. I had exactly what I needed to make this idea work!
Keep in mind, this is a project that I built out of scraps. I am going to tell you everything I used so that if you don’t have it on hand, you still are able to purchase what you need to create this cute color block stool for toddlers and kids! Plus, you’ll have specific building instructions and measurements.
How to Build a Color Block Kid’s Stool
Supplies:
– (1) 1″x6″x4′
– (1) 1″x4″x4′
– (1) 2″x4″x6′
– 1″ Pocket Screws
– Kreg Jig for pocket holes
– Wood Glue
– Stain (I used a combo of Early American and Weathered Oak)
– Paint (I used the color Heritage Park by SW)
– Polycrylic Wood Sealer
– Painter’s Tape
– Drill & Impact Driver
– Sand paper (60 and 120 grit is what I used)
– Clamp
– Table Saw
Since I made up this design as I went, I cut the wood pieces one by one to fit perfectly. I’m going to give you the dimensions I ended up with. Just make sure to keep in mind to check as you go as well!
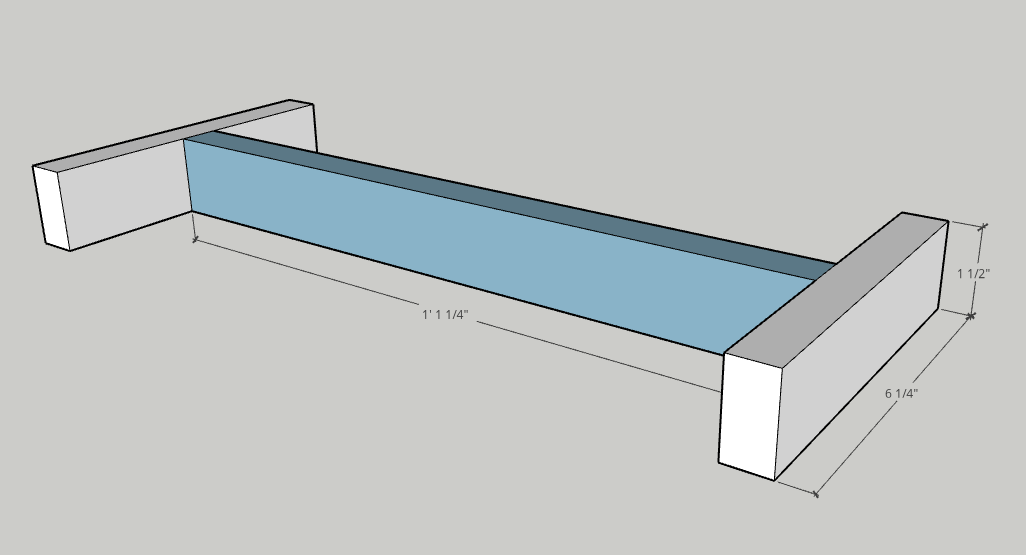
Stool Dimensions
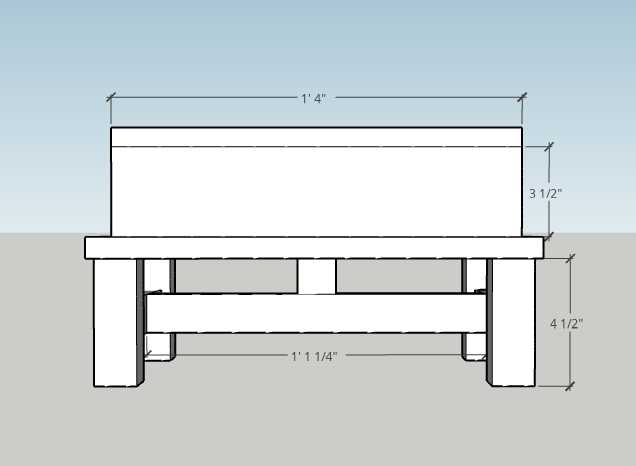
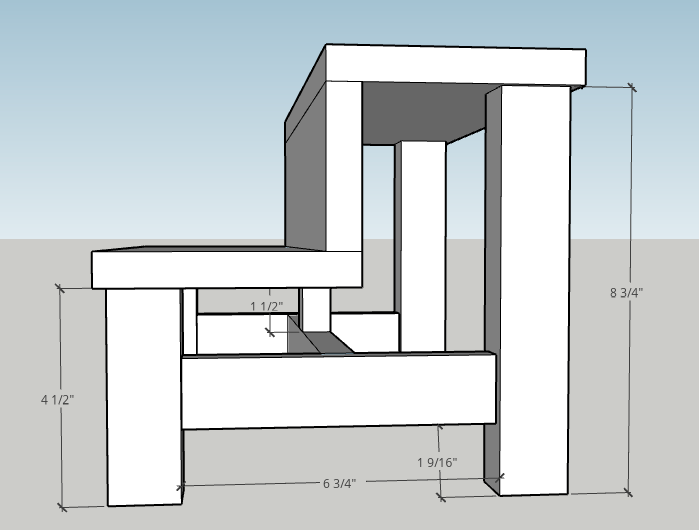
These are a couple angles of the dimensions of the front and side view of the stool, so you can have a visual of what you’re going to be building.
STEP 1: MAKE YOUR CUTS
It’s usually cheaper to get long cuts of wood instead and cutting them to size, but you can also use scraps if they’re long enough. The 1x6s will be your steps. The 1×4 will be your riser. 2x4s will be cut into your legs and support.
Take your 1″x6″x4′ and cut it to these lengths:
-
- (2) 16 inches
Cut the 1″x4″x4′ down to:
-
-
- (1) 16 inches
-
Cut the 2″x4″x6′ down to:
-
-
-
- (2) 4-1/2″
- (2) 8-3/4″
- (1) 6-3/4″
- (1) 13-1/4″
- (1) 1-1/2″
-
-
Tips:
For the legs, you’ll need the 2x4s that are 4-1/2″ and 8-3/4″ long. Now, we want square edges (not rounded like 2×4’s come) so you will need to rip the long, rounded edge off each board. Then I used a table saw for this step and set my fence to 3-1/4″. This way when I run my “legs” through they are all the same width. Then cut off one (1) of the the rounded edges. Make sure the board is laying flat on the wide side. Then set your fence to 1-1/2″, flip the leg over, and run your leg through on each side to get it square at 1.5″x1.5″. Do this for each leg.
For the bracing, you will need the 2×4 that are 6-3/4″, 13-1/4″ and 1-1/2″ long. You will use a similar method to cut down the rounded edges as the legs, to square them off but instead of cutting them to 1-1/2″x1-1/2″, you will cut them to 1-1/2″x3/4″ (half the width of the legs). The 6-3/4″ length board will yield two pieces. You should now have (2) 1-1/2″ x 3/4″ x 6-3/4″, (1) 1-1/2″ x 3/4″ x 13-1/4″ and (1) 1-1/2″ x 3/4″ x 1-1/2″.
Sand all surfaces down. Then I used 60 grit sandpaper for this step but we use a finer grit sandpaper later on.
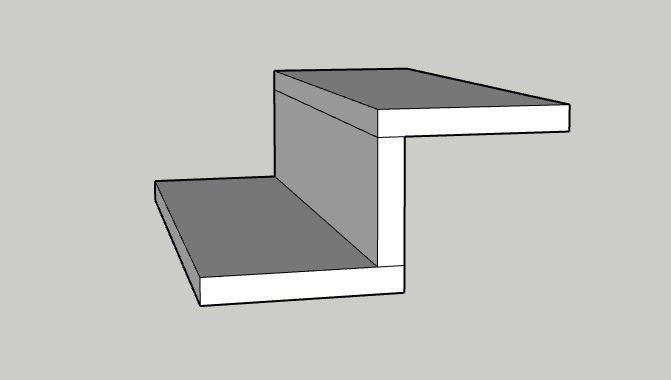
STEP 2: BUILDING THE STEPS
On the backside of your riser (1×4), you’ll create (8) pocket holes on the top and bottom of the long sides of the board. (4) holes on top and (4) on the bottom spread evenly and 1″ from the ends. I used a Kreg Jig to make my pocket holes but you should refer to your specific tool’s instructions. Since our board is a 1×4 then the screw length I used is 1″. Then I set the jig to 1/2″ thickness (nominal thickness and all that).
** Make sure to put wood glue in between any two pieces of wood you are connecting for a strong hold**
Since you have your pocket holes drilled, line up the riser (1×4) by sitting it on top of one steps (1×6) and screw in the 4 bottom pocket screws. Surely the holes are the inside of the stair make sure its facing the correct way and not visible when looking at the stairs. Then flip over the two pieces now attached and connect the top stair tread (1×6) by placing it on the top of the stair riser (1×4).
STEP 3: ATTACH THE LEGS
Make pocket hole on the top, inside side of each of the legs. Inset the legs 1/4″ from the edges. I used a spacer that was 1/4″ thick along the bottom and the side to help me out. You can also mark 1/4″ in from the edge and make sure it lines up when you secure the leg. Don’t forget your wood glue! Repeat this for each leg. Shorties in the front and long legs in the back!
STEP 4: BRACING THE LEGS
Now you add the bracing to go in between your legs to make a sturdy little stool! On the three longer pieces, (2) 1-1/2″ x 3/4″ x 6-3/4″, (1) 1-1/2″ x 3/4″ x 13-1/4″, drill (1) pocket hole on each end on the side that will face inward.
Note: I connected all of these differently but will explain the easiest way to connect all of these pieces together.
Make sure the 6-3/4″ pieces fit in between the front and back legs before attaching them and make adjustments if needed. Then you will measure to the center of the short, front legs (approximately 1-9/16 from the ground) and screw each 6-3/4″ piece into place on either side.
Next, attach the 13-1/4″ center bar in the center of the two side braces that you just installed. (If done right, the center bar will be directly below the stair riser. This is very important for the next steps) The support bars will in the shape of an “H” under the stool.
Finally, the small little block you cut, (1) 1-1/2″ x 3/4″ x 1-1/2″, will sit in between the center bar and the bottom of the stair for extra support. Drill a pocket hole into one side of your block and wedge it in place. Screw the block into the underside of the stair tread, just above the bar and wood glue both sides.
Give the whole stool a good sanding with a finer grit sandpaper for a nice smooth finish. I used 120 grit to finish it off but you could keep going up to 220 if you want that fancy-fancy finish.
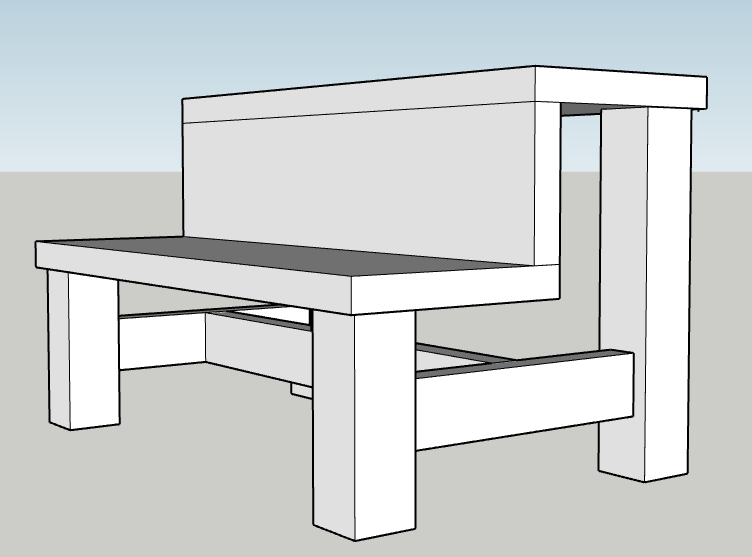
Your stool is now built!
STEP 5: PAINT AND STAIN
*Make sure to wipe down with a tac cloth or something similar to wipe off all of the sawdust from sanding.
The easiest way to paint and stain would be to stain the whole thing first and then tape off the legs to paint but hey, you live and you learn and I go through all the difficulty so I can tell you the best way to do something!
I, on the other hand, wrapped painter’s tape around each of the legs about 1/4″ above the support bars for paint. Then paint the bottom of the legs and the support bar with a color of your choice! Take off the tape when you’re finished painting for a crisp line and let this dry completely before staining. Tape off the same line but leaving all of the bare wood exposed and covering your newly painted area to stain the rest of the stool. (See why this now seems backwards?) I wiped on Early American and quickly wiped it off, then wiped on weathered oak and quickly wiped that off.
Finally, brush on a coat or two of Polycrylic Wood Sealer to keep your beautiful new stool in tip top shape!
Kid’s Stool Done!
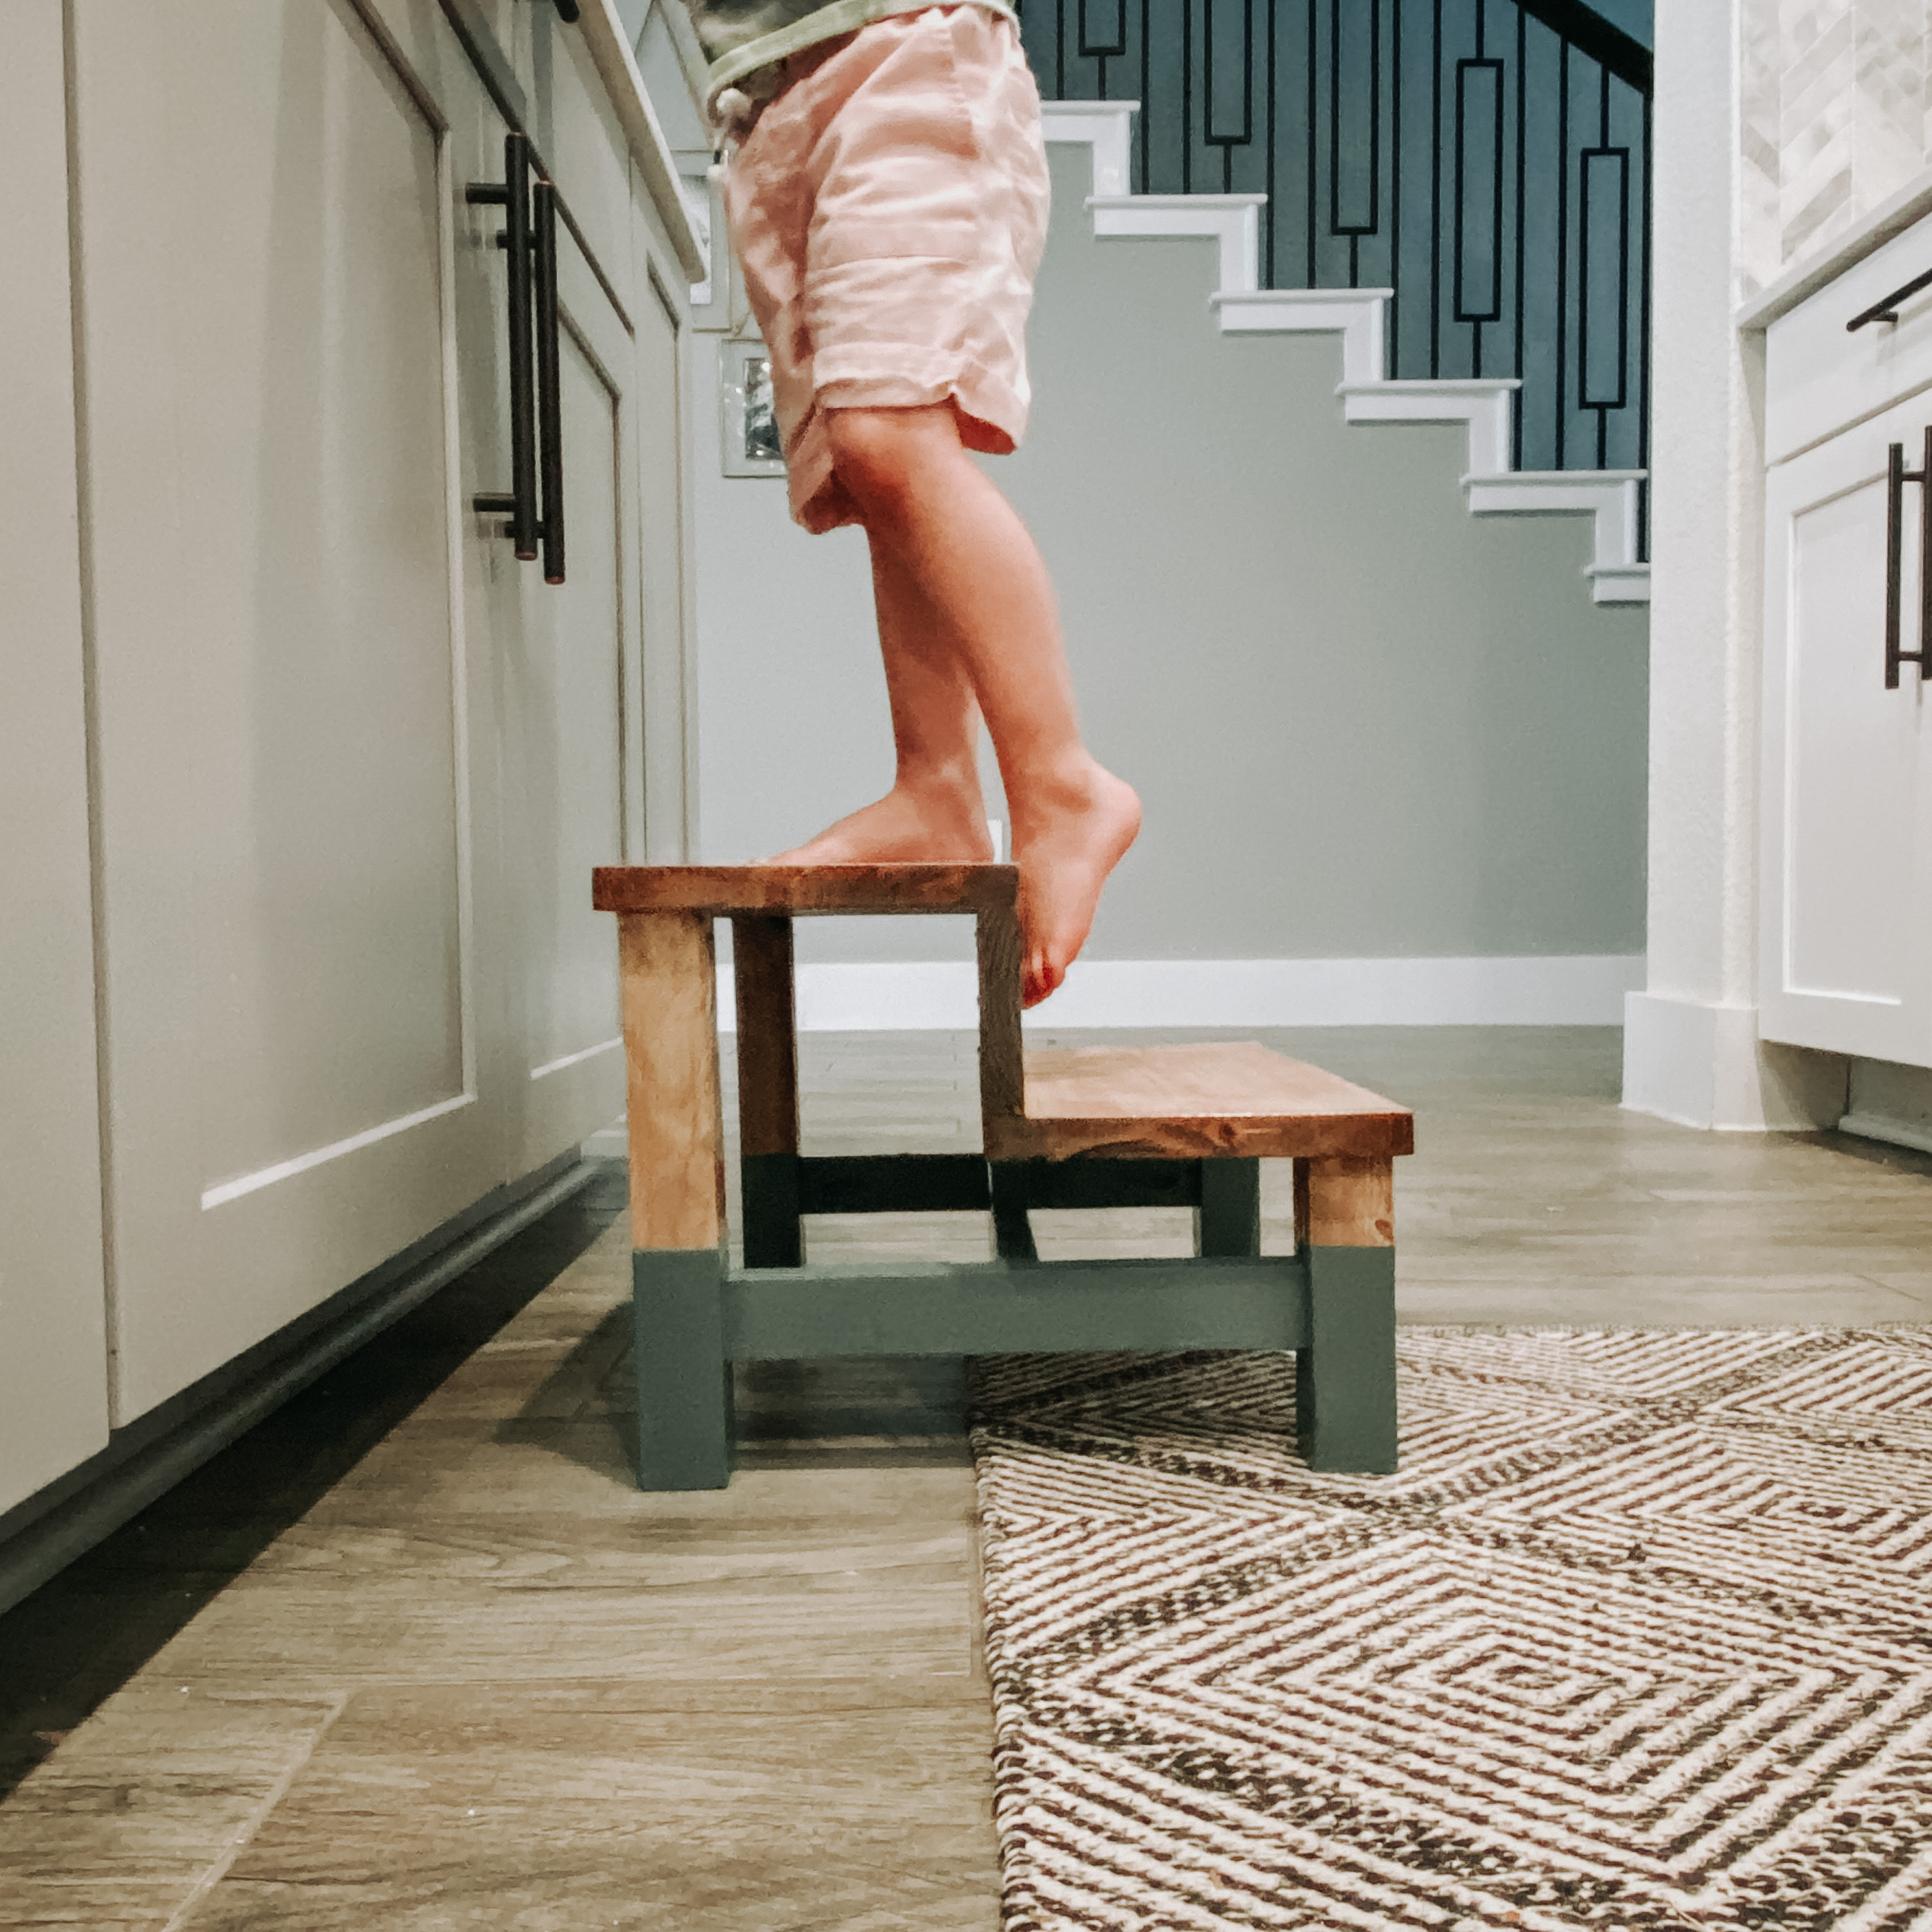
I love this stool and how it turned out. Now my son can wash his hands all on his own or feel involved when we’re in the kitchen at the counter. He sure does love being all in our business and this should help him feel independent. I hope these DIY instructions help you use some of that scrap wood or get that creativity out when you make it on your own! Leave a comment on how it goes for you and share your build photos with me here or on instagram!
Make sure to subscribe to the blog and follow me on all the platforms to make sure you don’t miss an ounce of DIY gloriousness.
Find us on social HERE!


