


DIY Shiplap Feature Wall


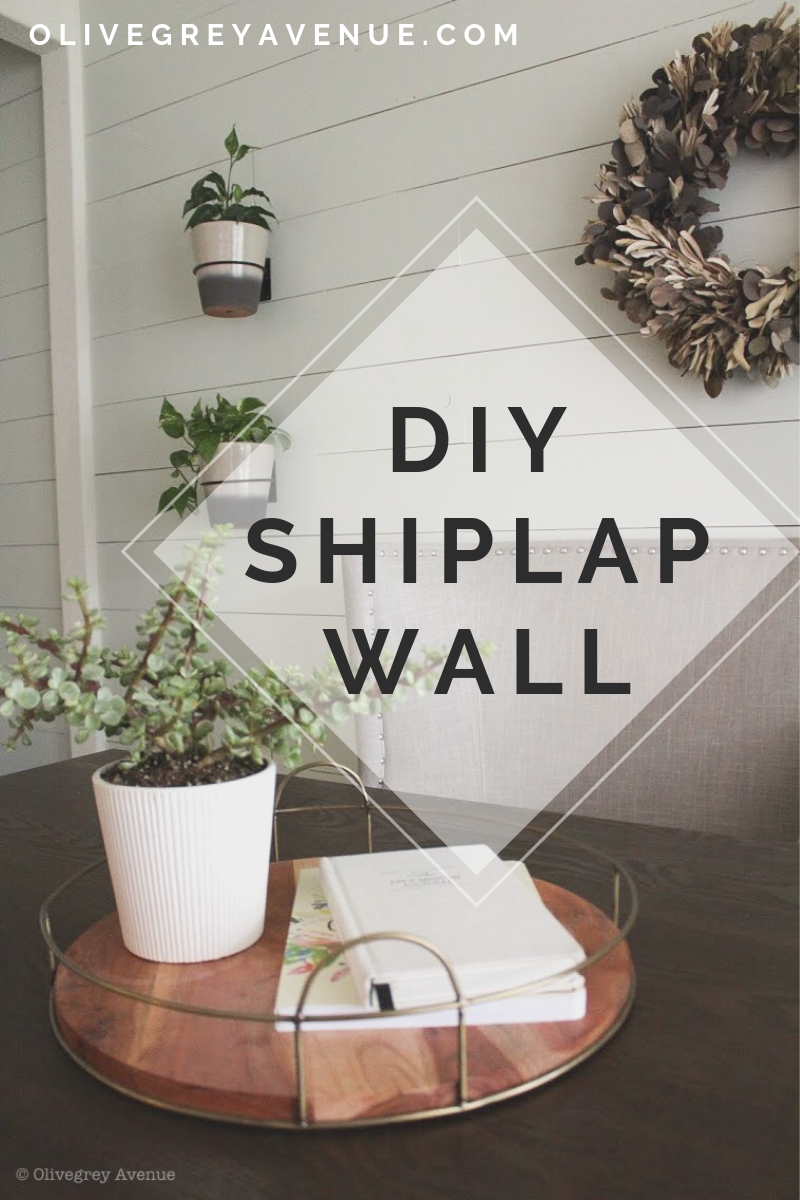
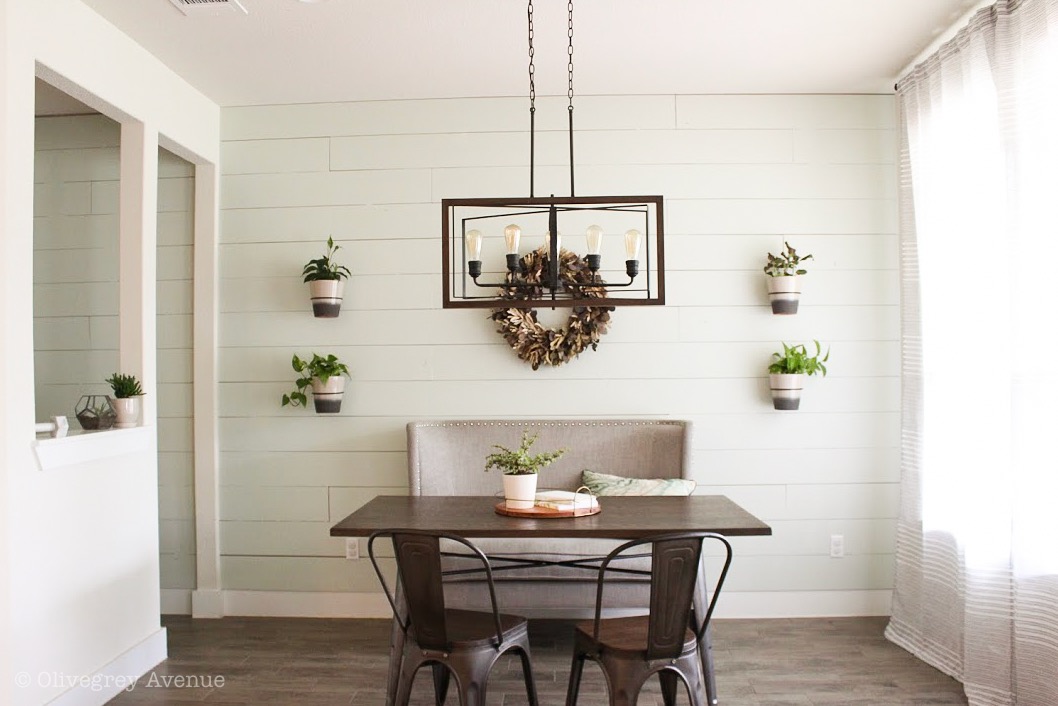
After buying my new house, this shiplap wall was one of my very first projects. I had my mind set on this project from the beginning of the building plans for our new house. Now, the breakfast nook is one of my favorite places in the house. I love the natural, airy feel with a farmhouse vibe going on in this space. Understated details are my favorite and the shiplap is a huge “under-statement” element in the room. By that I mean that it is a beautiful visual element in the room that’s not all up in your face but it makes the room feel completely tied together.
Anyways, let’s get to the juicy deets…
SUPPLIES NEEDED FOR SHIPLAP WALL
– Finishing nails & hammer (or a nail gun would be better if you have access to one)
– Level
– Stud finder
– Wood Filler
– Sand paper
– Primer
– Paint of choice
– Paint brush and roller
– Caulk
– Ladder
– Jigsaw
– Circular saw
Skill level: Basic
Time: A weekend
Cost: $350 (depending on the size of your area)
PLANNING
I did a lot of research about the appropriate width of the board for shiplap (or height?) anyways I found that 6-10 inches would be good but ideally shiplap is 8 inches.
So, I measured the height and width of the two areas I was covering. The wall of the breakfast nook continues into this planning area with a desk off of the nook but it has a dividing point so I didn’t want to divide the two spaces and make it look choppy and small so I continued the shiplap into this small space.
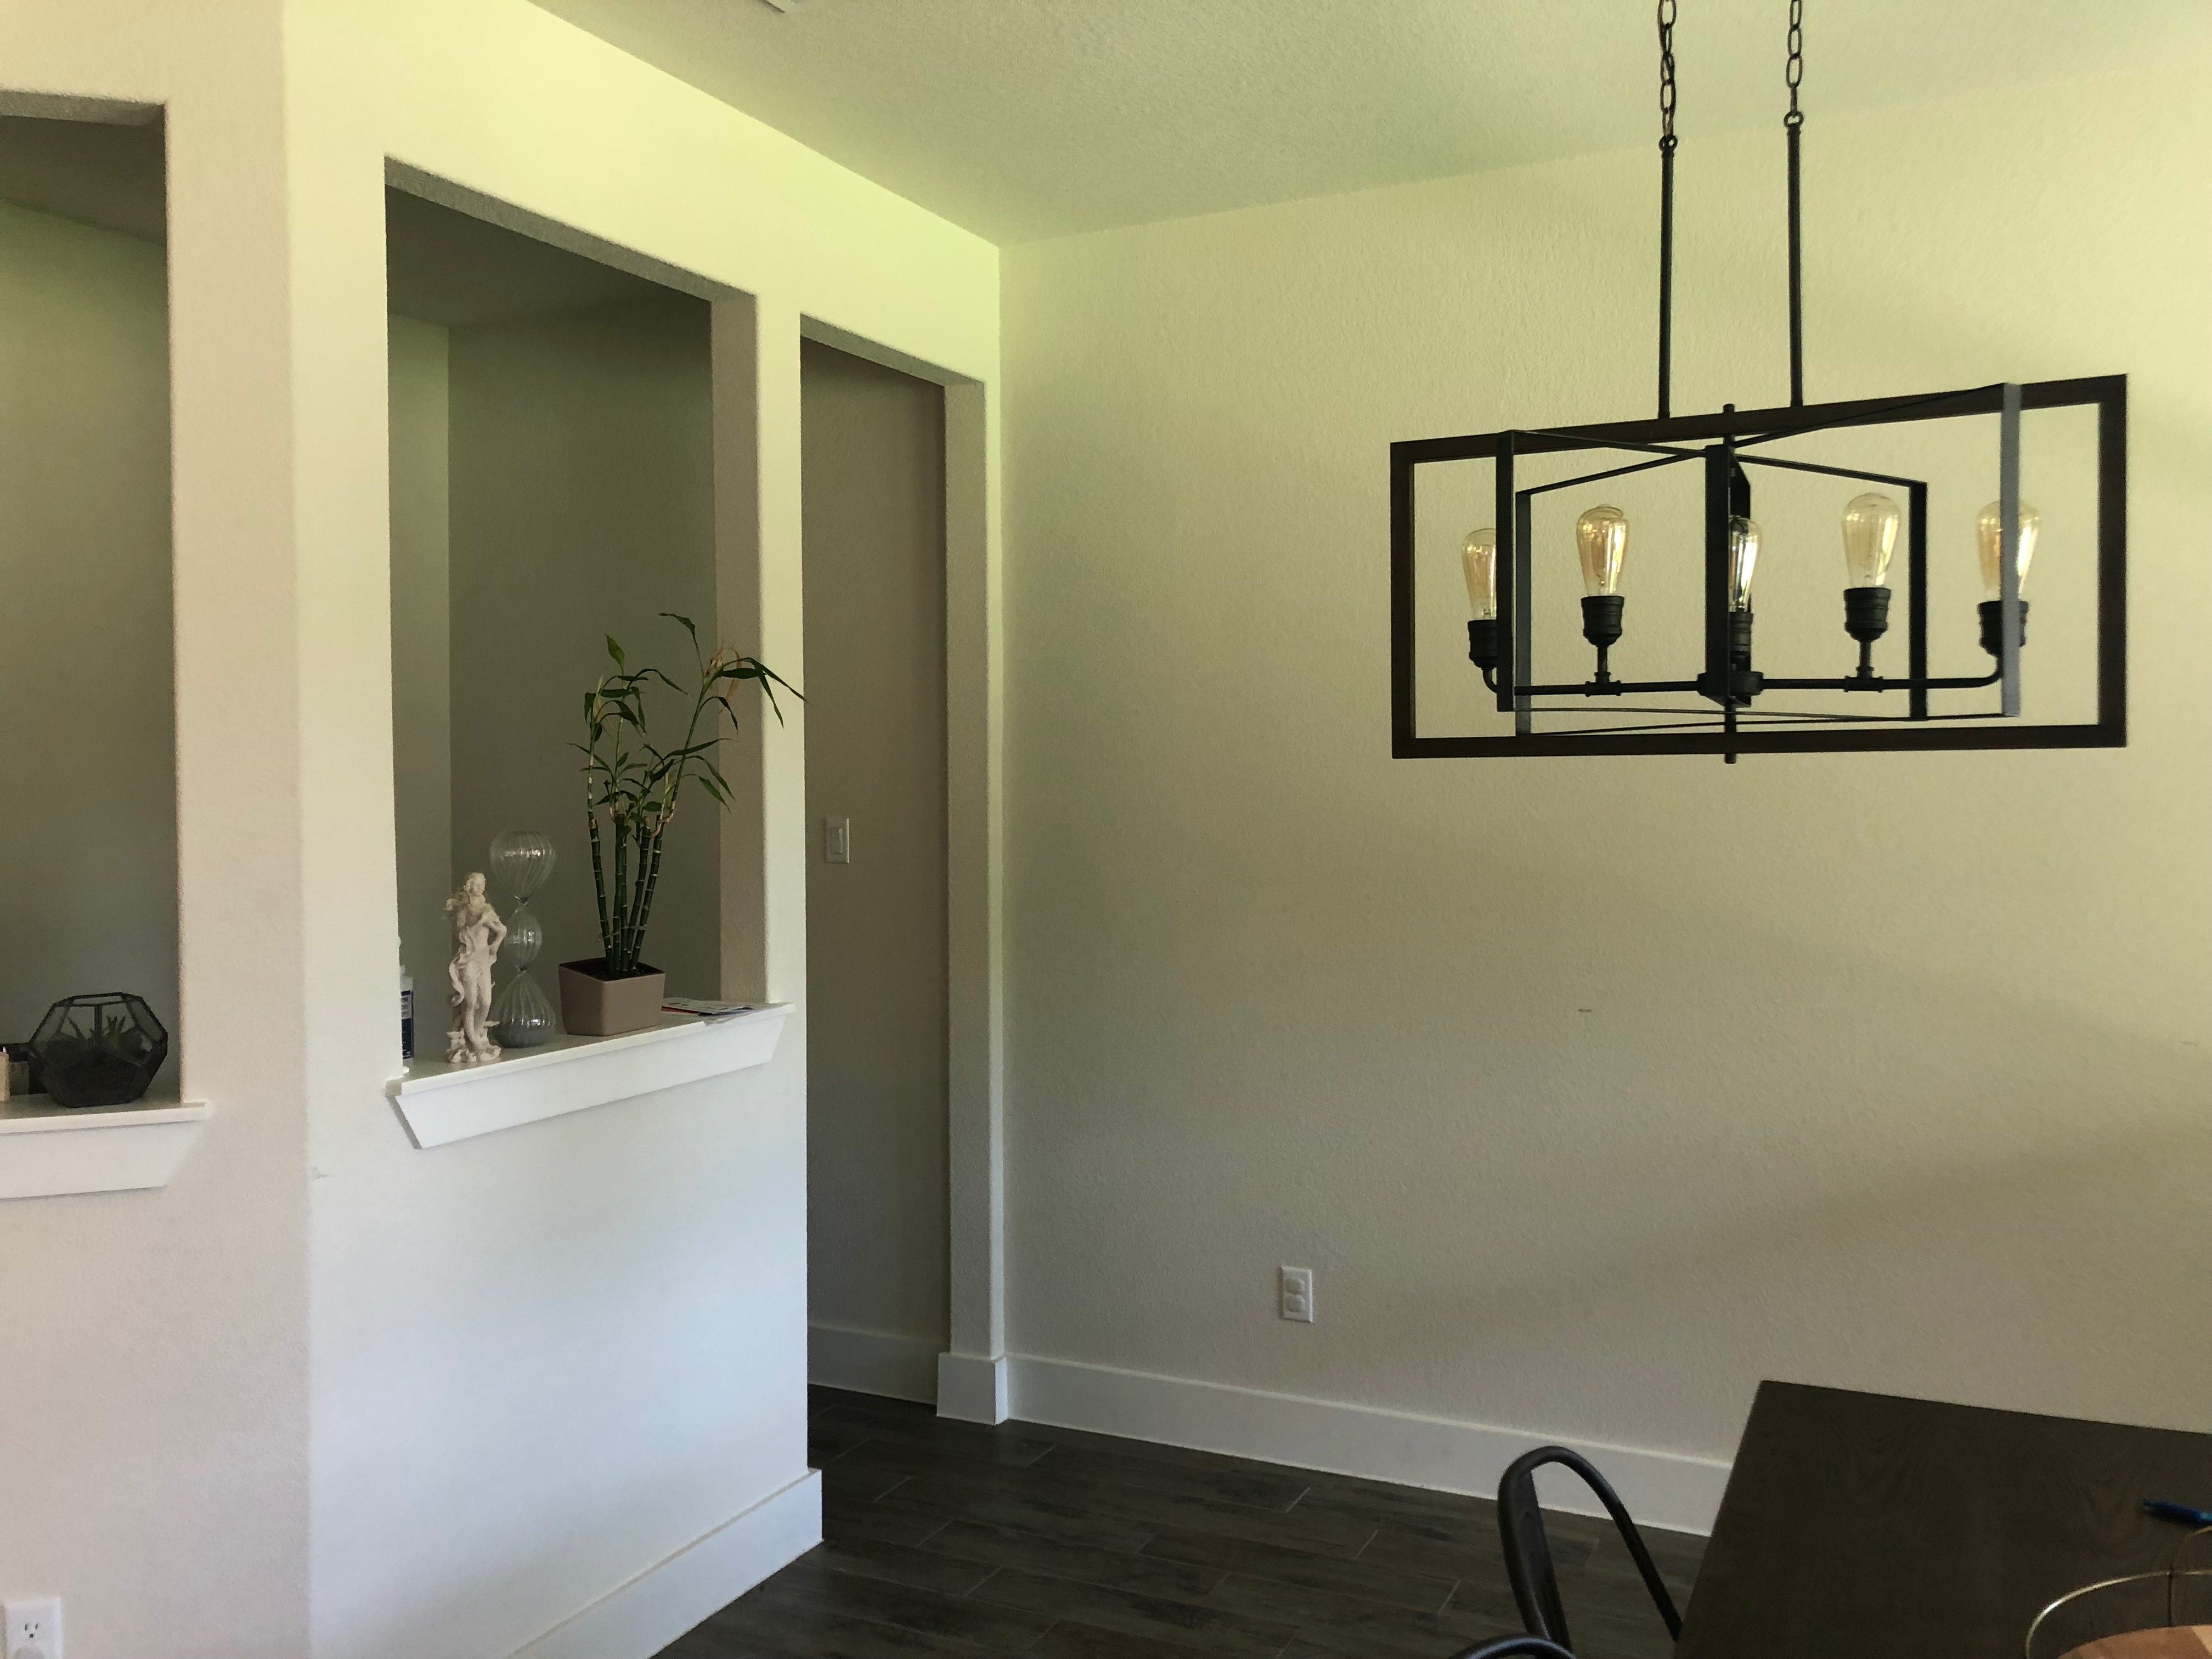
Before
MATH FOR SHIPLAP WALL
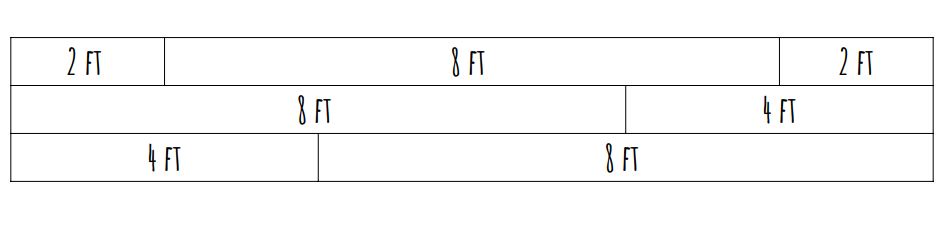
My ceilings are 9ft tall (108″) so I divided 108″ by 8″ (width of each board) which is 13.5 boards but I also have a 6″ base board that is staying there so I figured getting 14 boards high would be plenty (maybe one extra in case of mistakes). For the width, my breakfast nook is 12ft long and the nook within the nook is a little over 5ft. So, I ended up planning for 14 boards in the main space and 7 boards in the smaller area.
CUTTING & MEASURING THE SHIPLAP
I could have just put up the 12ft boards on the wall, shaved off what I needed to and have no seams but what’s shiplap without seams? So, I decided to do a couple cuts on the boards down to 8ft, 4ft and 2ft pieces and alternate the pattern going up the wall. I did the same pattern in the desk nook just with smaller measurements. See the drawing below to see the pattern I used.
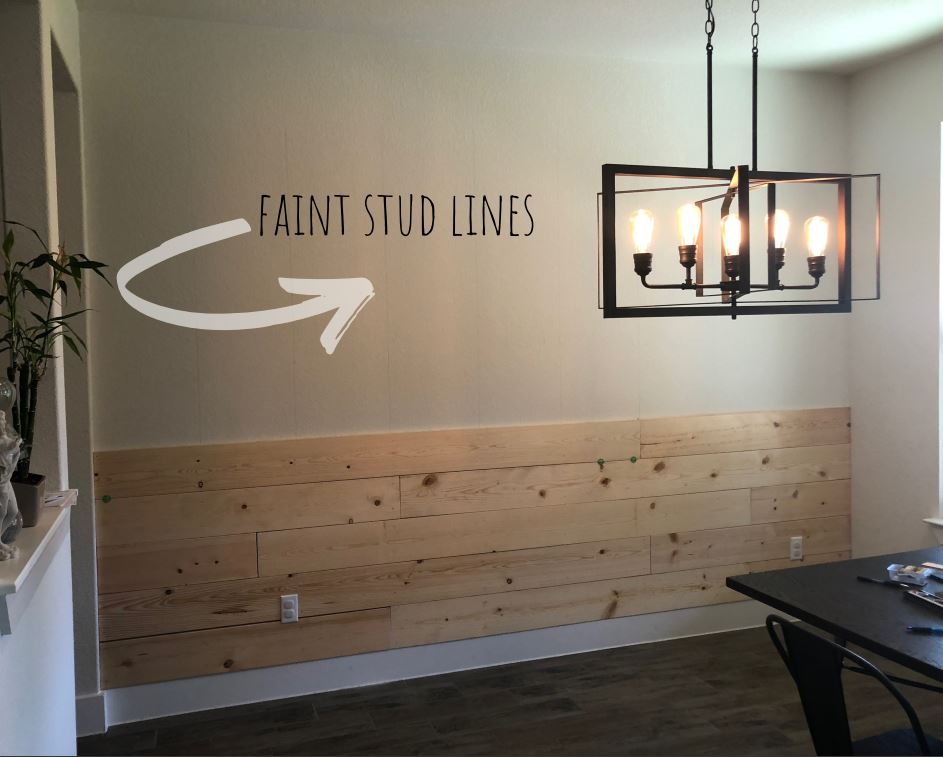
Before you begin putting up the boards, find the studs along the wall and mark them with a vertical line so you can see where the stud is as you go.
GO TIME
Once you’ve cut got your cuts done (you can also cut as you go), now we put them up on the wall. Start with whichever pattern you like but I tried to always mismatch the boards so that the pieces I’m putting together aren’t from the same board.
Put a wiggly line of construction adhesive on the backside of your board and press against the wall. The wet construction adhesive won’t really hold much, it’ll just hold the board enough to get your nail in the board. Nail as you go! Do not wait until the end to nail the boards in. Just before you nail them in, make sure the board is level and between the boards put the tile spacer so that the boards are evenly spaced up the wall. Like I said above, a nail gun would make this extremely easy but at this time, I didn’t have a nail gun so I took the finishing nails and put two in per stud. That may be overkill to actually secure the board to the wall but I also wanted it to be as flush as possible which the nails help with.
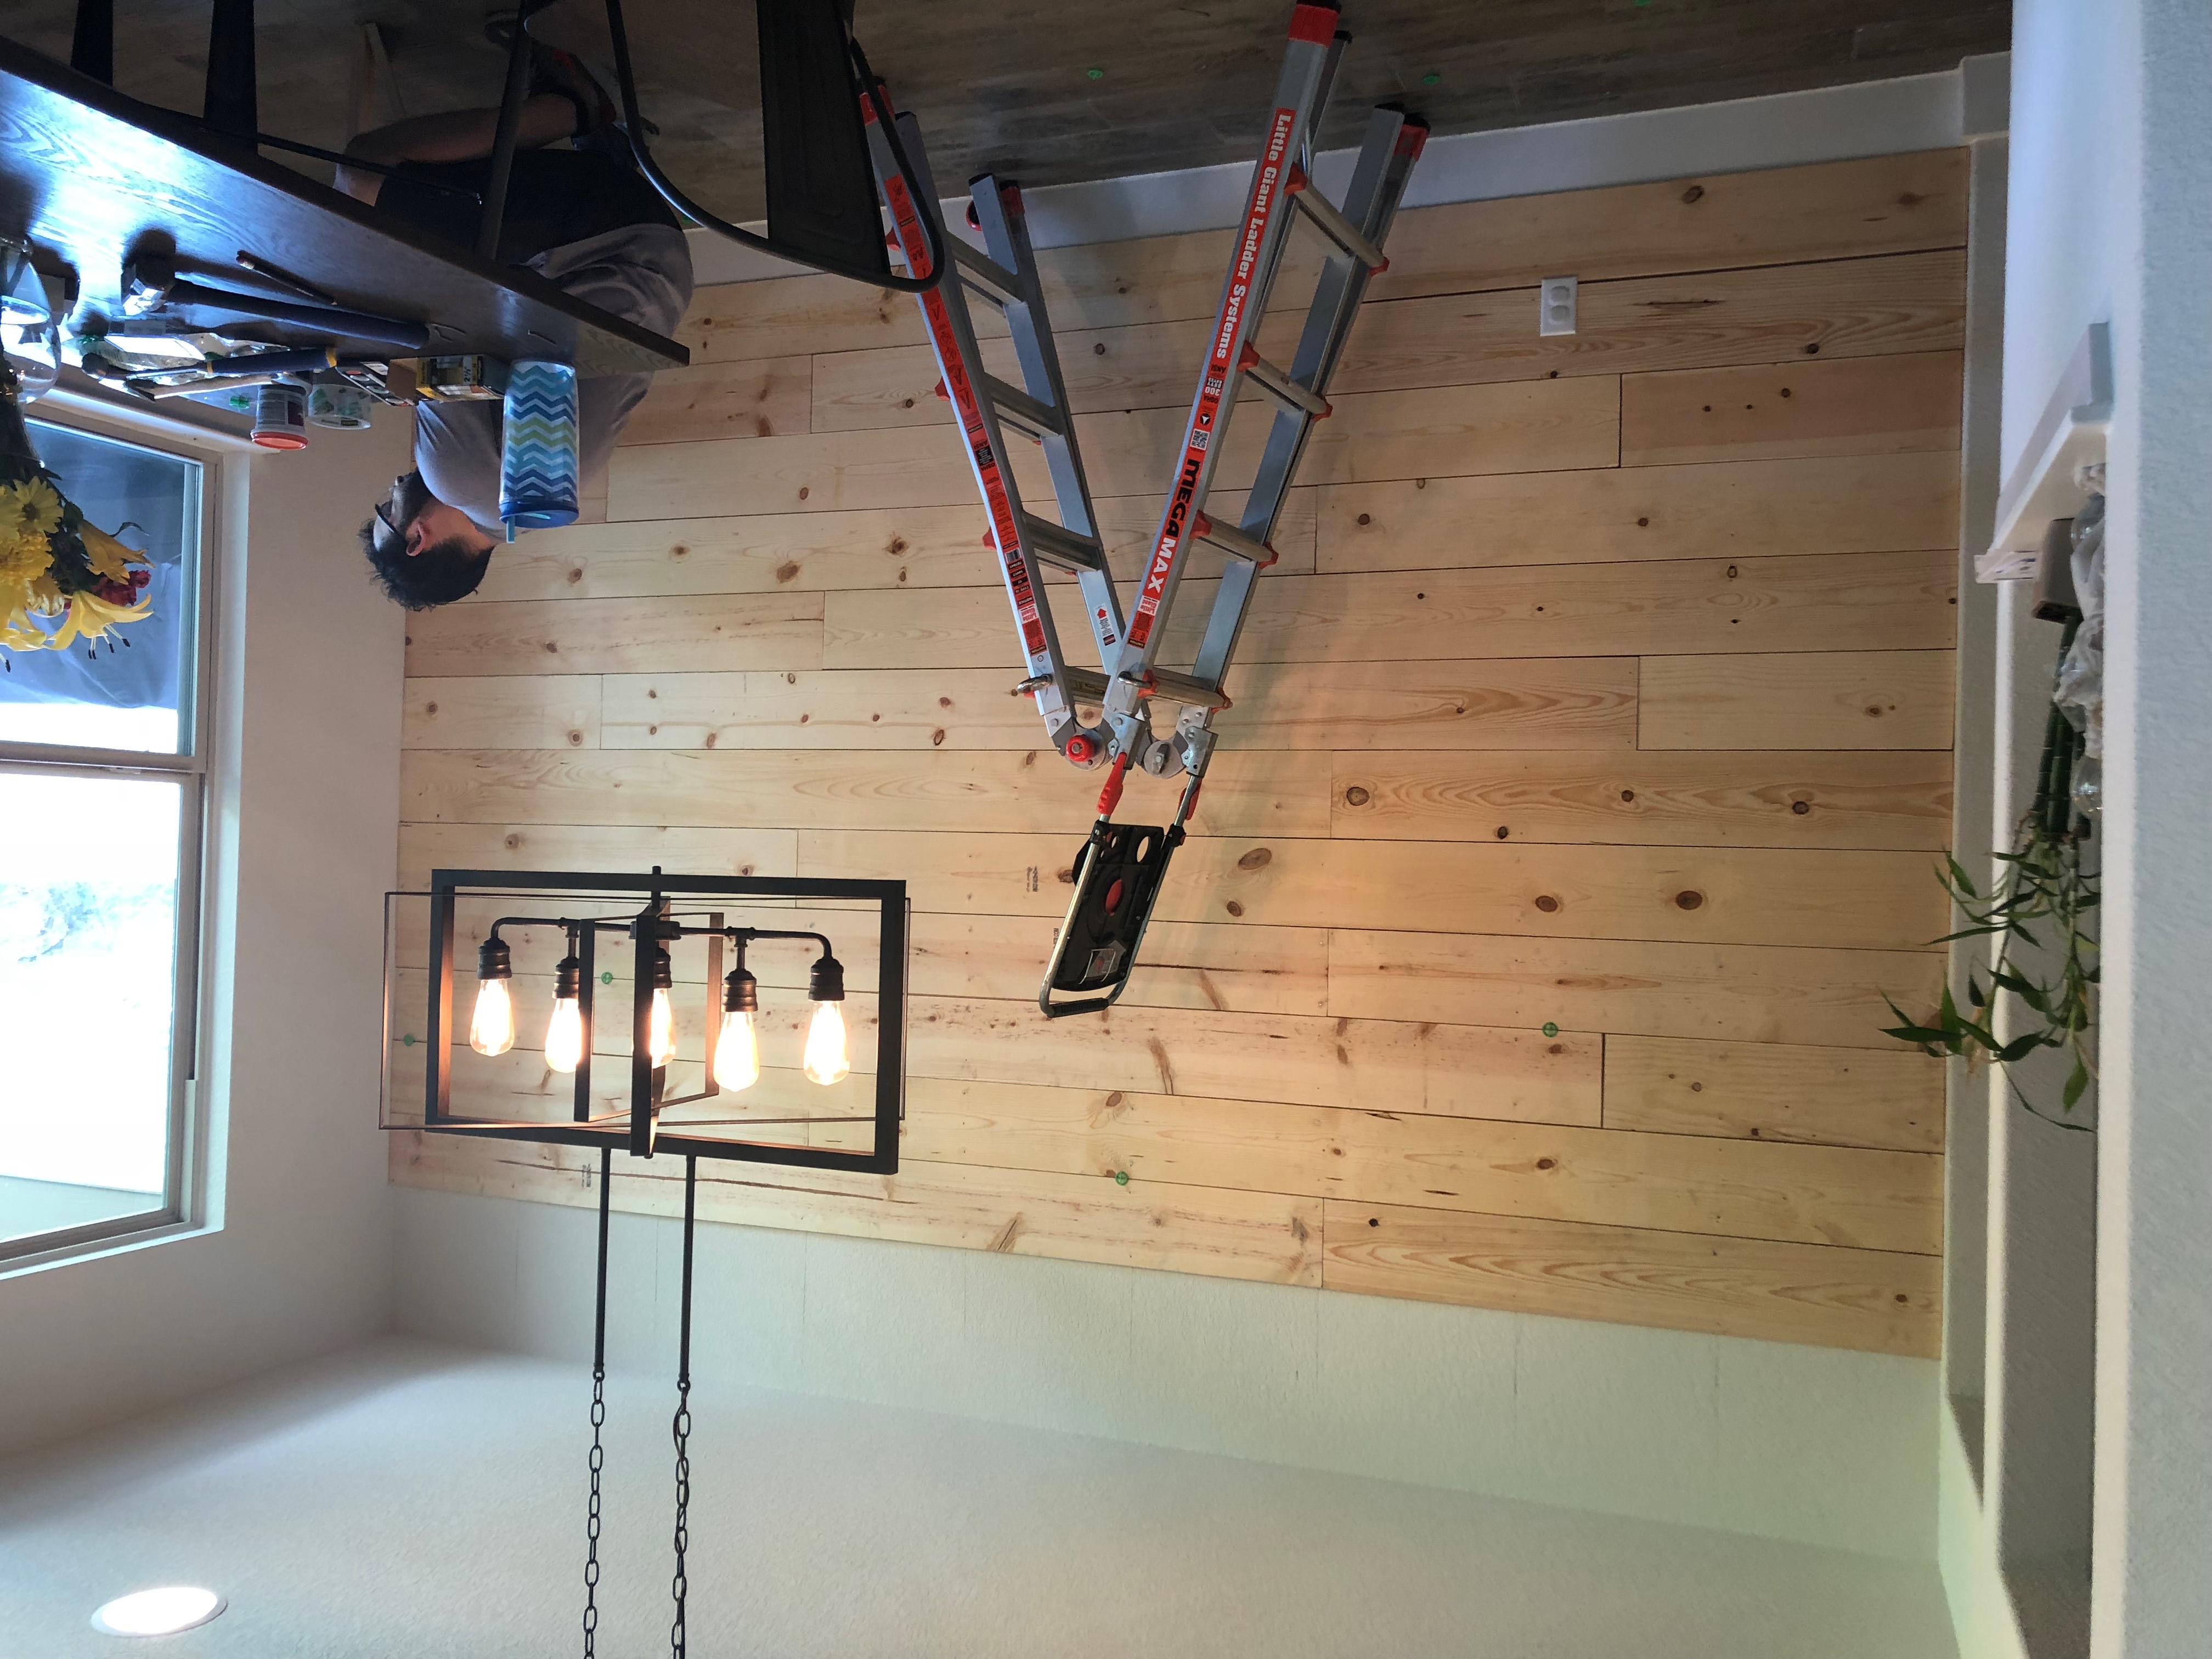
Make sure to level every single board you put up so you don’t end up at the top of the wall crooked
The most difficult part of this project was getting the electrical outlets to fit. Mark the board you are going to use in this area and cut out the size that you need with a jigsaw. Then you’ll have to bring the electrical box forward (so you don’t have weird sunken outlets) and screw it to the board so it’s flush like before.
If you’re lucky like I was, you wont have to cut down any boards to fit all the way to the ceiling. I felt like I was magic with how perfectly all the boards led up to the ceiling. I was so impressed with myself haha!
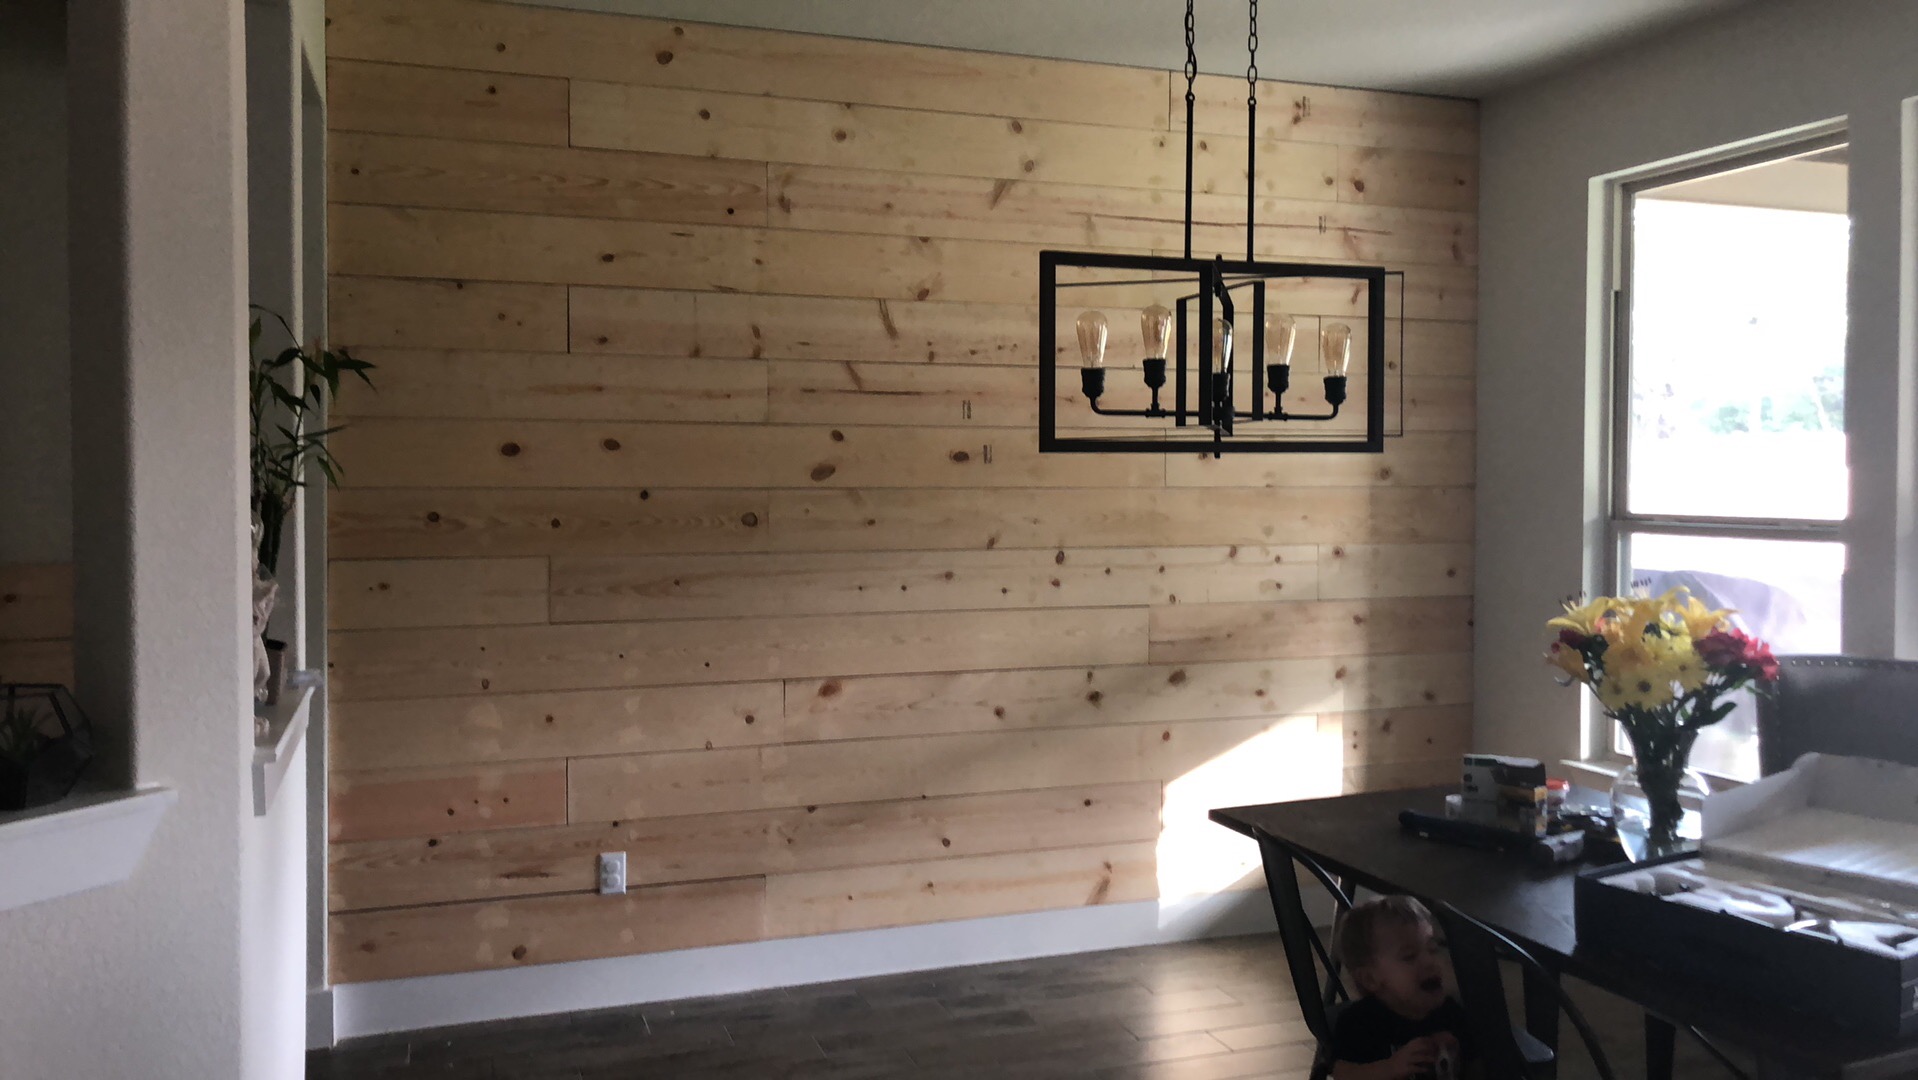
Can you spot the upset baby? I swear he doesn’t feel that strongly about the wall.
FINISHING TOUCHES ON THE SHIPLAP WALL
Once the wall is complete, you need to go back through and fill all the holes with wood filler, let it dry and sand them down.
And FINALLY it’s time to prime and paint!
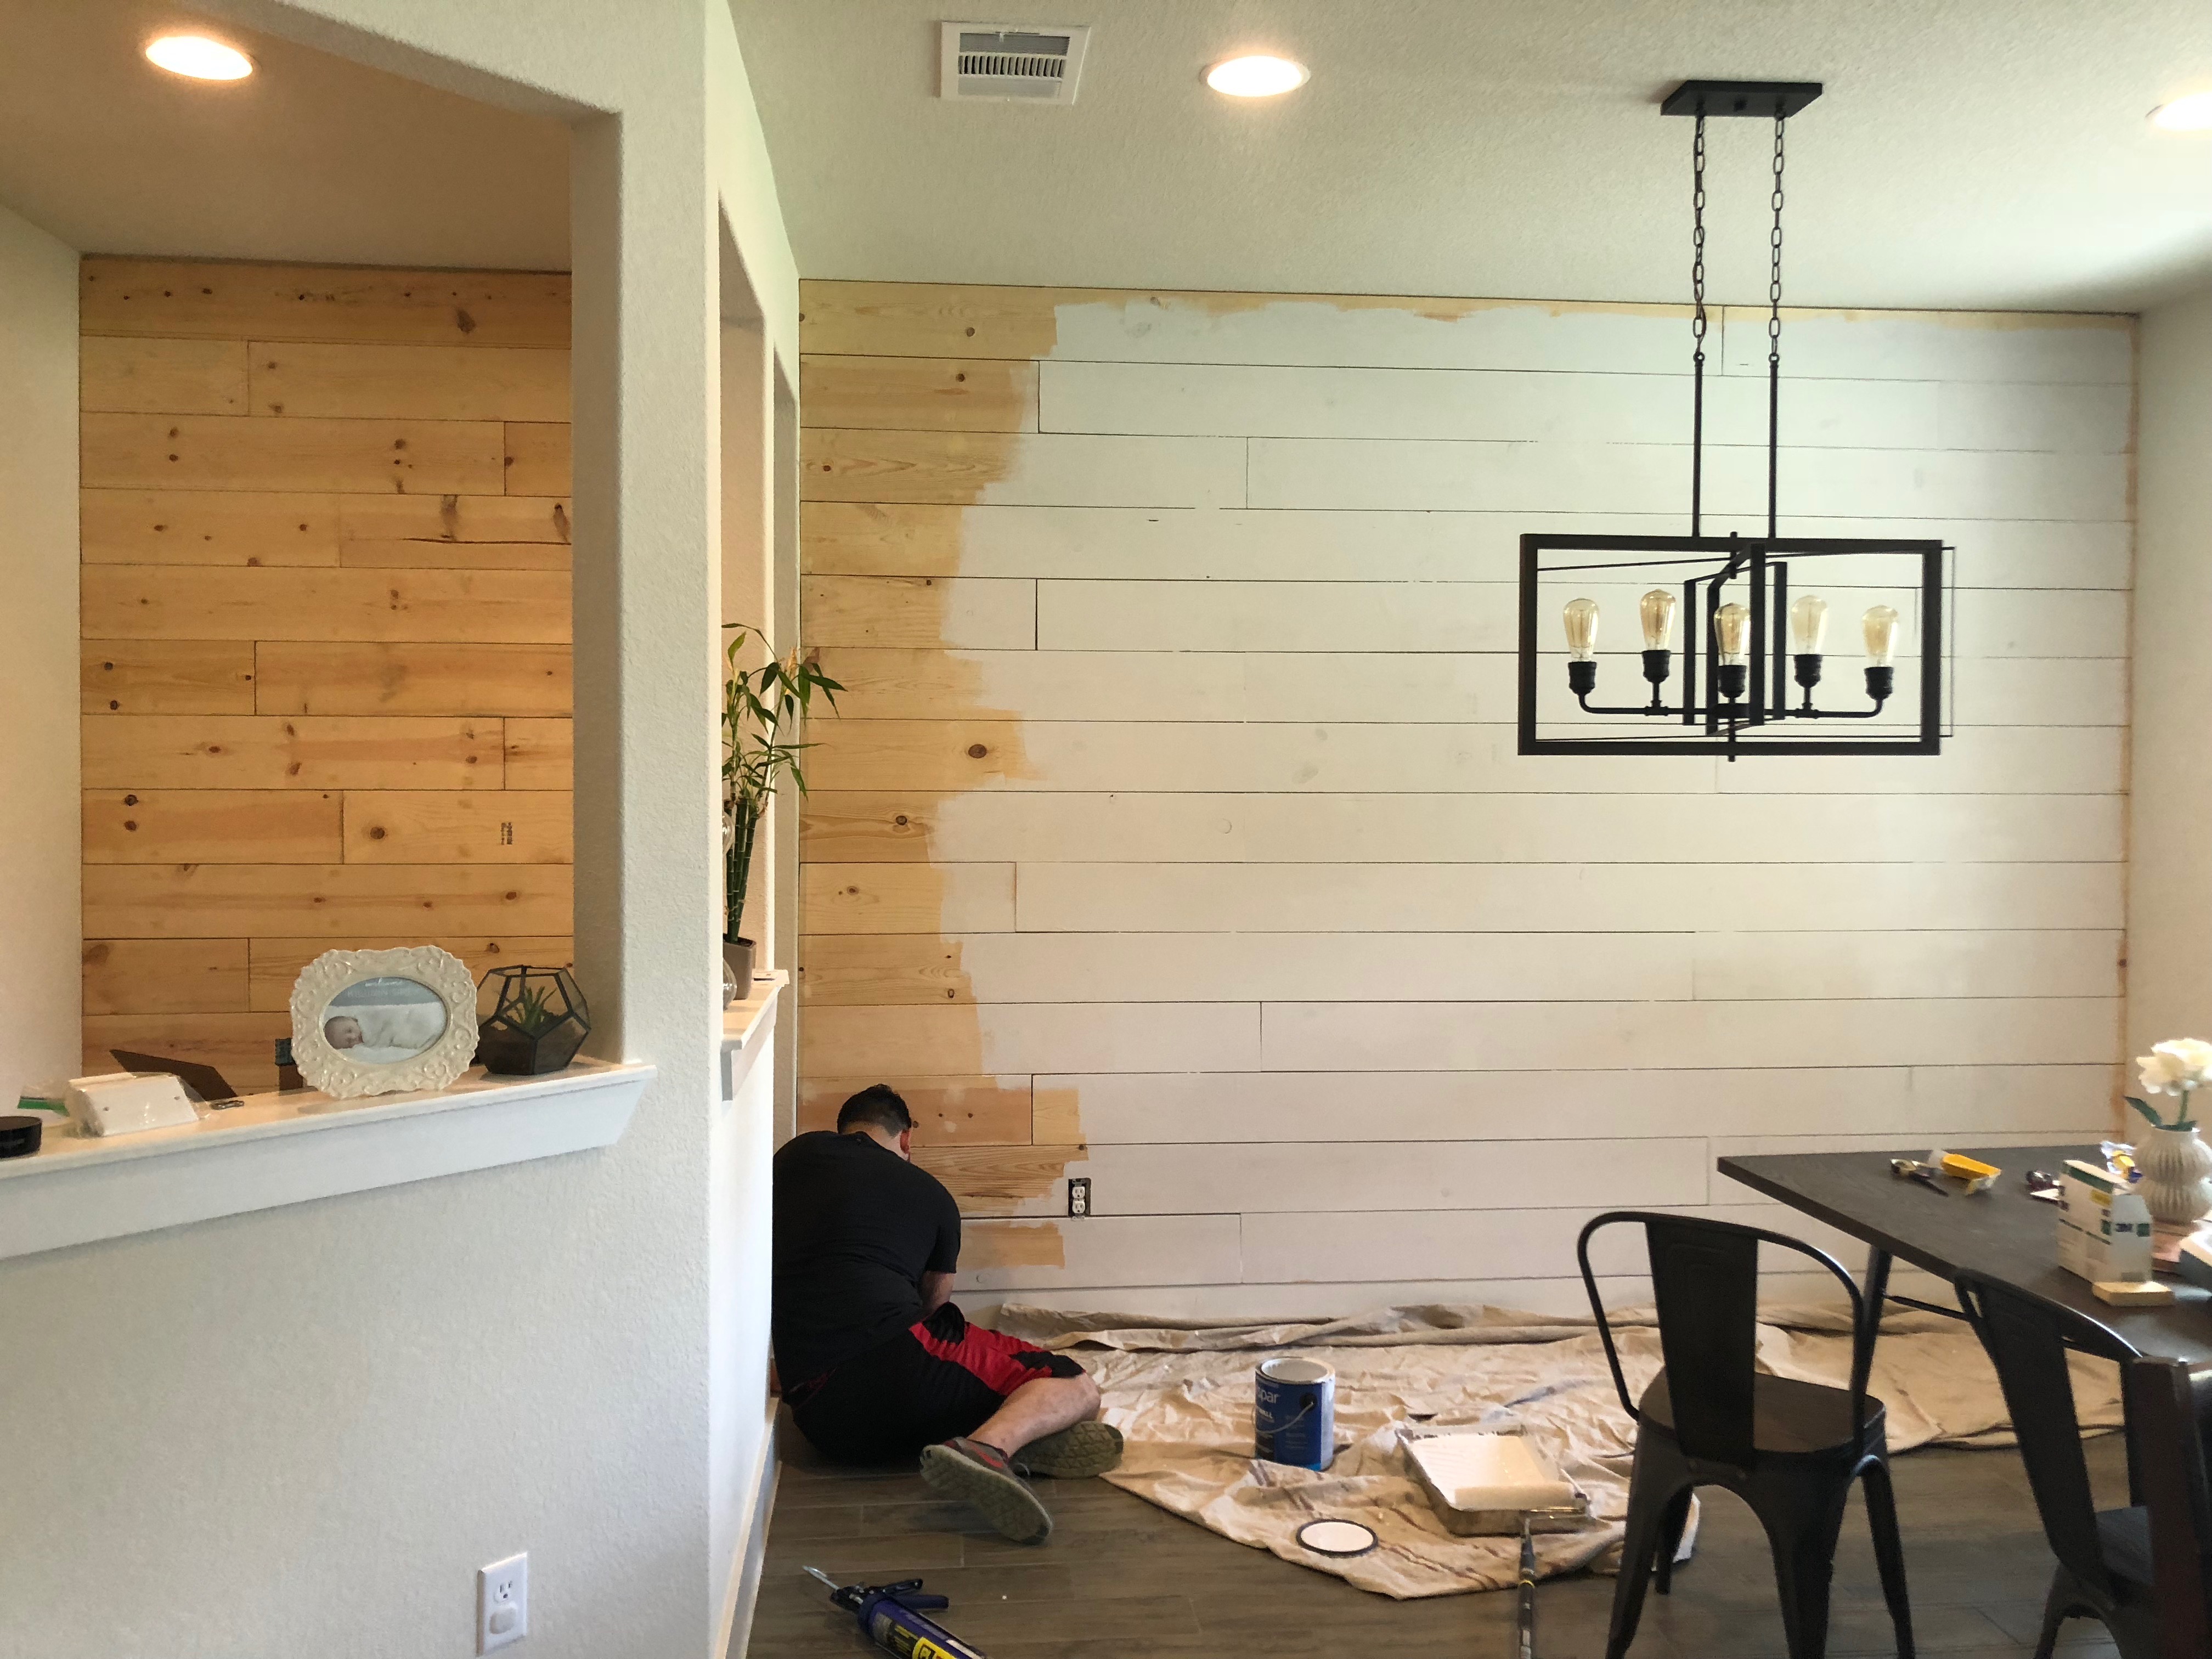

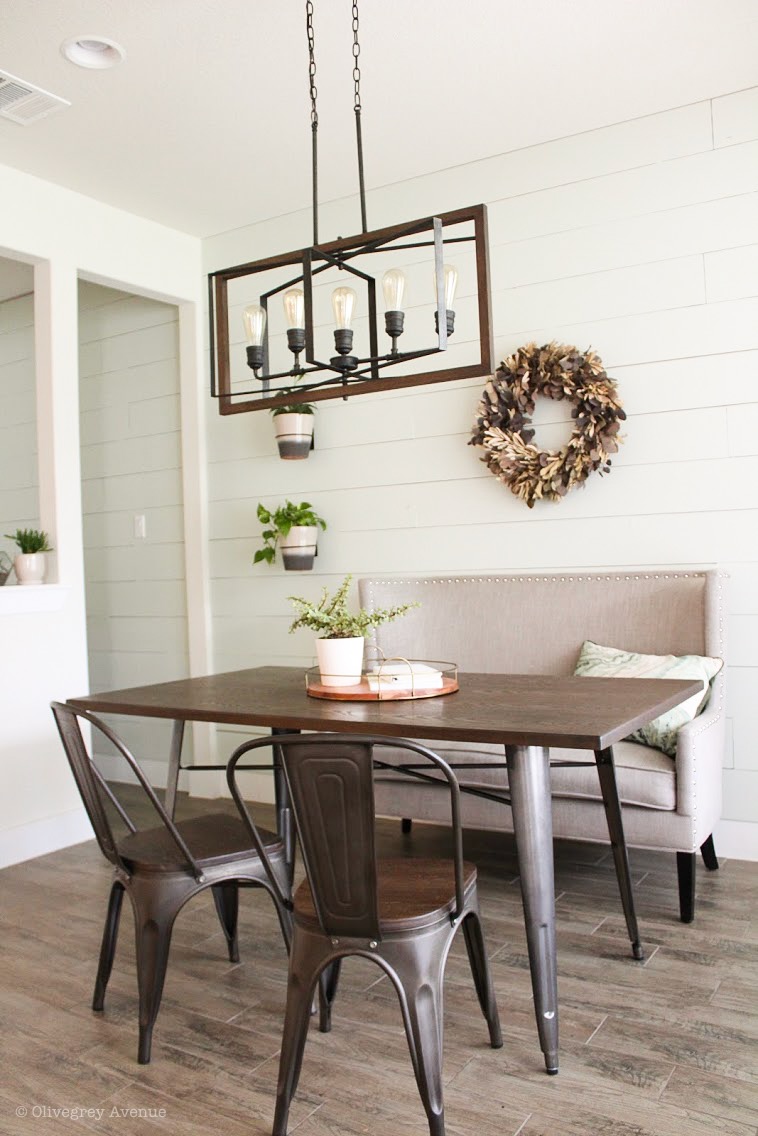
There was debate about whether to stain the wood instead of painting it, which would look awesome! But that’s not the look I wanted in this room. So, then I had to decide on a color. I was thinking the whole time that I wanted to do a big, bright white wall but one day I came across a picture of this mud room with shiplap that was a greyish-greenish color that I loved! It was different than the traditional white but still very subtle. So that’s what I went with!
I had to do 1 coat of primer and 2 coats of the paint so the wood grain wouldn’t show through. Last but not least, I caulked both sides of the shiplap walls which really makes the wall look finished. I’m telling you that it’s all in the details. Always.
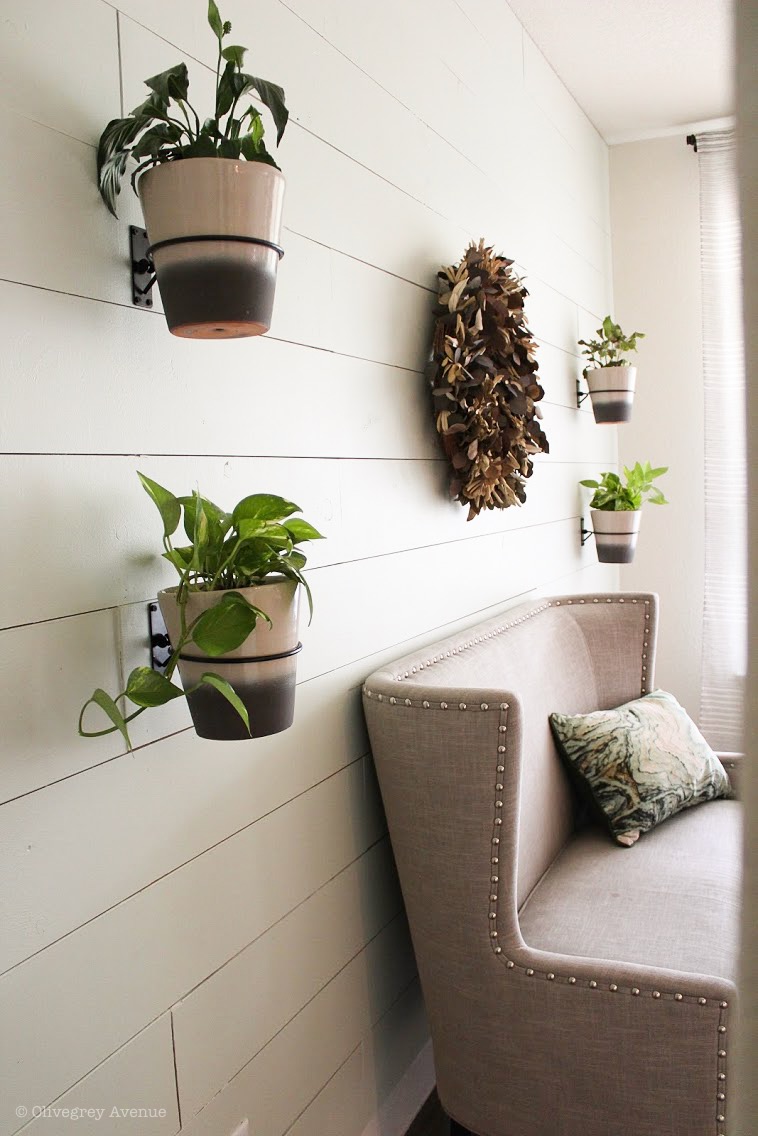
You can just buy shiplap boards that are even painted I think which sounds great and they’re beautiful but in an area this large, it would get pretty pricey, plus I like the challenge. I couldn’t be more thrilled with this area now! It came together so beautifully and it’s exactly what I wanted. I even like the variation in the boards’ gaps and textures.
LESSONS LEARNED
WHAT I GOT RIGHT: I’m so glad I planned out the pattern and the amount of wood needed for this project so I didn’t have to make more cuts than I needed.
WHERE I GOT LUCKY: The finishing nails worked fine but it would have been easier and quicker with the proper tools. And I wouldn’t have had to use so much wood filler with the dents the hammer would make in the wood.
I hope you enjoyed reading about this fun project! Follow along with me on the blog and instagram @olivegreyavenue.
Find us on social HERE!
Shop our favorites HERE!


