


Beadboard Accent Wall


It’s week 6 of the One Room Challenge and WHAT the actual wall treatment will be has been the question since the beginning. Truly, I wanted to do a fabulous accent wall of wallpaper. That didn’t work out because of a couple reasons. This is a large wall and to cover the entire wall would be about $500. Which wasn’t quite in the budget this time around. The other issue is that when searching for wallpaper, many of the ones I found, didn’t work on textured walls, which we have. So, if I want to use it, not only would I have to buy the wall paper, but I’d also have to skim coat the whole wall or cover it to make it smooth. No thanks to both of those options.
Then while searching wallpapers, I saw one that I felt like I could paint something similar myself. I bought 5 quarts of paint to complete my vision and started by drawing out the shapes on the wall. BUT I hated the colors. I thought they would be more subtle than they turned out to be and I’m all about understated things. So I figured I could either buy more paint (different colors all together or get the same colors at like 25% to mute them a bit). Or I could pivot completely. After deliberating over a couple days, I decided to scratch the mural. It just wasn’t giving off the vibes I was going for in this space.
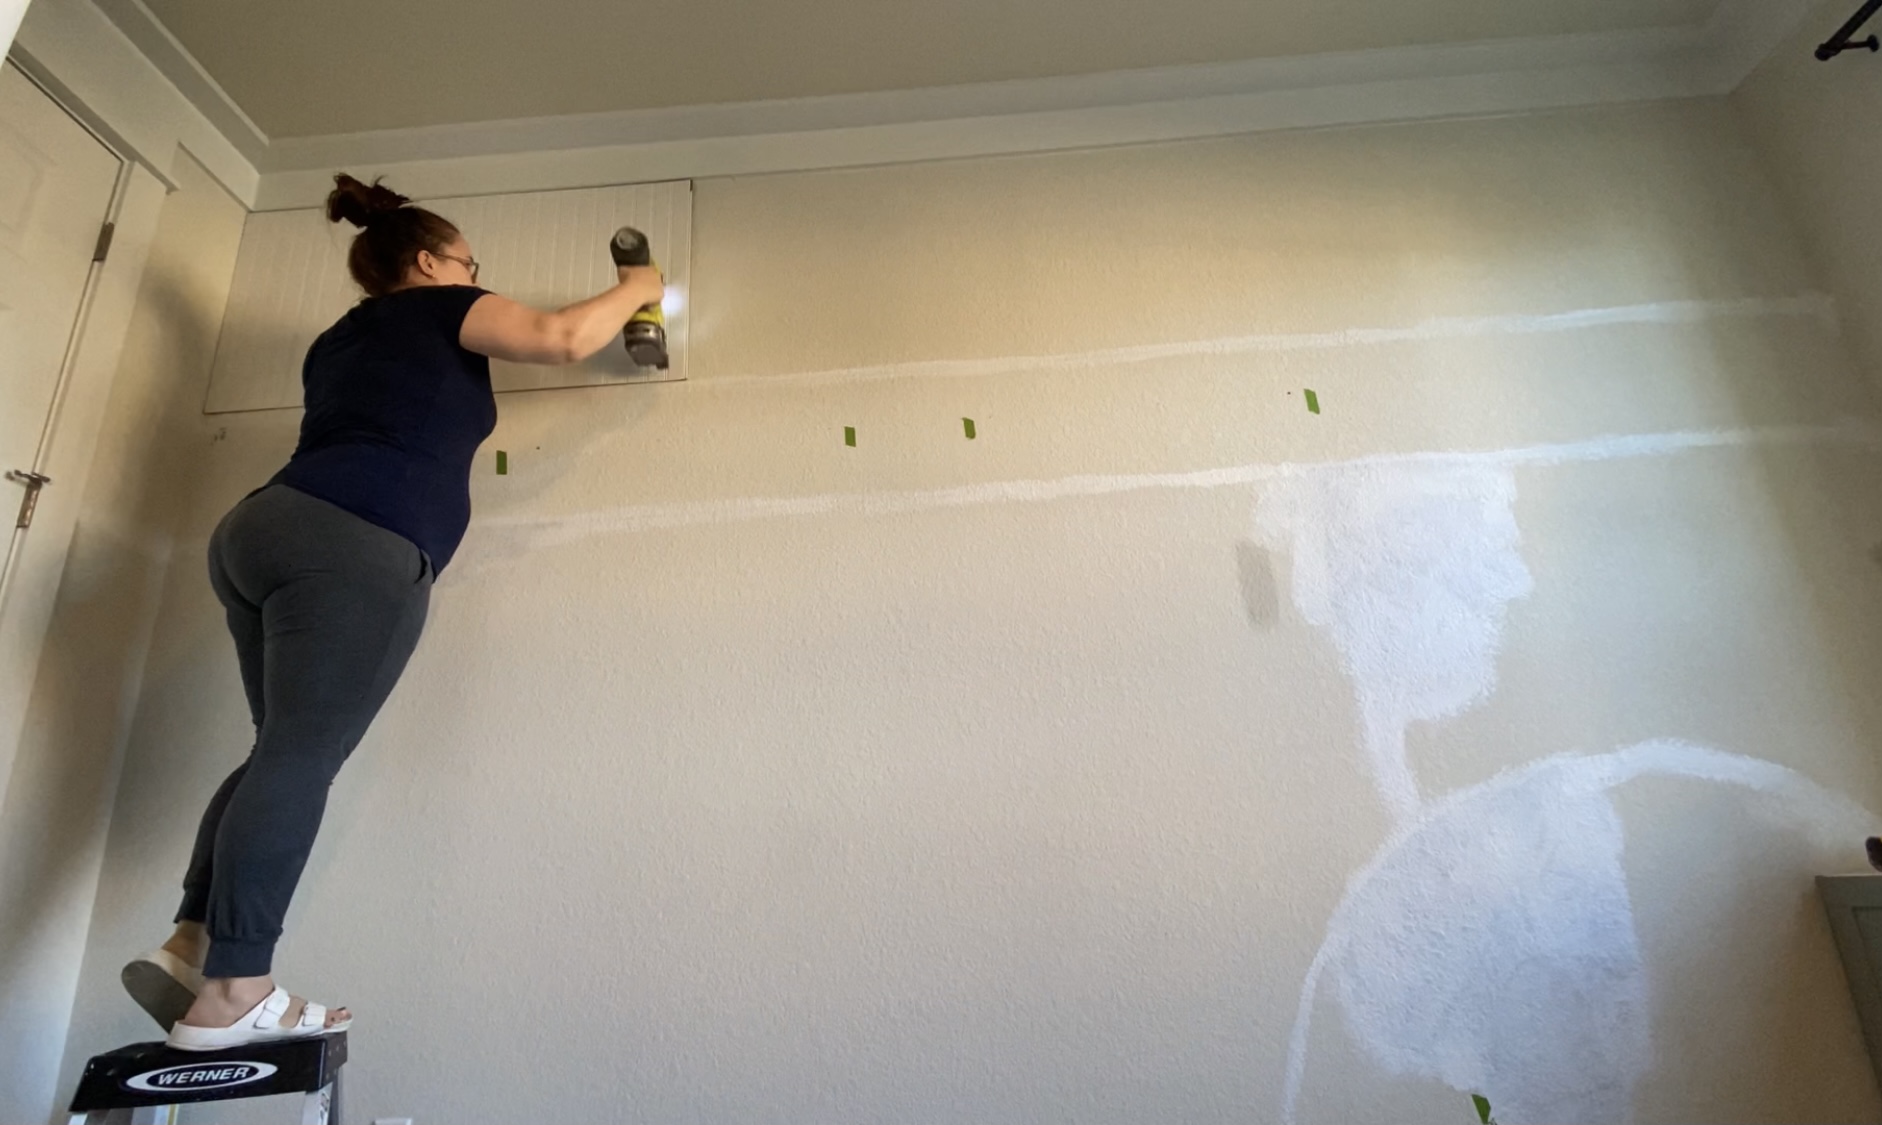
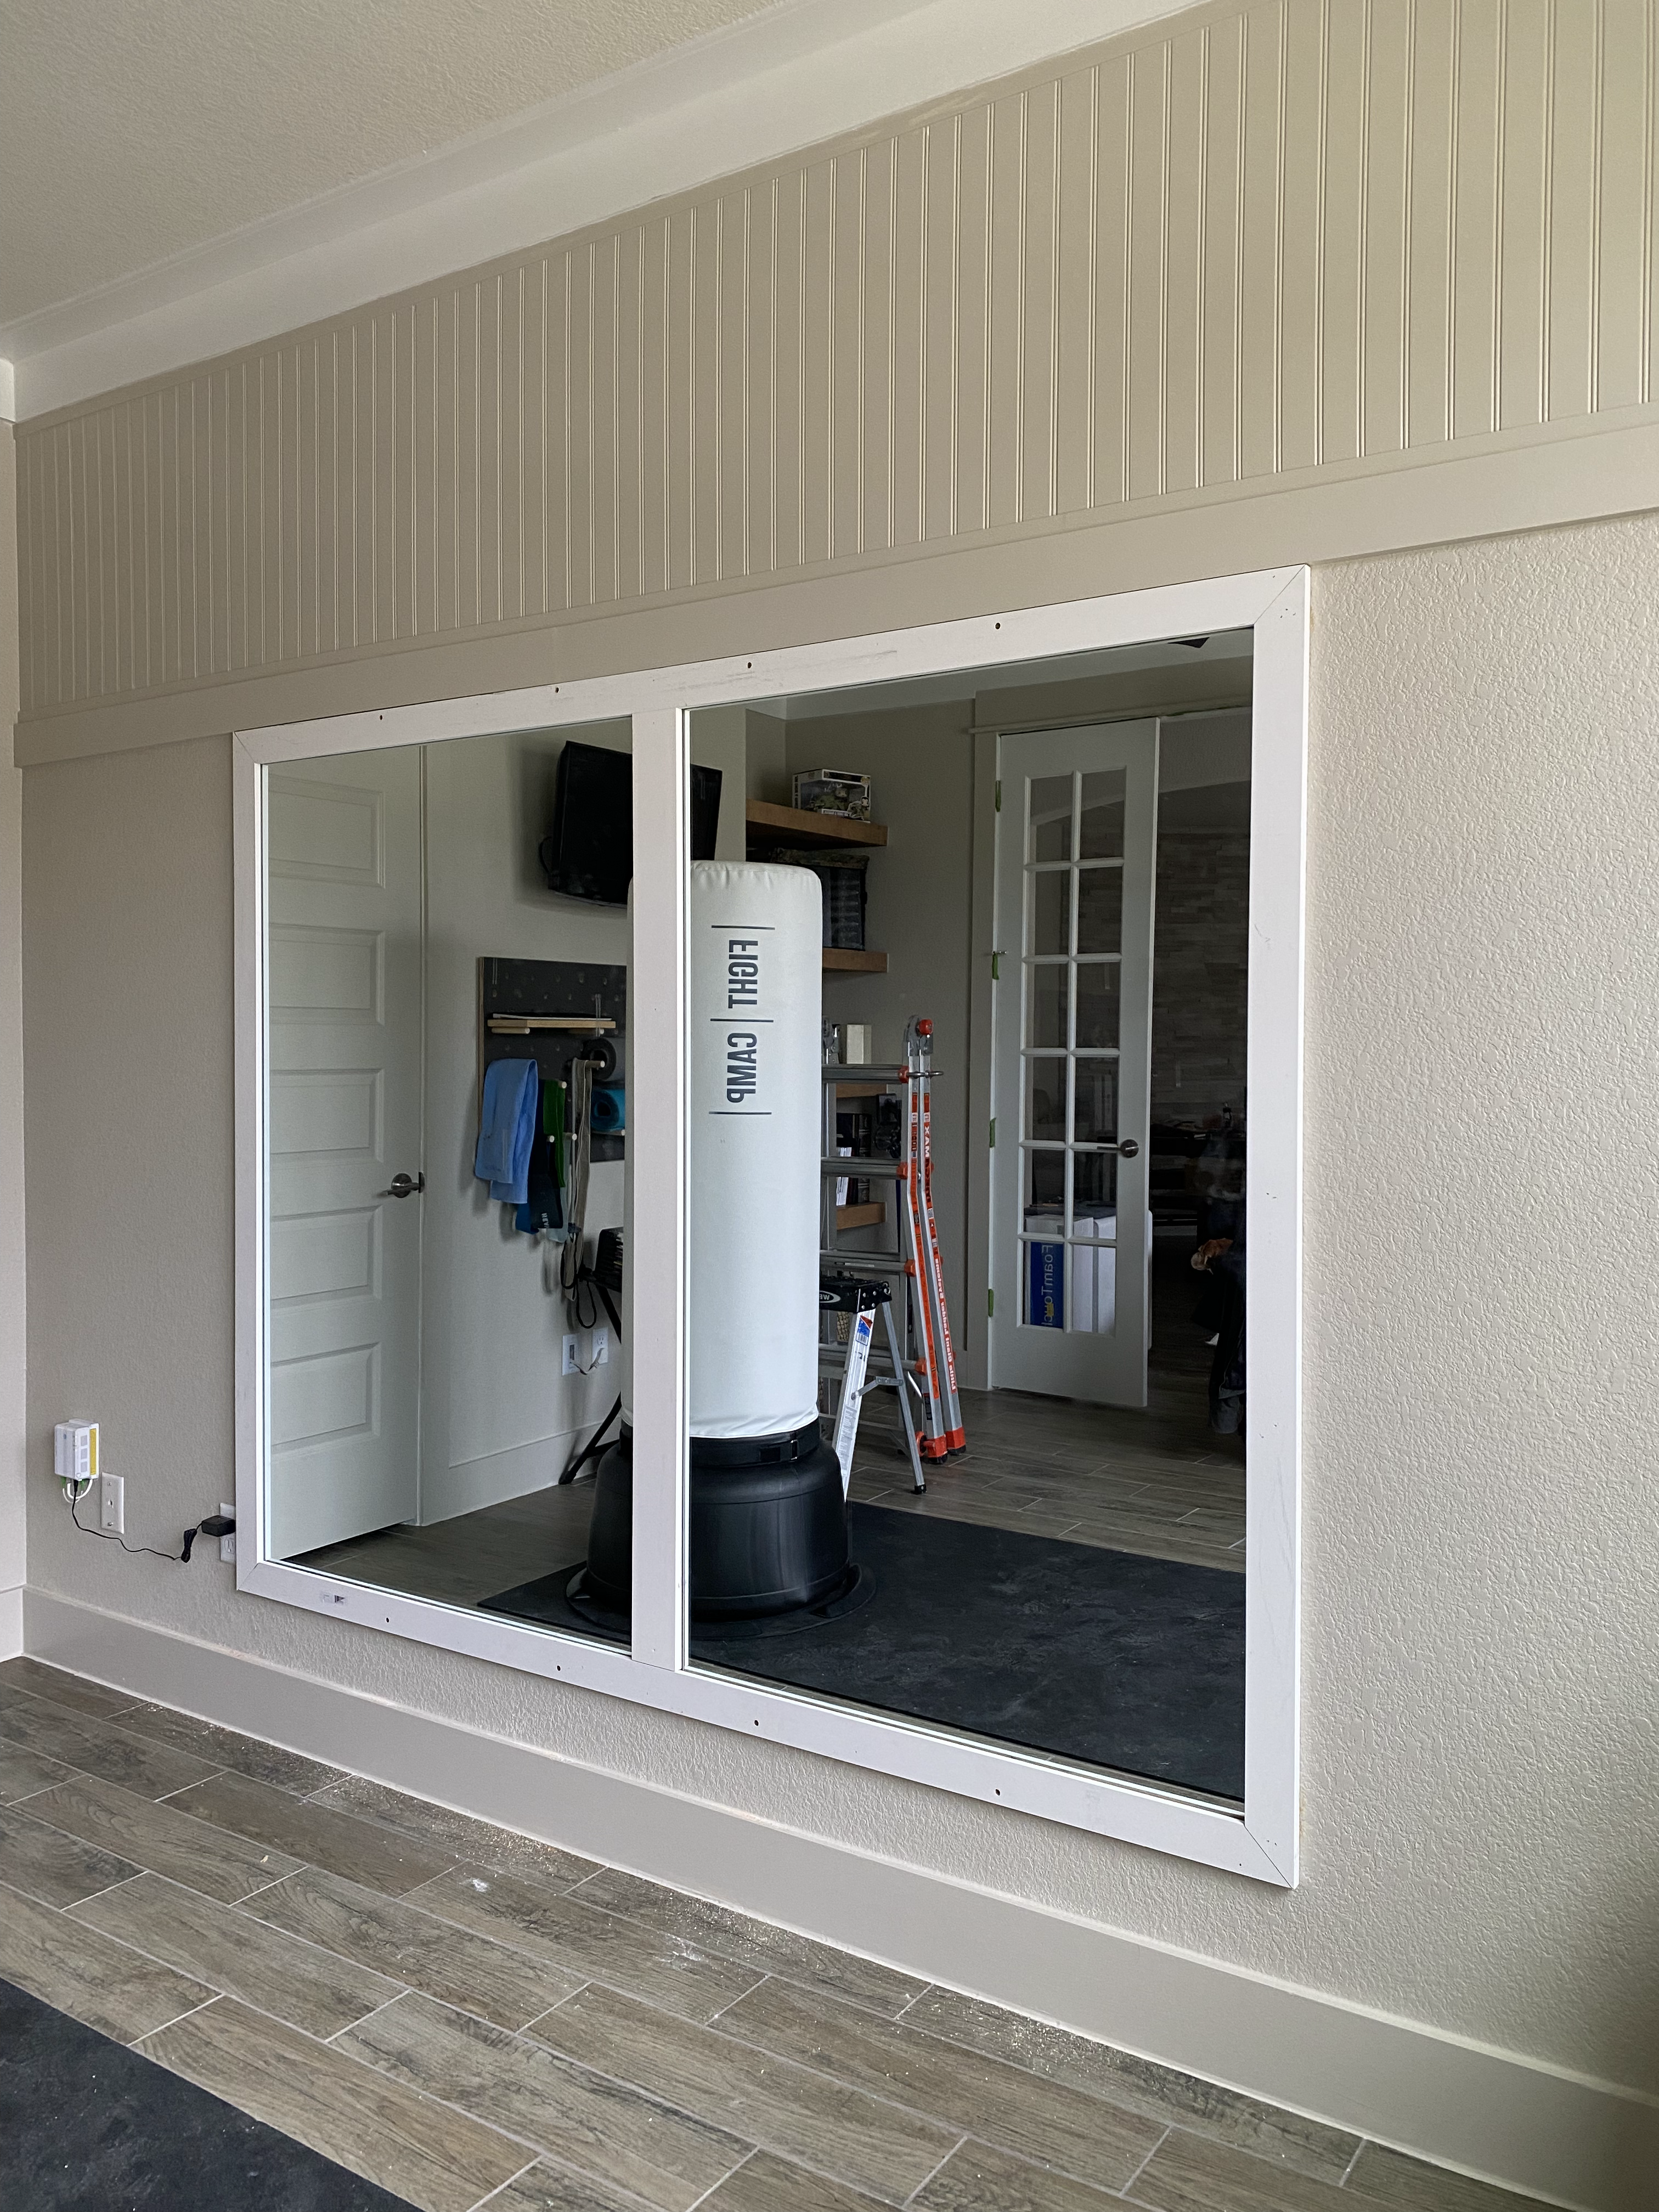
Beadboard accent wall it is! But I don’t want to cover the whole wall because I just did that on the wall behind the waterfall desk. I measured the wall and figured that I could cut the beadboard in 2′ sections. One sheet would span the whole length and it would take up just the right amount of space to balance the mirrors. Oh I haven’t mentioned those have I? Well we’re circling back around to the gym part of our office/gym space. We are putting two giant mirrors on the wall. More on that below.
Micro Beadboard Accent Wall Treatment
I was able to get the beadboard cut at the hardware store so it was already in 2′ strips when I got home. I put some construction adhesive on the back and brad nailed it in place. The only cutting I had to do was trimming the end piece to fit the length of the wall.
So far, we’ve spent $23 on one sheet of beadboard.
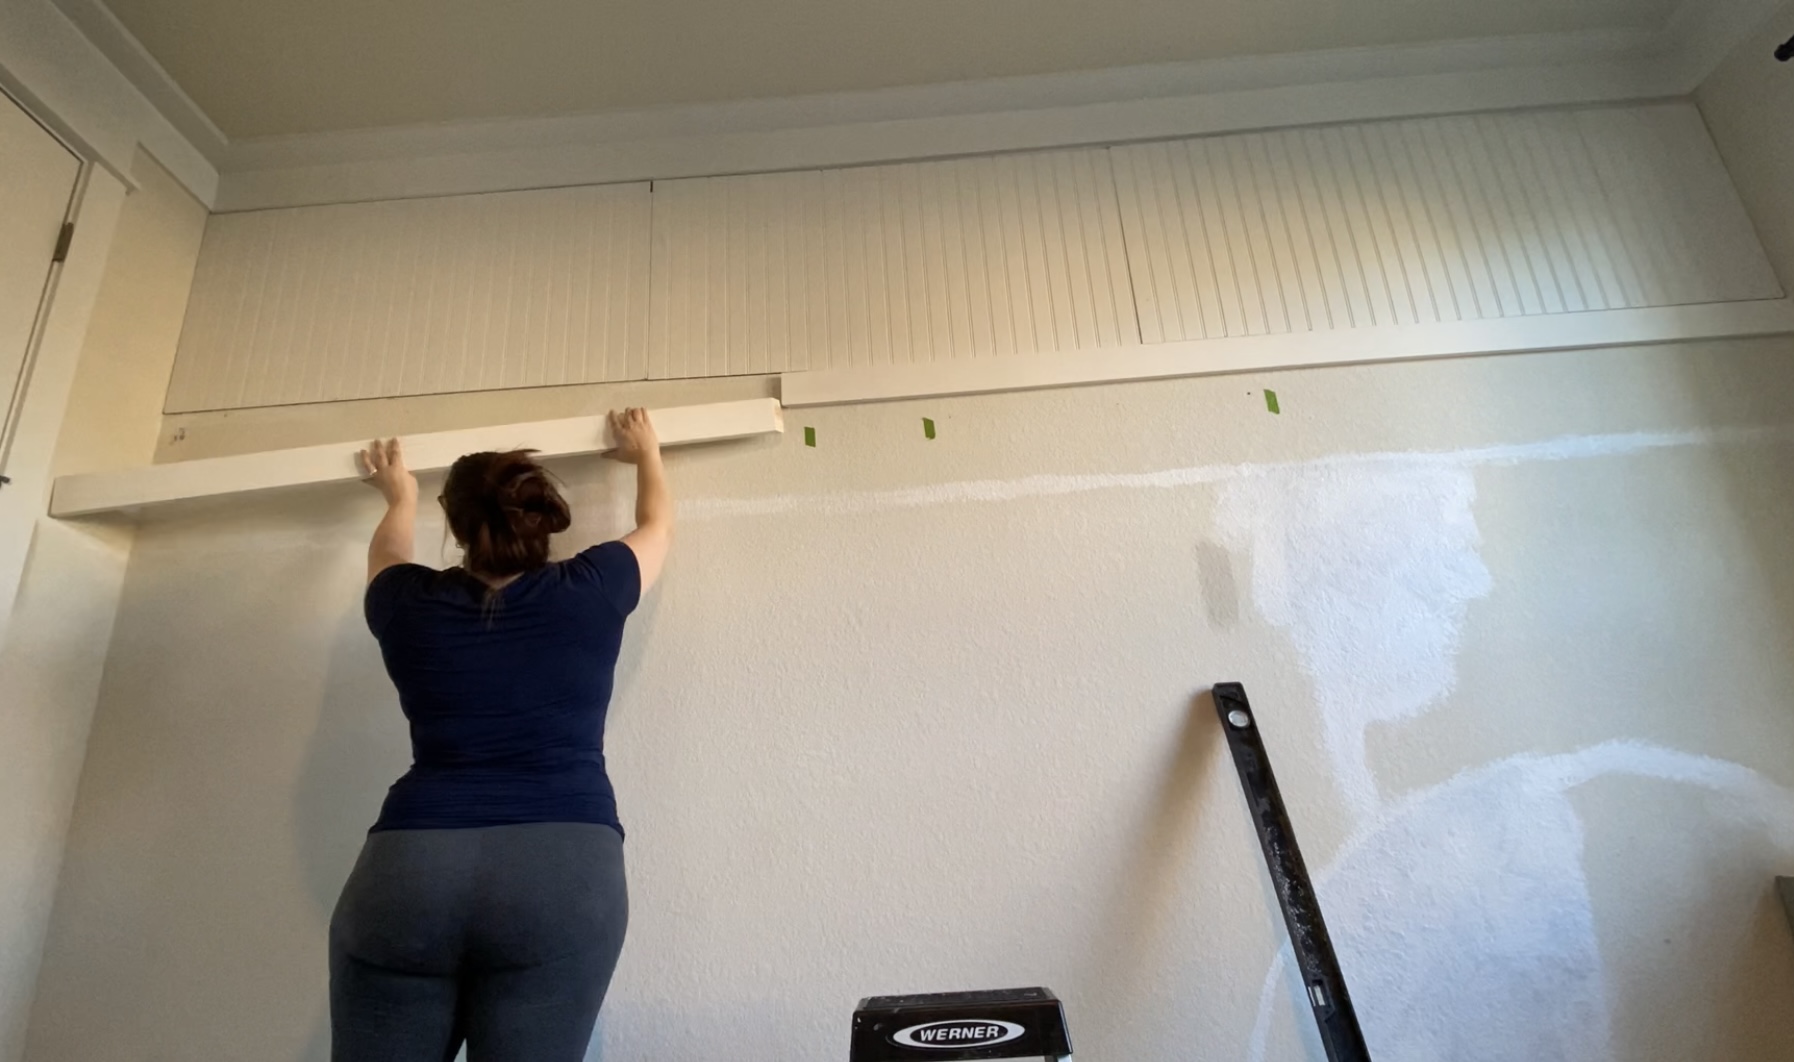
After the beadboard, we have to finish off the edges with some trim. I used primed 1x4s and I needed two which was about $18. Then I used the small trim I used on the other side of the room to finish off the top and bottom gaps. Four of those cost $16.
Now we have a wall treatment that took about an hour of time to complete. It only cost me about $57! Now that Is much better than $500+ wallpaper.

Then the rest of the gaps between sheets can be fixed with caulk. Then the seams and nail holes can be filled with wood filler.
Lastly a fresh coat of paint and you have a custom accent wall treatment that’s less than $60!

I actually decided to take this color around the room, including the baseboards, closet door, and trim for that monochromatic look.
Now to finish off this wall with the mirrors!
INSTALLING GYM MIRRORS
Now I did my research on mirrors and tried to find the largest mirrors for the least $$$. With so many retailers out of products, most of what I found was just out of budget. I decided to get the frameless 36″ x 60″ vanity mirrors from Lowe’s and customize a frame.
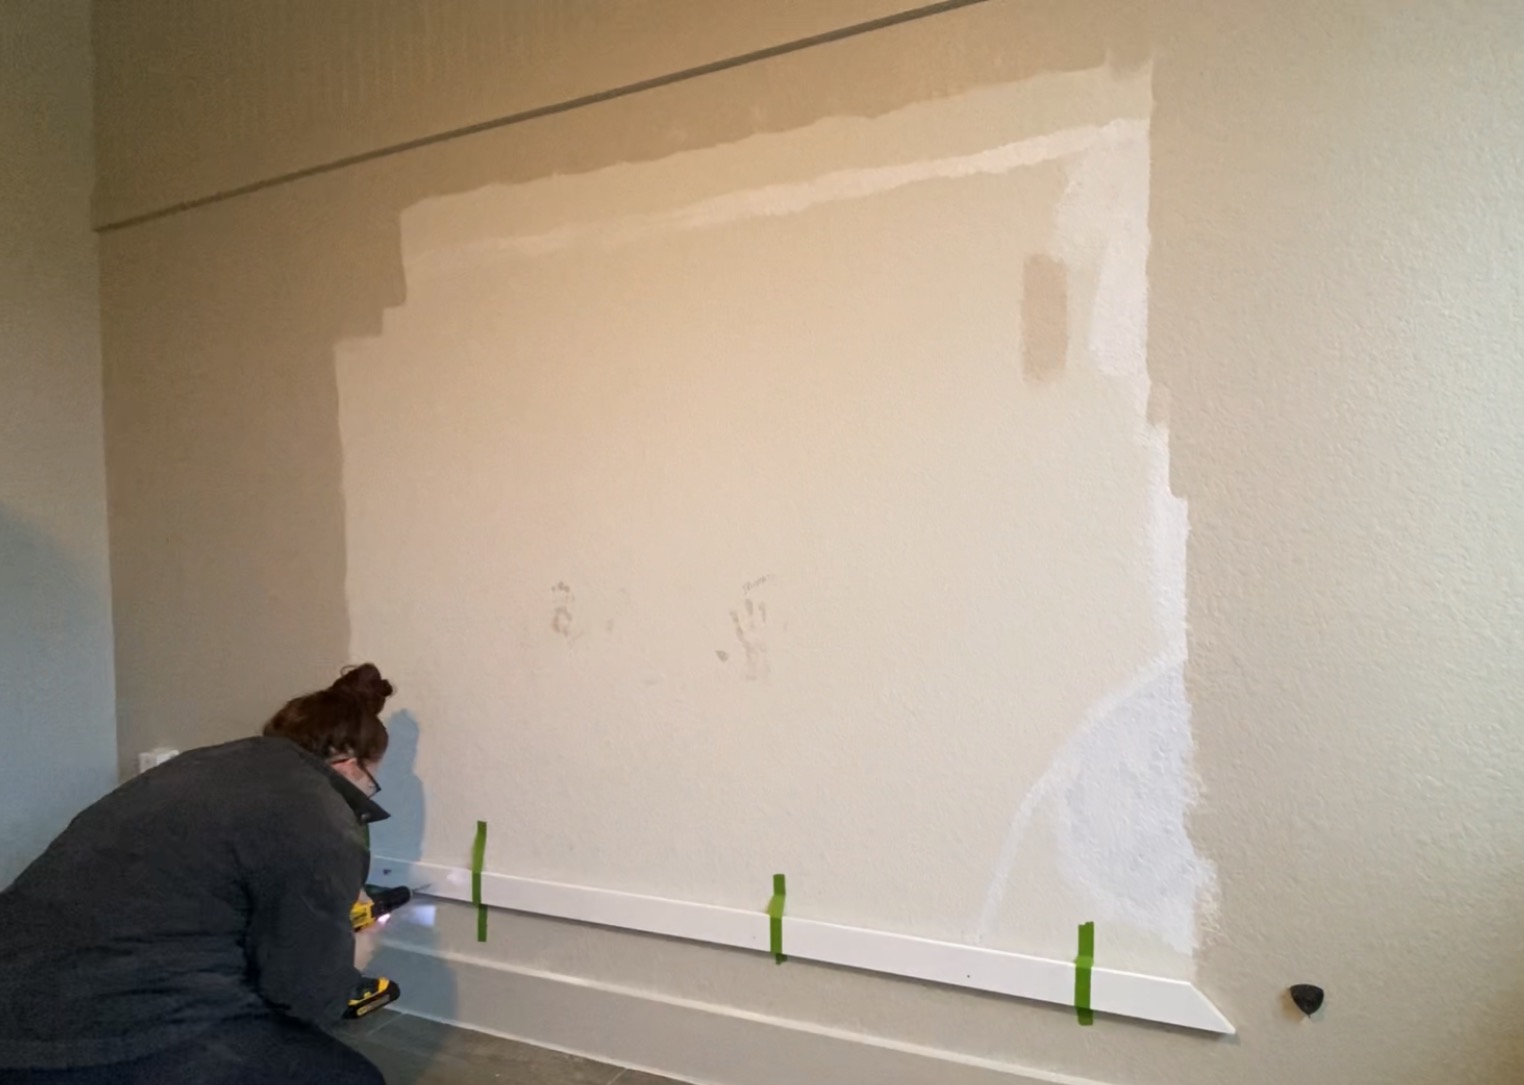
The frame is simple, primed 1x3s around the edges and a 1×4 down the center. The only complicated part is just cutting out the slot for the trim to fit over the mirrors and to be a support for them to stay in place.
I took the top and bottom pieces and ran them down to my table saw to cut out a 1/4″ by 1/2″ slot for the mirrors to sit on. Then used the miter on the ends at the exact length of both mirrors plus the size of the trim (36″+3.5″+36″).
To make sure this trim was level, I created a level line with my laser and taped it to the wall. I did this because I wanted to pre-drill pilot holes into the studs before the screws.
After this, Steve helped me put these heavy mirrors onto the trim. He also held them in place while I put the top trim on the same way as the bottom. The side and middle pieces were just placed flat against the wall. They don’t need to hold the mirror in place, they just finish off the frame.
Now should I stick with the monochromatic look and paint it Accessible Beige or should I go with the contrasting Urbane Bronze or Evergreen Fog?
Come back next week to see the finishing touches of this space because reveals are just two weeks away!
Find us on social HERE!


