


Plunge Pool Install Process: Why Plungie + What It Really Costs


If you’ve ever dreamed of having a pool but couldn’t stomach giving up your whole backyard, you’re not alone. That’s exactly what led us to discover Plungie pools—a modern, compact solution that gave us the best of both worlds. In this post, I’m sharing why we chose a Plungie plunge pool, what the install process actually looked like (hint: it involves a crane the size of a small skyscraper), and the real costs behind one of our biggest backyard projects yet. Spoiler: it’s been a little chaotic, a lot exciting, and soon-to-be totally worth it.
I’m sure you’ve seen those reels floating around, there are just so many, talking about how your
kids are only with you for so many years and these ones we’re in are so tough at times but
they’re the best days of our lives. Ok, let’s not get too heavy straight out the gate but these are
the things that give me that motivation to just do things. Plus with the healthy heat in Texas,
summers just make you not want to be outside when you feel like your skin will melt off your
body. But my biggest issue with a pool is that you typically have to choose between a pool or a
yard and I wasn’t willing to give up my beautiful yard. Of course when I get an idea, it festers in
my brain until I start researching and ultimately convince myself it’s the best idea I’ve ever had.
With all that being said, we’ve decided to install a POOL!
It’s not a traditional pool because that felt very big and overwhelming to me. I decided to go the
route of a cocktail pool, also known as a plunge pool. They’re a bit smaller than a “traditional”
pool, kind of like a jumbo spa pool.

Why a Plungie Pool?
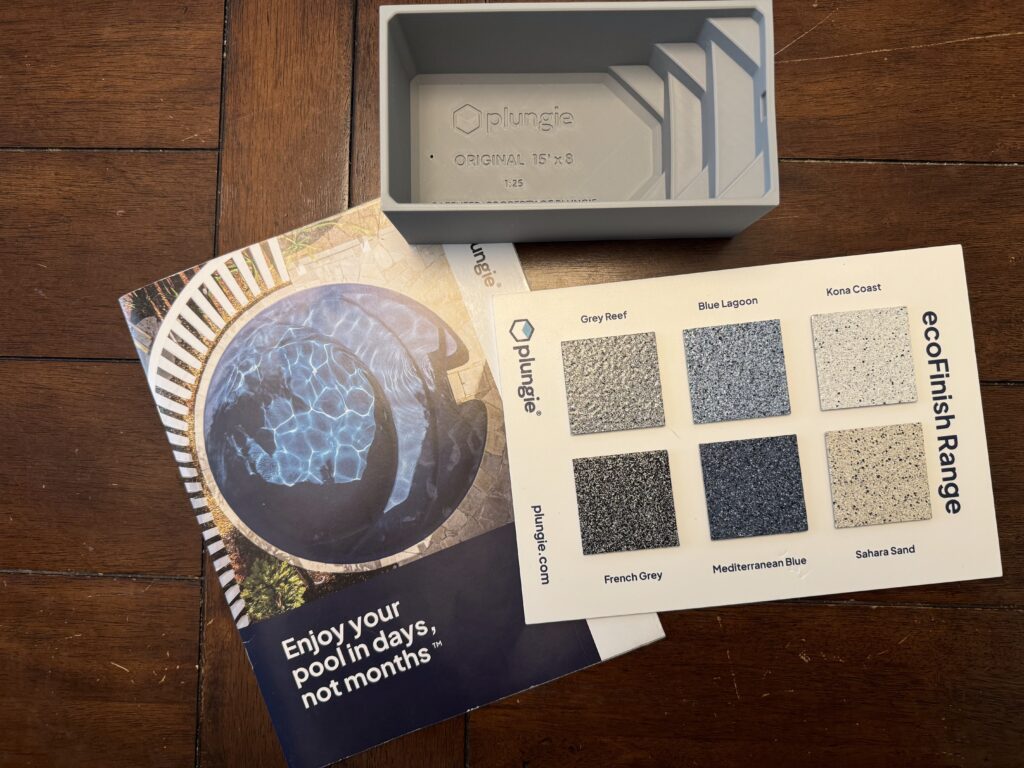
In my research for cocktail or plunge pools, I found the Plungie. I finally decided to move forward with Plungie for the following main reasons:
- They are manufactured in a warehouse instead of in your backyard
- They’re compact (although they do have one fairly large option as well)
- They have a 10 year warranty, absolutely unbeatable.
- Since it arrives already built and partially assembled, it’s almost a plug and play situation.
Planning + Prep
You know what I think is just so idiotic? The fact that in an HOA, you have to get HOA approval for things in your back yard. Like, I get if it’s going to be huge. like above the fence line. That’s different. Something that your neighbors can’t even see? I don’t get it. Nevertheless we had to get HOA approval and submit for proper permits before beginning. We didn’t personally have to do that, our contractor who is trained by Plungie in their installation ways, did all of that for us.
It took me a while to wrap my head around a pool, design wise. I originally got a full exterior design with Yardzen because the exterior of my house is just a whole other beast for me and I honestly didn’t know where to start. Finally after a while I went back to them and said “hey, what if we add a pool over here in the corner?” So they revised the design to include a pool and I was like, “OK, YES!”
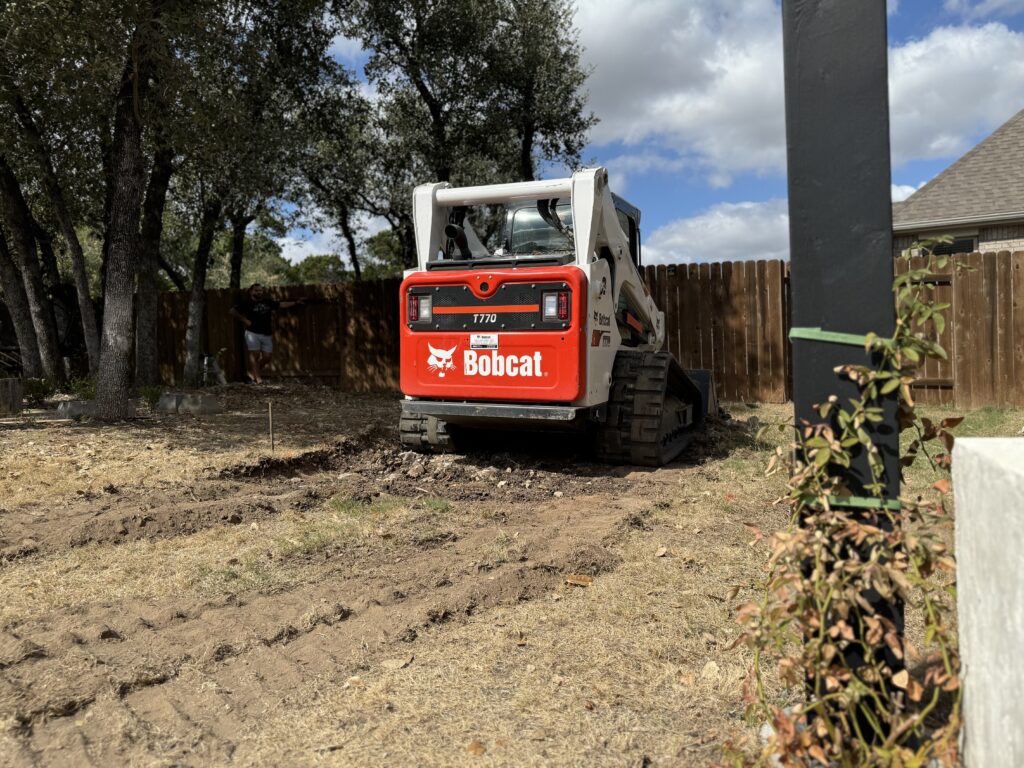
Digging Day
We broke ground on the pool and this is when the reality of this project set in! The estimated
time to dig was 2-3 days but it quickly turned into about 6-7 days because of the solid limestone
that is our ground. We have about 6 inches of top soil and below that is almost solid limestone.
So fun for planting season. We loved watching out the window at the big machinery in our
backyard. It was a nice treat to not be doing the heavy labor ourselves this time.
So, you know this pool is manufactured in a warehouse so a question you might have is: “…but
how the heck do you get that to its final resting place? A big ‘ol crane. So next up is crane day!
The factory is in Dallas area so they put our Plungie on a semi and a giant crane is going to plop
it into our newly dug hole.

Crane Day: When the Pool Finally Arrived
If digging day felt surreal, crane day was next level.
After all the planning, prepping, and piles of dirt, it was finally time to get the Plungie into place. And let me tell you: watching a full-size concrete pool suspended mid-air over your backyard is a very specific kind of adrenaline rush.

It took the crane 2 hours to set-up and 2 hours to break down the crane and the install was only about 30 minutes. They had huge weights that had to be strategically placed all around the area to keep the crane in place. The crew made it look (almost) easy. It was a whole day of commotion and I felt so unprepared. I’m usually the one doing all the work, with the plan, etc. I had nothing because I didn’t have to but I still had that anxiety since this was very out of my norm. They lifted the Plungie straight off the truck, slowly swung it between the houses, and guided it down into the hole in our backyard.
There were a few deep breaths and a lot of holding our collective breath, but when it touched down perfectly, it felt real for the first time.
Seeing that pool sitting in our backyard — even unfinished — was one of the most exciting moments of this entire process so far. I kept thinking: This was just an idea not that long ago.

The question I’ve gotten over and over again since sharing this news is ‘how much does it cost??’ I will deep dive into this later on but the estimated cost for basic install of our size is $41-66k. Check out more about Plungie here and stay tuned for more to come on our build!

Follow along for the daily updates on instagram. This is one of the biggest projects we’ve taken on, and I can’t wait to show you every step—even the messy ones!
Check out our post about the planning process of our backyard! HERE
Until next time,
Ruth


