


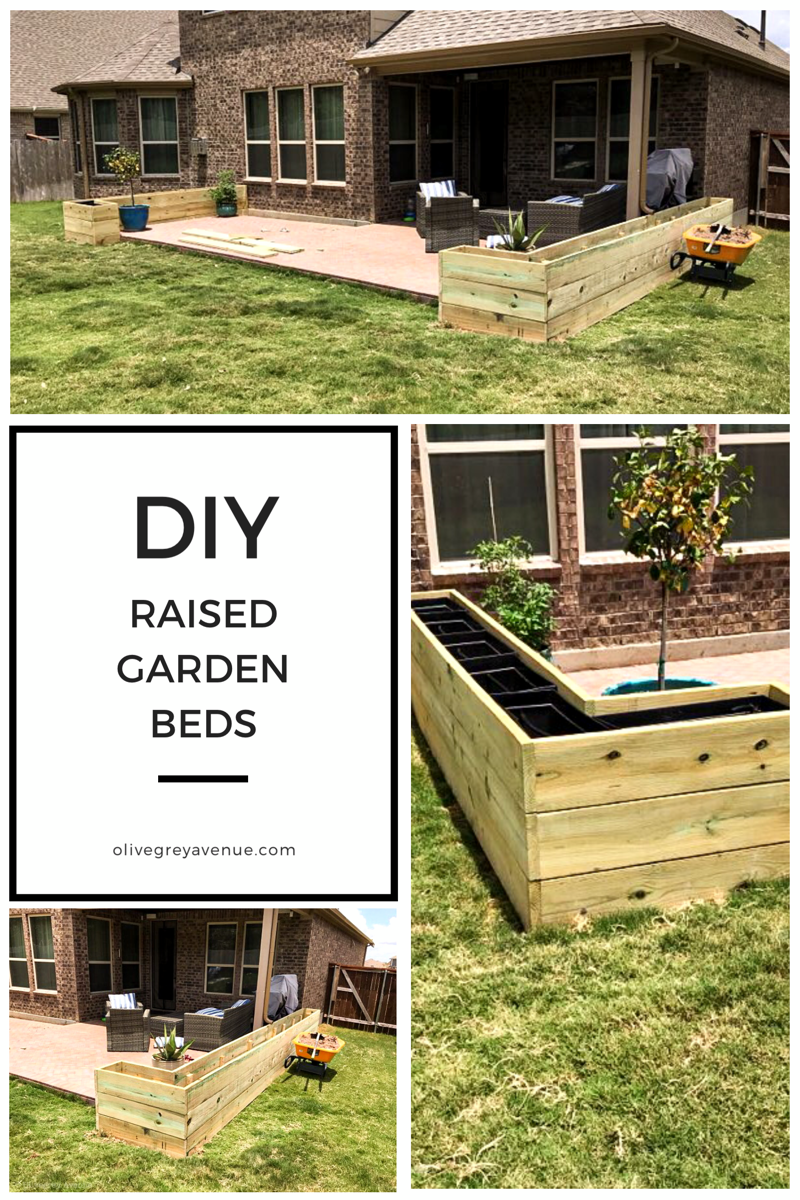
DIY Raised Garden Bed – Part 1


I’m reflecting on this project a little more than I normally do. There were many lessons learned as this project progressed. Making raised garden beds can be fun, but also complicated. I’ll share some throughout this post and the key points in”part 2″.
In the last post I wrote, I talked about budgeting and planning for DIY projects. This is an area where I’m definitely not perfect. I could take a lesson from myself with the planning for this raised garden bed project. I don’t think that any DIYer posts projects because they are prefect at them. Most of us are striving to be better than we were before. Also learning something new in the process and telling others about our mistakes so that they may learn from them.
When planning out these raised garden beds, one of my key points that I wrote about in the ‘Budgeting for DIY’ post came from my lack of planning out all of the details for this project. While planning and budgeting for what we would need. I was planning on only the cost of the wood and (barely) the dirt, that’s it. Yes, those are big components of the project. There also were so many other little things went into it that I quickly went over budget. Below is my list of supplies that I used for my Raised Garden Beds.
Skill level:
Basic-Intermediate
Time:
A weekend per raised garden bed
My Cost:
$626 (for this portion of the project)
**I’ll share the full breakdown of my budget and how much I spent in total in part 2…
SUPPLIES
– 2×10 boards (for the raised beds themselves)
– 2×4 boards (for bracing inside the raised beds)
– crap load of exterior screws (2 3/4”)
– planters (optional)
– kreg jig
– pocket screws
– level
– tape measurer
– circular or table saw
– drill
– hammer drill
– concrete screws (2 3/4″)
– concrete drill bit
– shovel
I estimated that this project would cost about $600 in total. For part of this project, I’m going to share a detailed list with all the grand totals. I’ll get into the details of the step-by-step shortly, but I just want to emphasize on the points that are so easily overlooked by myself, beginners, and some expert diyer’s alike. Pros are pros for a reason. I want to make sure to express my respect for those professional tradesmen that mastered such skills.
Once you get your hands dirty by taking on big projects like the concrete fire pit and pavers or raised garden beds, you gain a whole new respect for why labor is the most expensive part of hired projects. It’s really hard and takes a person willing and able to do such a thing. For me, DIY is all about getting my own hands dirty to create my dream home. Also doing it the cheapest way possible. While learning new skills that give me a fulfillment for accomplishing these creative projects.
PLANNING AND GETTING INTO IT
These Raised Garden Beds have been on my project list for quite some time. In my early planning stages, I wanted to get really thick pieces of wood (like 4″ x 4″ or 4″ x 6″) to build a very sturdy, heavy and quality looking Raised Garden Beds. I finally decided against the thicker pieces of wood for two reasons: 1. the cost and 2. those are super heavy! I still really wanted a sturdy piece of wood that wouldn’t be too flimsy and become warped quickly.
This lead me to choosing a wood that was the middle ground of everything I wanted. The 2″ x 10″ pieces of lumber were thick, sturdy and they also provided the height I wanted for the garden beds. I wanted the beds to rise above the patio but not be too high that they would make the area feel closed off. So, I eyeballed my desired raised garden bed height. Eyeballing it is usually how I roll (of course I take actual measurements too).
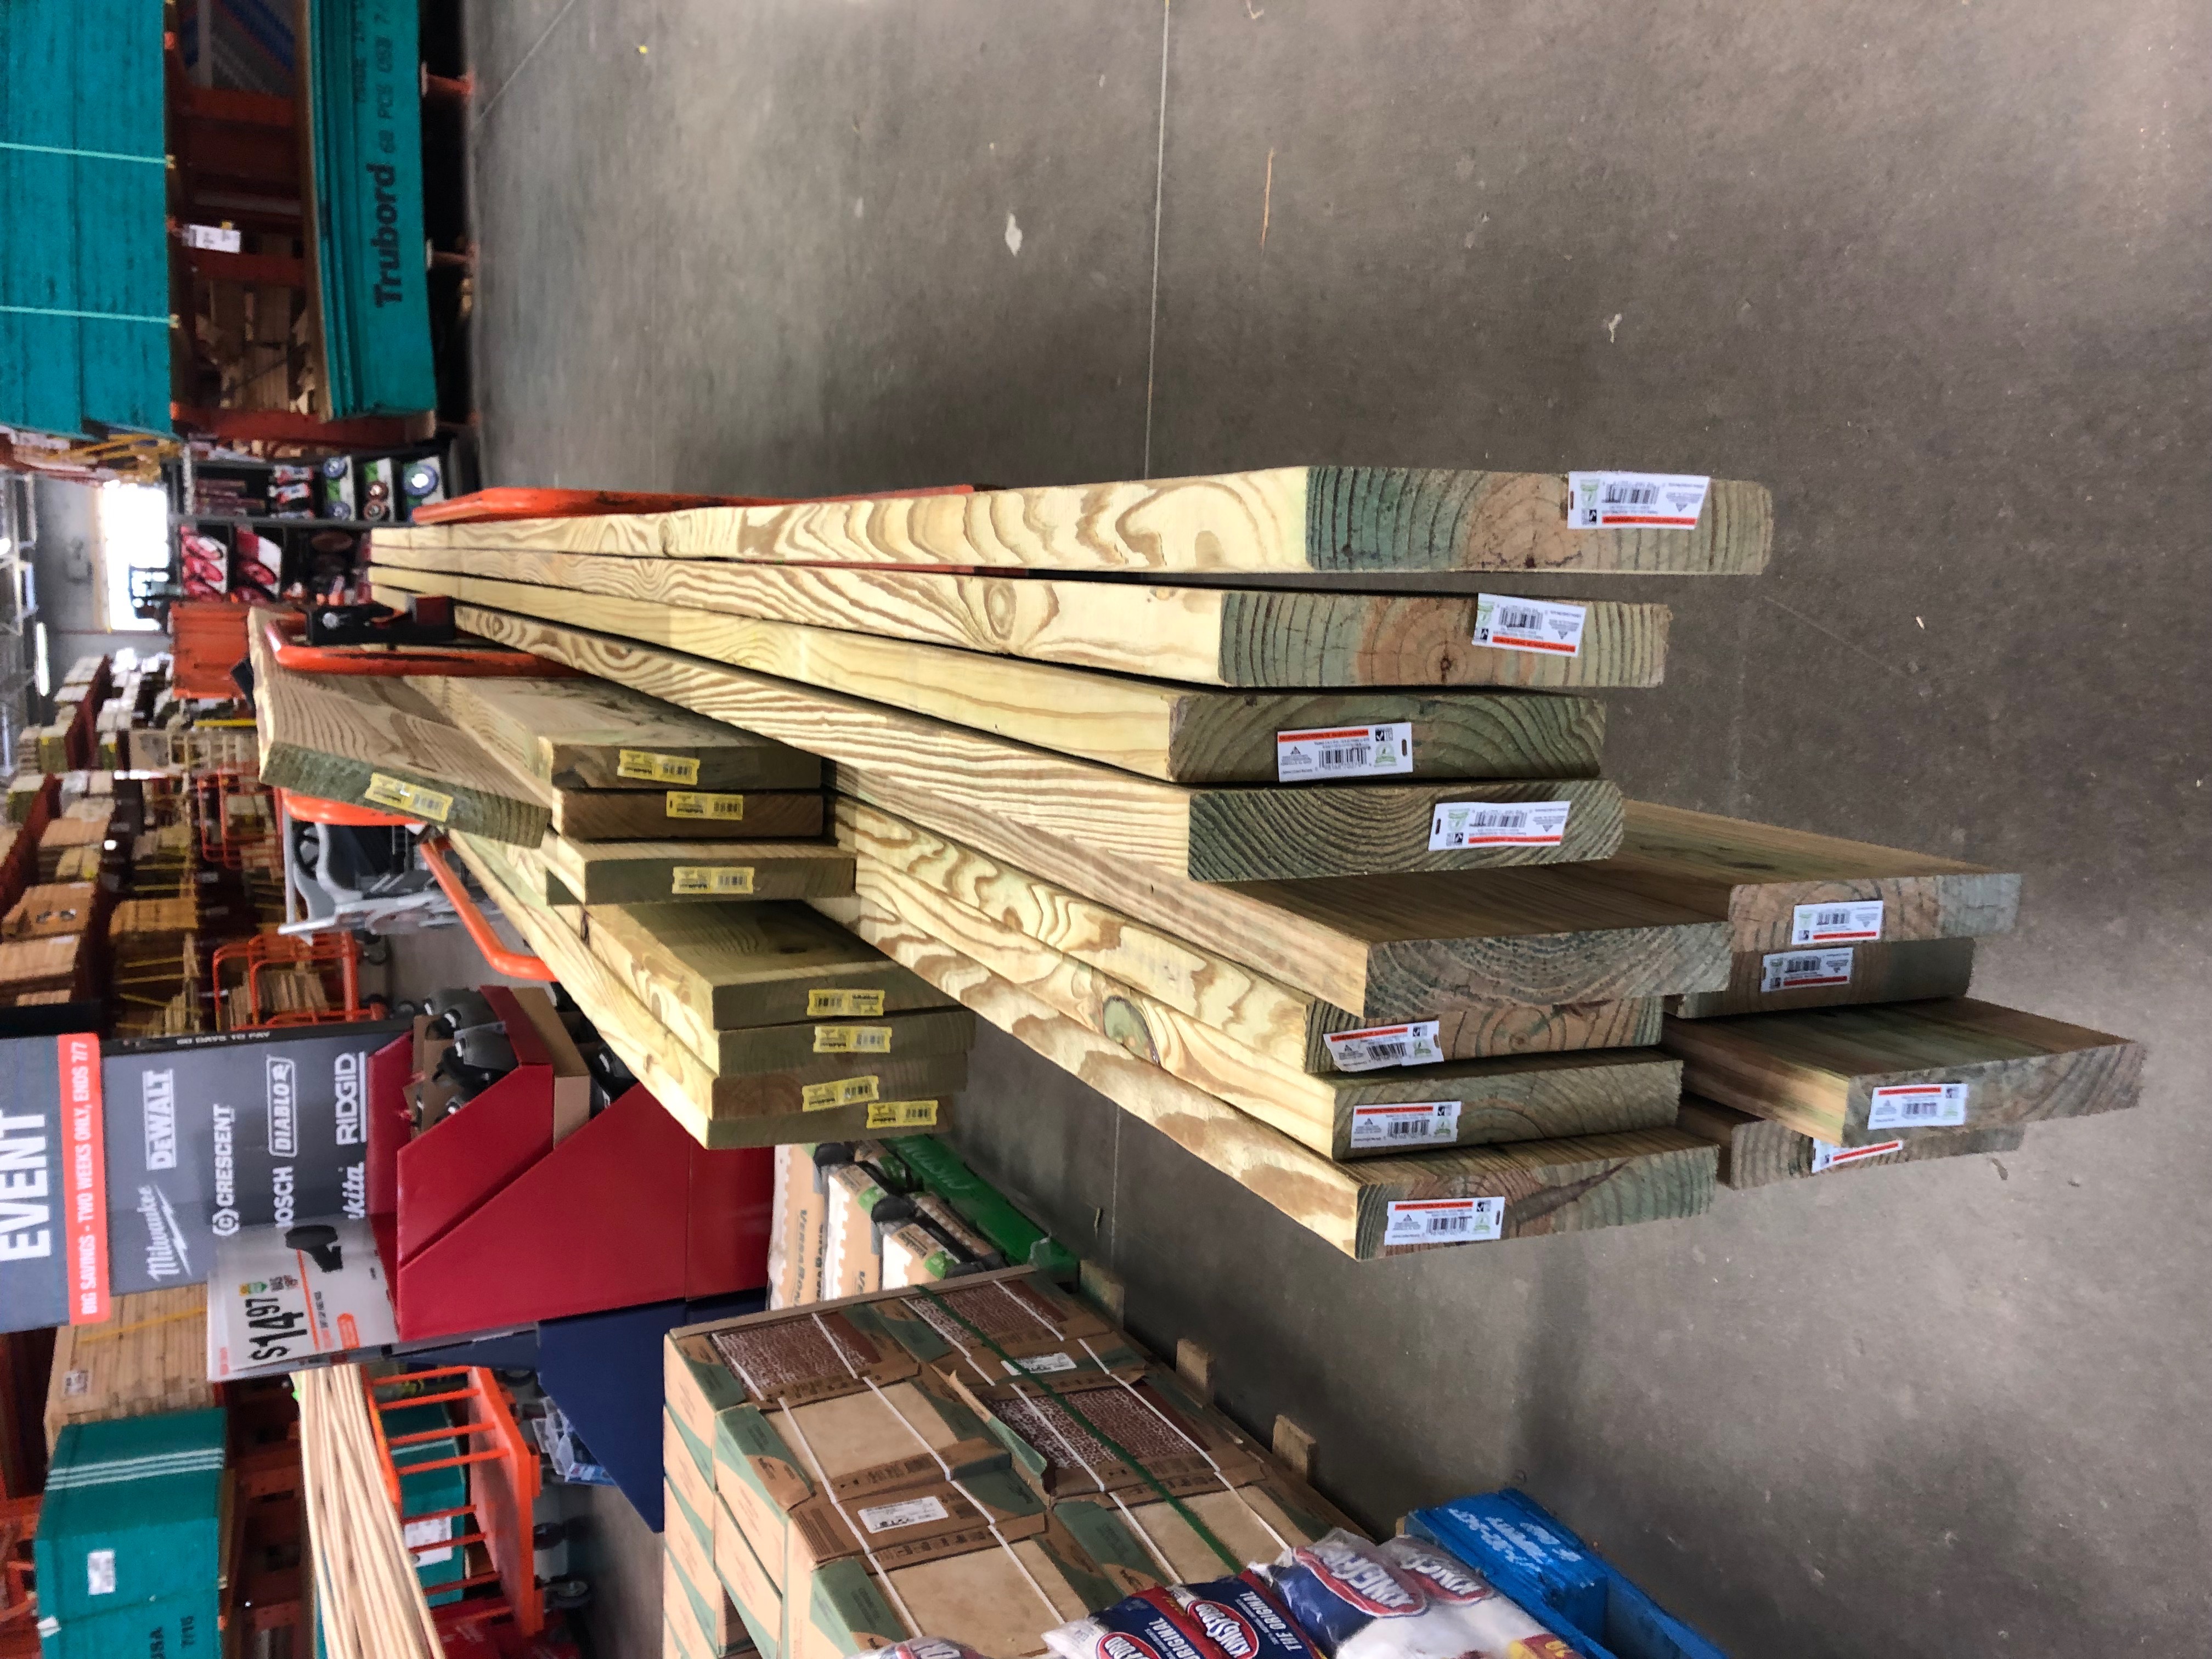
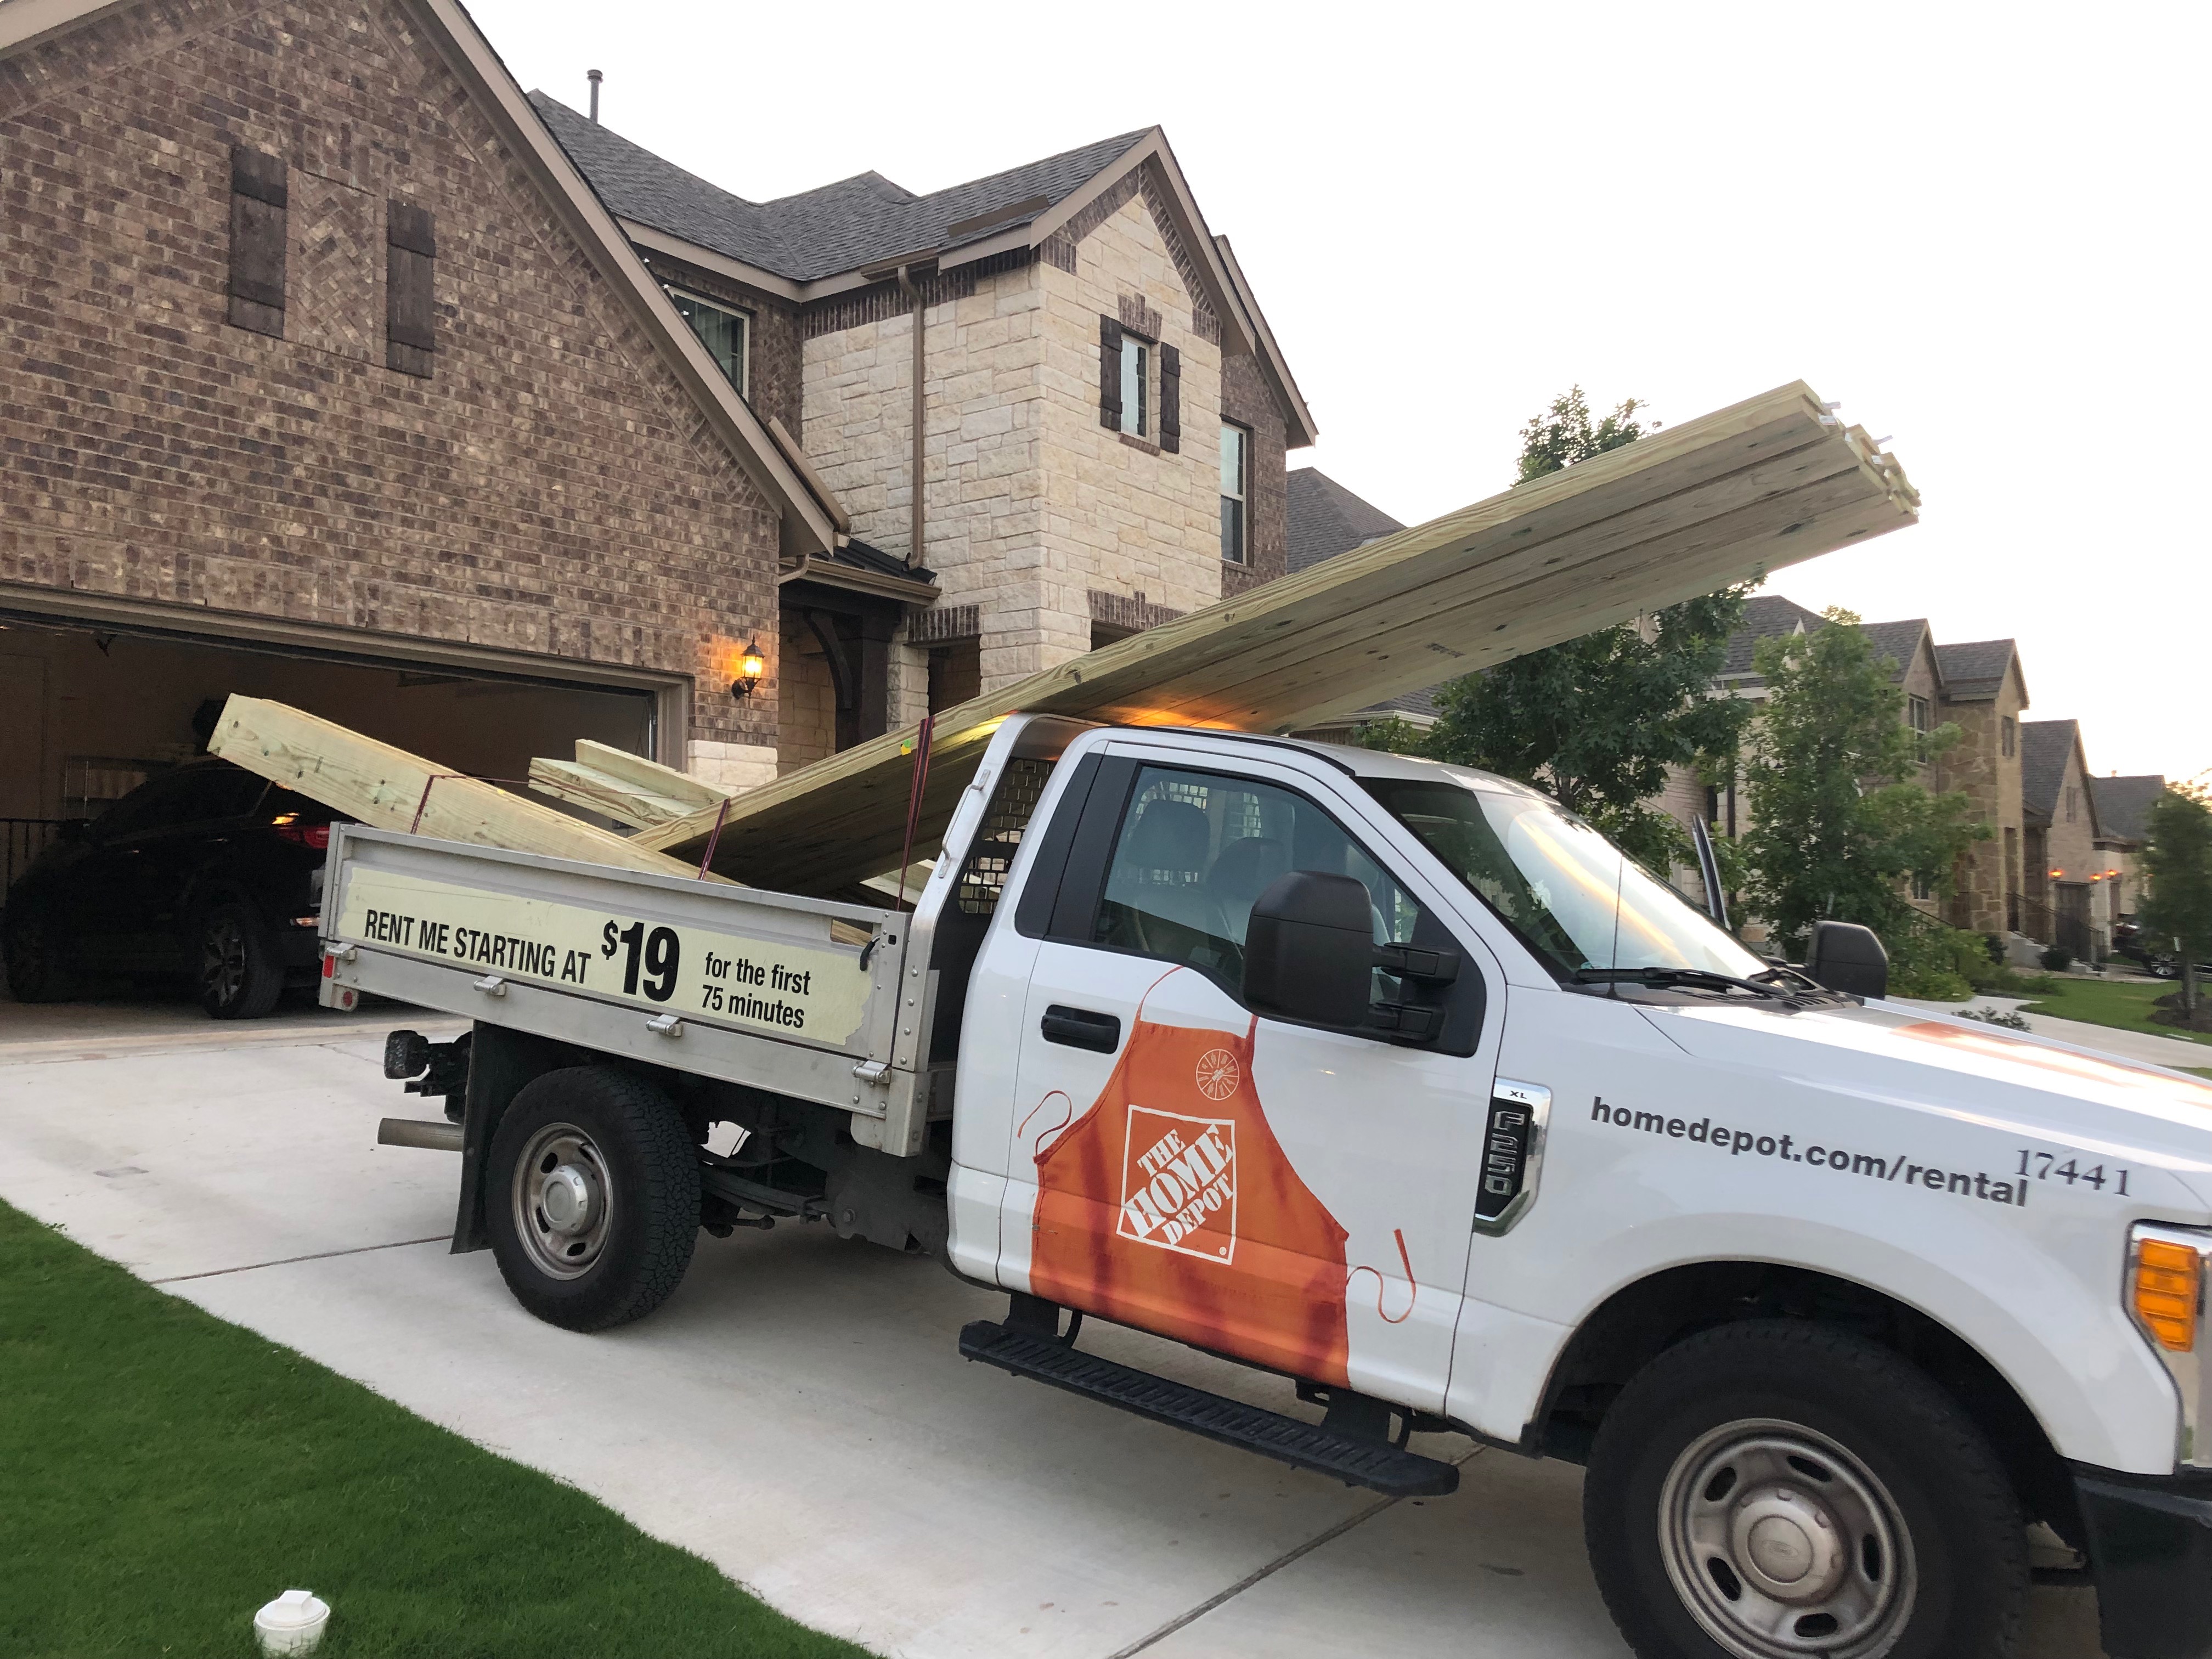
I was originally planning on having the lumber for the Raised Garden Beds delivered. That is consistently something that I am grateful that I spent money on. This time, it was ‘just lumber’ so we decided to just go to The Home Depot, pick out the pieces of lumber we wanted and rent a truck to haul it home. We were able to make it in one trip so it wasn’t too bad of an experience. Ultimately delivery is always a great option for these heavy things that I keep needing in my projects.
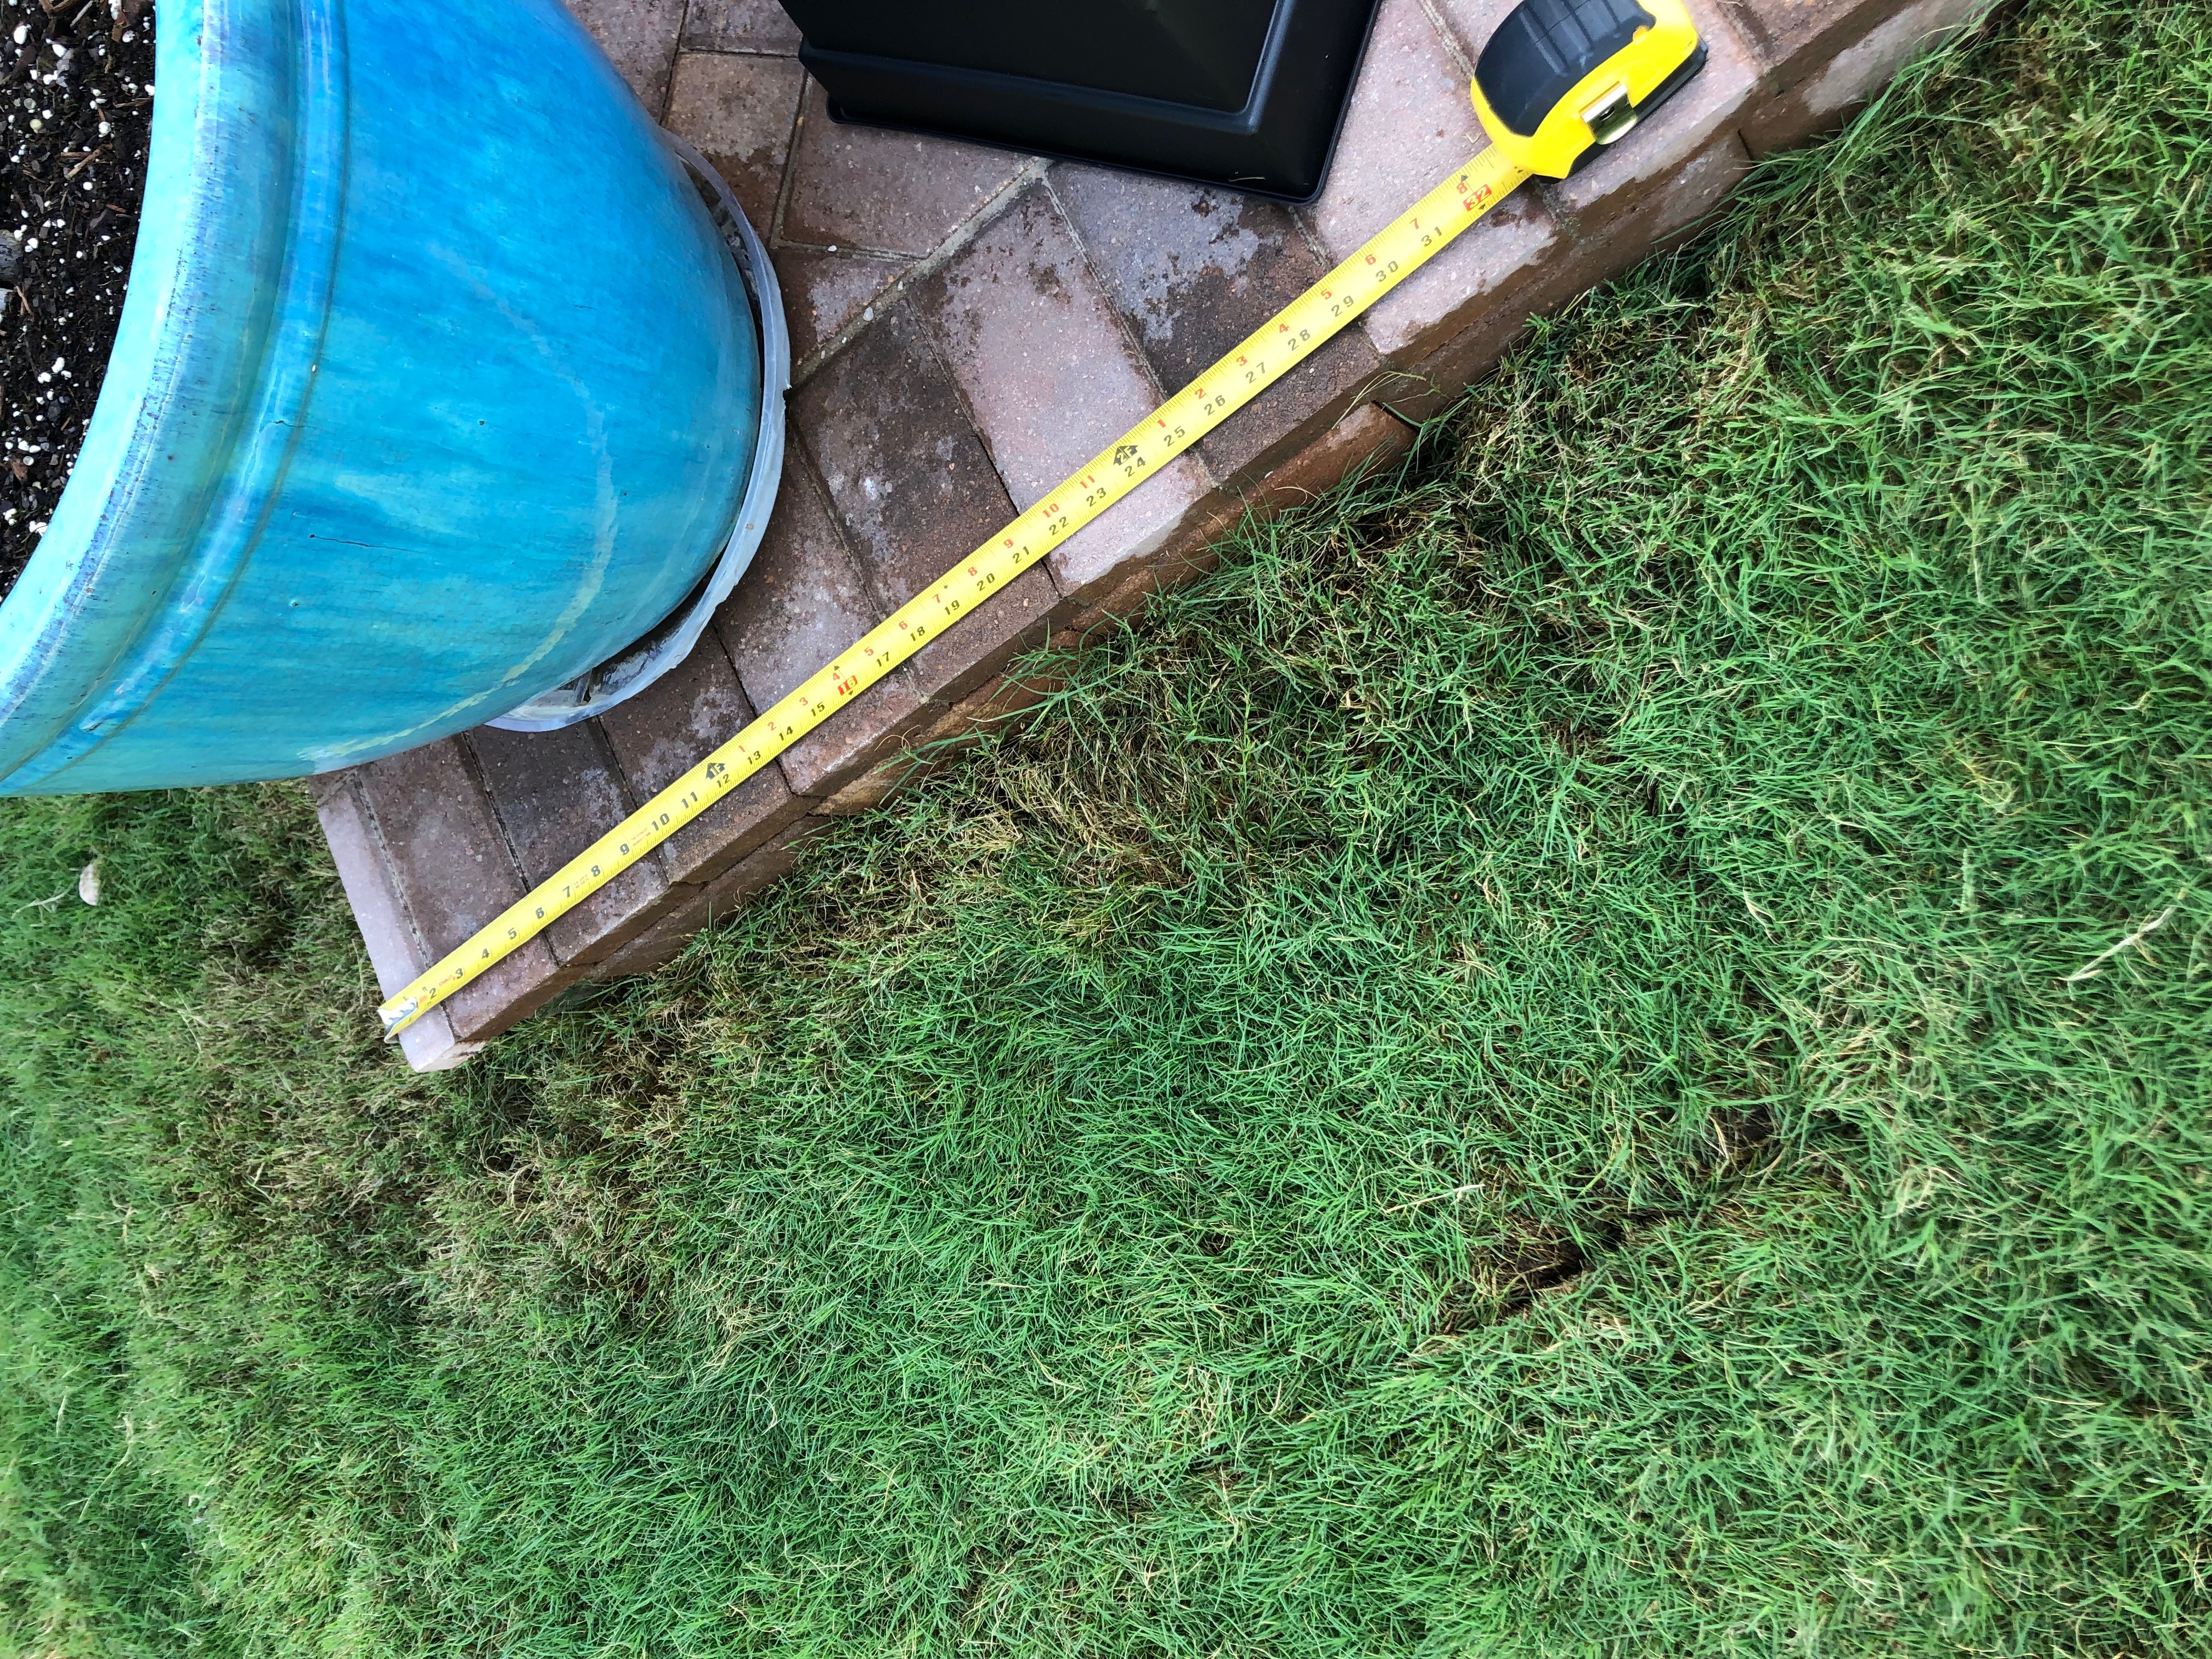
MEASURING
The measurements in the project, like always, are very important. I left a small sliver of grass (about 18 inches) left between the house and the patio slab extension because the access points to the sprinkler is there. So, I left it undone with the intention of finishing it out after building the Raised Garden Beds. Essentially I wanted two large “L” raised beds that flank both sides of the patio extension. Below you can see the diagram for what measurements I needed on the long side of the patio. Your measurements will be different but here’s how I did it. I made sure that the boxes were the same interior dimensions even though both sides won’t have the planter boxes sitting in them, just so they look uniform. The interior measurements of the boxes are based on the width of the planters I bought with about 1/4″ extra.

For the shorter bed that will be filled with the planter boxes, I laid them out in the area to ensure they would be the right size to fit the space. They actually fit perfectly! I had originally planned dimensions that were a tad larger but finding the perfect planter boxes made me adjust the numbers a tad and it worked out great!
Making sure these planters will fit the way I need them to.
After checking and double checking the measurements, we cut one layer of the boards to do a dry fit before cutting the rest. Remember, I want my boxes to be about 30″ tall so I need to do three layers tall for the wood to come up to the right height.
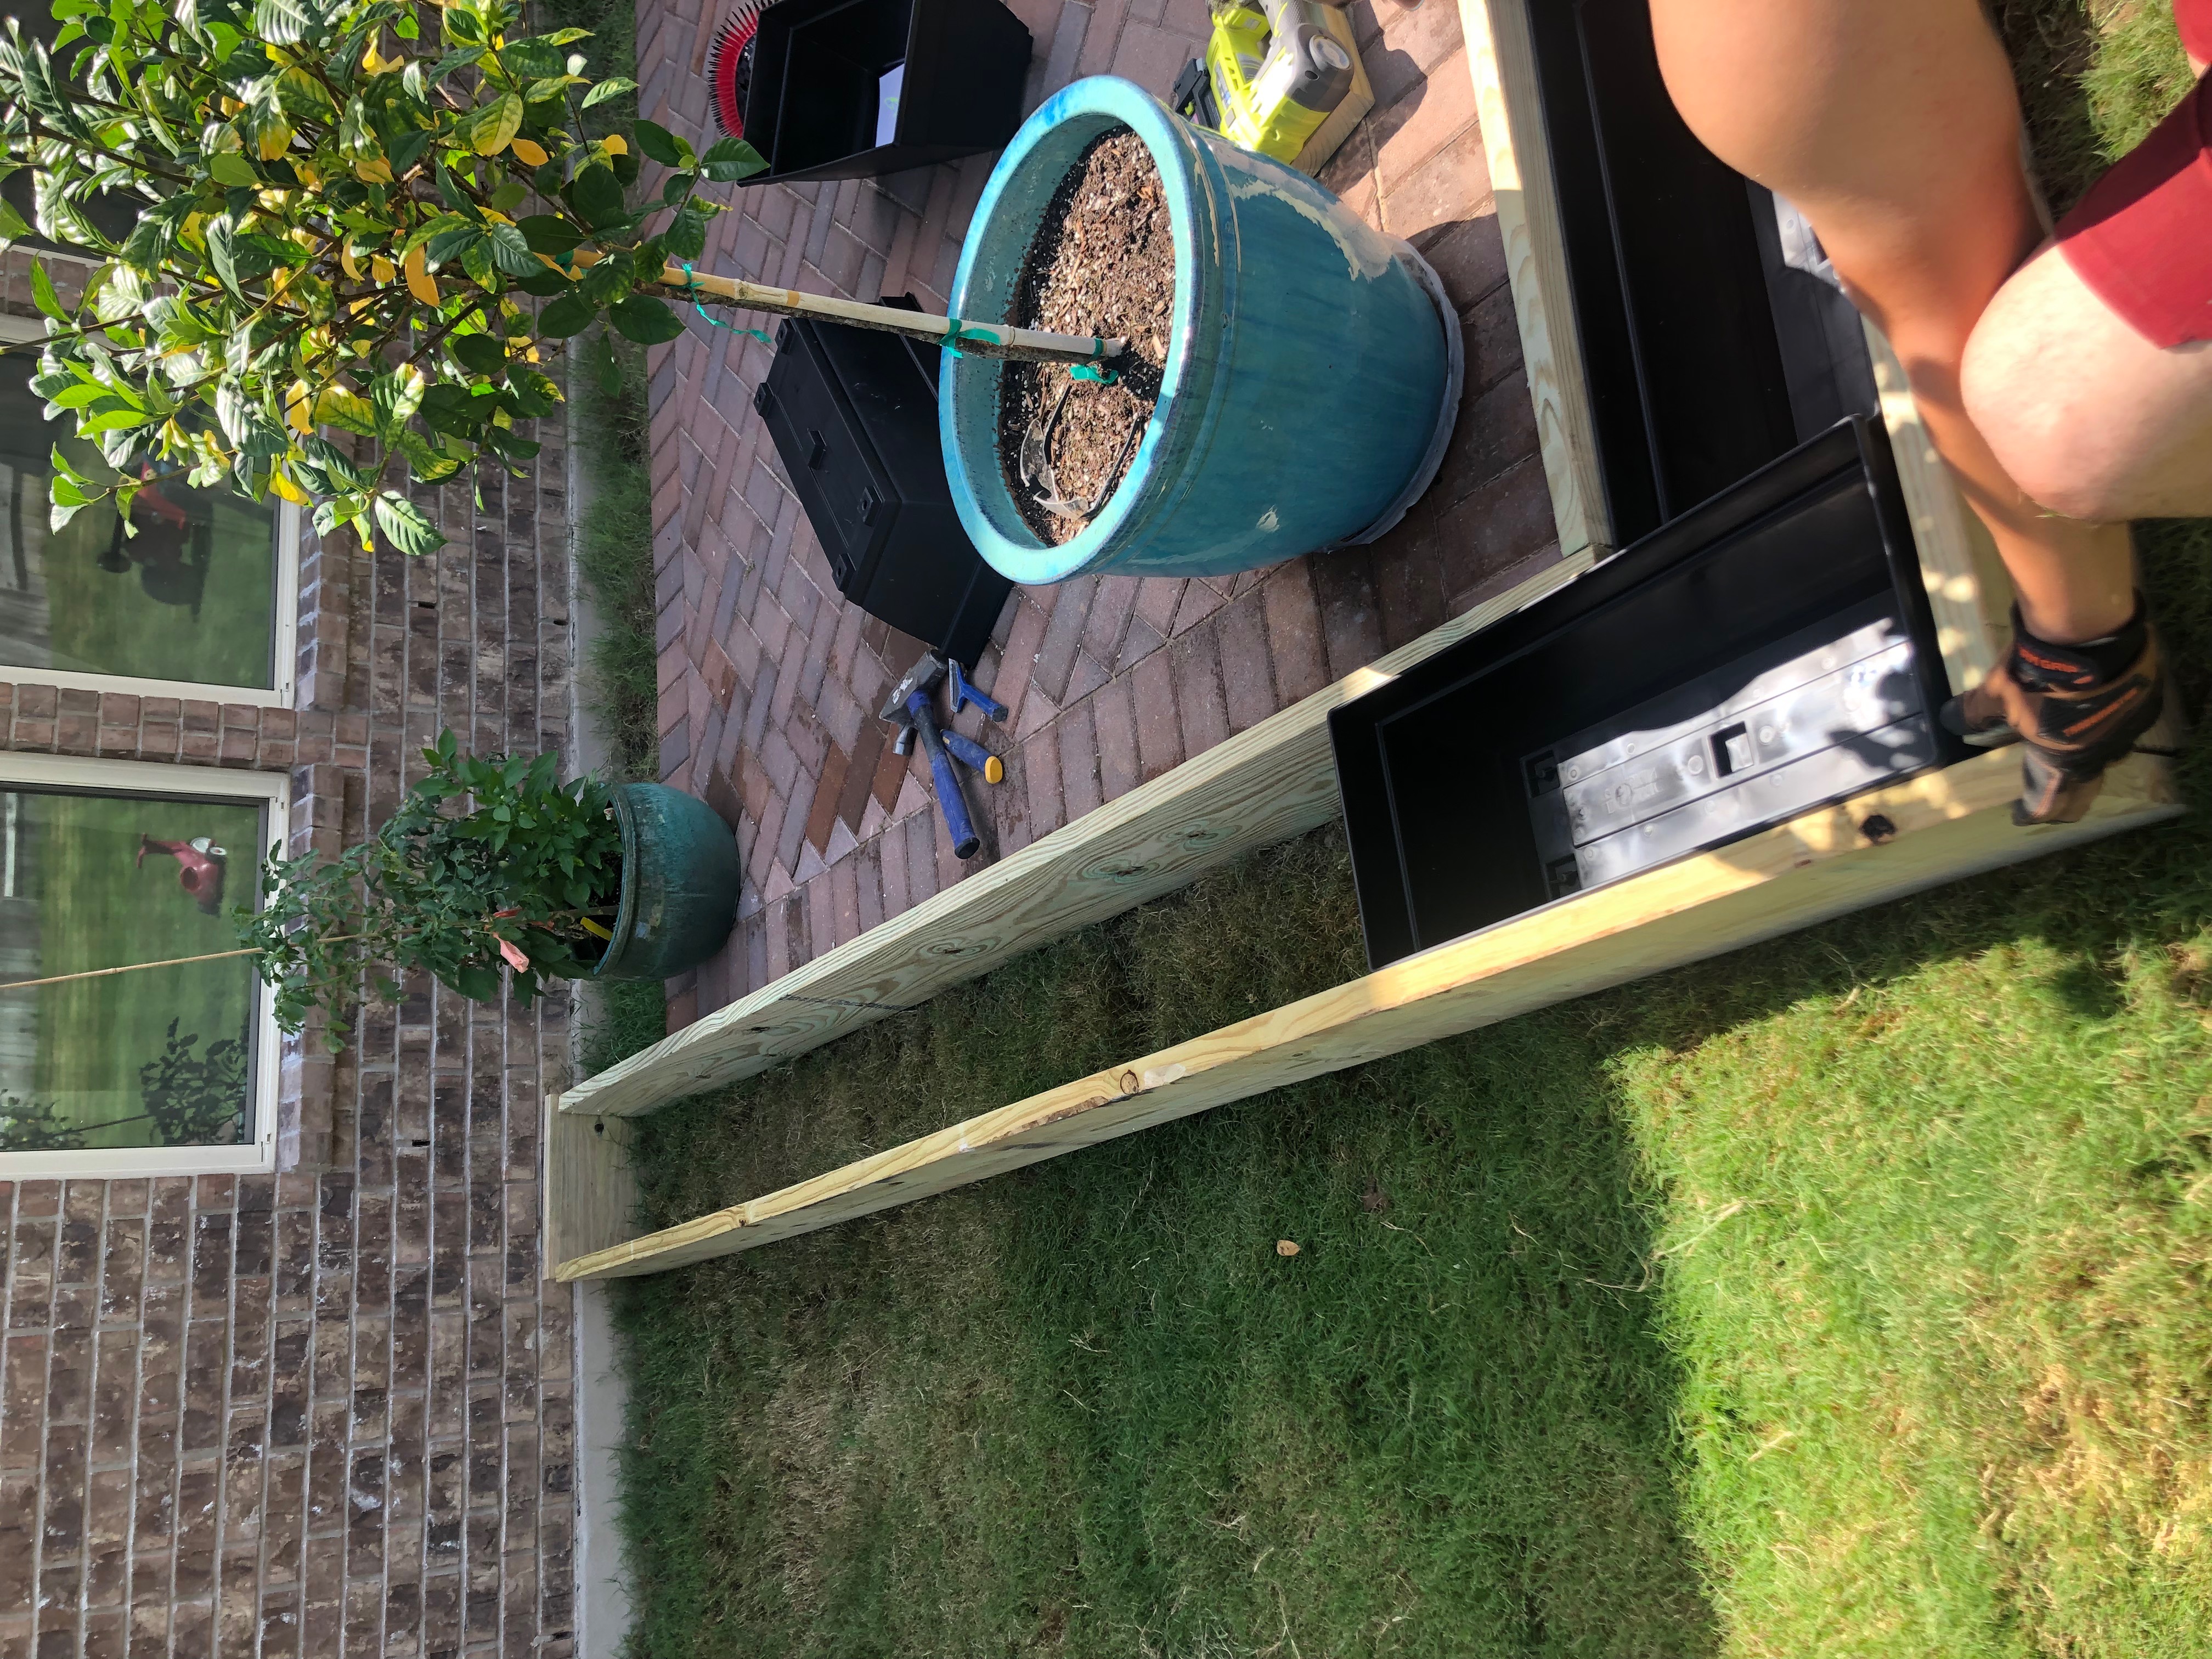
Dry fitting the first layer of the bed with the planters.
EXCAVATING
You may not need to dig up anything but we did. I wanted to make sure the surface was as level as possible. Also so it would sit into the ground a little bit.
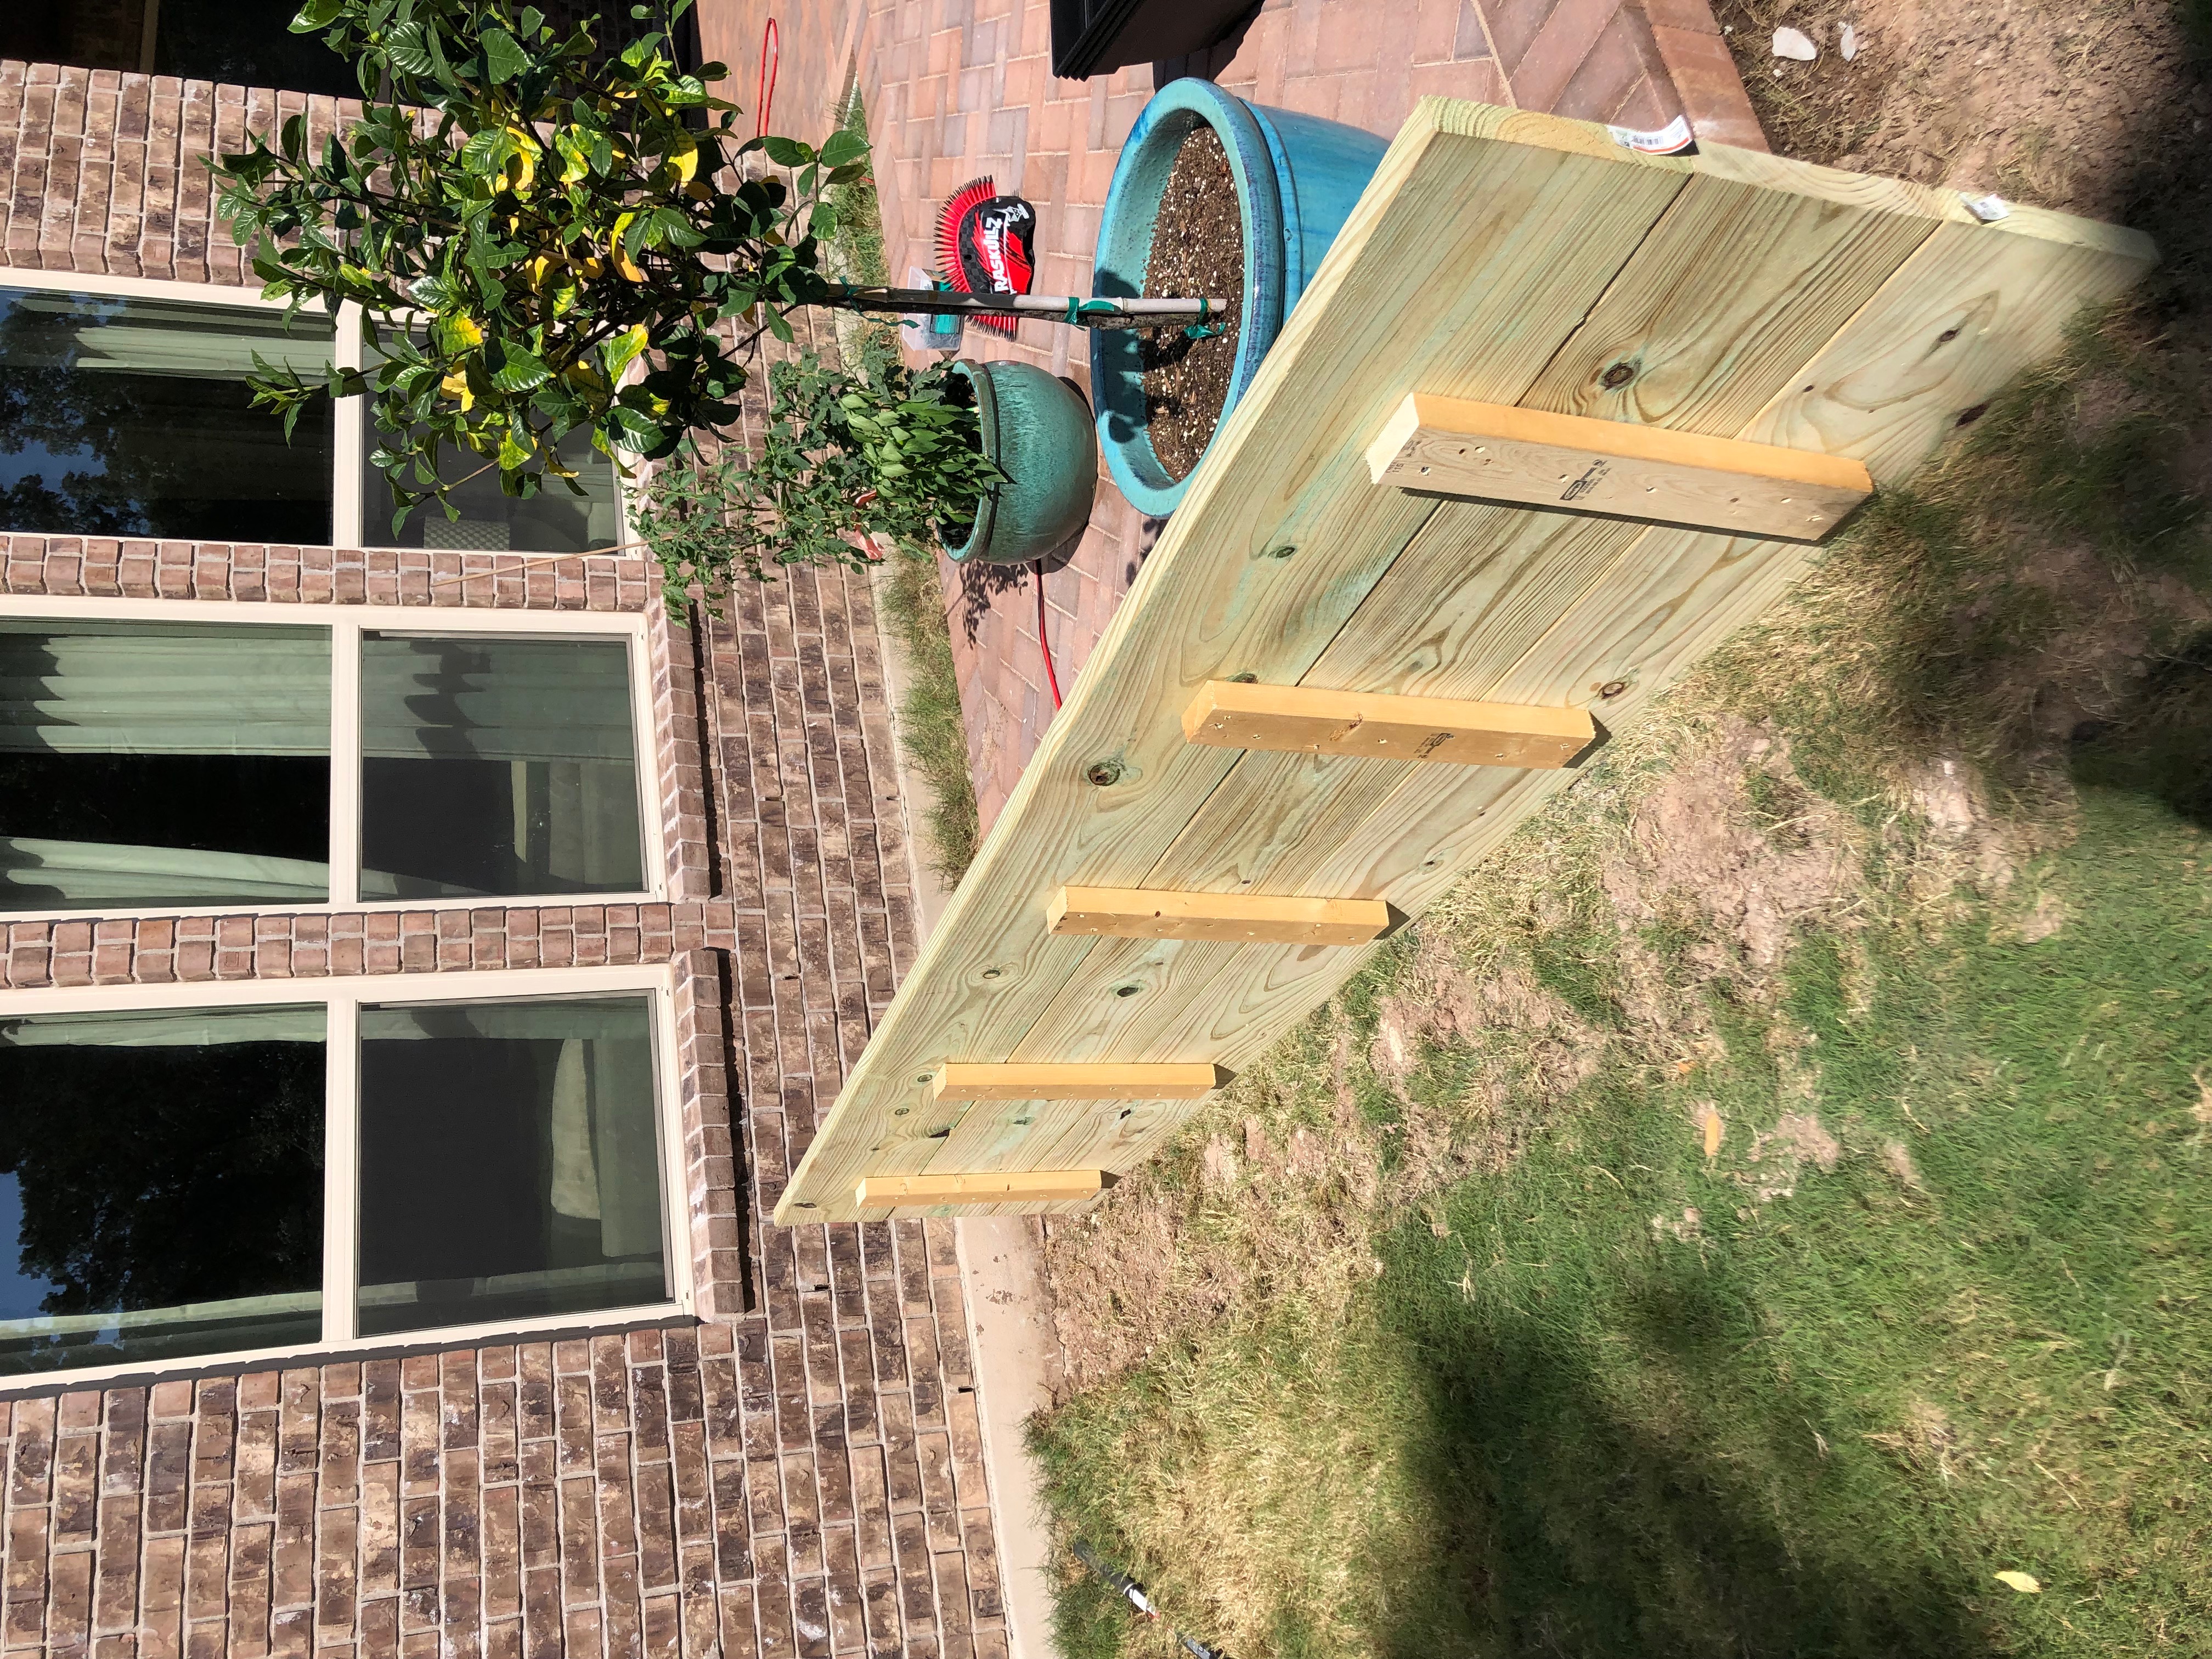
BUILDING THE PANELS
I learned from the DIY Fire Pit and Pavers project that the best way to build layers like this is to build each wall panel and then secure those together. Make sure to lay the side of the wood that you want to see face down and then secure them all together with 2×4’s cut down to size. I used 20″ long 2×4’s for the interior bracing.
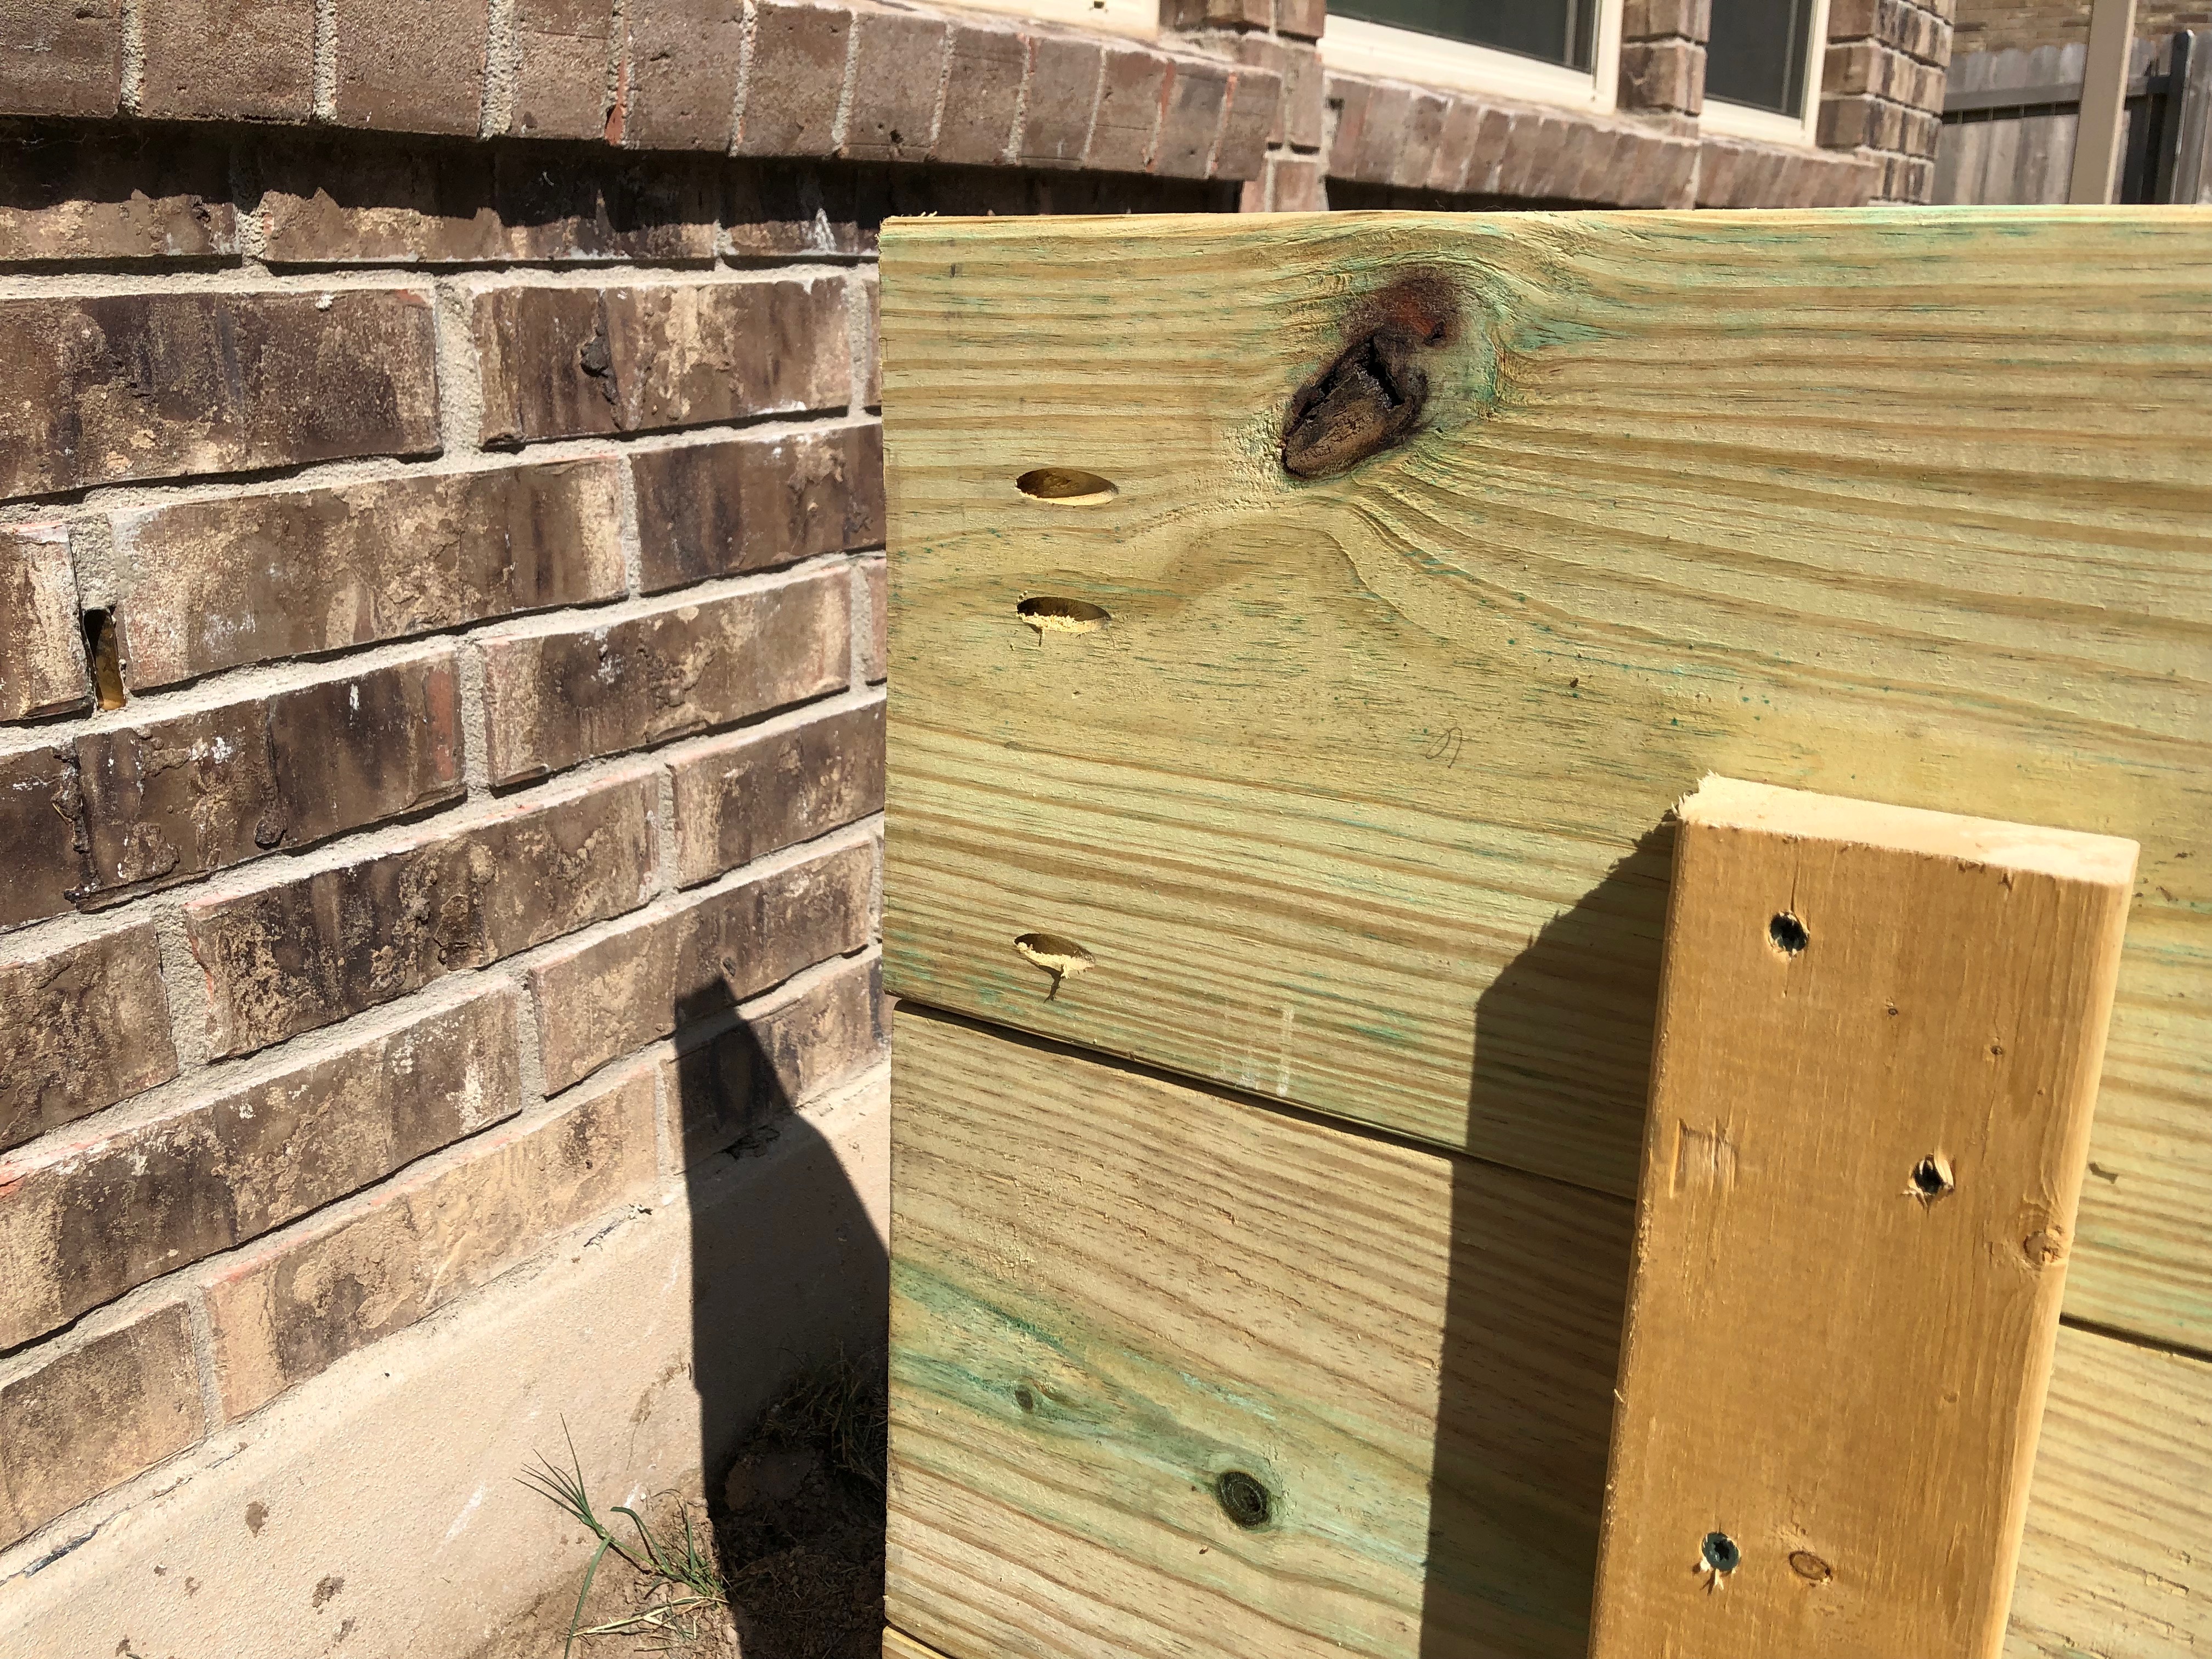
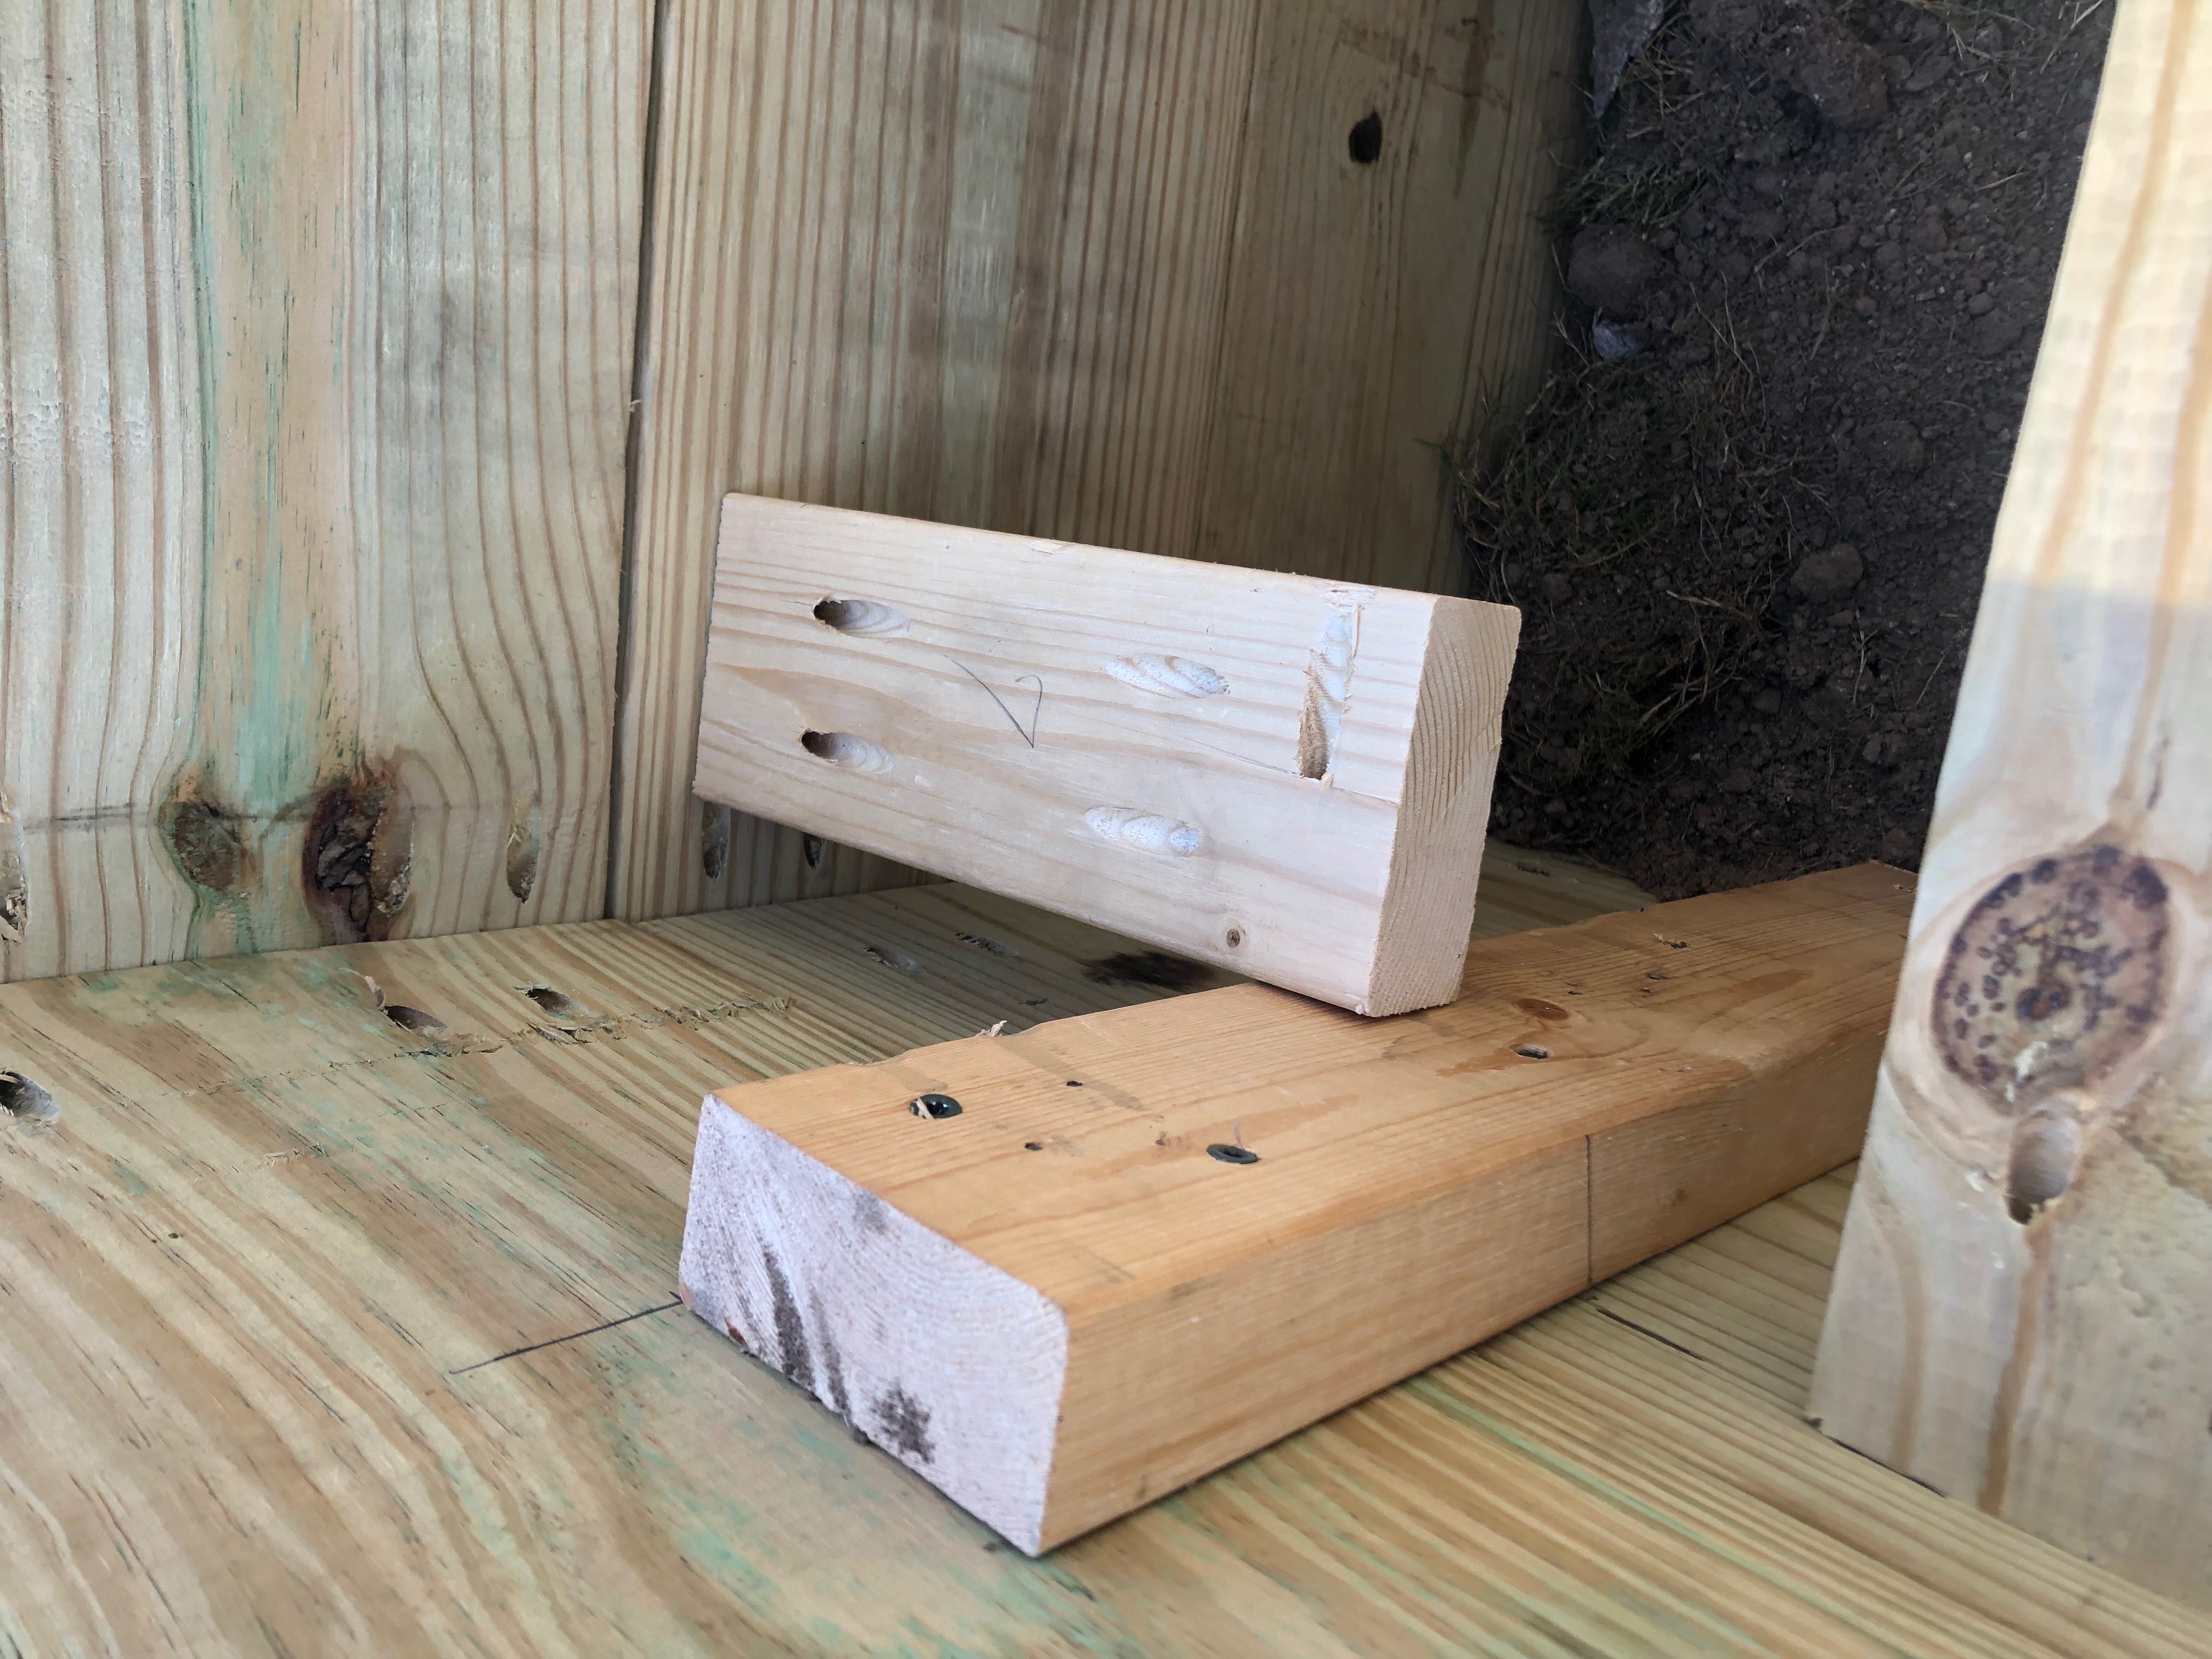
Another important step that we didn’t think about doing with the first raised garden bed panels is to drill the pilot holes for pocket screws with the kreg jig before putting them all together. It’s easiest if you can clamp the kreg jig onto the boards before they are secured together because the interior 2x4s get in the way of the drill. We put 2 pilot holes on each board for where the pocket screws will go. We decided to used this method of putting the panels together because it can be done on the inside of the box so there are no screw holes to fill and because it is a very sturdy hold.
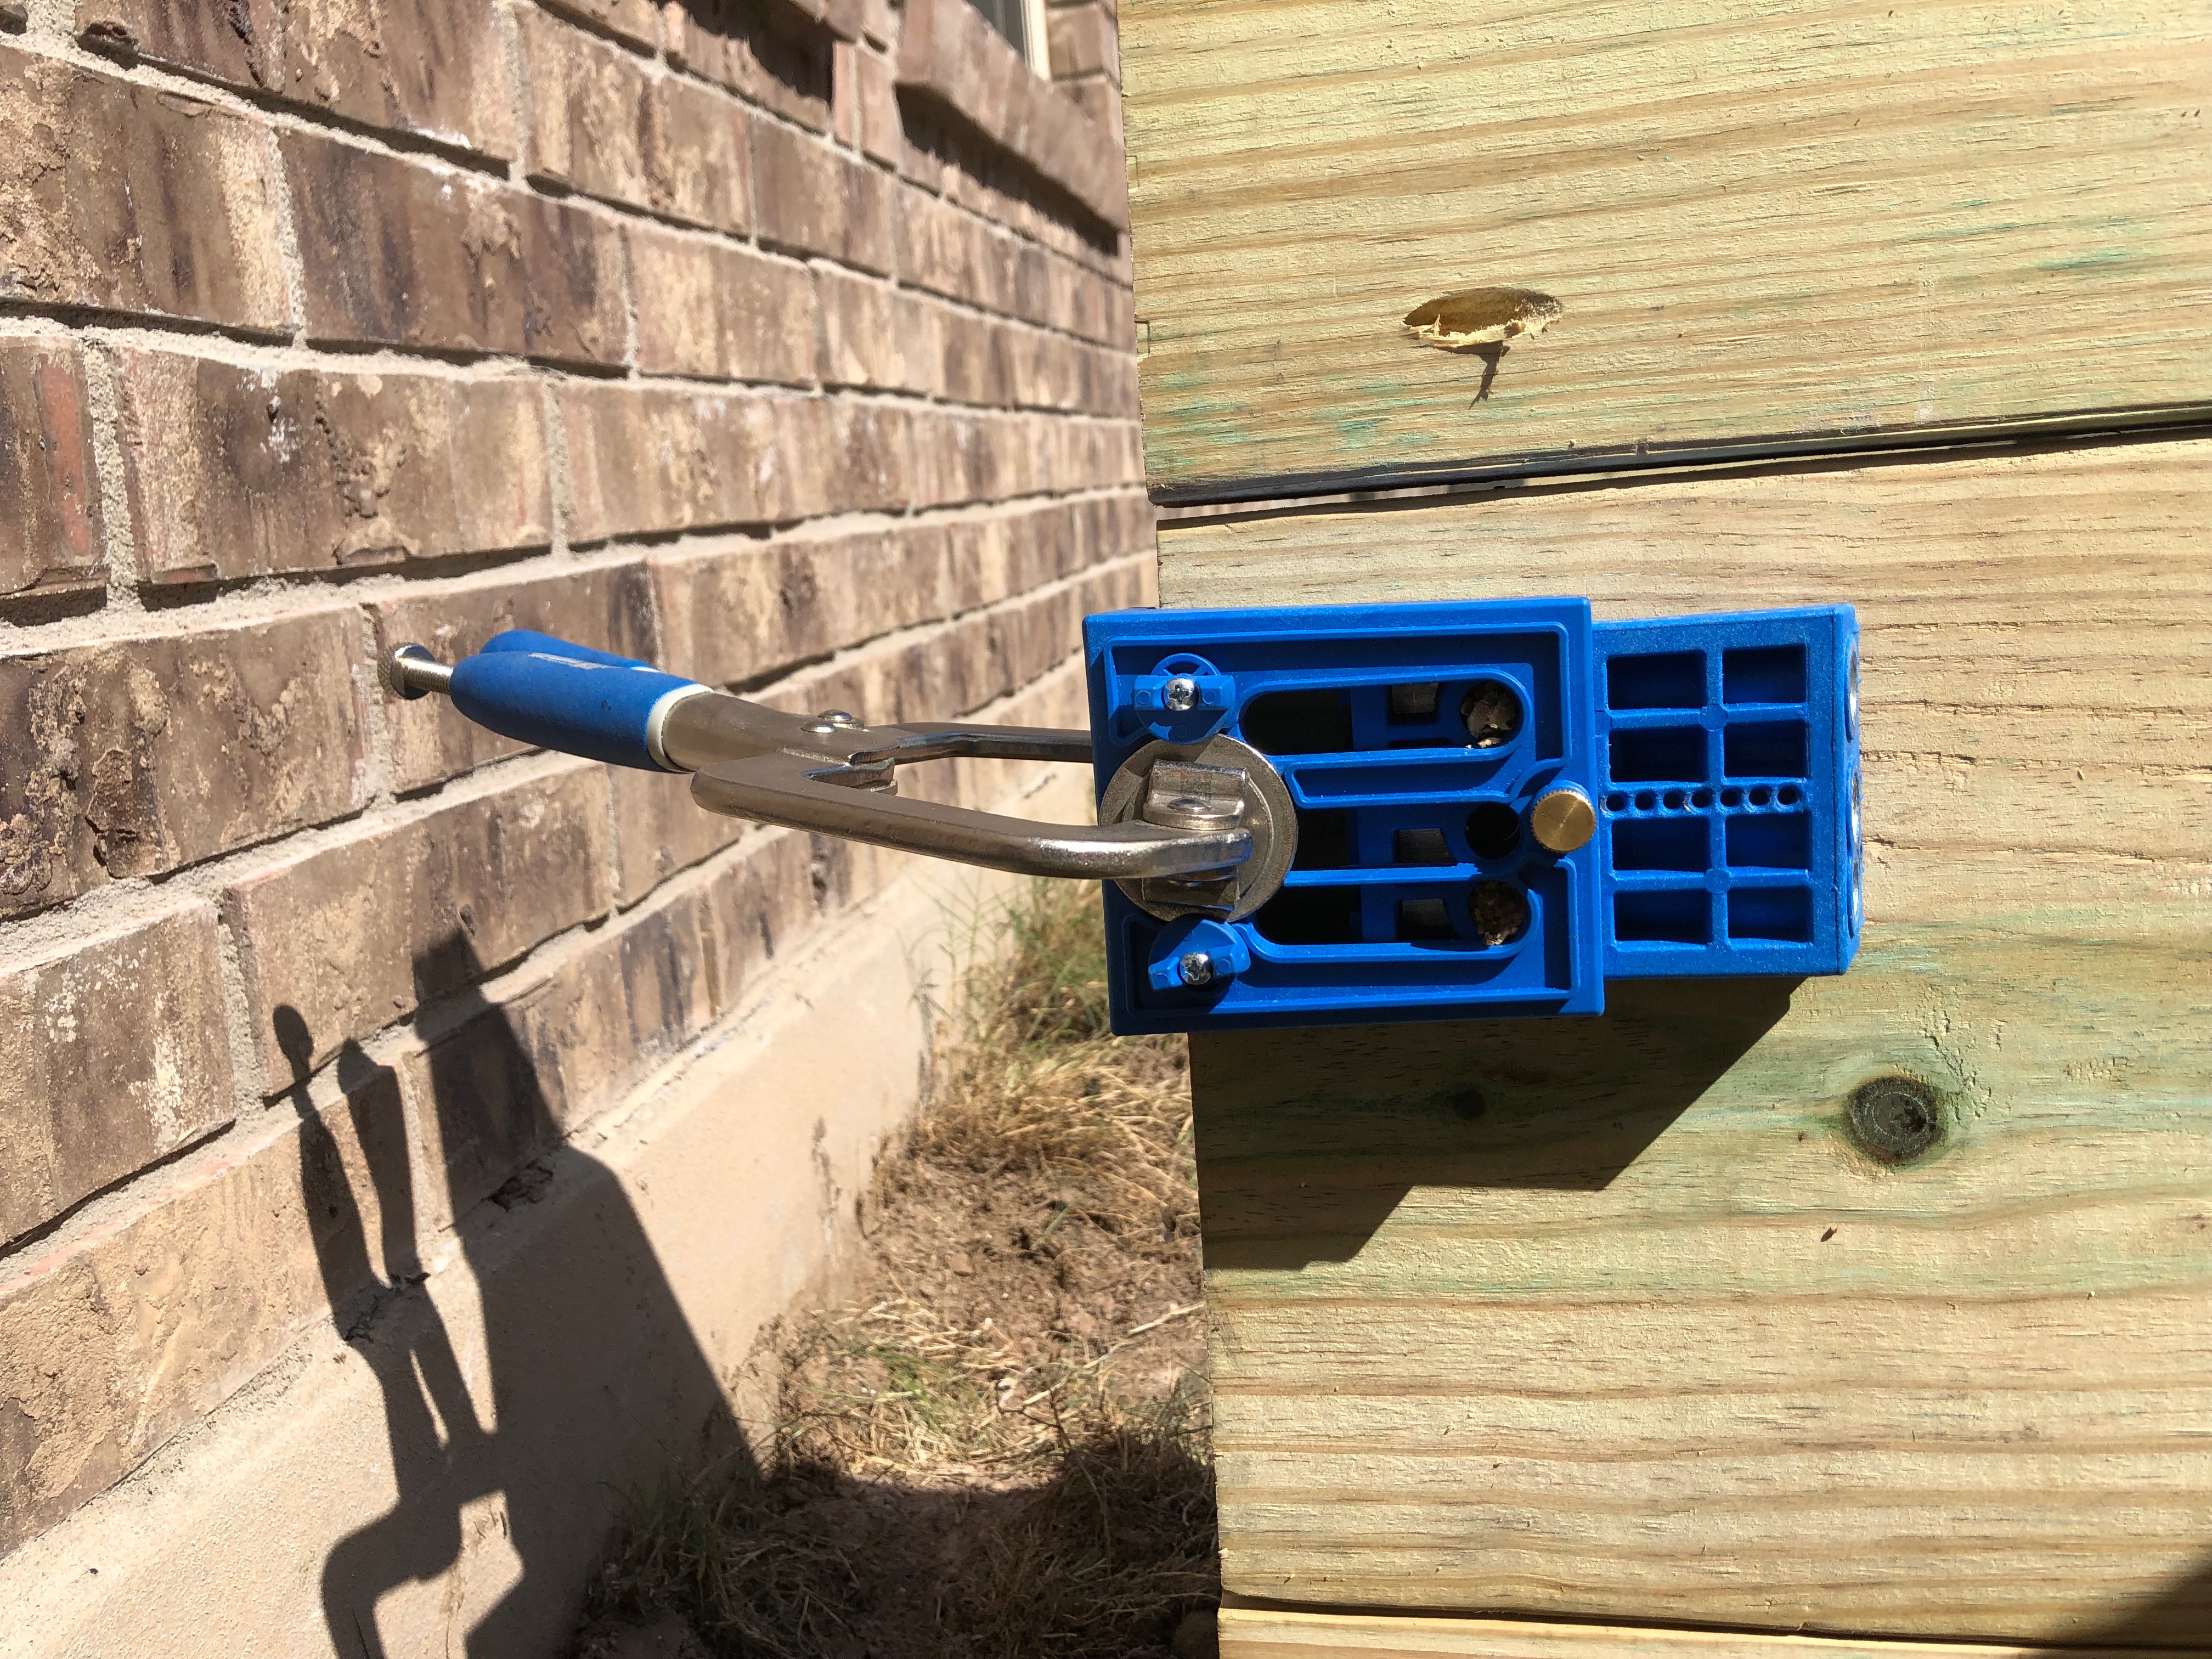
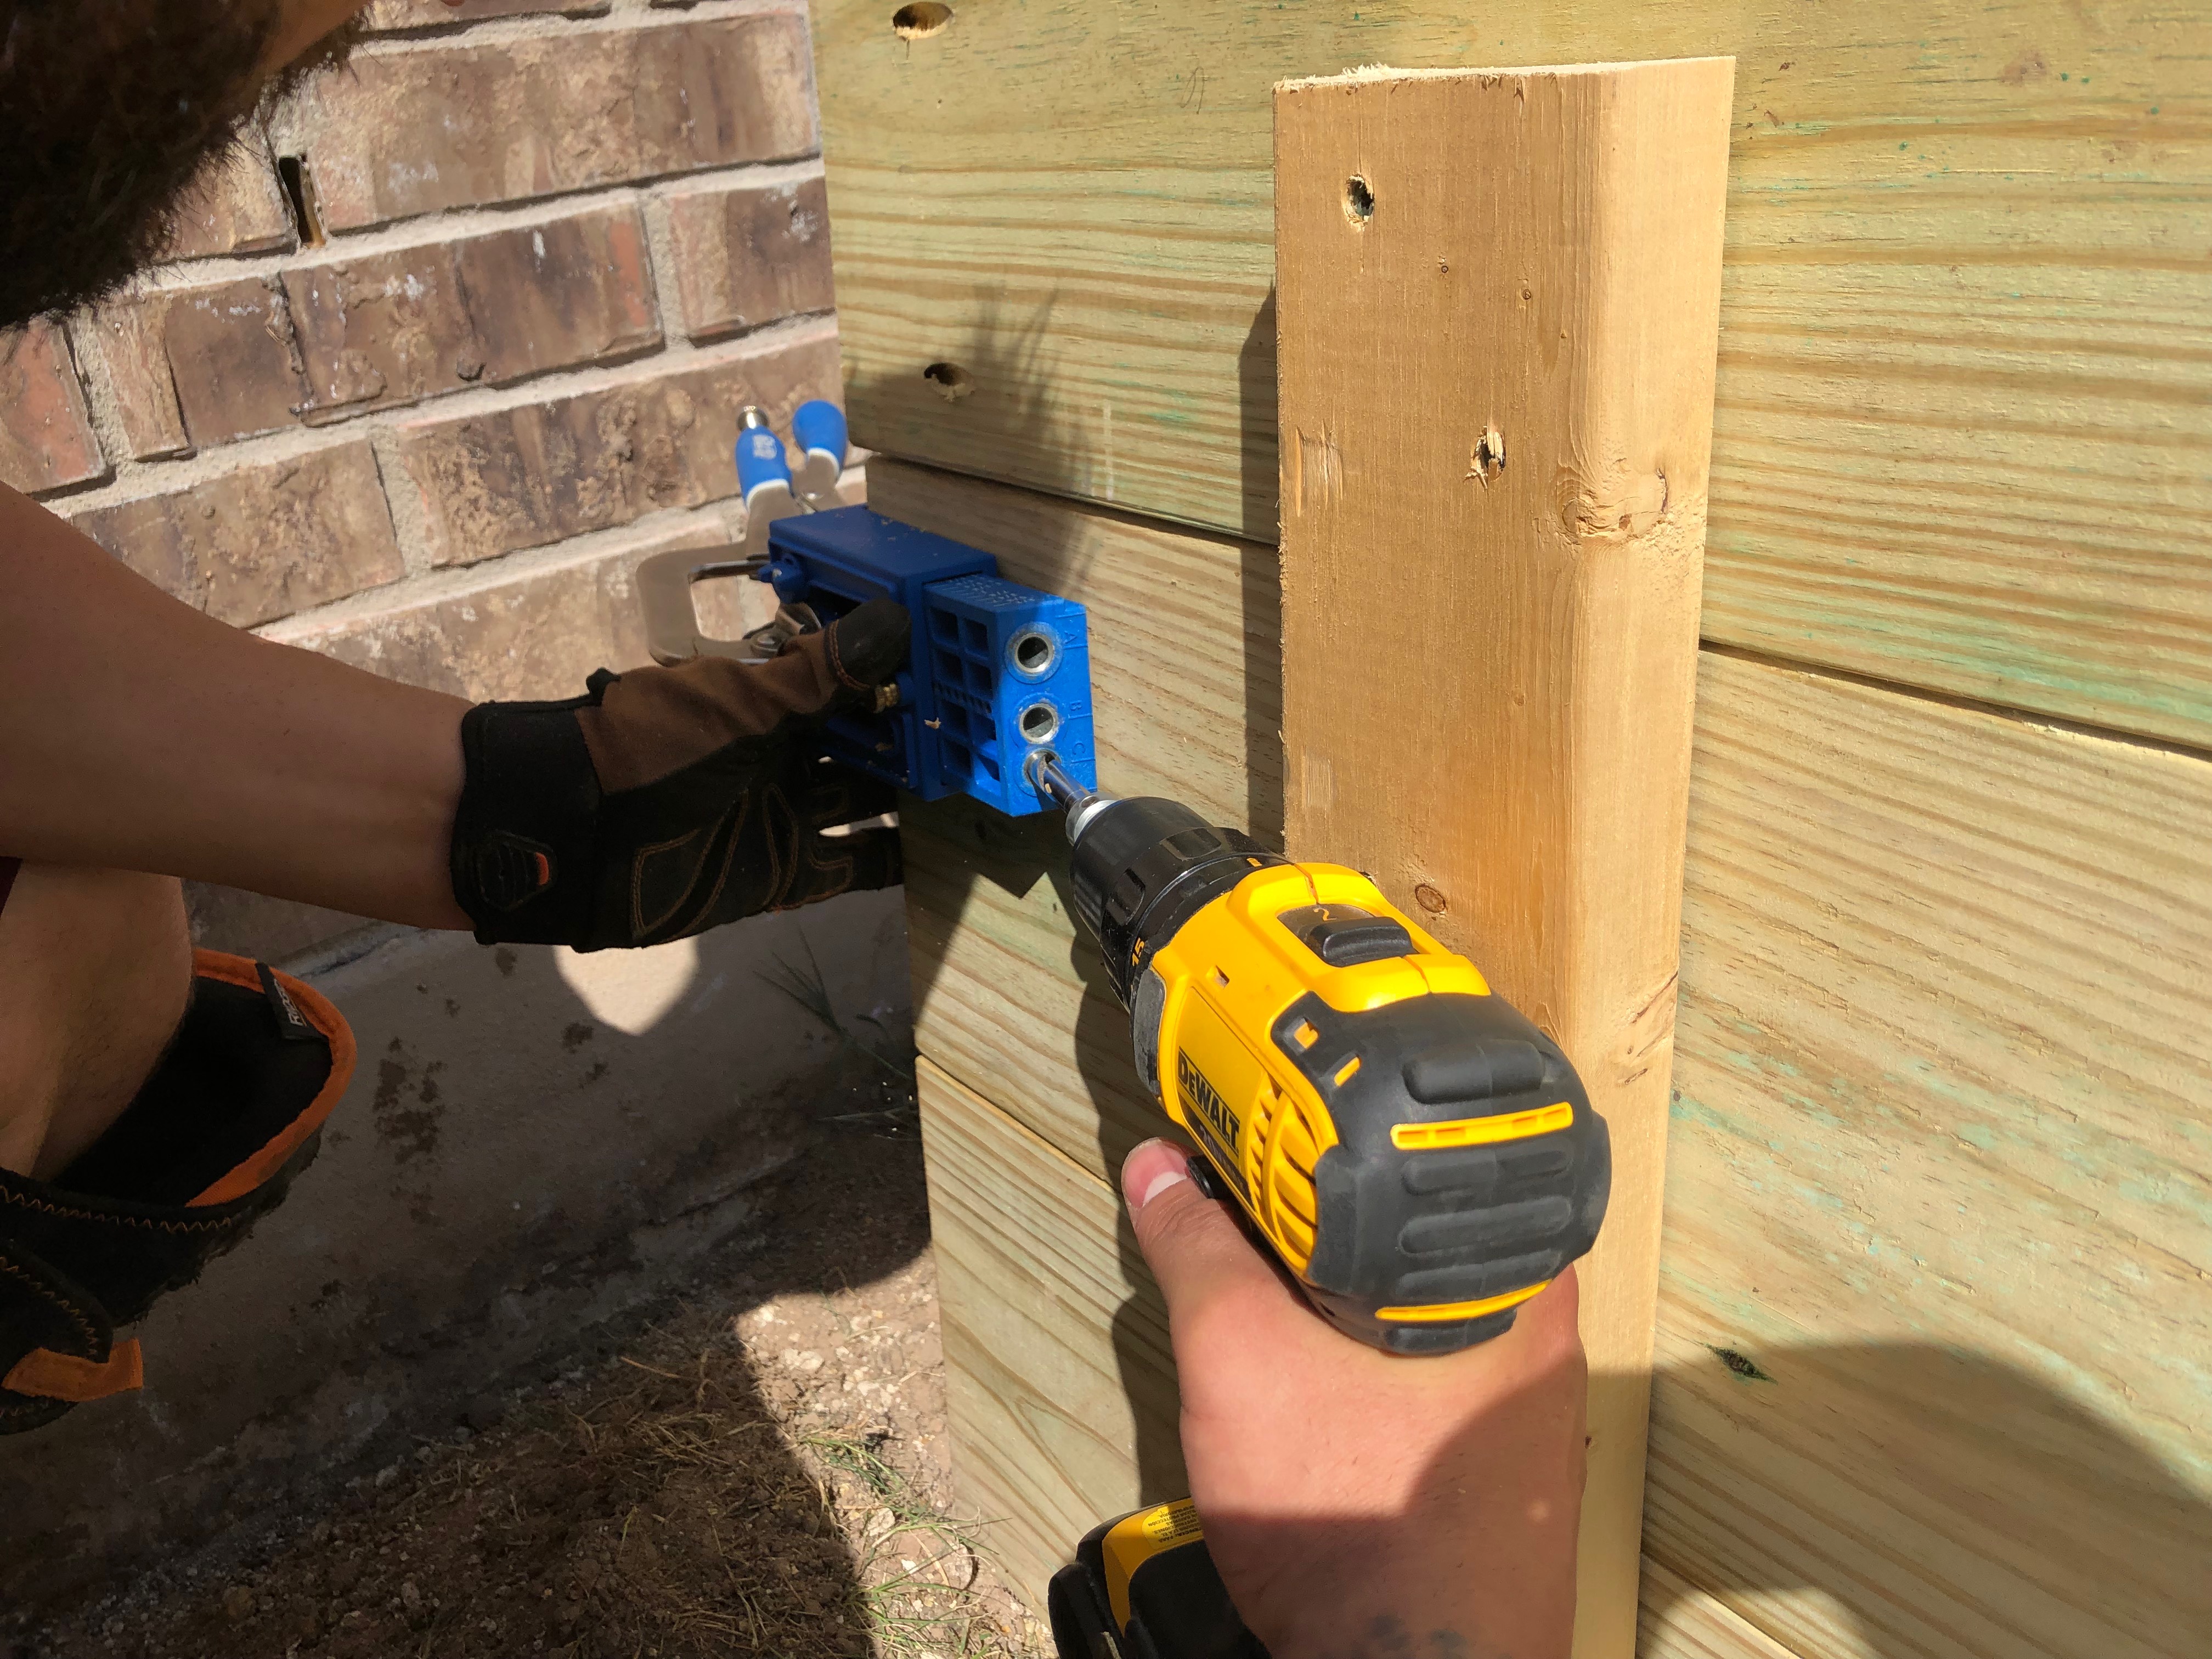
In the middle picture, you can see that we forgot to drill the holes before the 2x4s were there so it made drilling a little crowded.
What you also need to know when preparing your kreg jig to drill the proper pocket holes is on which board you put them. You always drill the holes in the board that is going against another board. For example, in the pictures above, this board is going to connect to a wall panel going against the house so this wall will butt up to that one which is why we put the holes here. See diagram below:

DRILLING INTO CONCRETE
Before putting all the panels together, I wanted to make sure that these suckers weren’t going anywhere. So, I bought some concrete screws to screw them into the side of the patio slab. This process took a lot longer than it should have because we didn’t have the proper tools. My husband took the entire brunt of this portion for the project. He had to chip away the rough concrete edge that was left pretty messy from the slab being poured. This was important because if he hadn’t, the whole box wouldn’t sit flat against the slab. Which just wouldn’t look nice and it would be much harder to make it look even to the patio.
Once he got the surface prepped, we held up the wall panel exactly where it would sit so we could drill pilot holes through the wood (with a wood drill bit) and mark the concrete enough to know where to drill those pilot holes (with a concrete drill bit). The main reason this process took so much time is because he was using a regular drill and not a hammer drill. A drill can serve a ton of purposes but a hammer drill is specifically used for drilling into concrete because it “hammers” and drills at the same time chipping away the concrete. If you can’t get your
ASSEMBLING THE BOXES
You now have pilot holes drilled into the concrete so it’s just about lining up those holes with the wall panel. Take the special concrete screws, line up the hole you pre-drilled in the wood and secure the wood to the concrete. From this point you take one panel at a time and screw them together with the pocket holes you pre-drilled. It’s pretty much just assembly now.
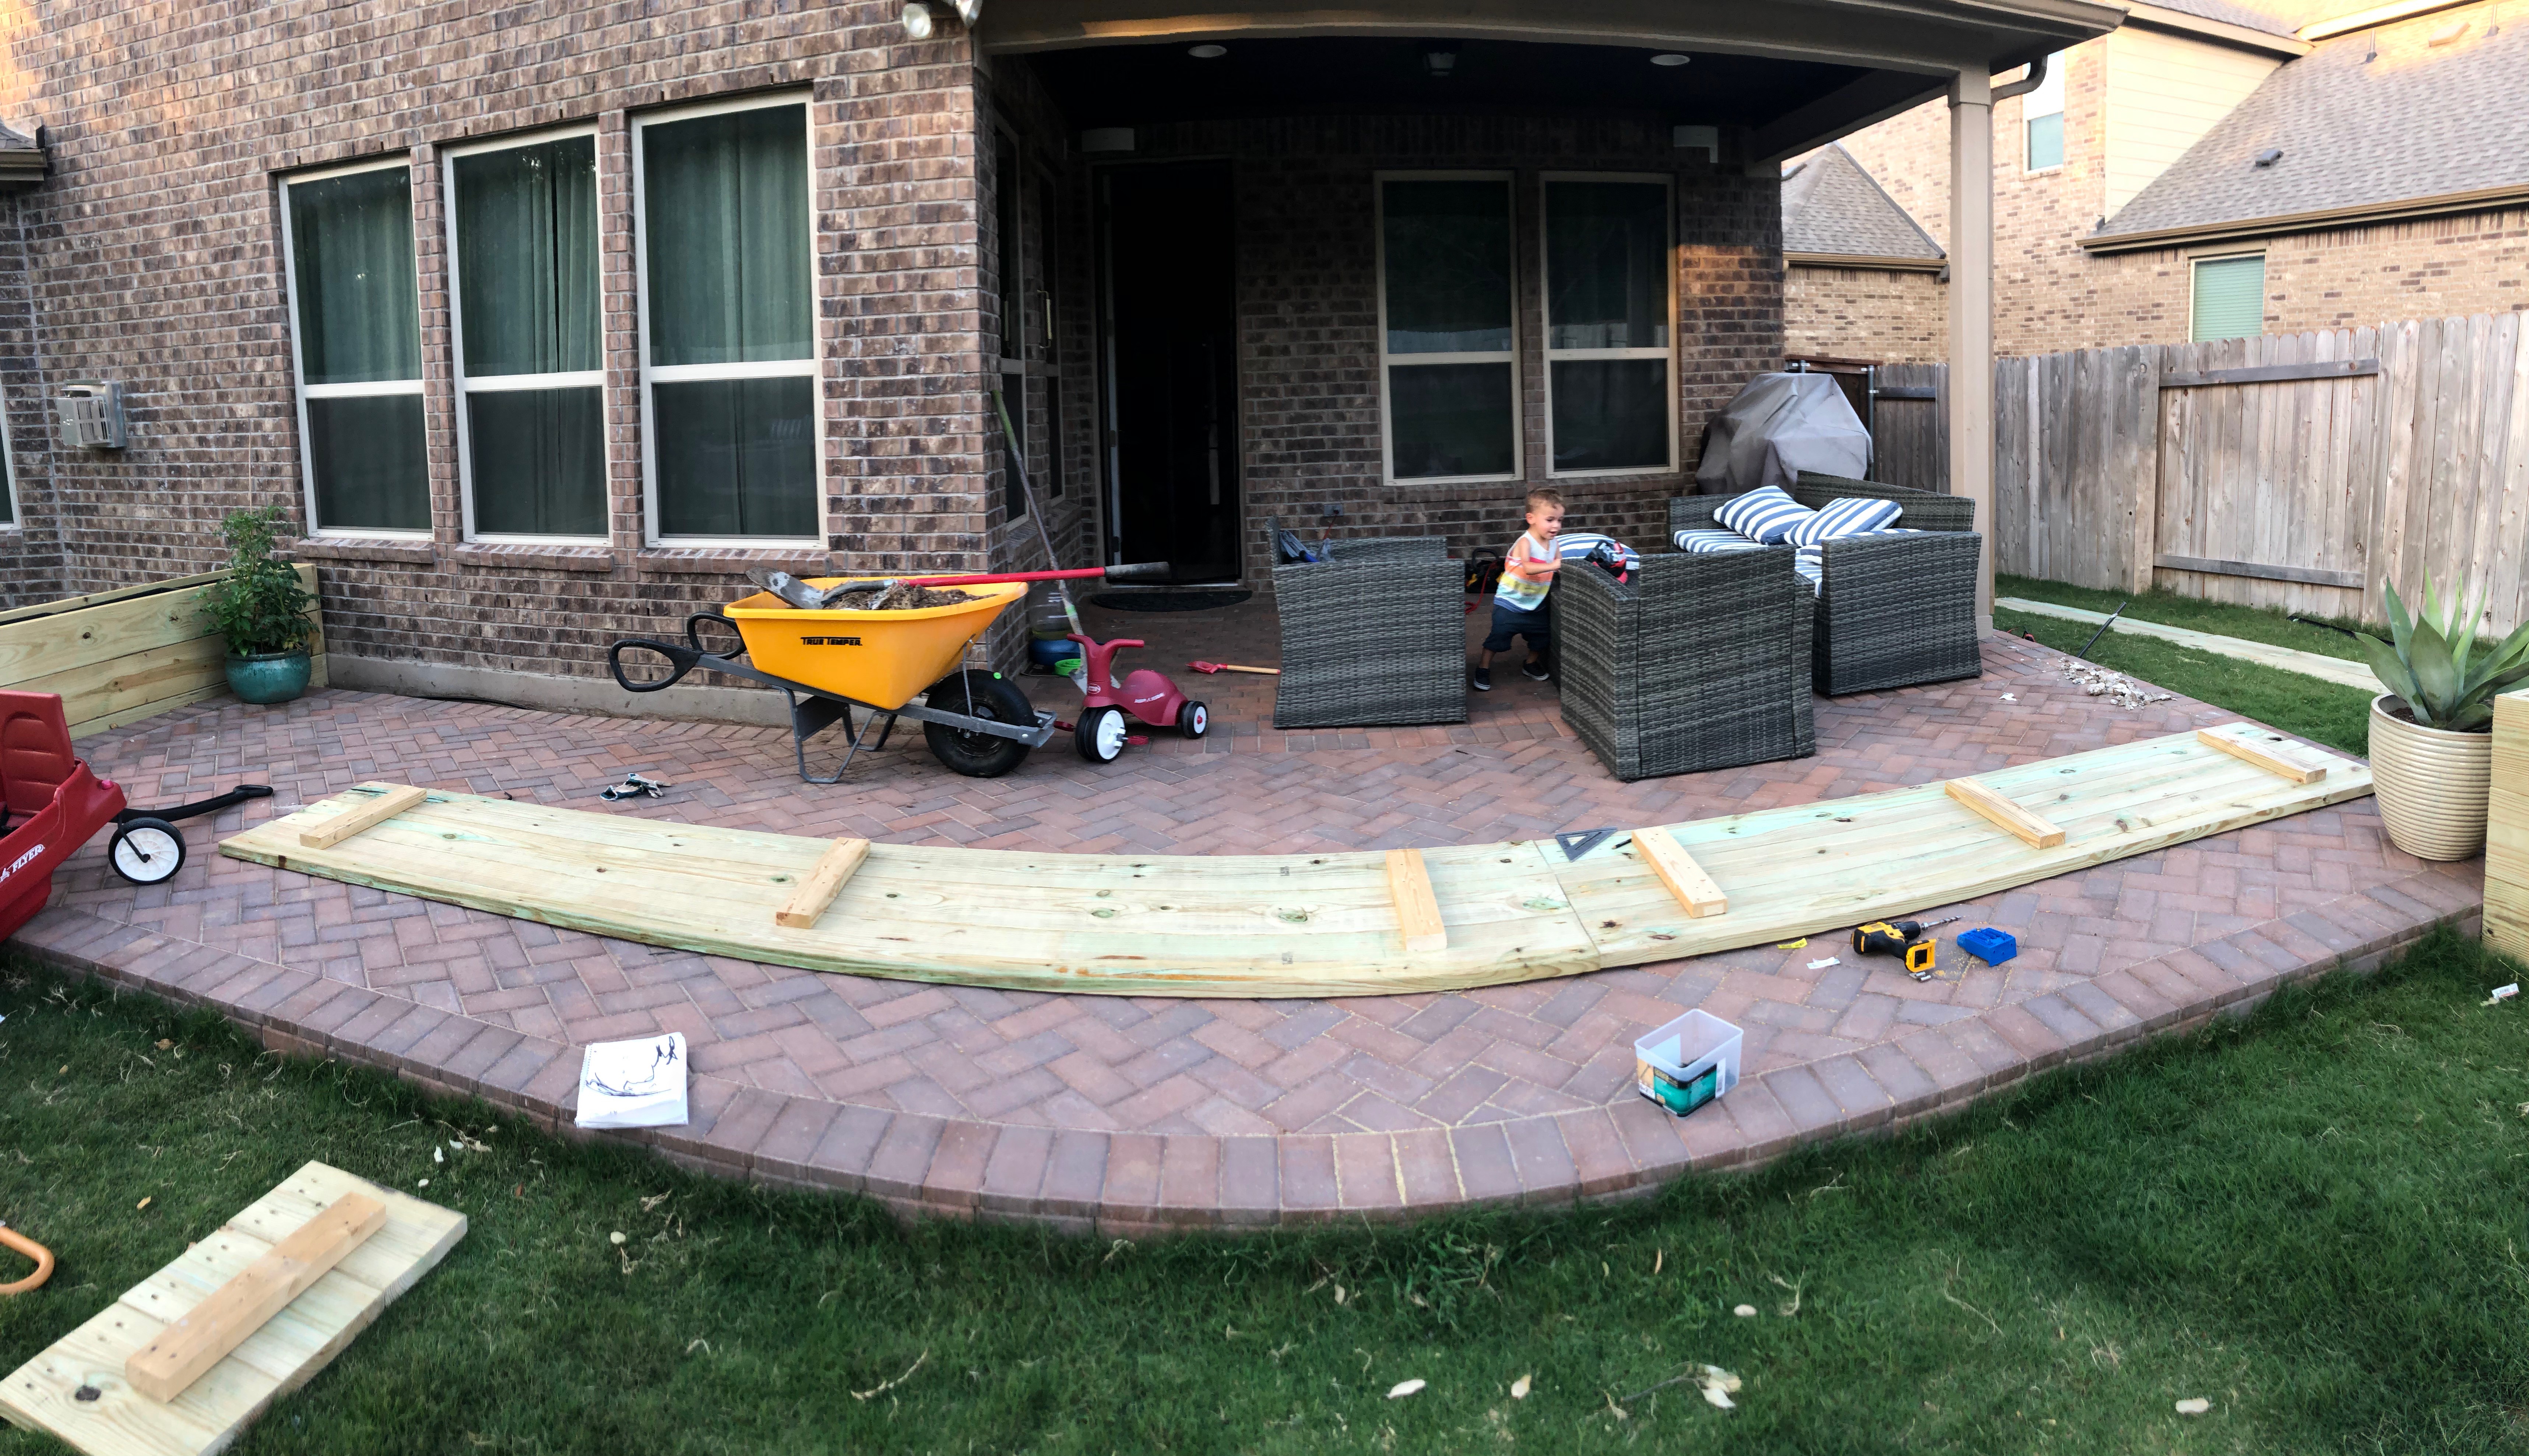
The most difficulty that we had assembling the boxes was on the long 21′ raised garden bed. We couldn’t use just one piece of wood to span the whole 21′ because, well, Home Depot doesn’t sell lumber that long. To get a long enough panel, we put a 12′ and almost 9′ piece together, end to end, with pocket screws again. I wouldn’t recommend doing that for other people. It did work, but if I did this all over again, I would do it differently. You could essentially make a 12′ box and then another separate 9′ box to butt against one another. Then secure them to each other because the two separate boxes would be more sturdy. We didn’t do that.
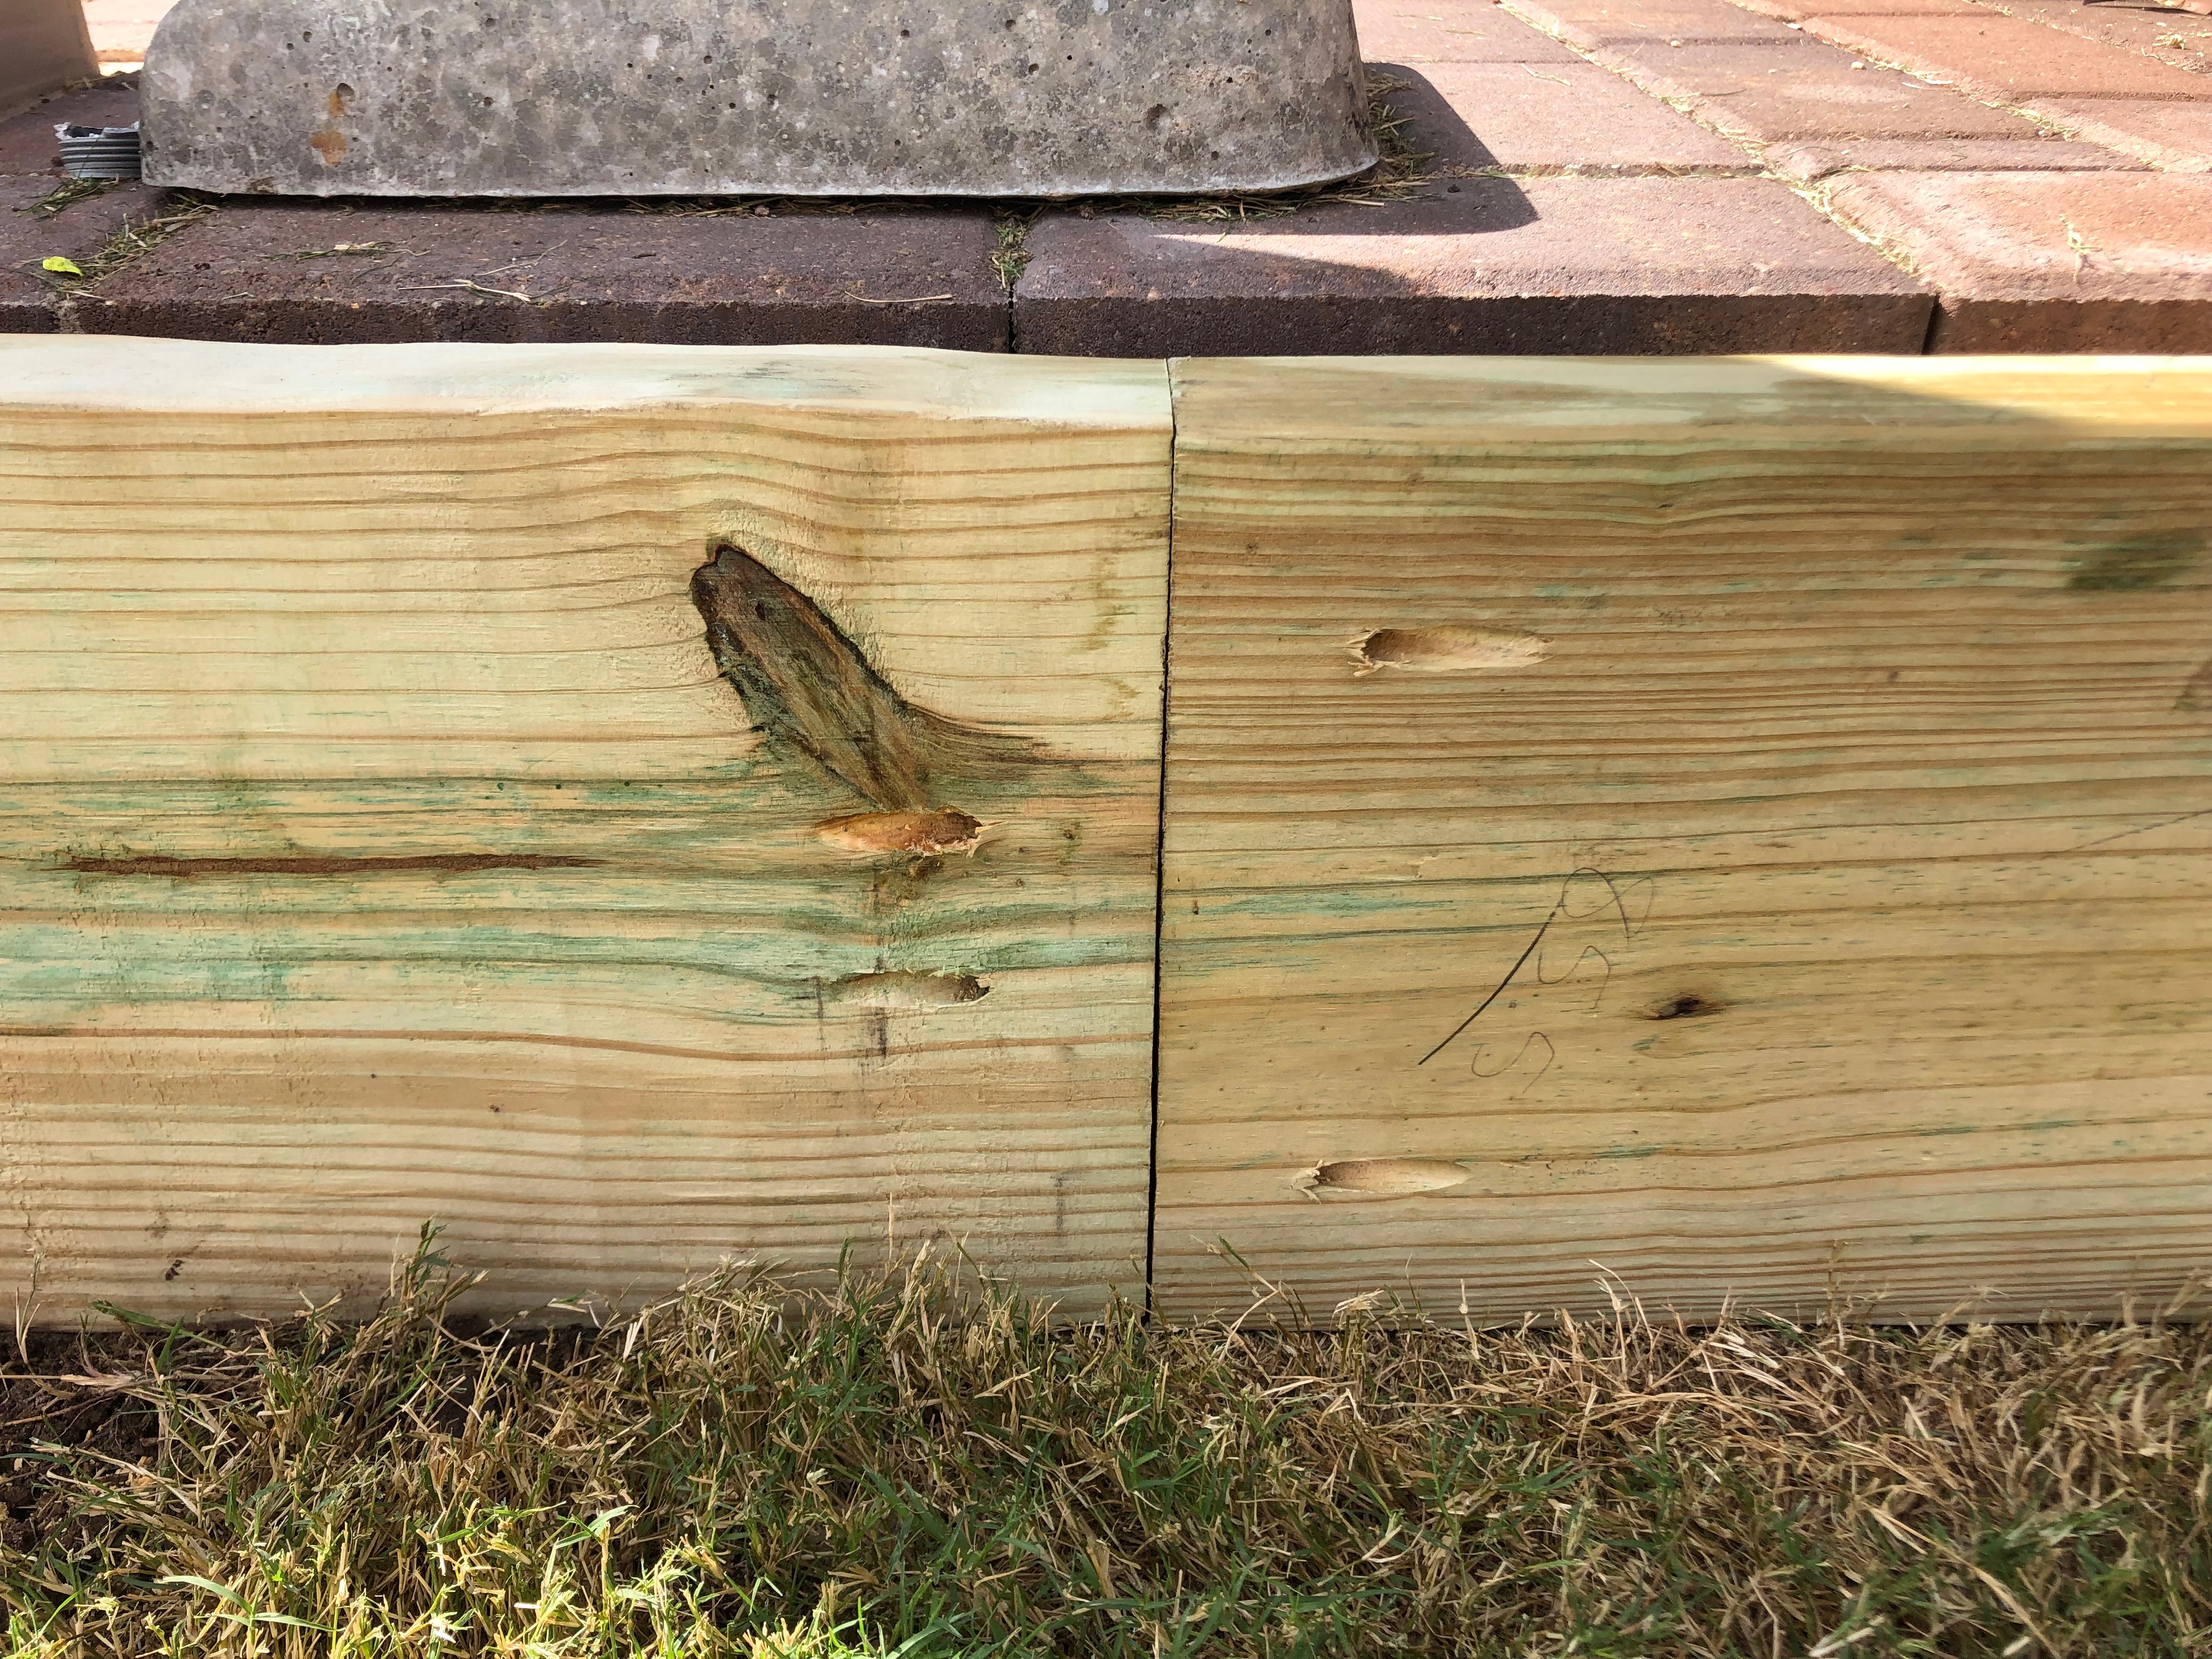
The connecting point of the 12′ and 9′ pieces with pocket screws crisscrossing each other.
We built the whole 21′ panel first and then planned on moving it. I think we got overly confident and forgot just how dang heavy each piece of wood was. Terrible idea. I couldn’t even lift it a little bit so it had to be pushed into place little by little (and that was much harder than it sounds). Anyways, it finally got to where it needed to be but we learned our lesson for the second long panel and put together the two panels in their homes so there wouldn’t be any moving them afterwards.
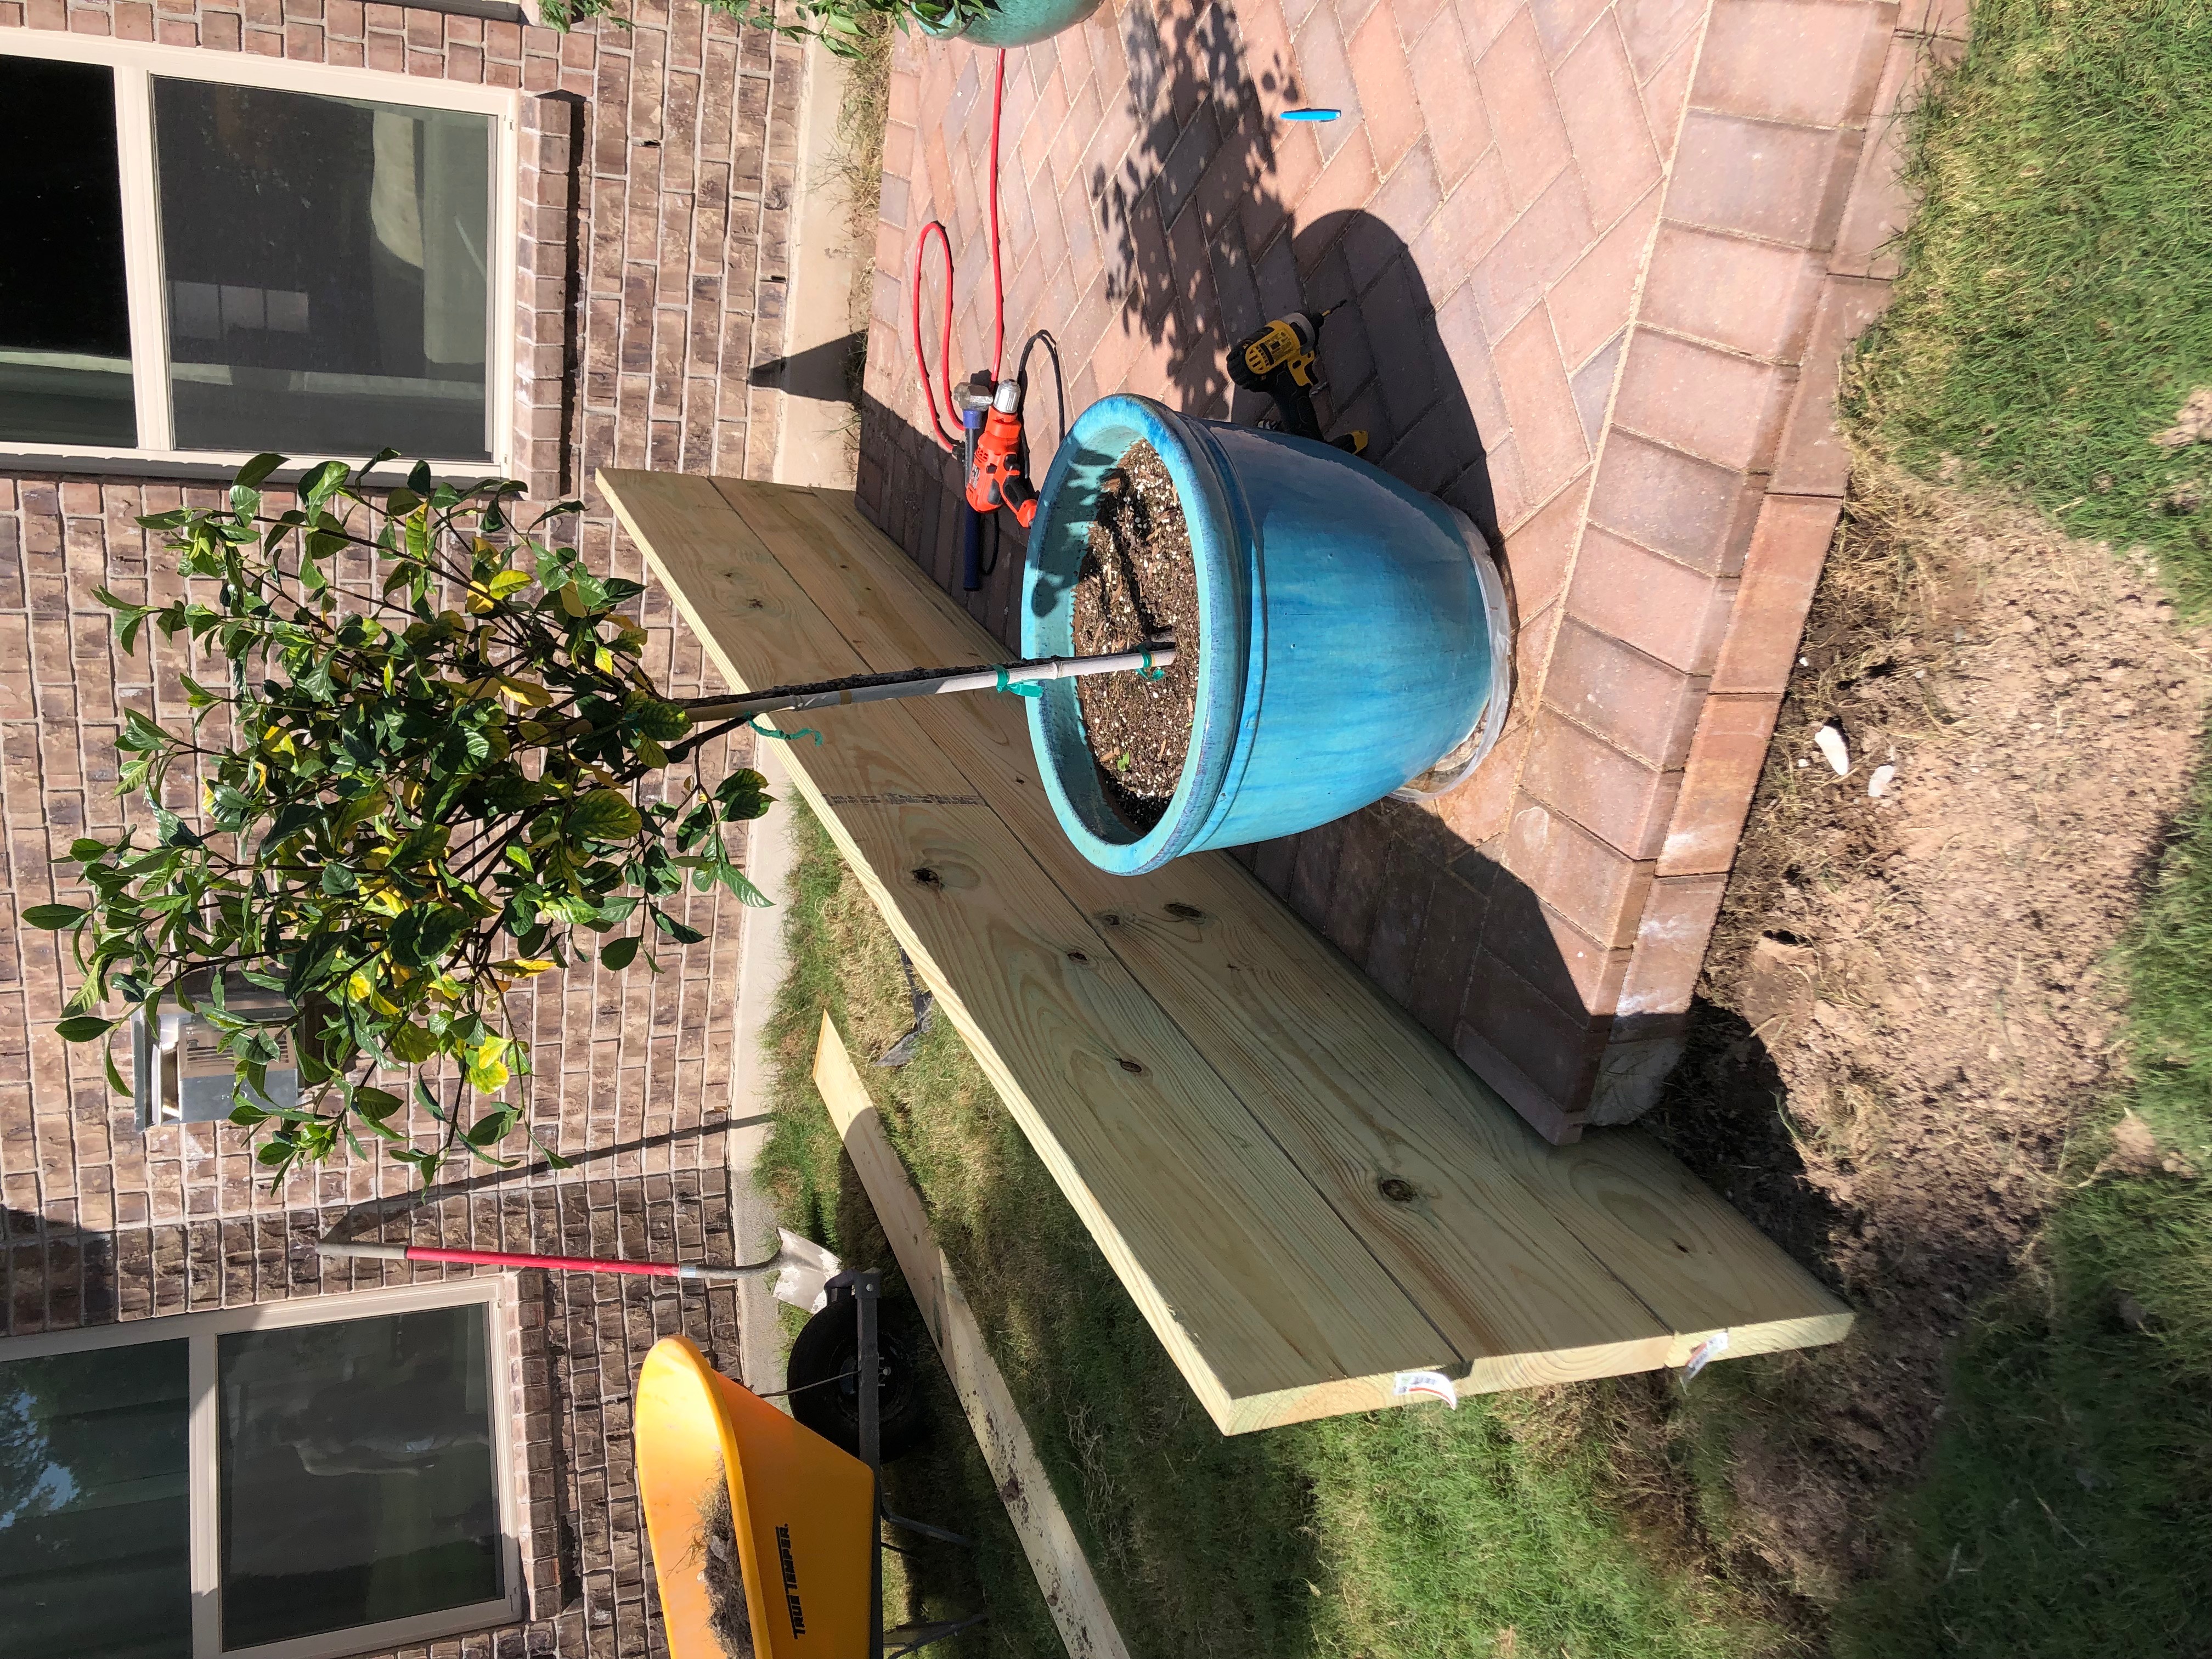
At this point, the large 21′ planter box is complete because I plan on filling that completely with dirt. The shorter Raised Garden Bed is going to have the small planter boxes in it so we need to build the platform for them to sit on.
PLANTER BOX PLATFORM
Start by measuring where the feet of the planter boxes will need to sit (one on each end and one in the middle to keep them from bottoming out). Then you will want to measure the depth at which you want the planters to sit. The planters I bought are 9″ deep so I measured down into the raised garden beds 10″ for the wood to come about 1″ above the top of the planter boxes. Finally, take the interior measurement at each place you will be placing a brace. Once you have all your measurements down, cut the 2x4s for the interior bracing.
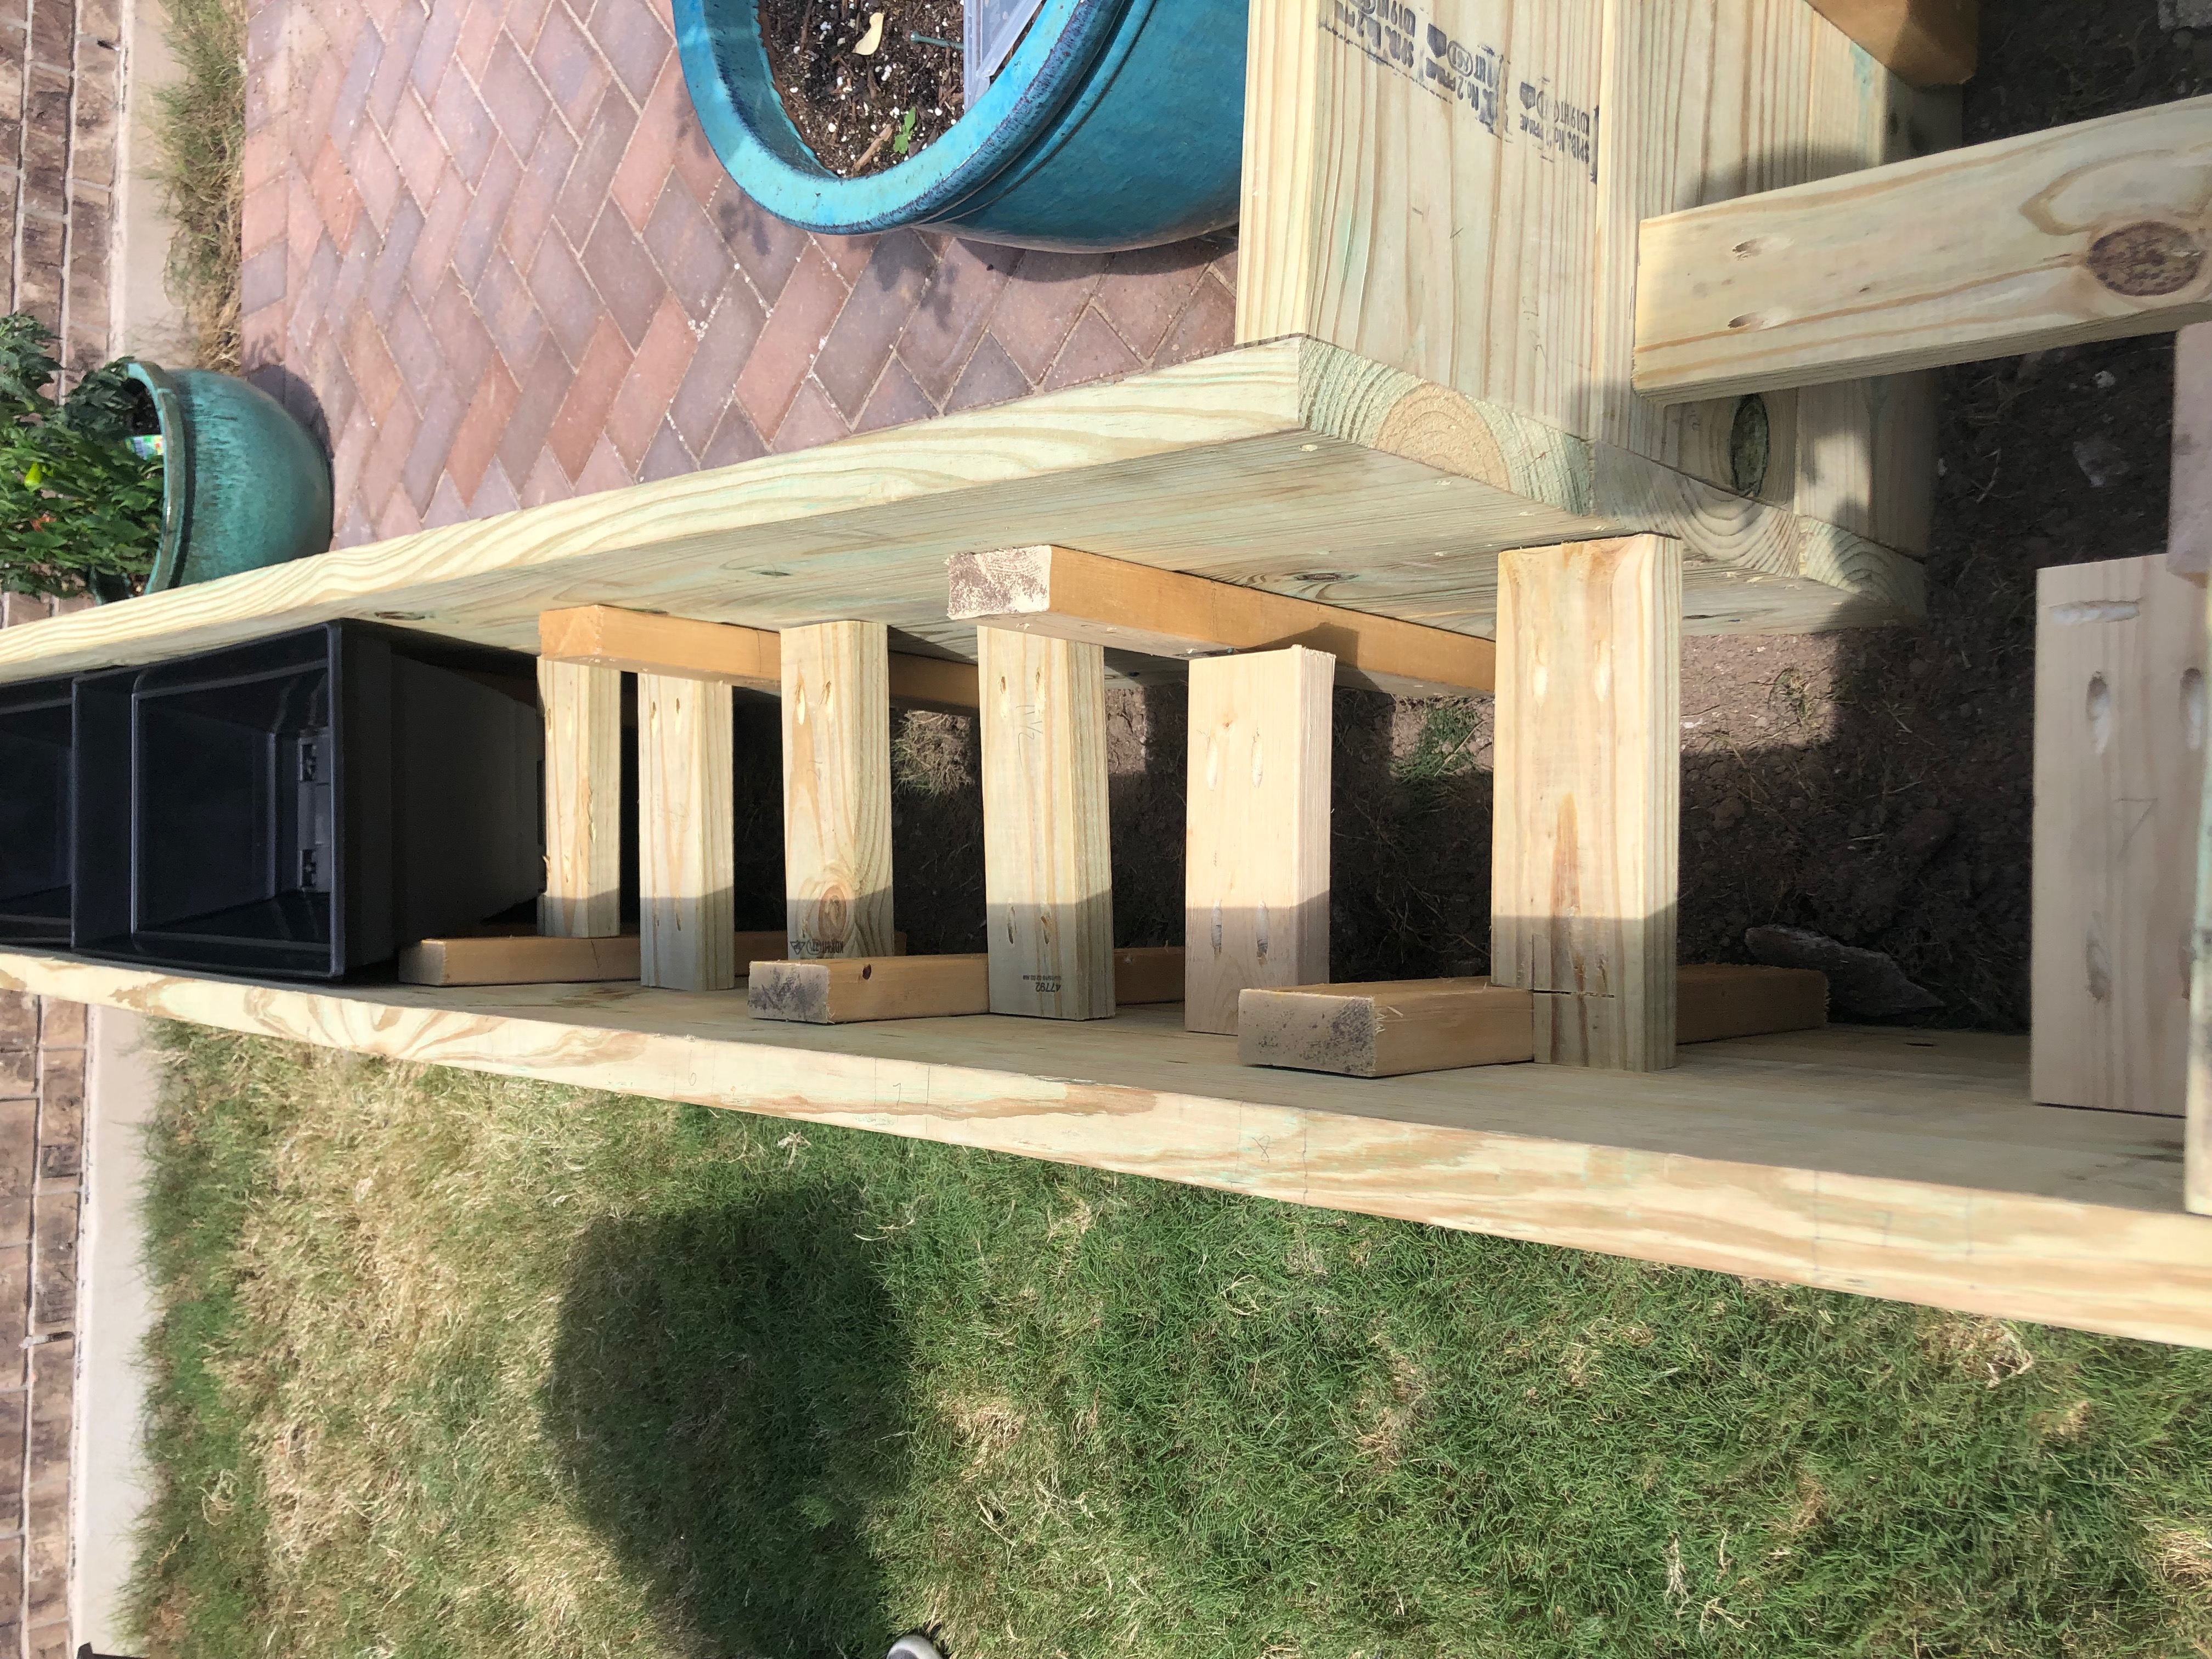
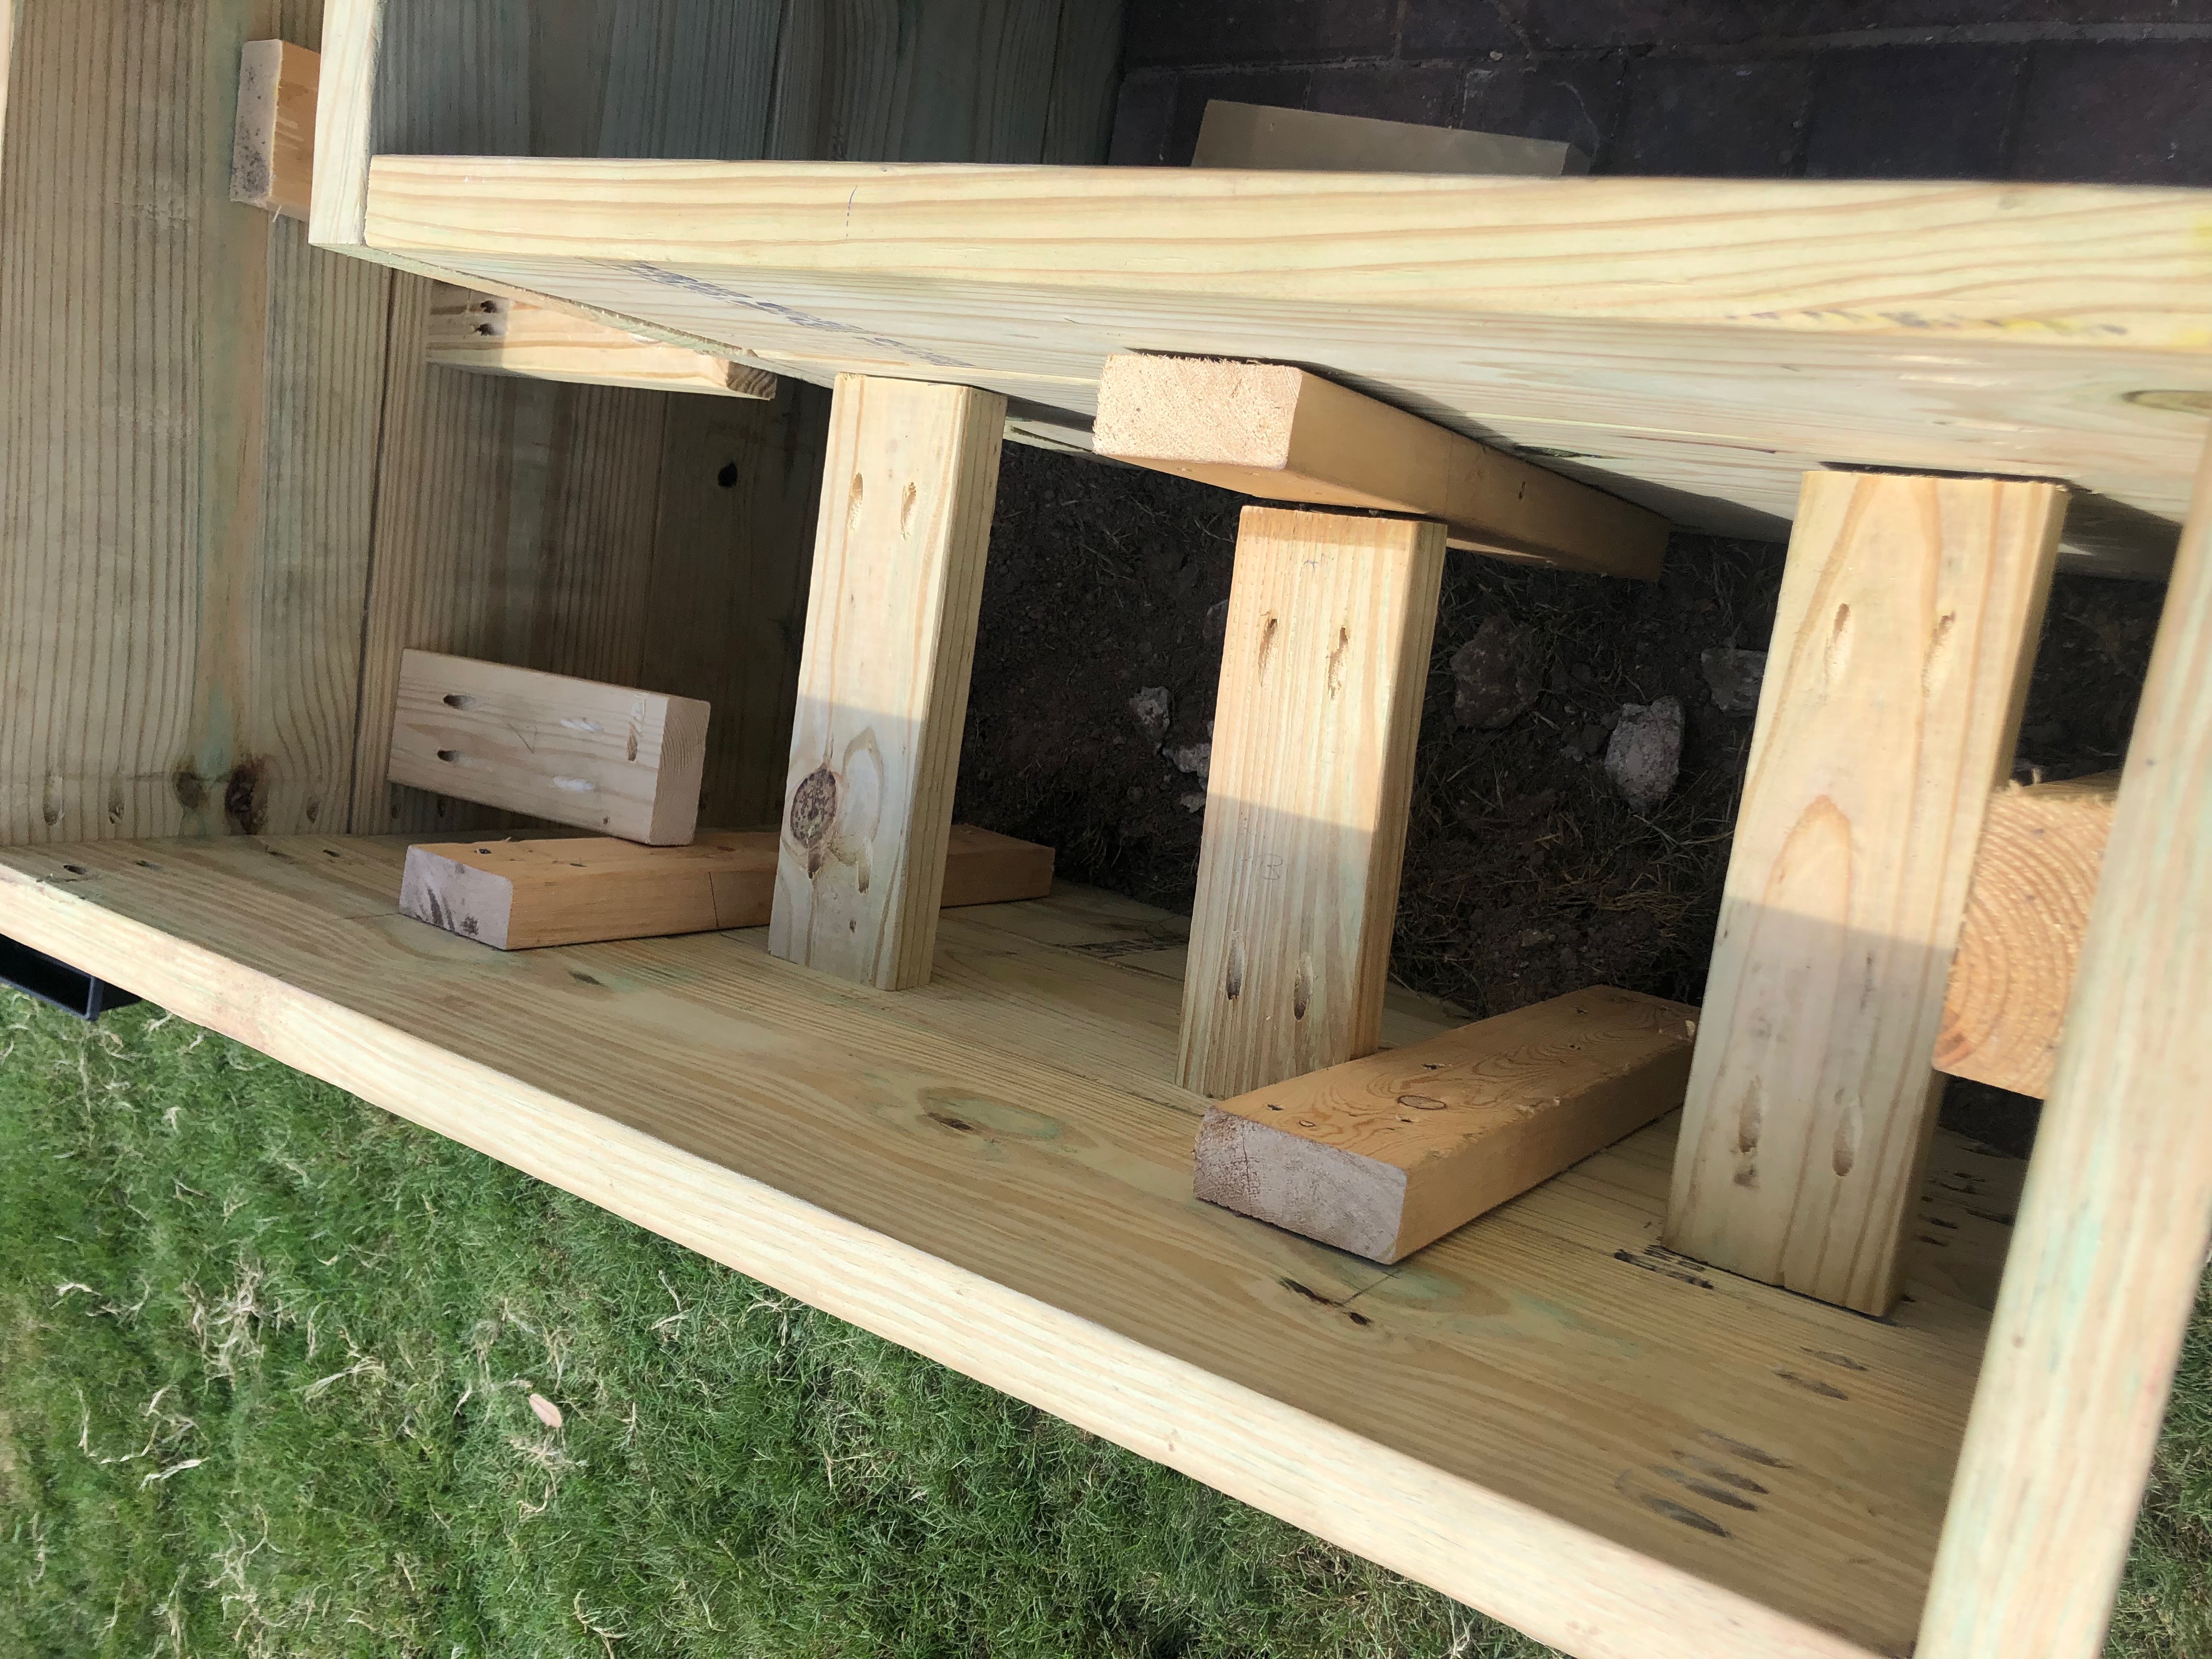
These braces don’t need to be pretty. They do need to be level so the planters don’t look all crooked from the top. What I did to level them, was measure 10″ down into the raised garden box on each side of the box. You can see that we used pocket screws again to secure the braces on the inside.
SANDING
The last thing I will be doing before staining these raised garden beds is sanding. Sanding is optional based on the look you want. I decided to sand mine for a cleaner finish and because I have a new sander! If the lumber you use has lumber stamps on them, sanding takes them off pretty quick and easy too.
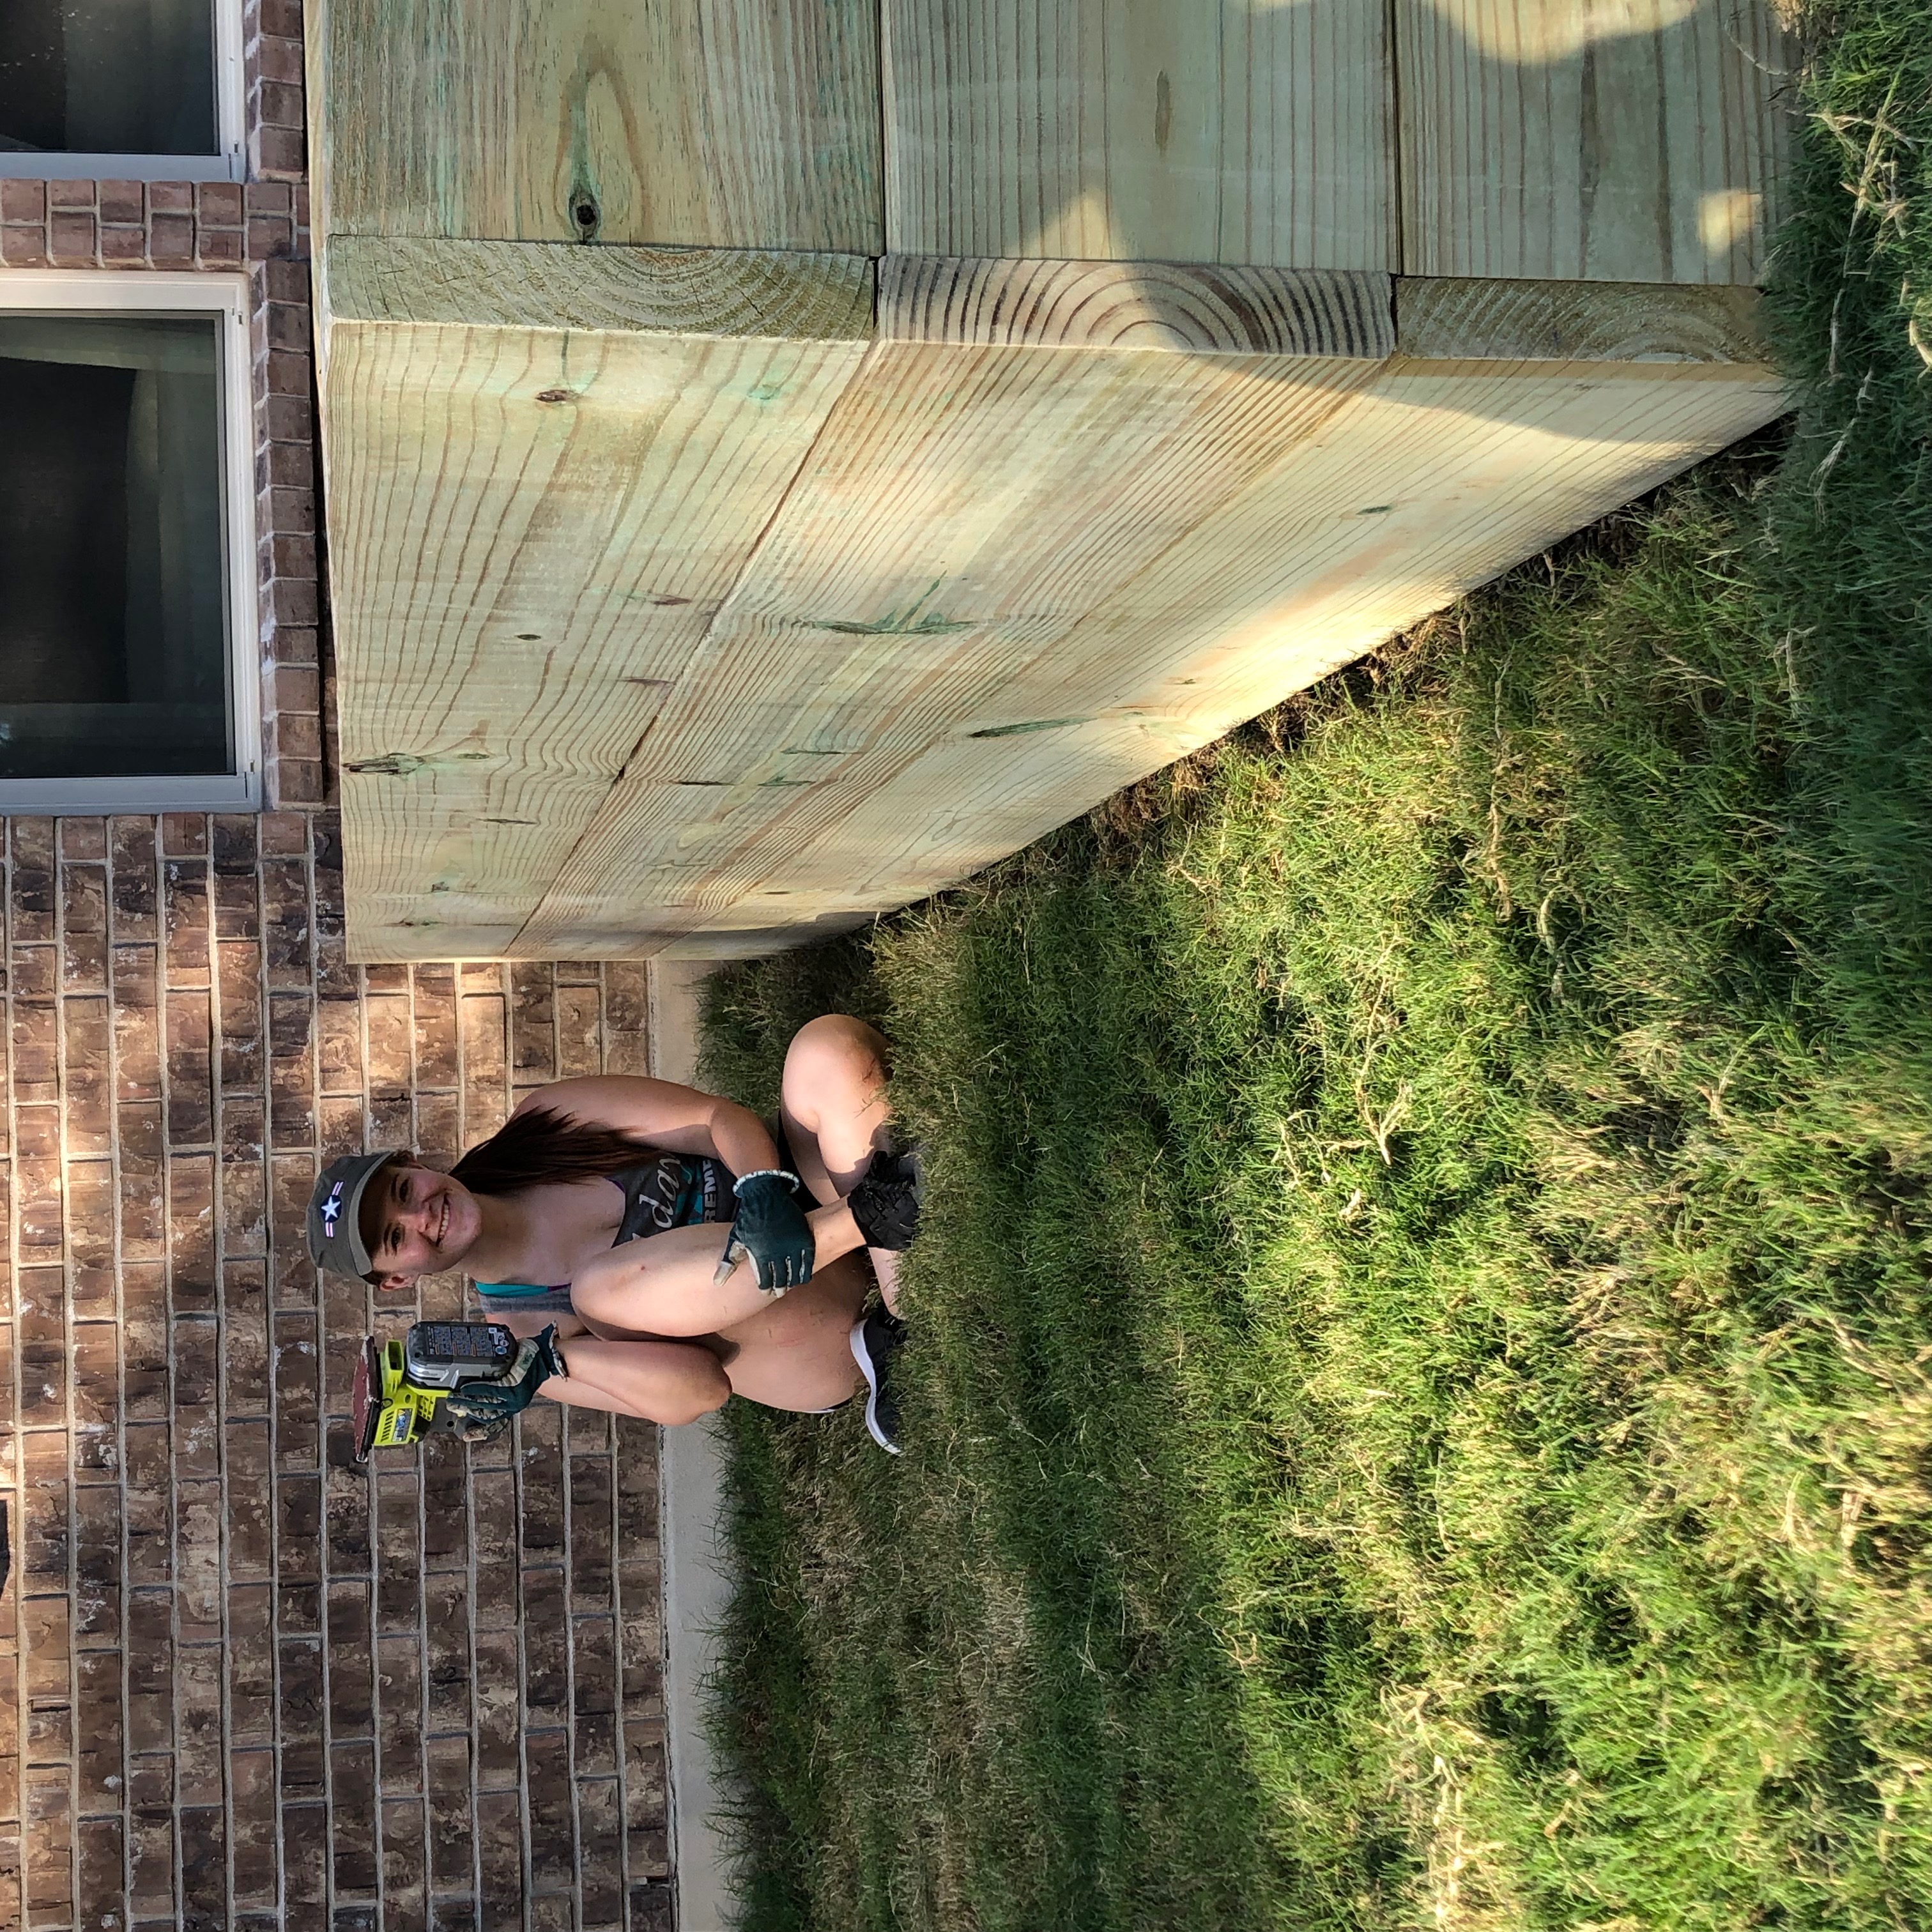
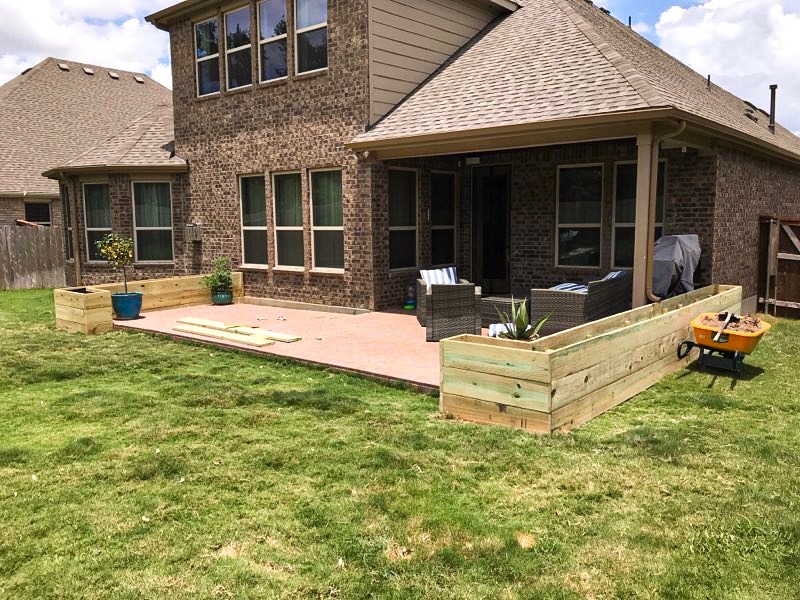
There you have a completed Raised Garden Bed! This is part one so although they are built, there’s still lots of work left to do to get these babies beautifully complete. Part of the delay in these is with staining. I’ll go over it more in part two but since the wood that we used was ground contact treated wood. In order to prevent rotting, it needs to dry out before staining and sealing. Stay tuned and see all the final touches that really start bringing the outdoor space together!
Follow me on instagram @olivegreyavenue to see more videos and sneak peaks to the projects I’m working on, as well as parts of my day-to-day life.
We’ll see you soon for part two…
Find us on social HERE!


