


The Master Bedroom in the new house is much larger than the one we moved from. I still didn’t want to cram it full of stuff and make it feel crowed and small. So, when we were moving I decided to sell the dresser we had. Then move all of our clothing storage into the closet with the Elfa closet system from The Container Store that we were planning to put in the closet instead of the builder’s standard closet. I knew, pretty much right away, that I wanted to build an electric fireplace in the bed room.
Finding the Right Style of Fireplace for me
I could just see it in my head and that’s exactly what I wanted. It would be a beautiful focal point of the room without taking up a bunch of space. I made A LOT of sketches of how I wanted the fireplace to look. I went from traditional to ultra sleek and modern looks.
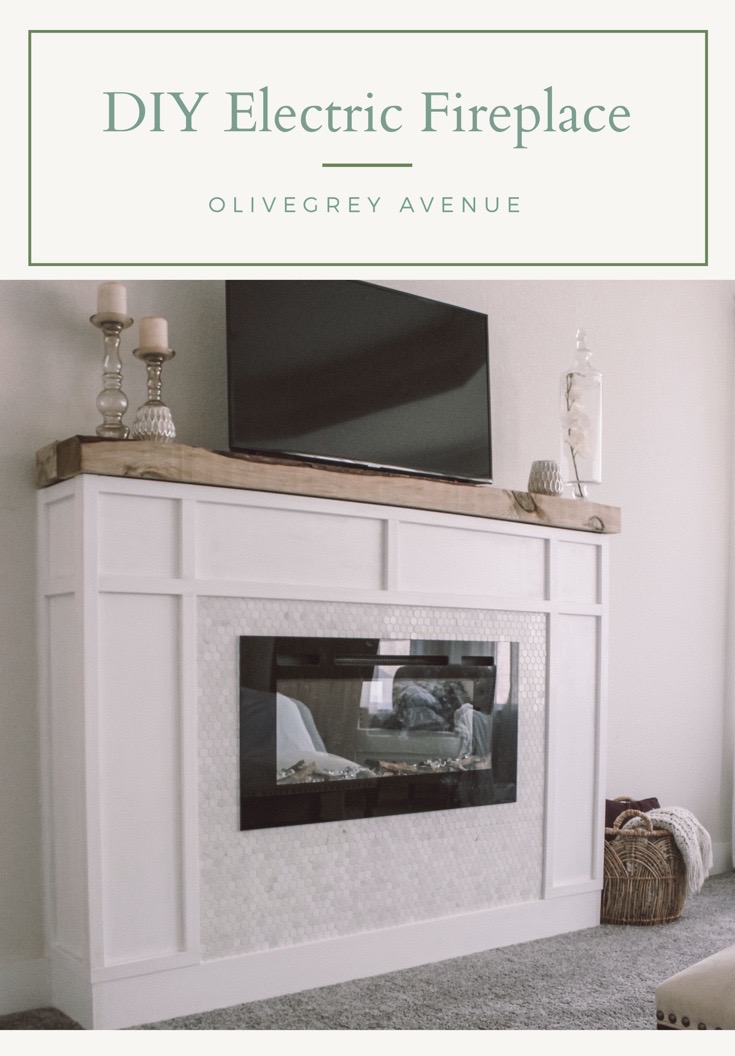
Then I finally settled on a style that, I would say, is very “me”. It’s a modern take on a traditional style that is simple, beautiful and hopefully timeless.
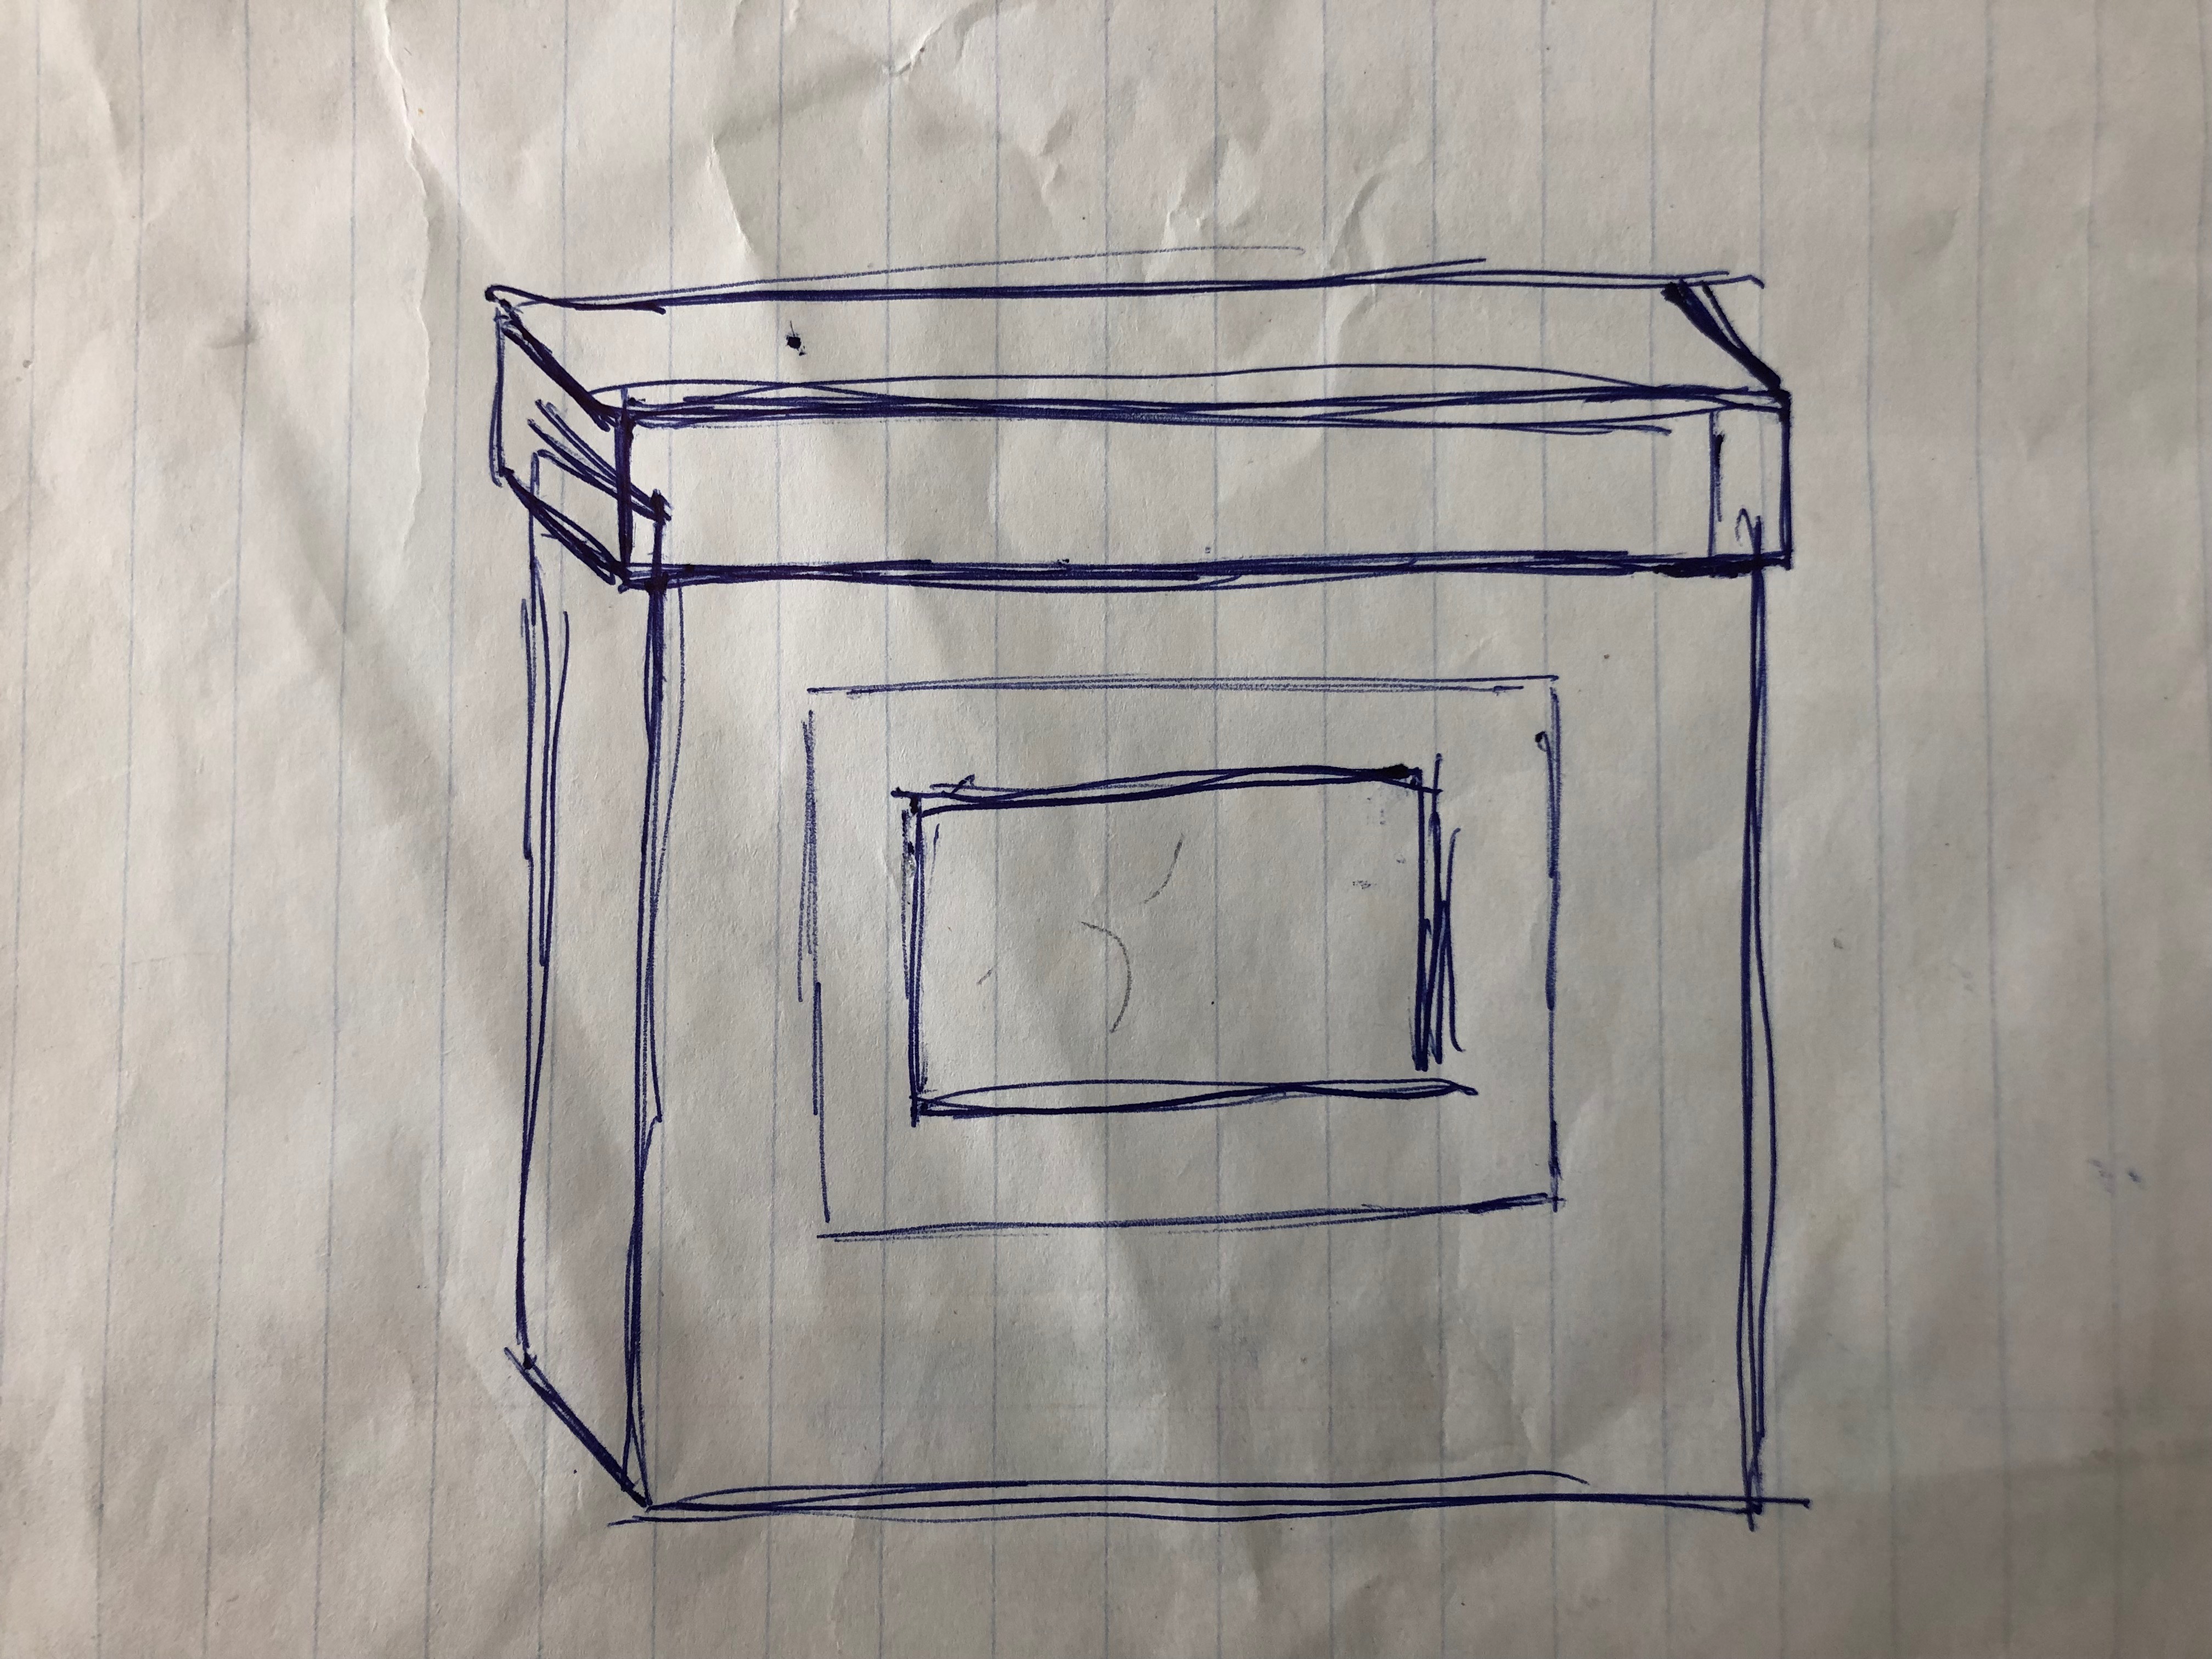
Okay, so there was a bit more detailing and it didn’t end up looking exactly like that, but this was where we started. I knew I wanted to do white trim to make it look like columns and tile around the fireplace itself. But to start, I had to find the electric fireplace insert that I wanted. I searched through dozens of electric fireplaces until I found the one with the best reviews and was the right look.
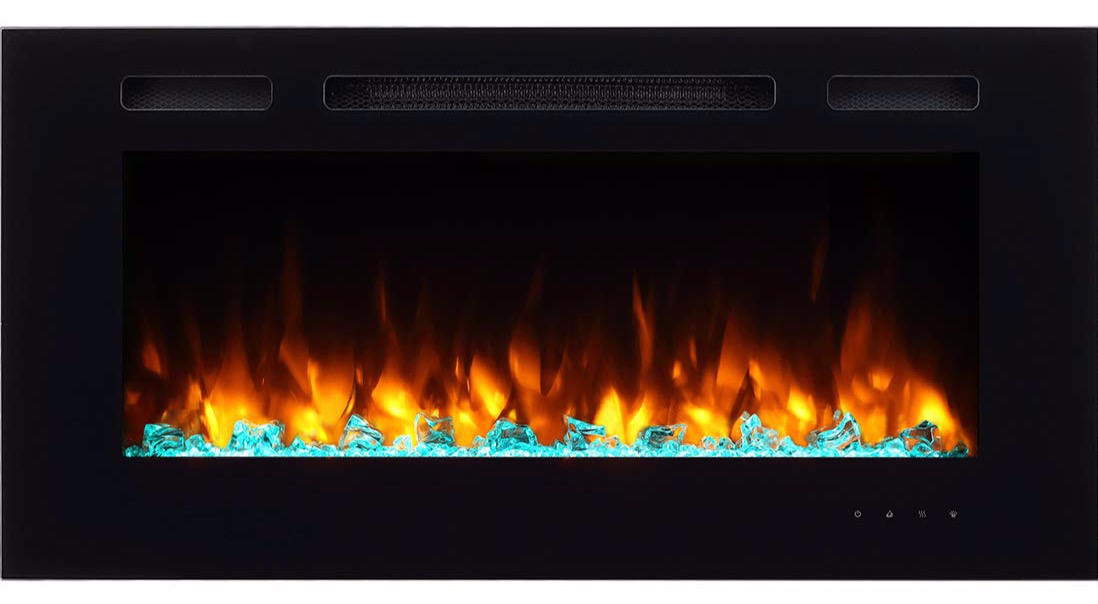
This is the one I ended up purchasing.
Troubles
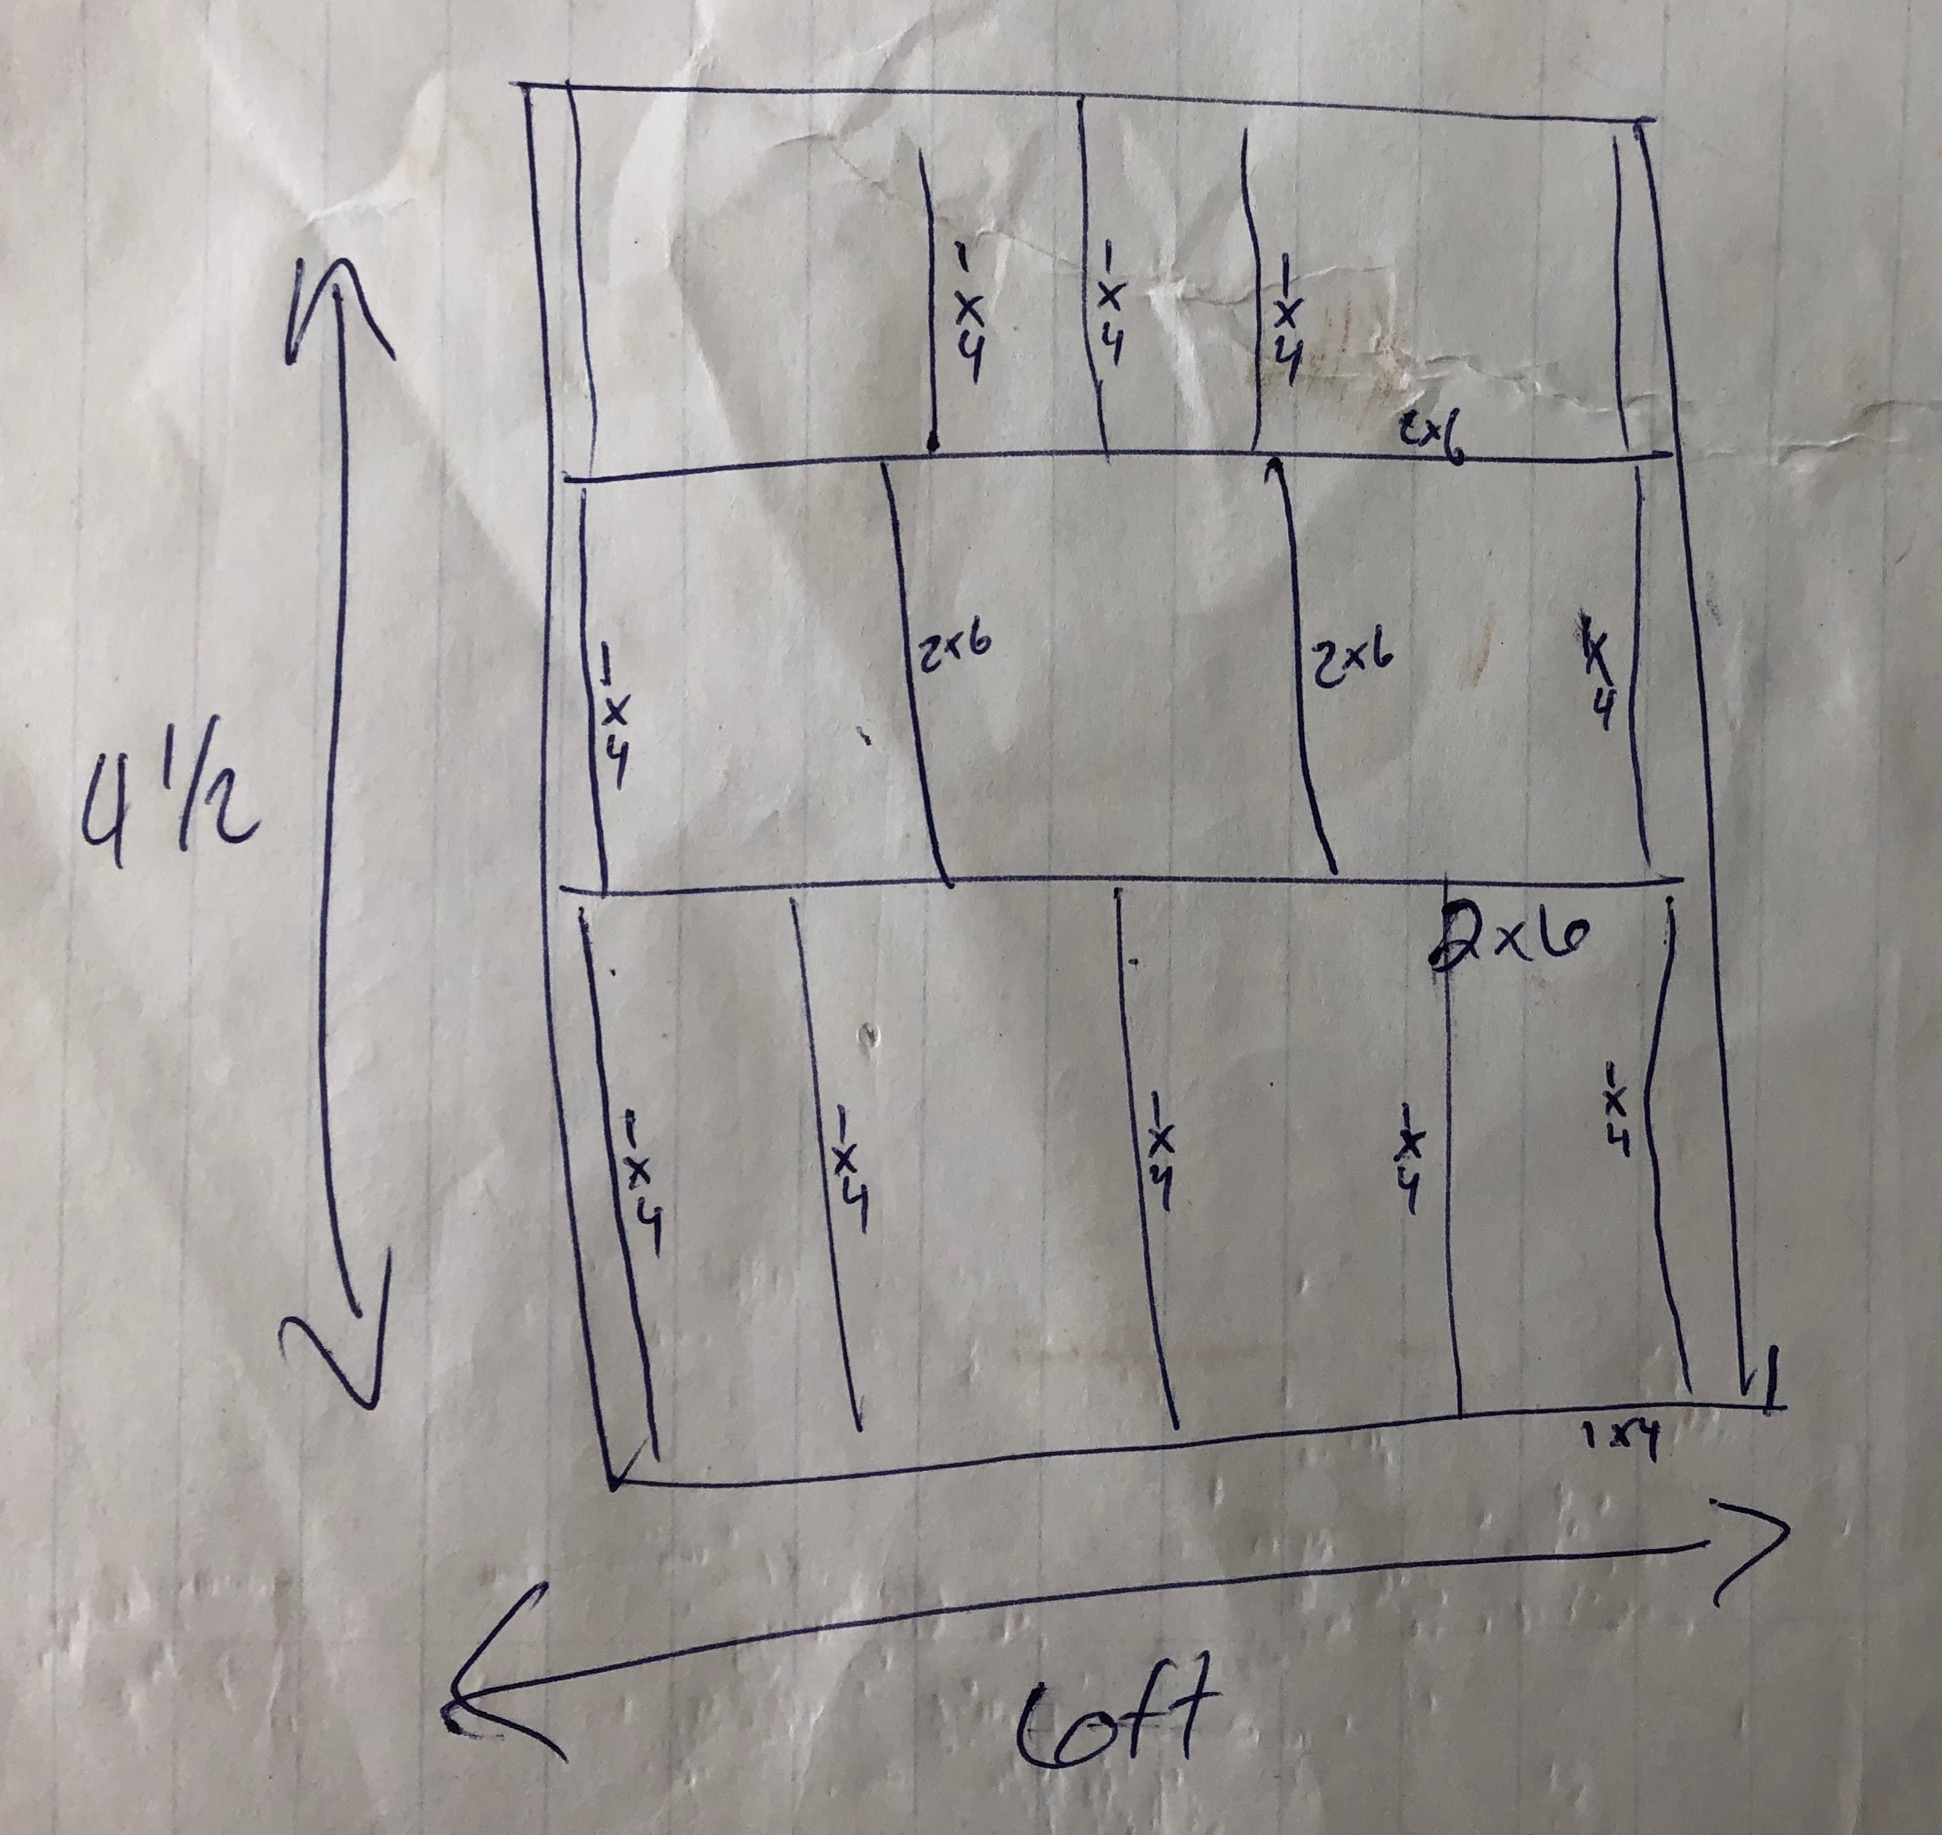
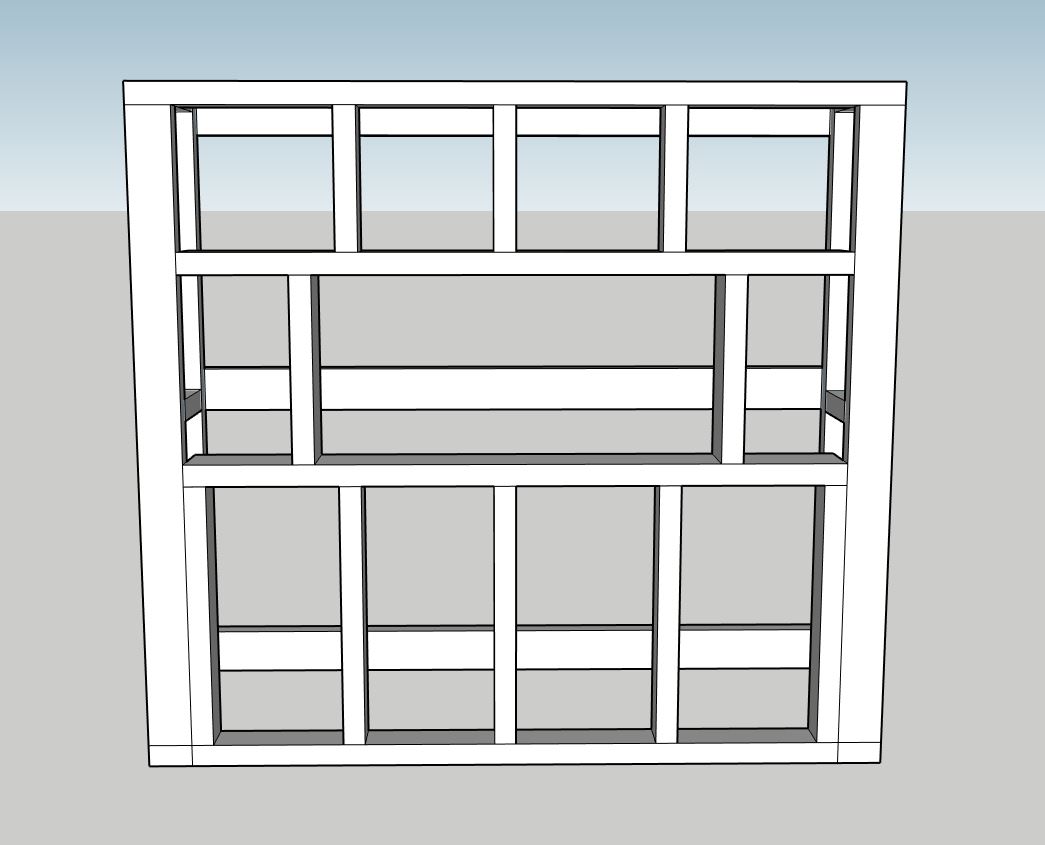
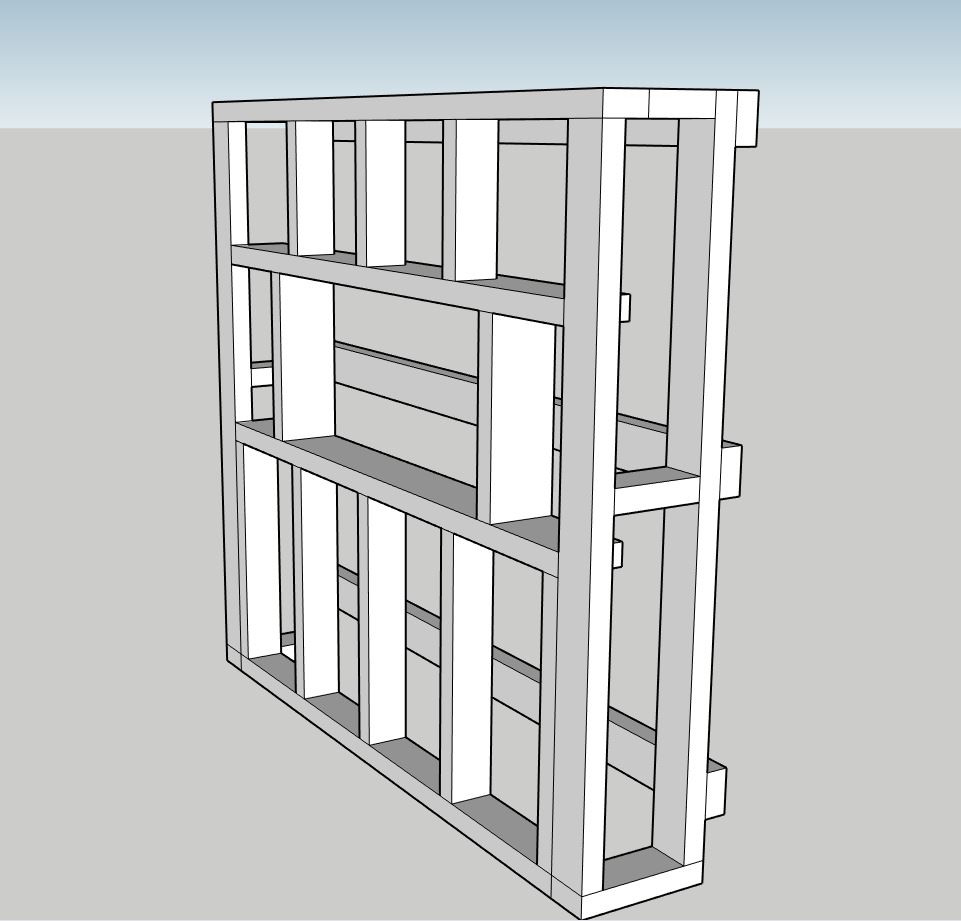
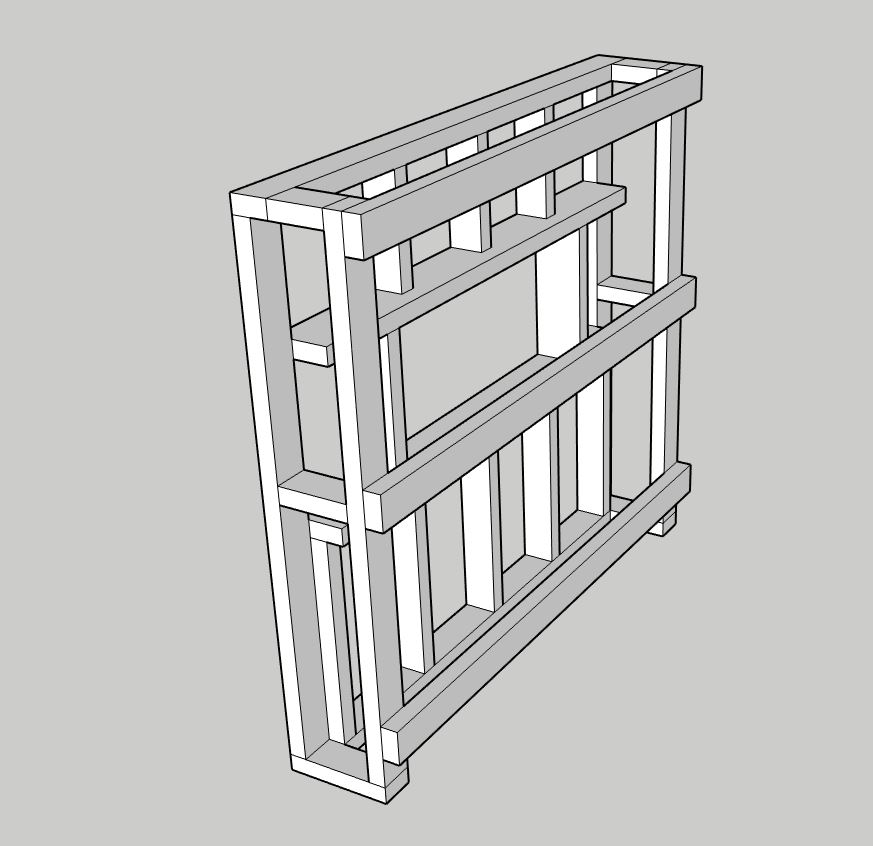
Something I had trouble finding was actual instructions on how to build the frame for this fireplace to sit in. In the customer reviews for this insert on Amazon is actually where I found a lot of good information about how to build the box for this to sit in. So, the next drawing is how we figured we would build the box–out of 1x4s and 2x6s. The box immediately surrounding the fireplace is made of 2x6s which is what was suggested by the manufacturer of the fireplace insert and the rest of the bracing is made of 1x4s (but we actually ended up using 2x4s just for added strength).
SUPPLIES
– 2×4 lumber
– 2×6 lumber
– counter sinking screws
– drill
– finishing nails
– hammer
– mesh drywall tape
– Millwork
– Molding (to match current baseboards)
– Tile
– mortar
– white grout (used grout left over from the kitchen mosaic)
– trowel
– construction adhesive
– jigsaw
– caulk
– clamp
– wood filler
– sandpaper
– white semi-gloss paint
– tile saw (I’ve had this one for years)
TIME: 2-3 days
DIFFICULTY: Beginner-Moderate
COST: Approximately $650-700
BUILD THE FRAME
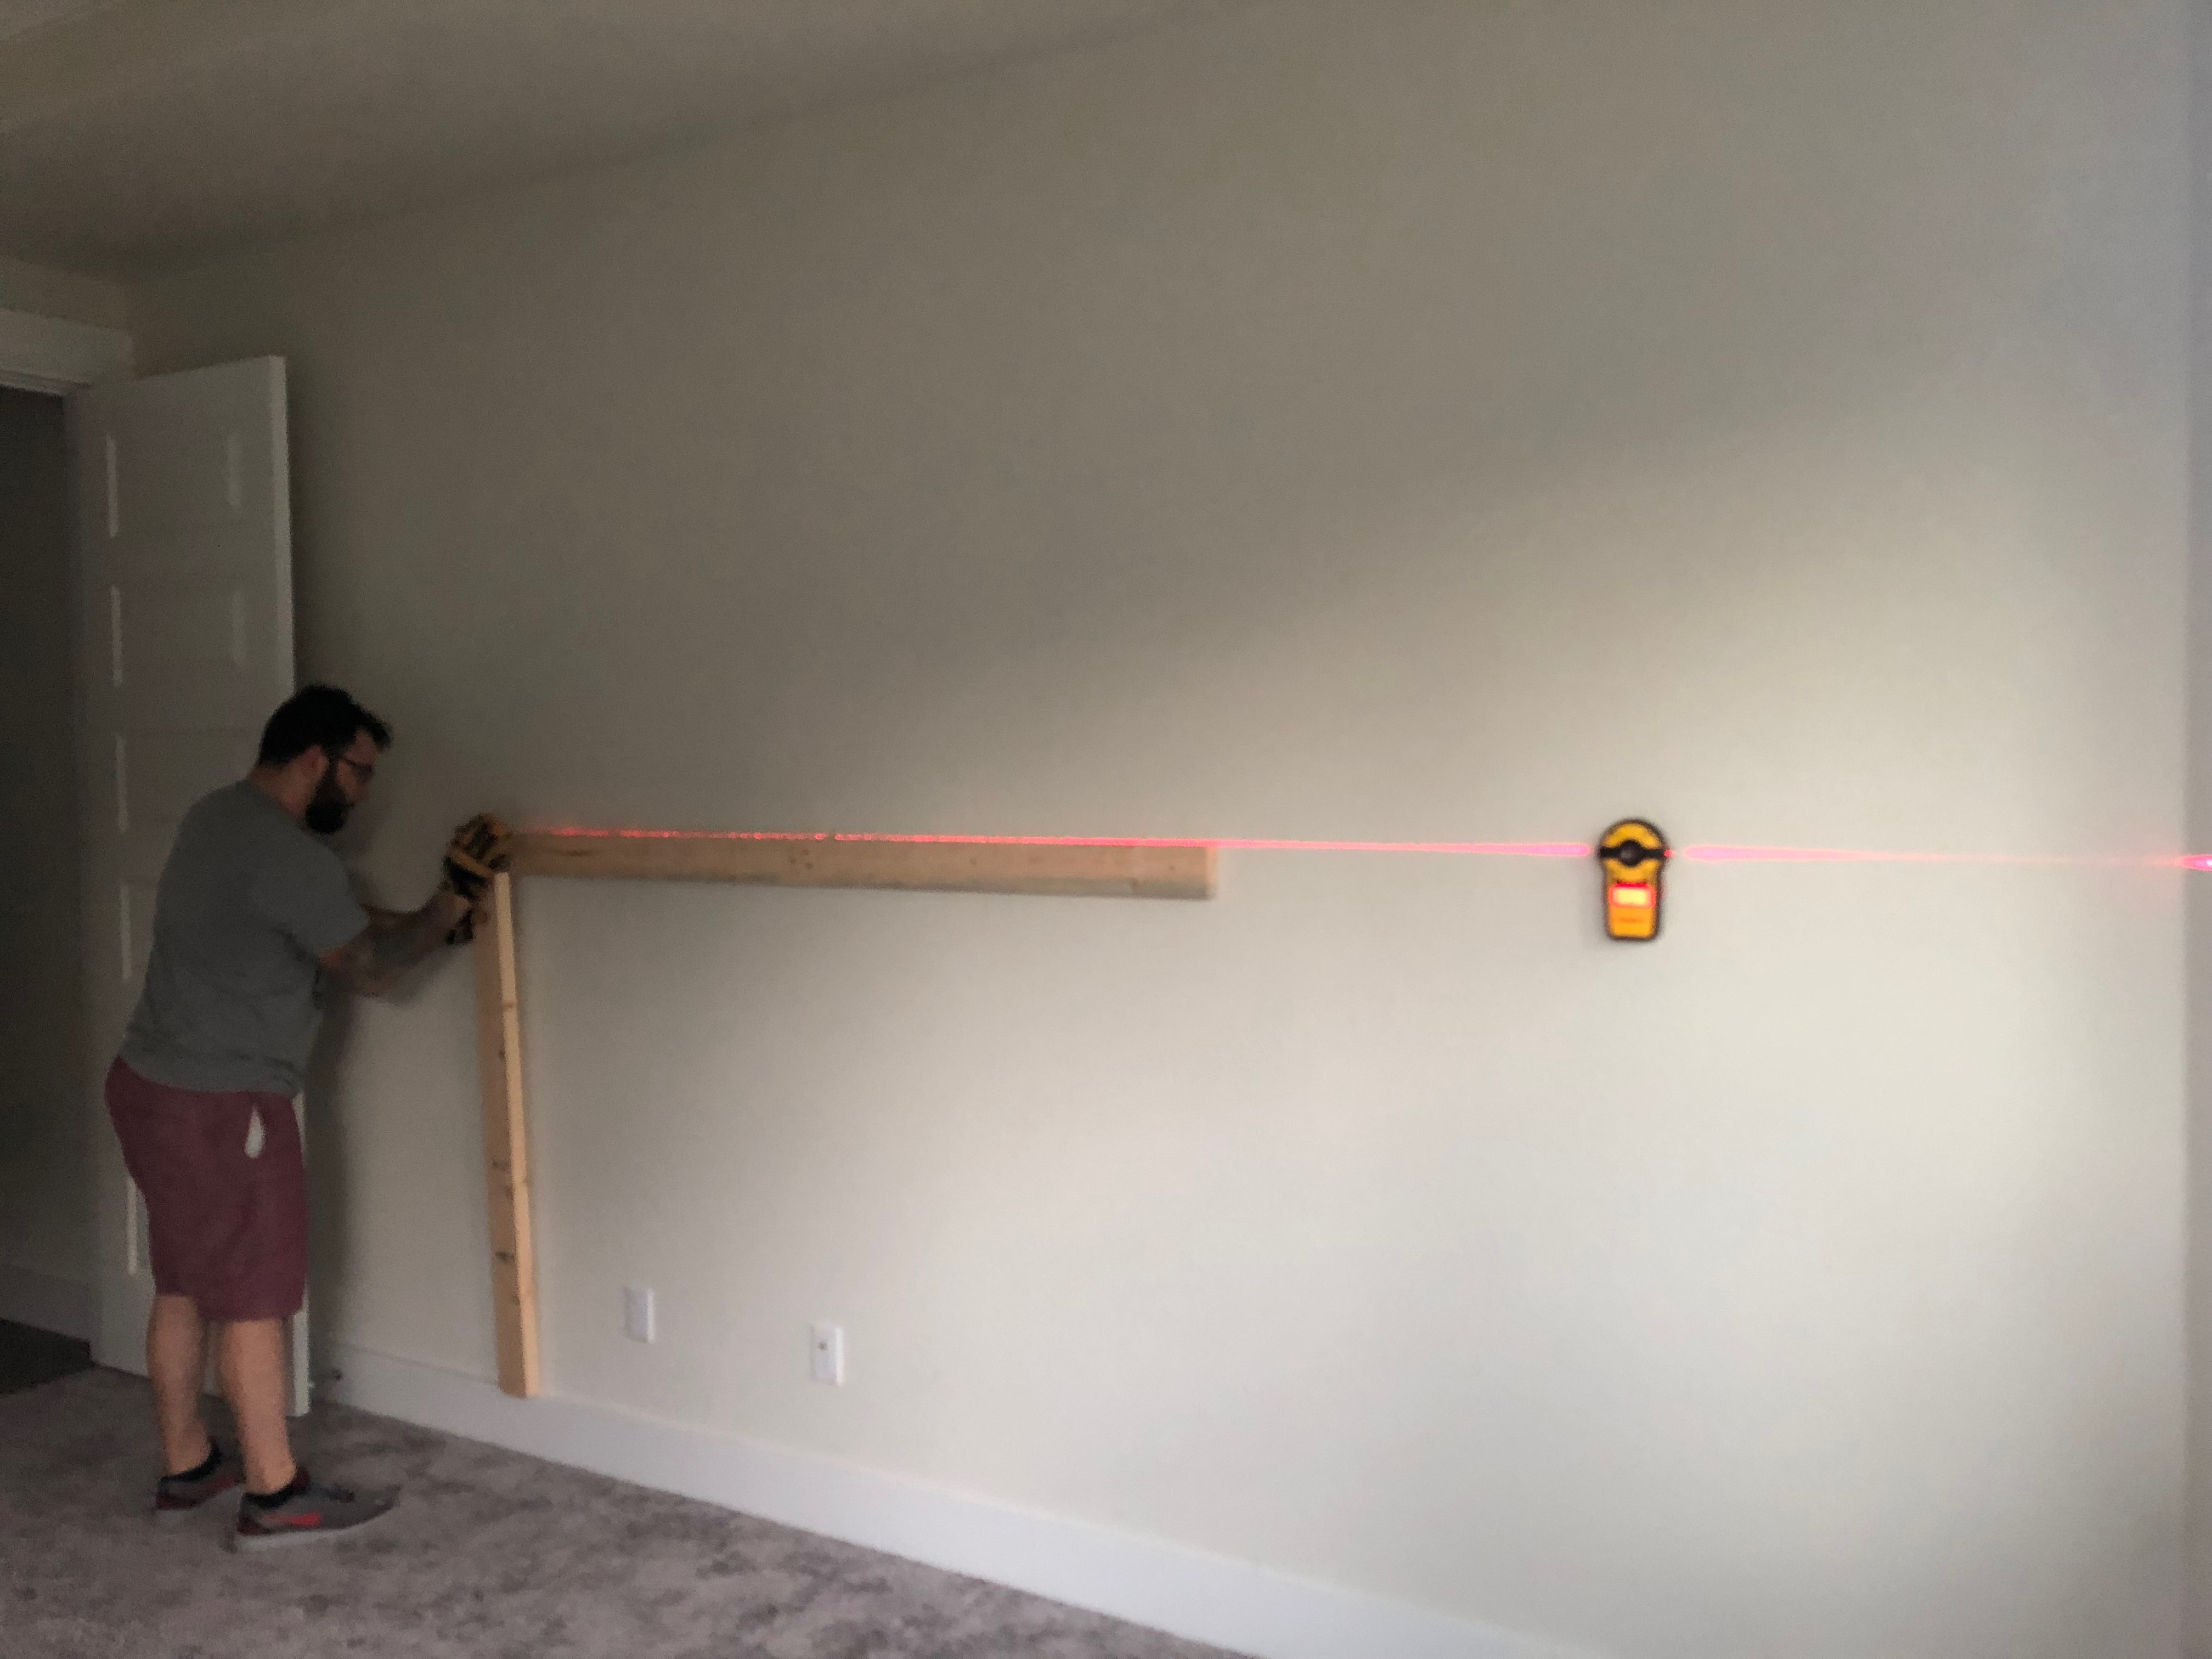
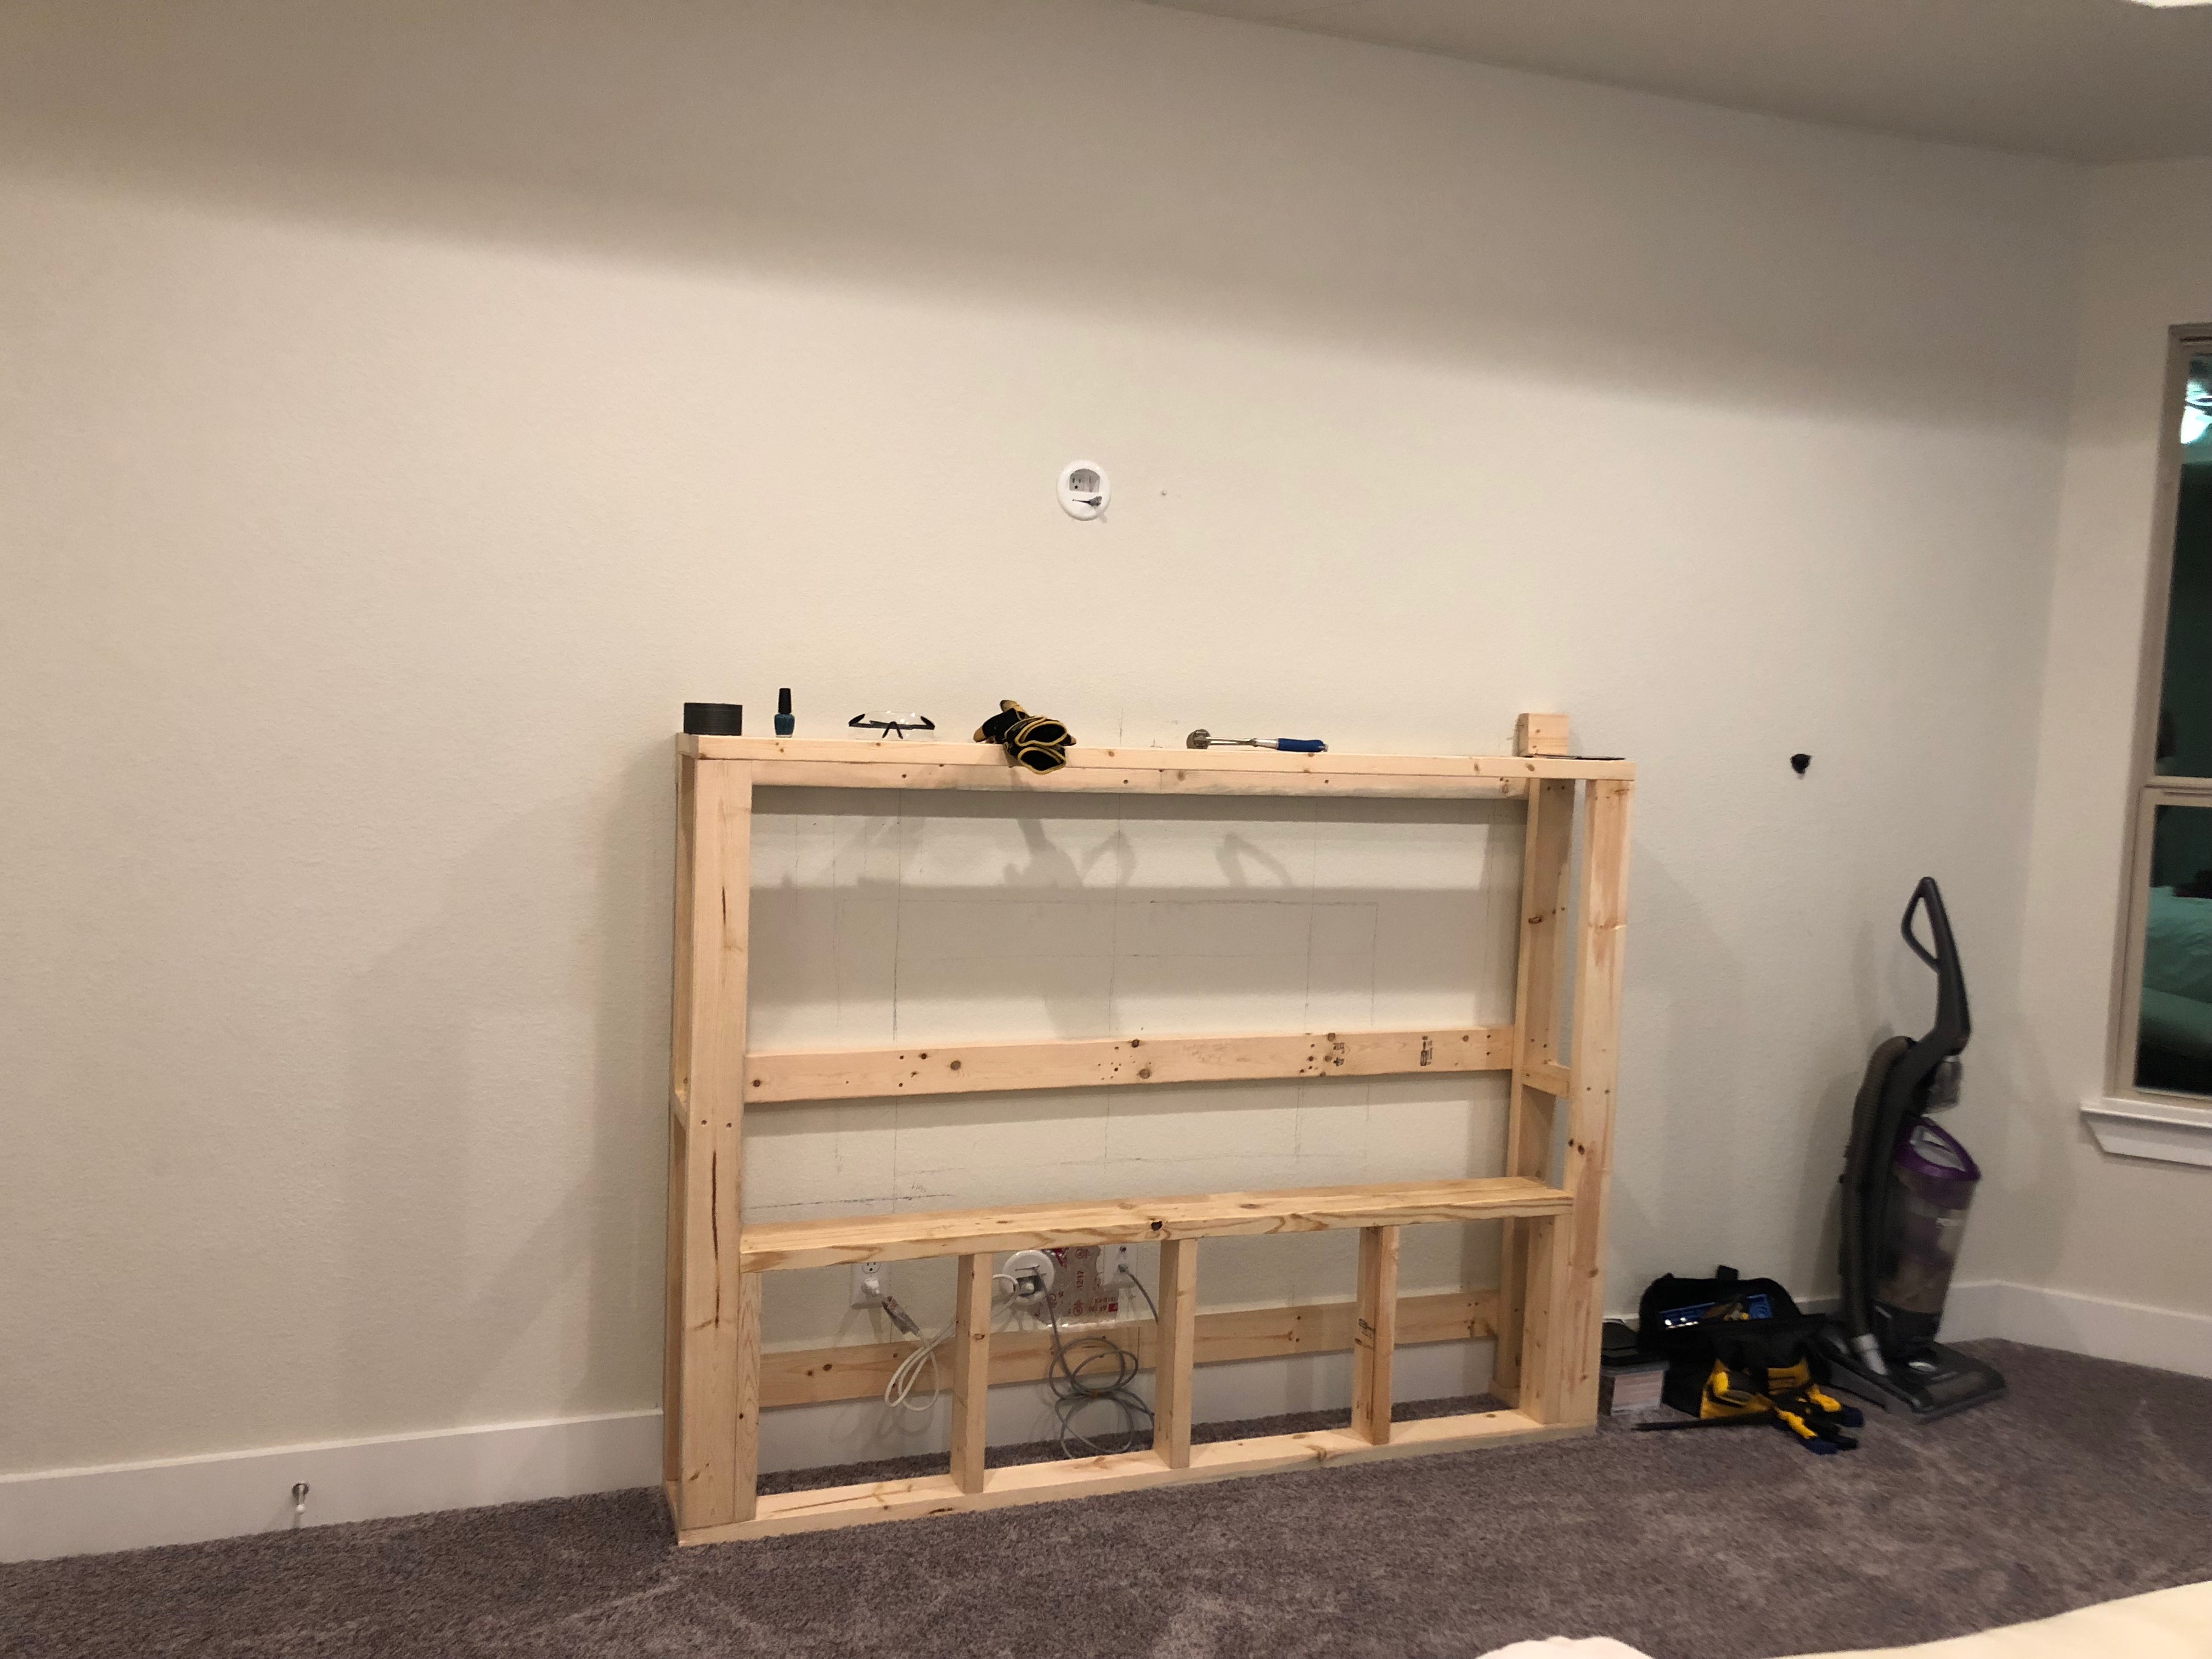
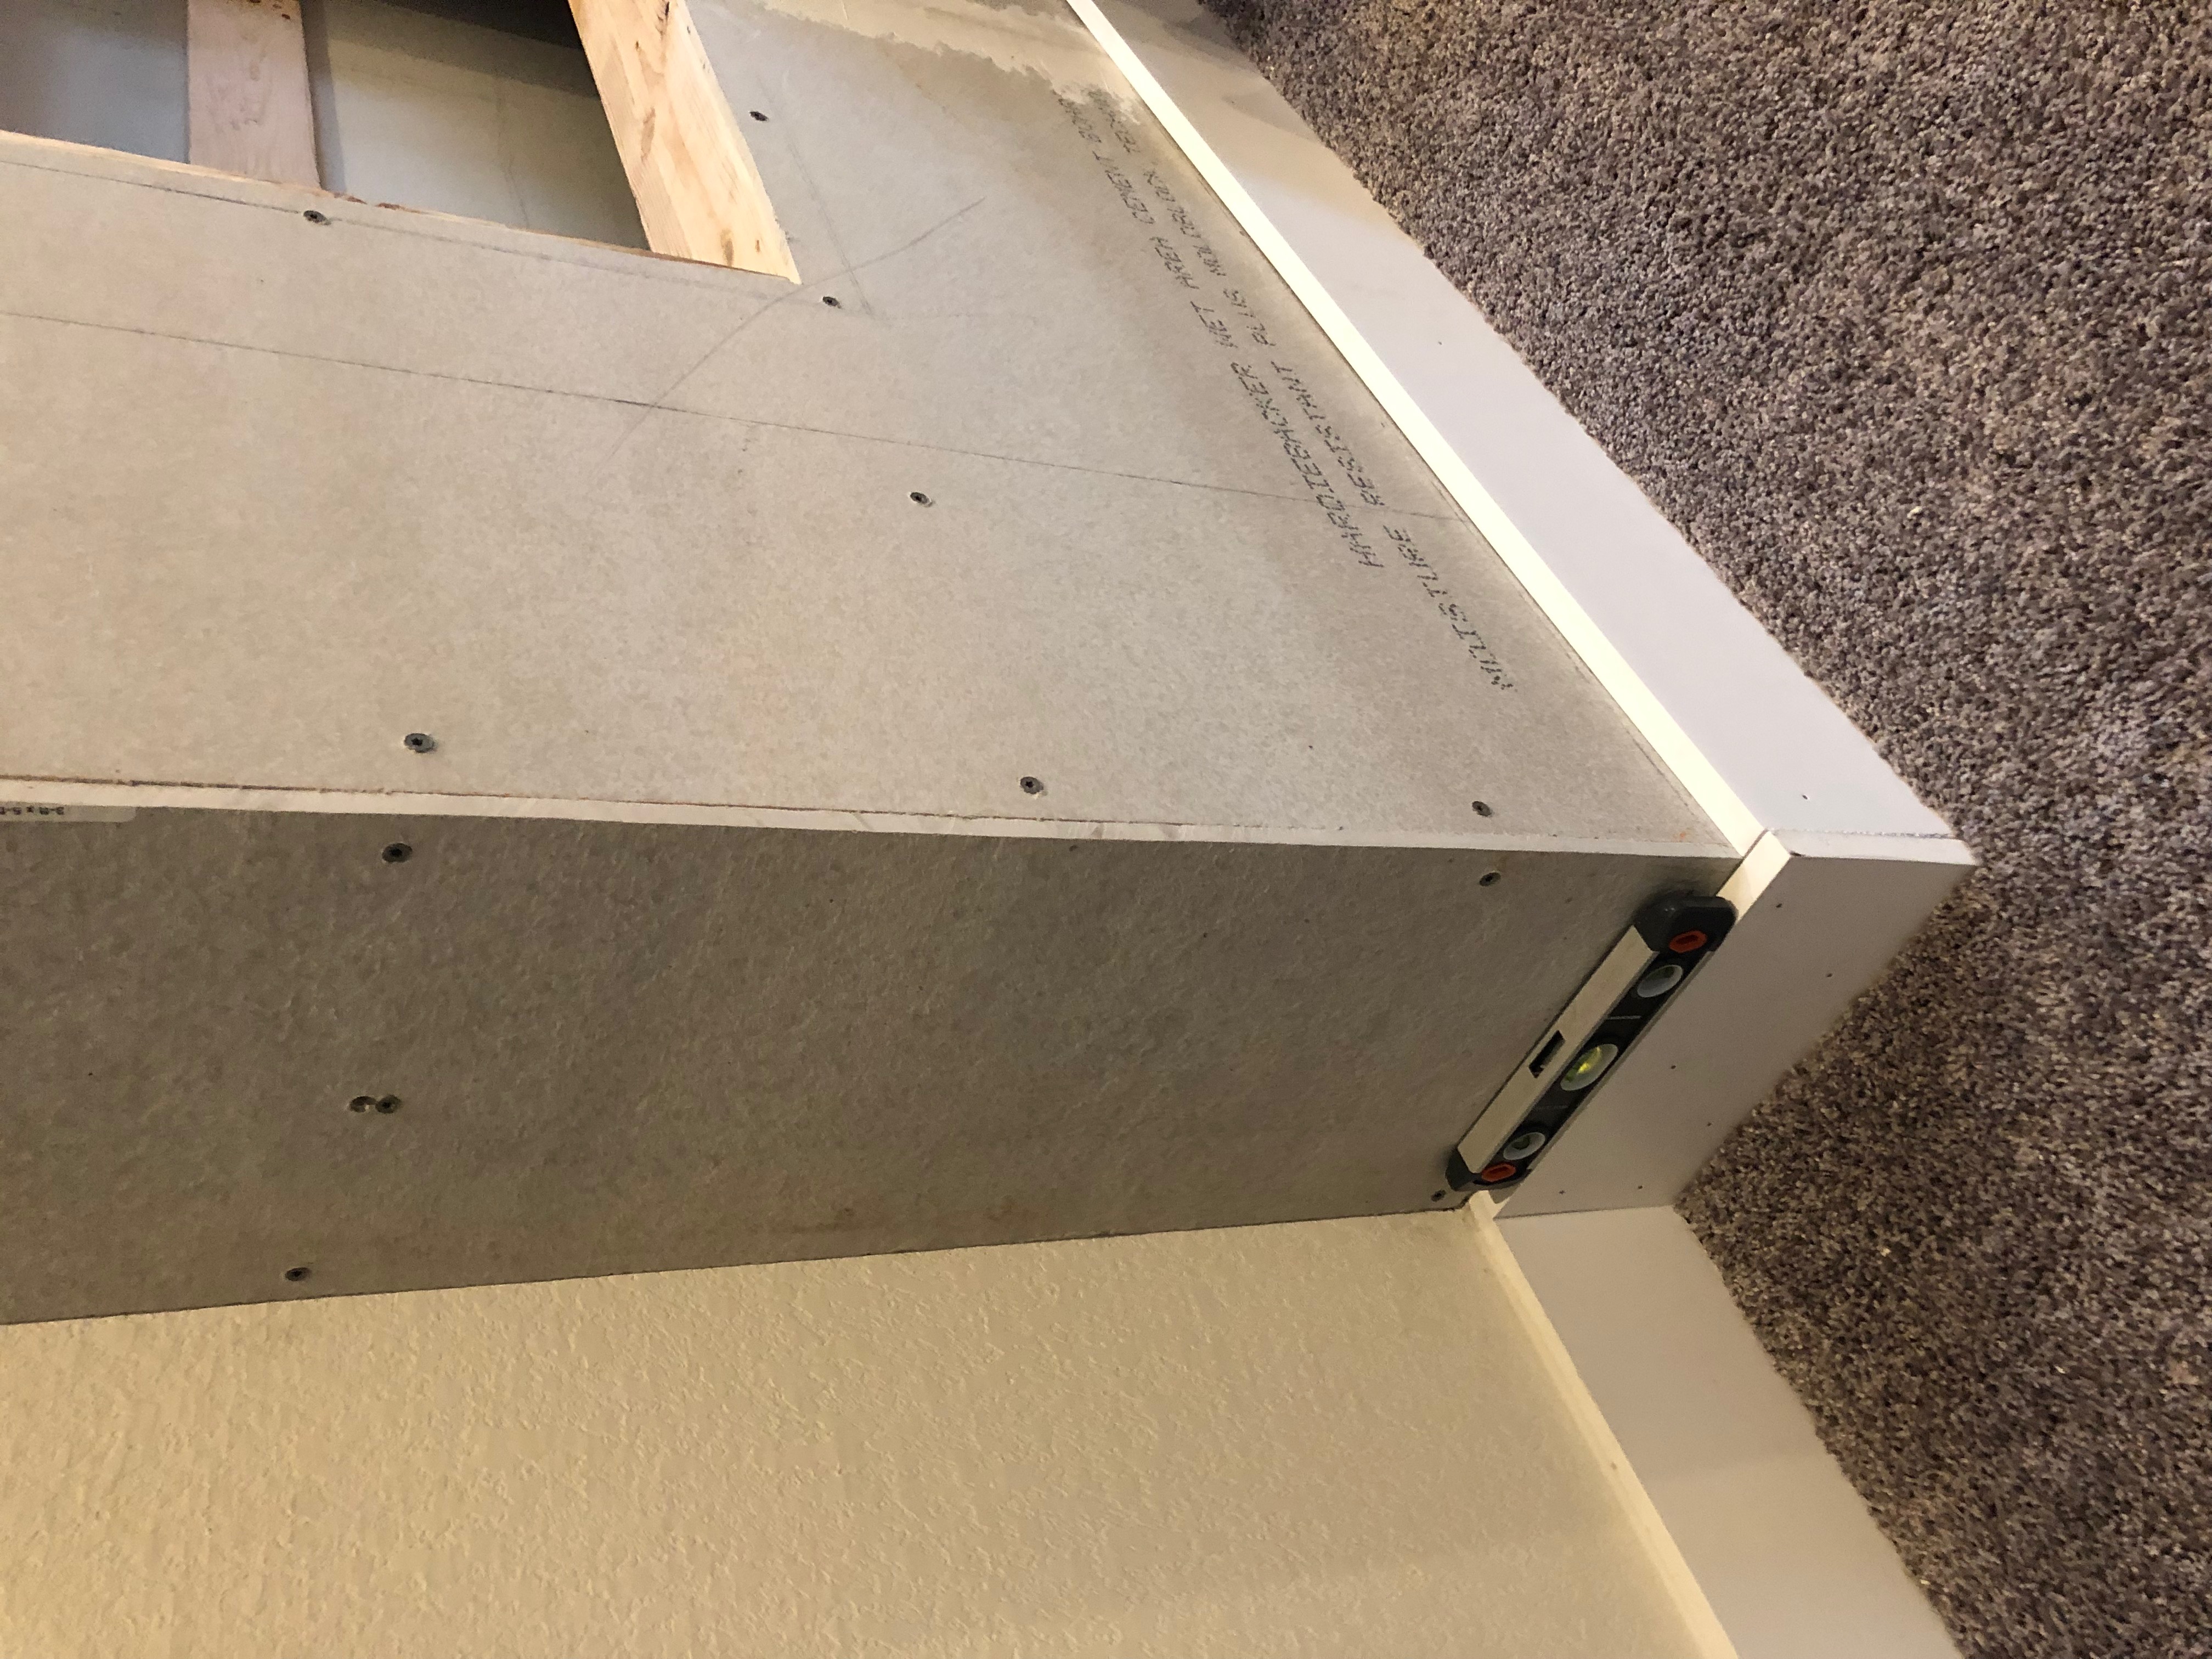
Above I showed my plans for the frame and where I was going to put it. I wanted the fireplace to be on the wall that my bed faces in the master bedroom. On this project, I made the plan and design and Steve executed 90% of it. To start you want to secure the frame you are building to the wall so we attached three 2×4’s horizontally: one along the wall where the top of the frame would be, one in the middle and one just above the baseboard. Then we have a 2×4 on each side going vertically down to the top of the baseboard. TIP: make sure that you are able to secure these boards to studs so that they don’t go anywhere!
Next, we need to build the frame out from the wall. I don’t have a lot of pictures of the framing process (this was before the blog about projects) but I’ll do my best to explain since this was the most challenging part for us to plan out.
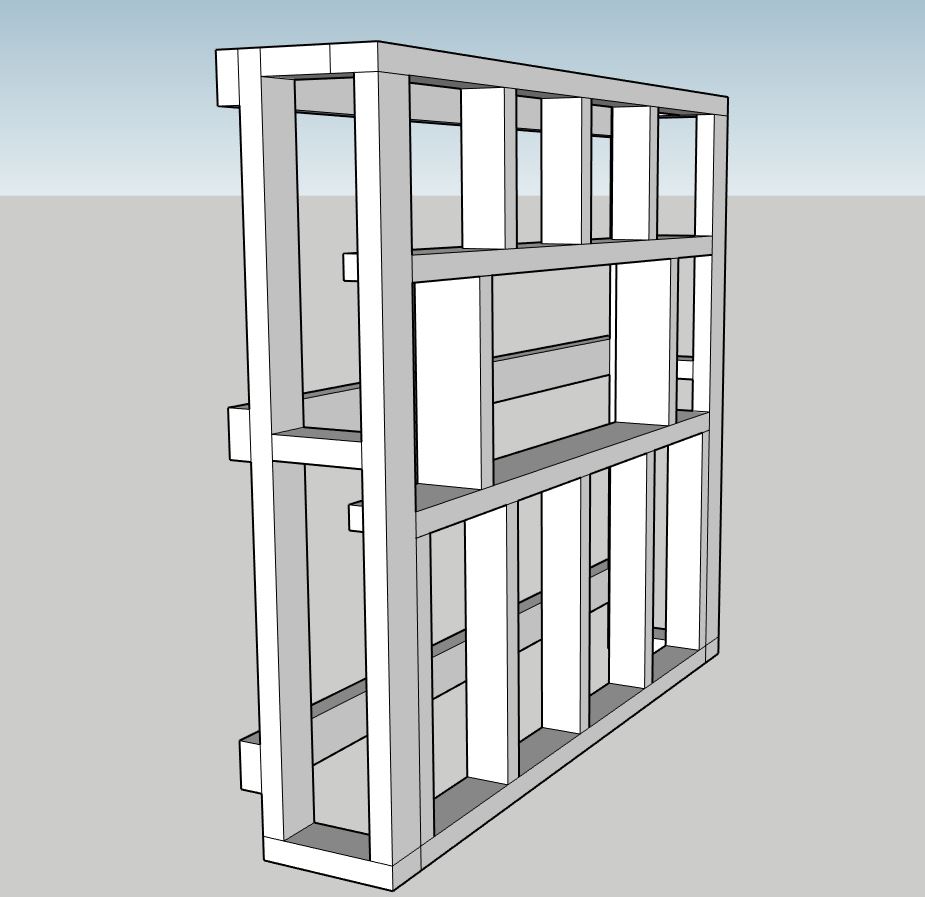
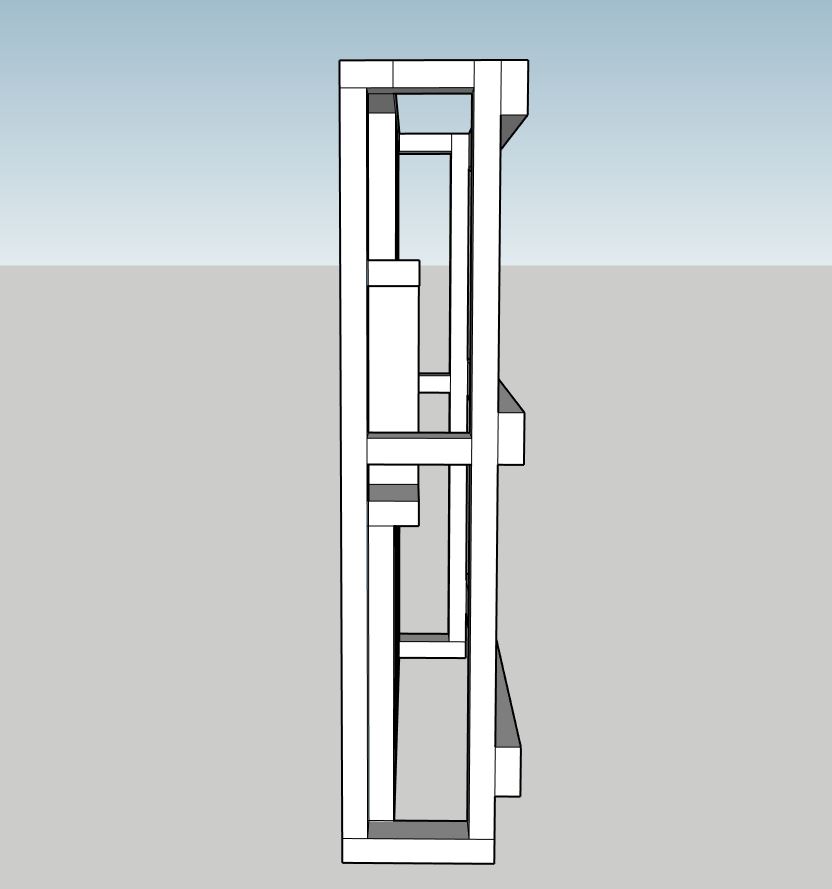
Then I determined the depth I wanted the fireplace to be based on the depth of the fireplace insert and the aesthetic I was wanting. I wanted it to look “real” so I didn’t want to make it too shallow and I didn’t want it to come out from the wall too far and take up a bunch of space in the room. I decided on a depth of 12″. This allows plenty of room for the insert to set in perfectly but, if need be, we can remove the insert to access the cords in the wall.
Back to the frame
What we have so far are the boards attached to the wall. Now what we did was attach another 2×4 face-to-face (by face I mean the 4″ side of the 2×4) with the one that is already attached vertically to the wall but this one will go all the way to the ground.
Another way we could have done this would have been to remove the baseboards where the frame was going but alas we did not. The reason we added another 2×4 on top of the one already there was to start bringing the frame out from the wall. We need surface area to attach the Hardiebacker Board to so this is how we did it. Instead of me describing each board that was used, see below for the 3D diagram of the frame. I will mention that the boards in the middle that surround the fireplace insert were not 2x4s but instead 2x6s. This was a suggestion by the fireplace insert manufacturer so check the instruction manual for the fireplace you purchase.
Side Note: This is not required but what we did before continuing to build the frame was run a smurf tube (what we call the tv cable in-wall organizer) from the inside of the fireplace to above so we can have power and TV coming out above the fireplace and no cords to be seen. I also bought an Alexa enabled outlet plug to plug the fireplace into. I thought this would be much cooler than it has turned out to be but I still think it was a clever idea.
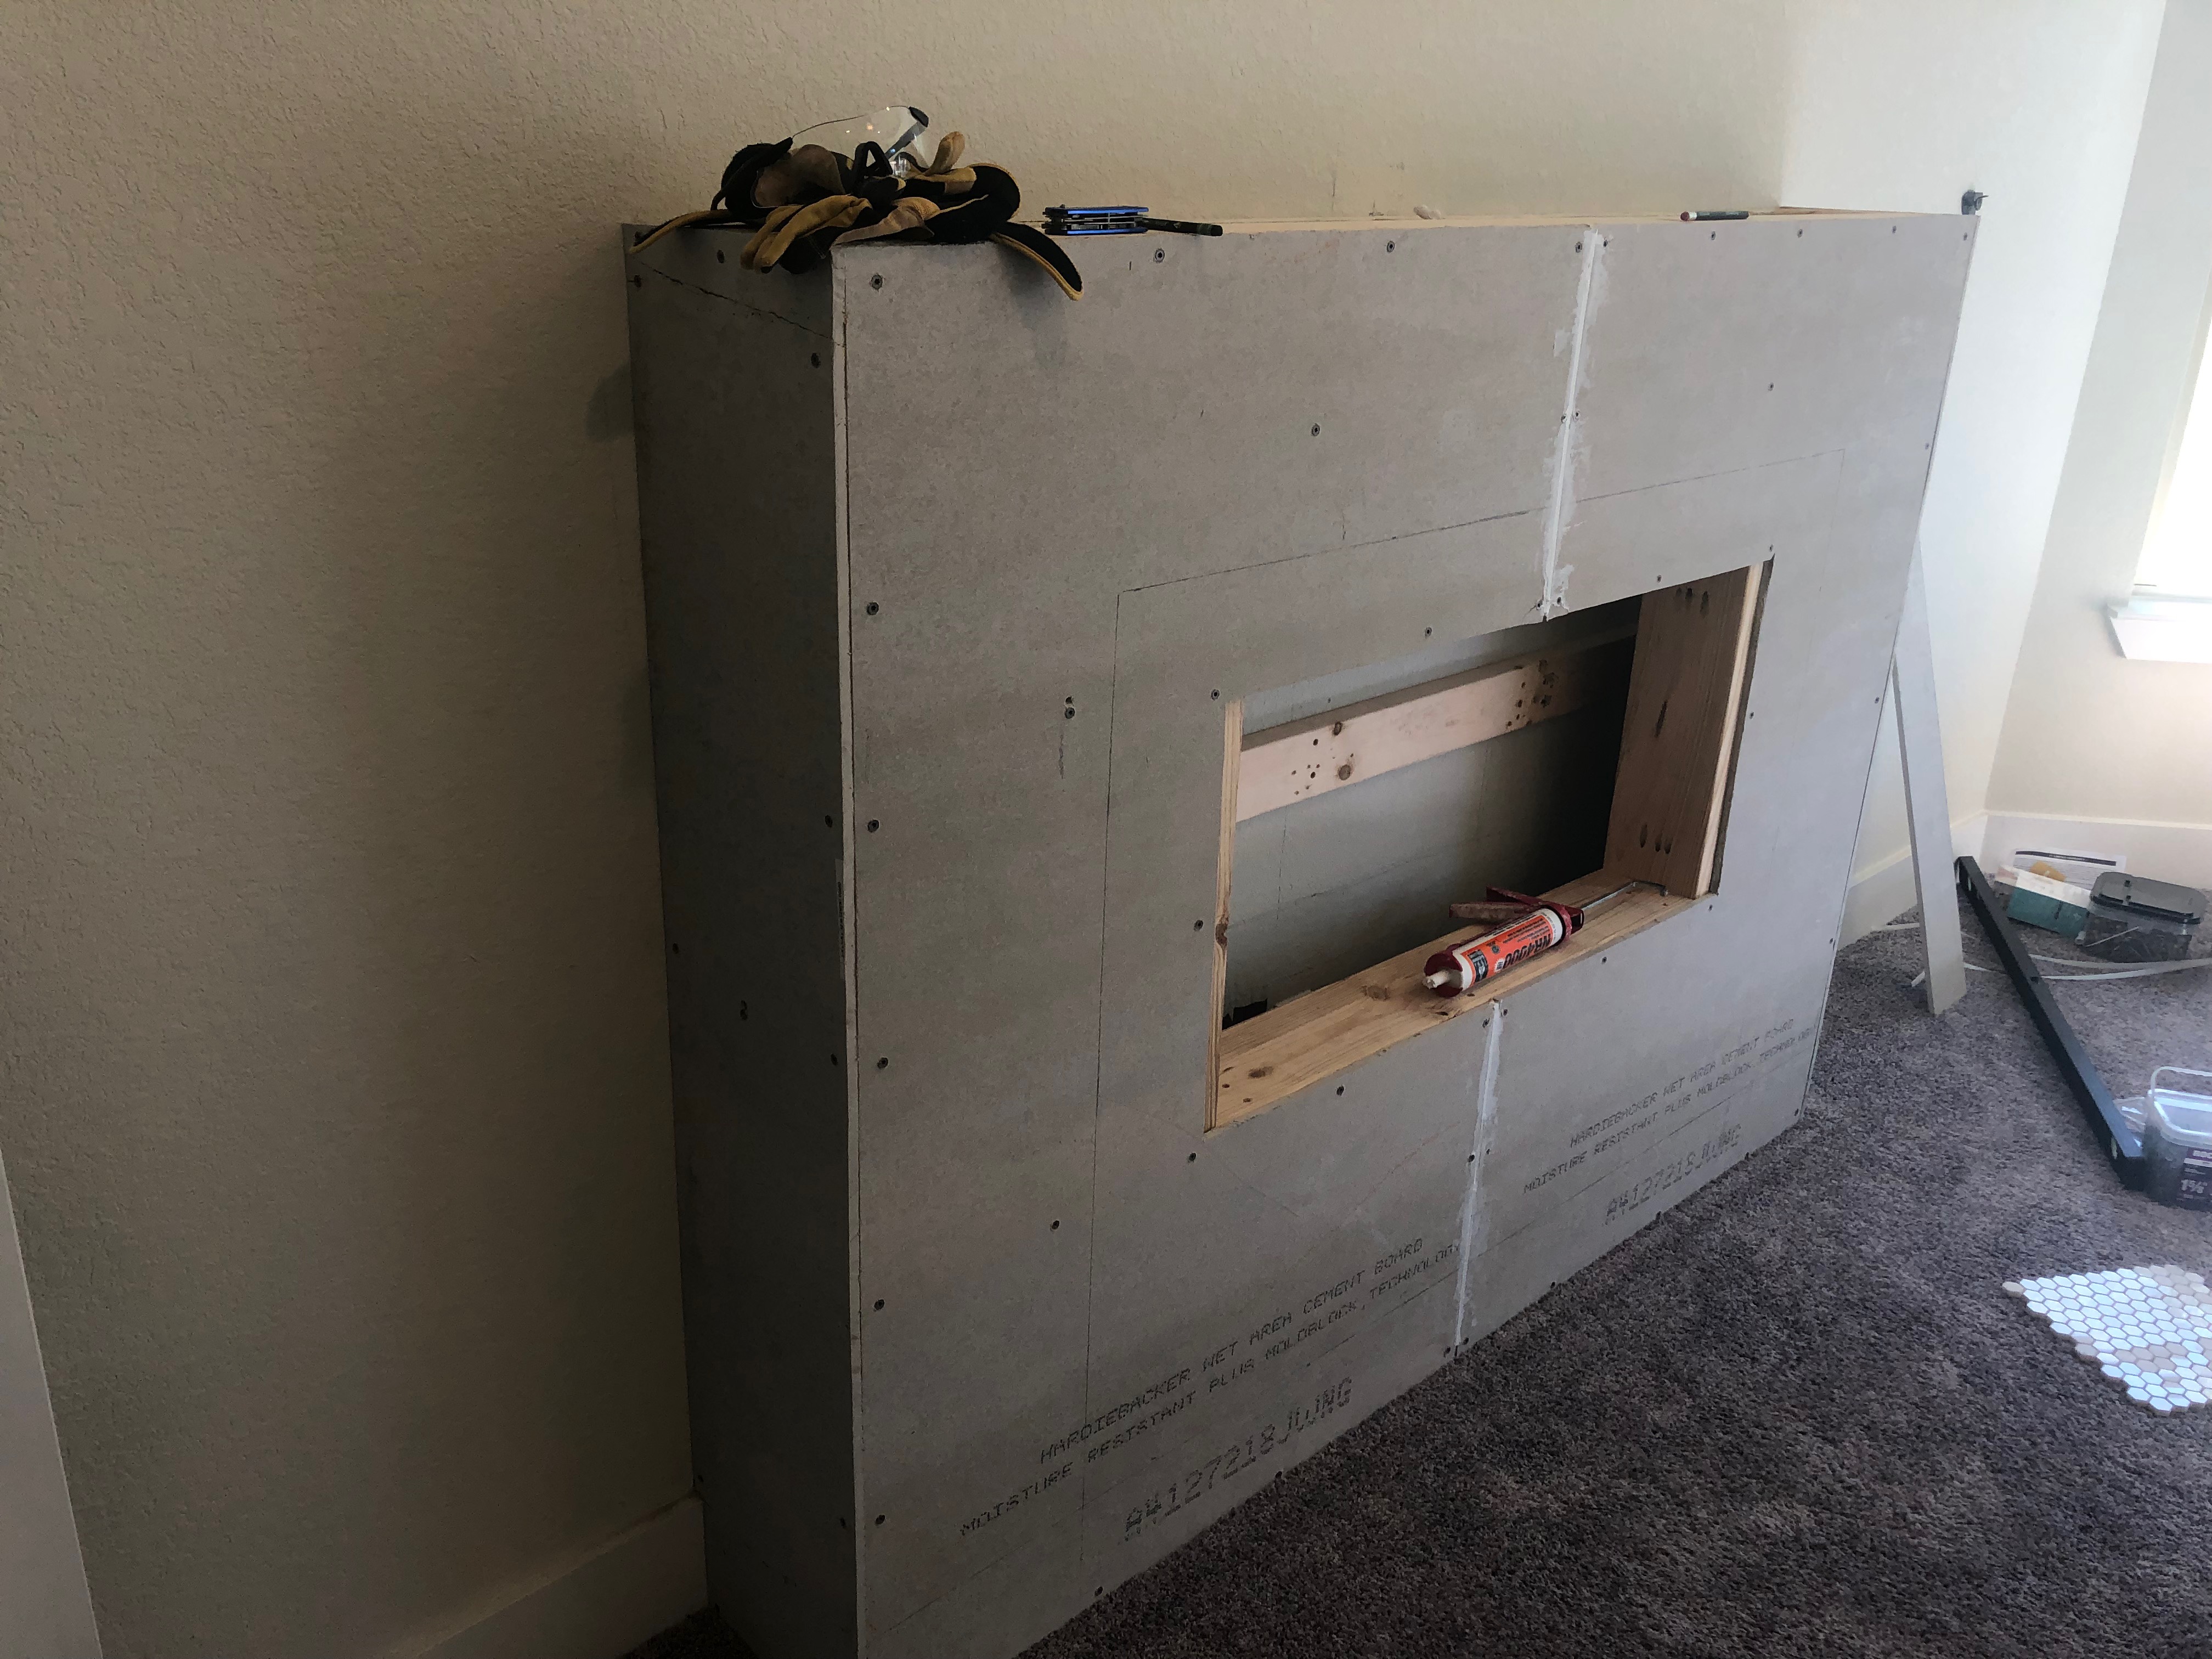
ENCLOSE THE FRAME
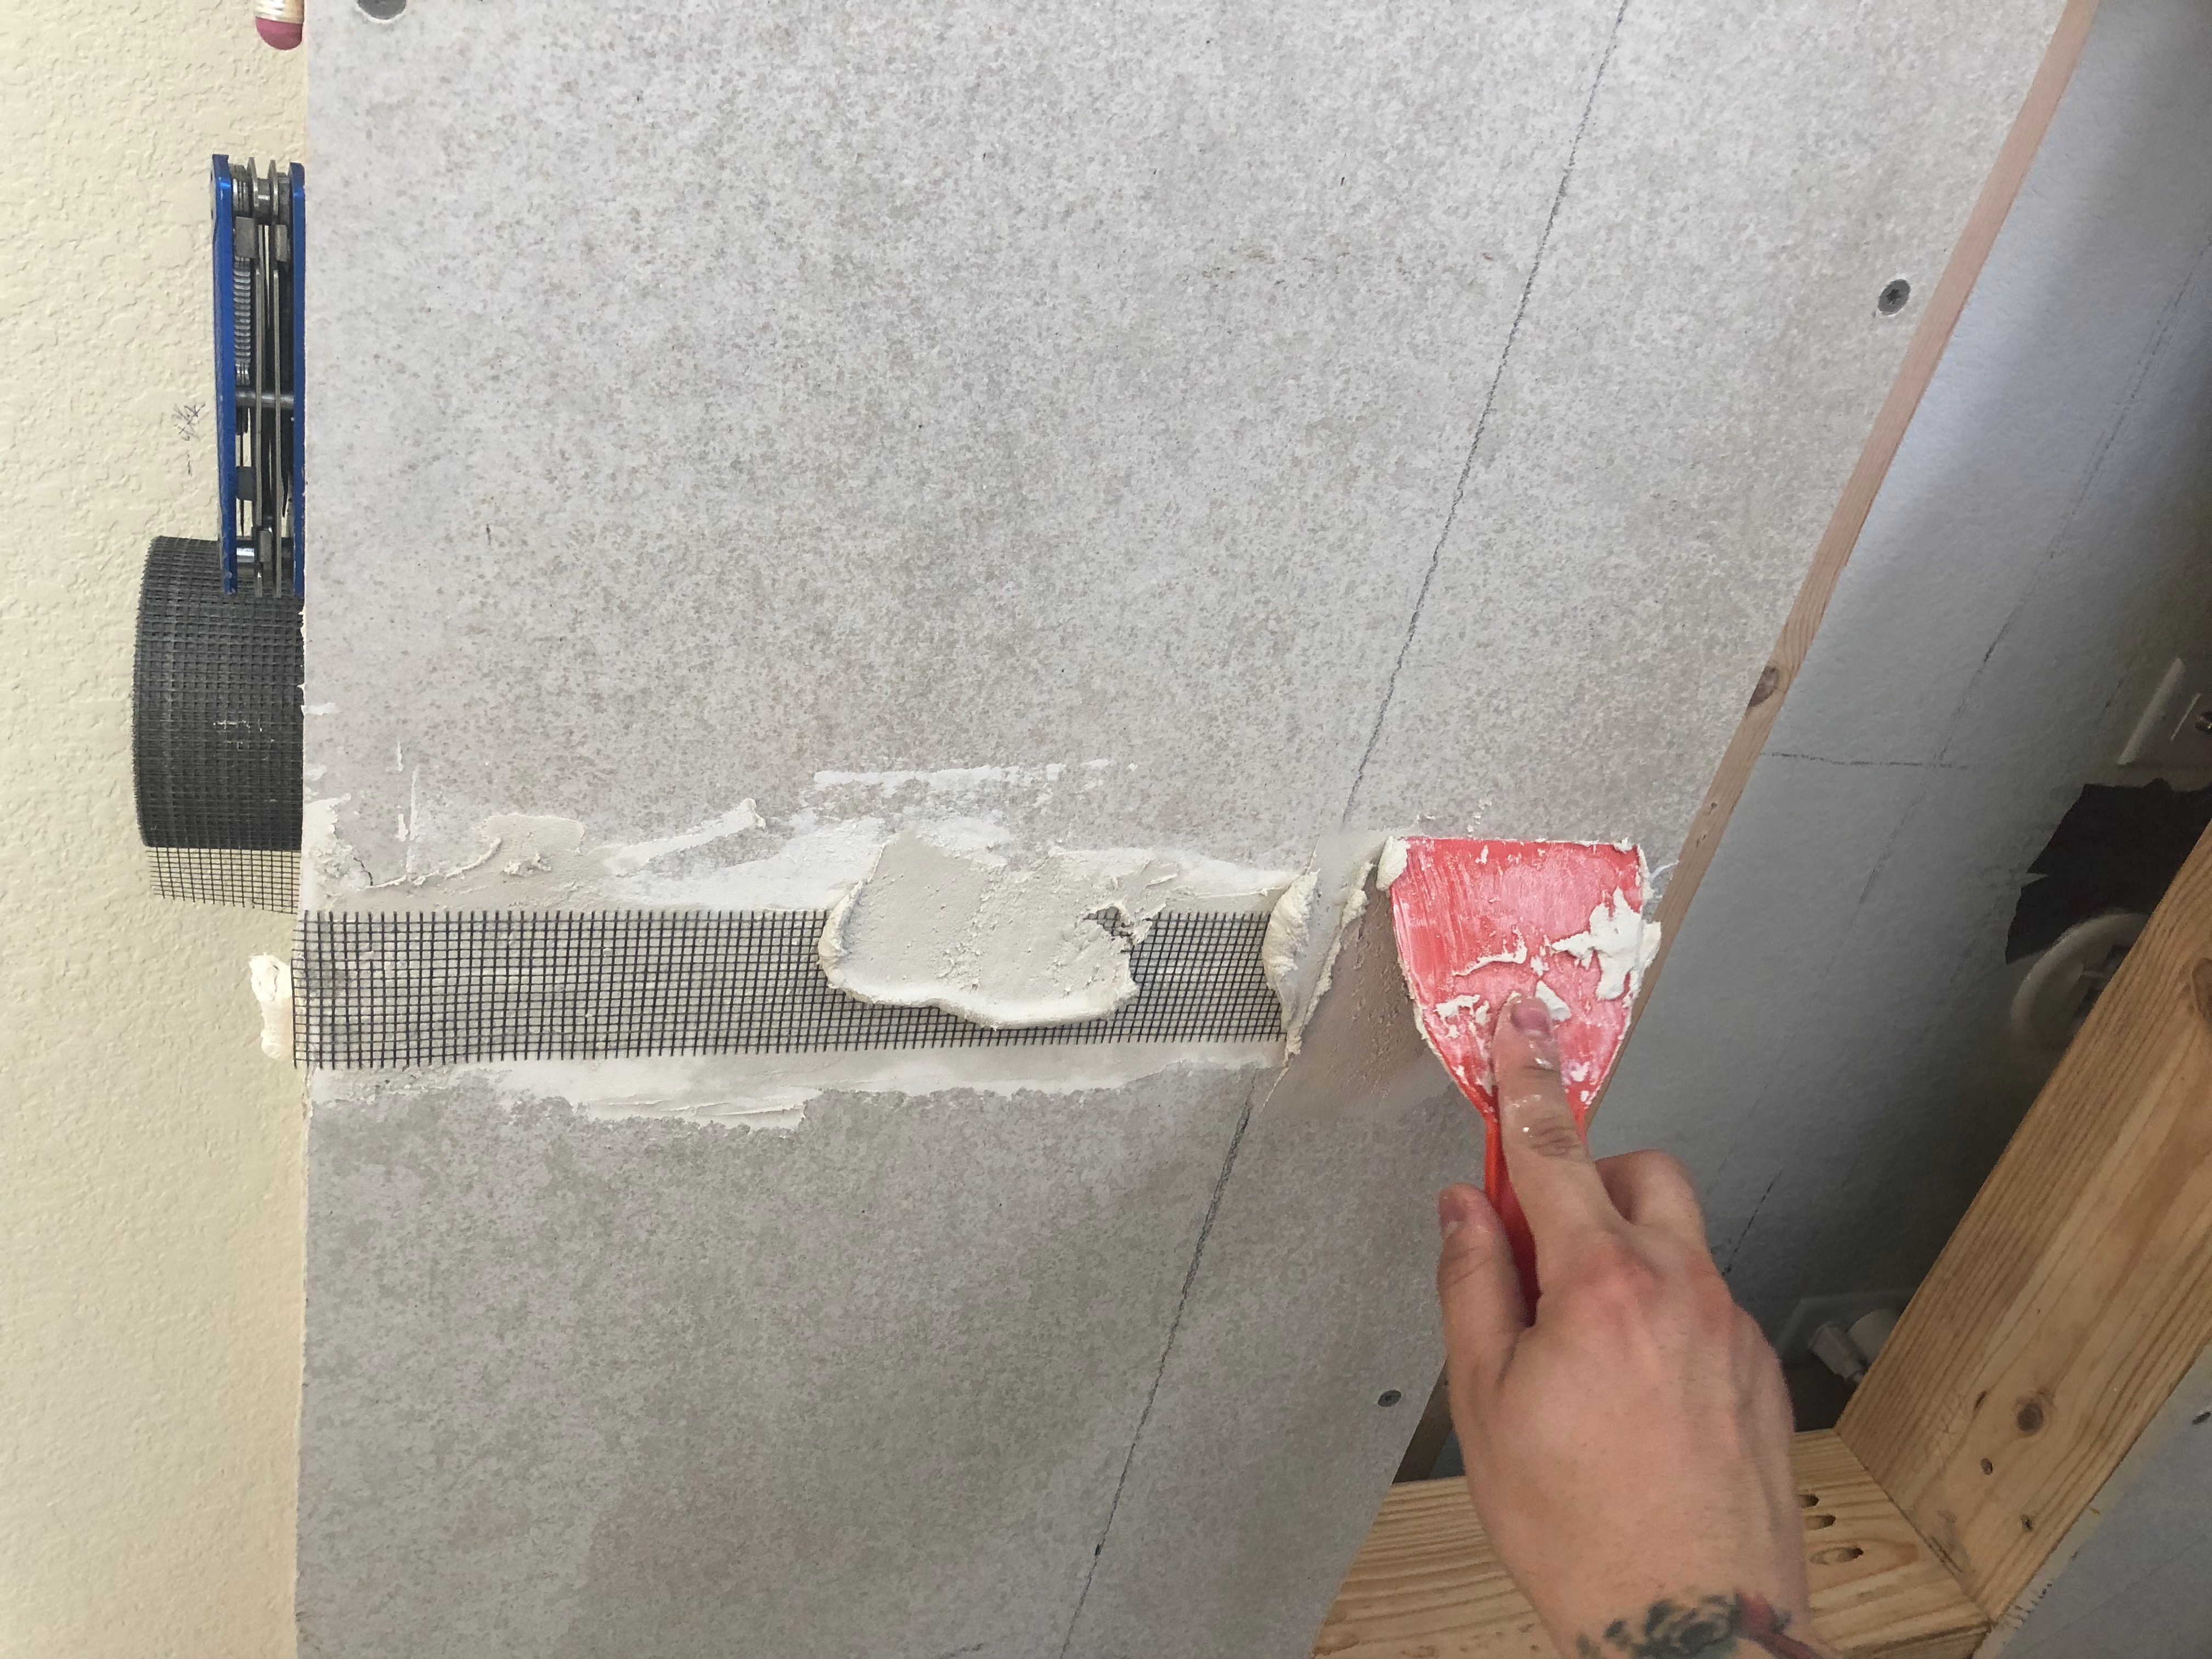
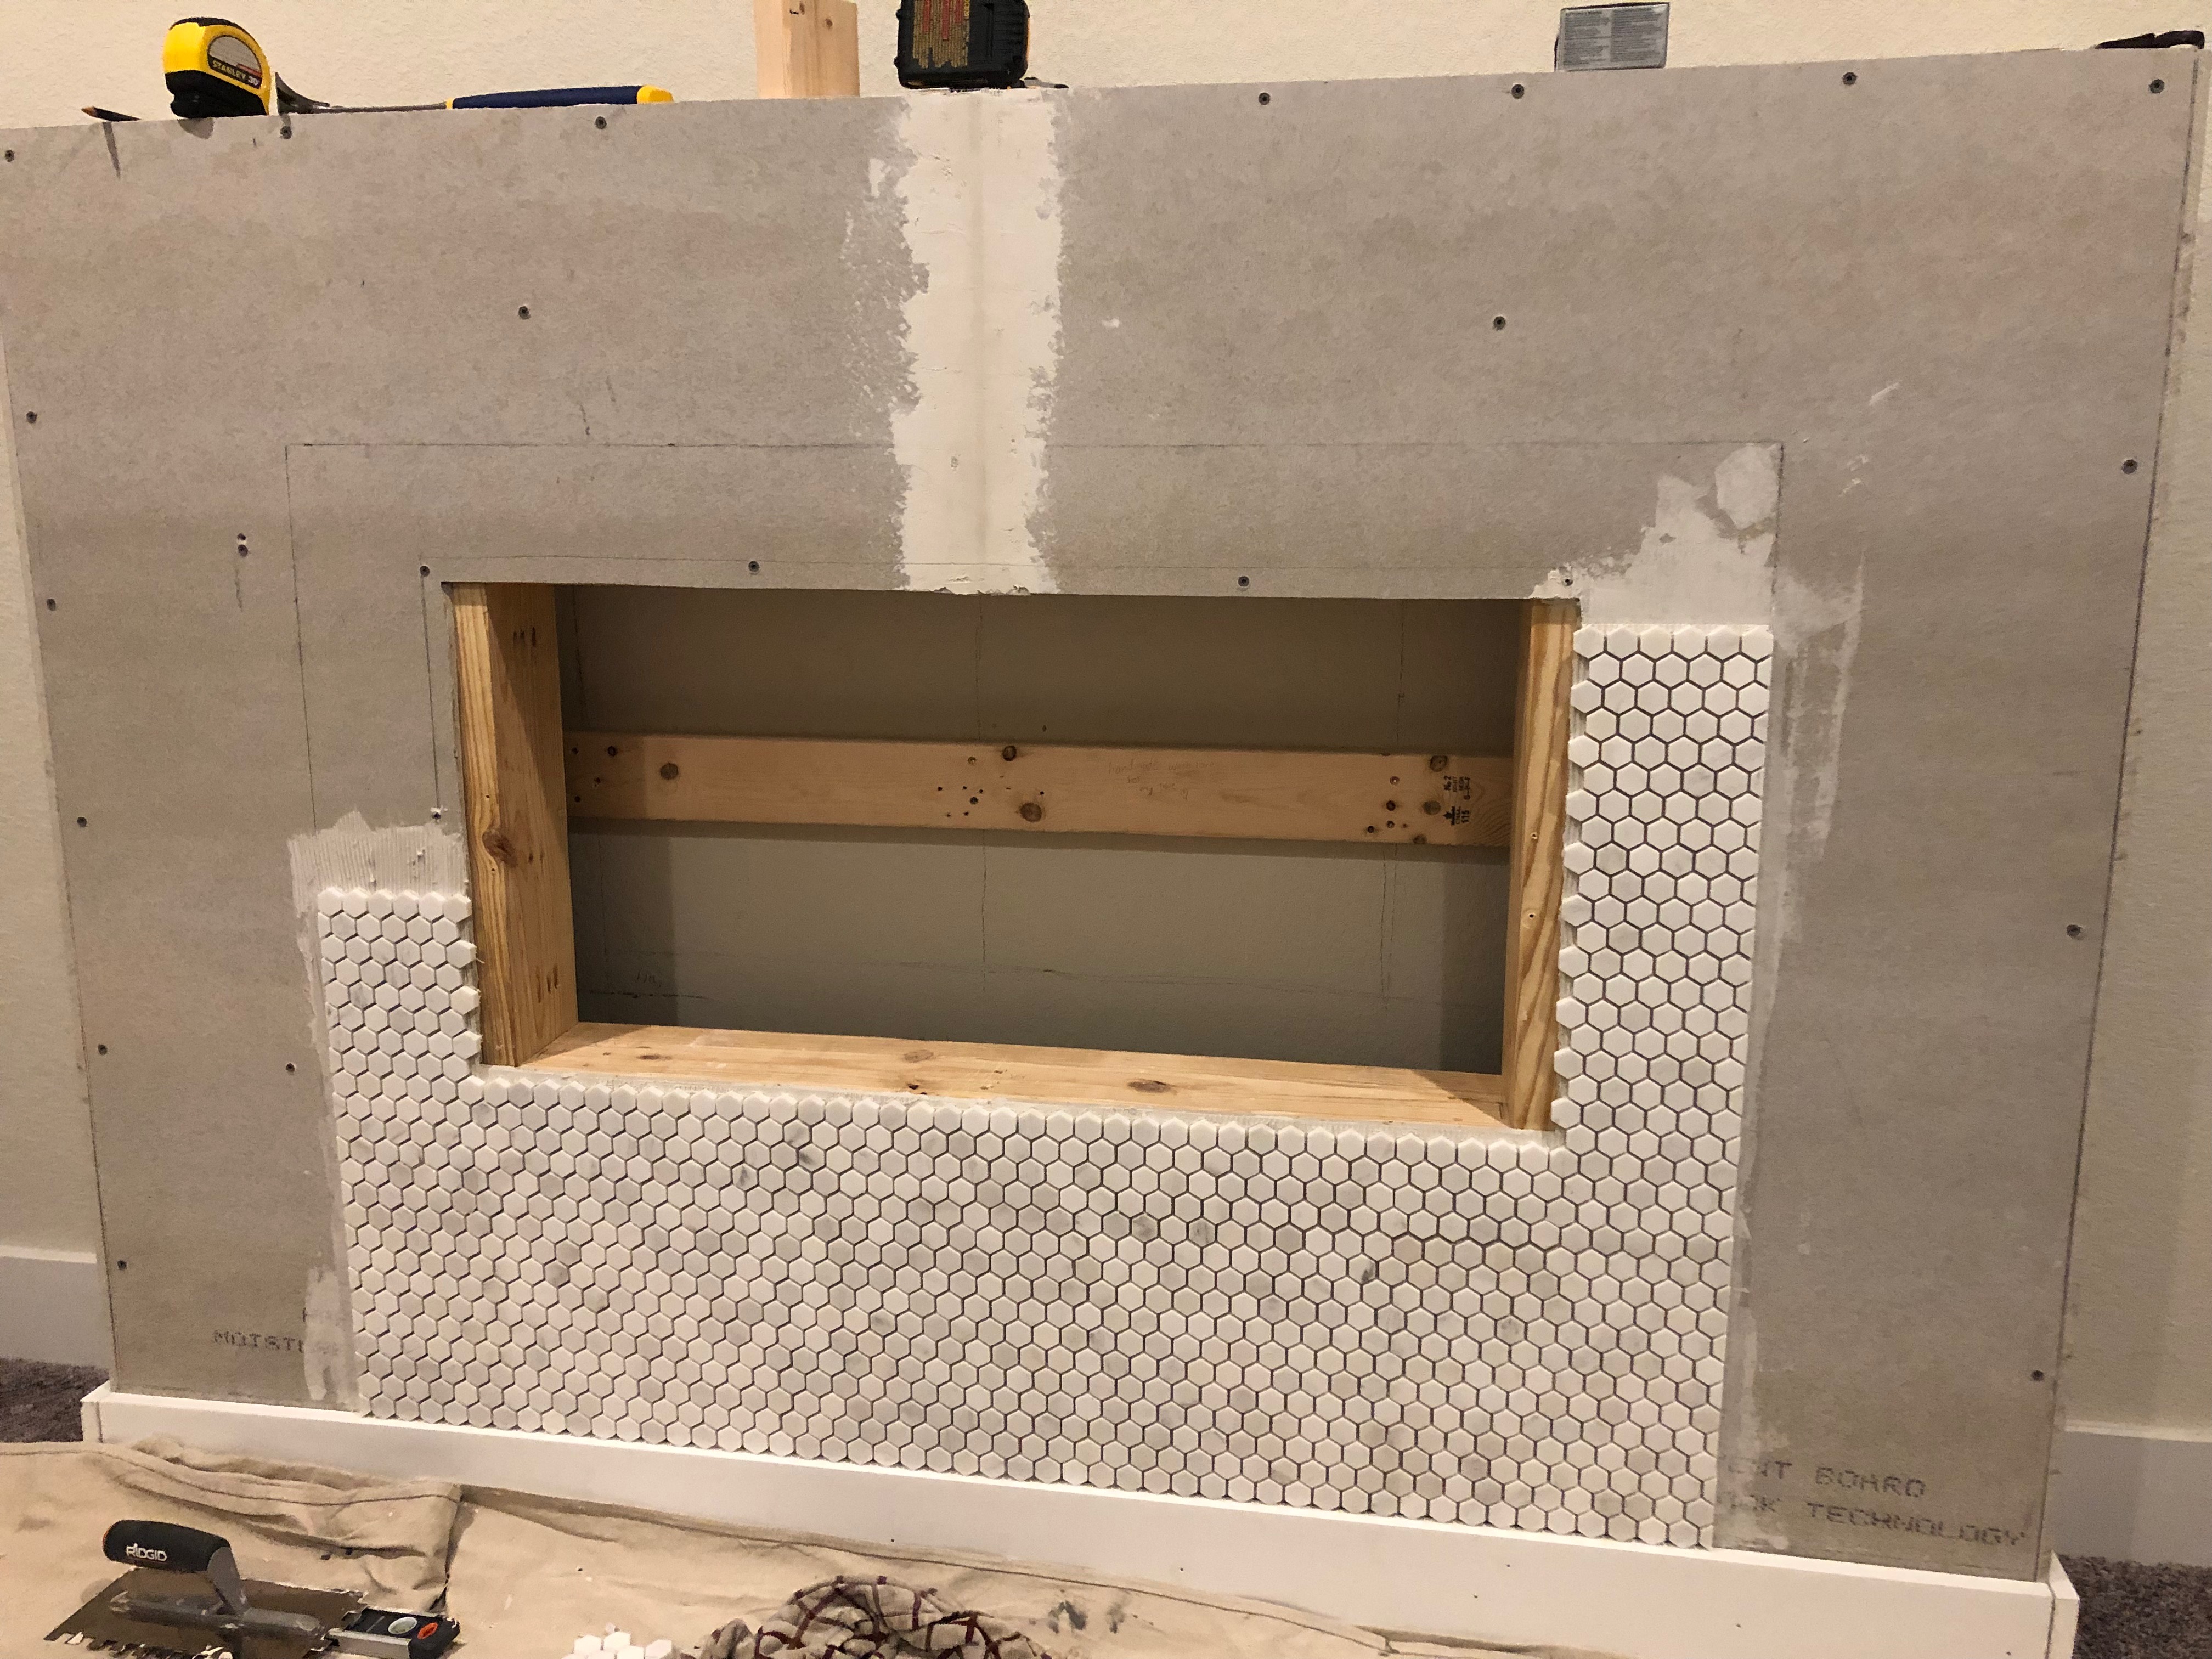
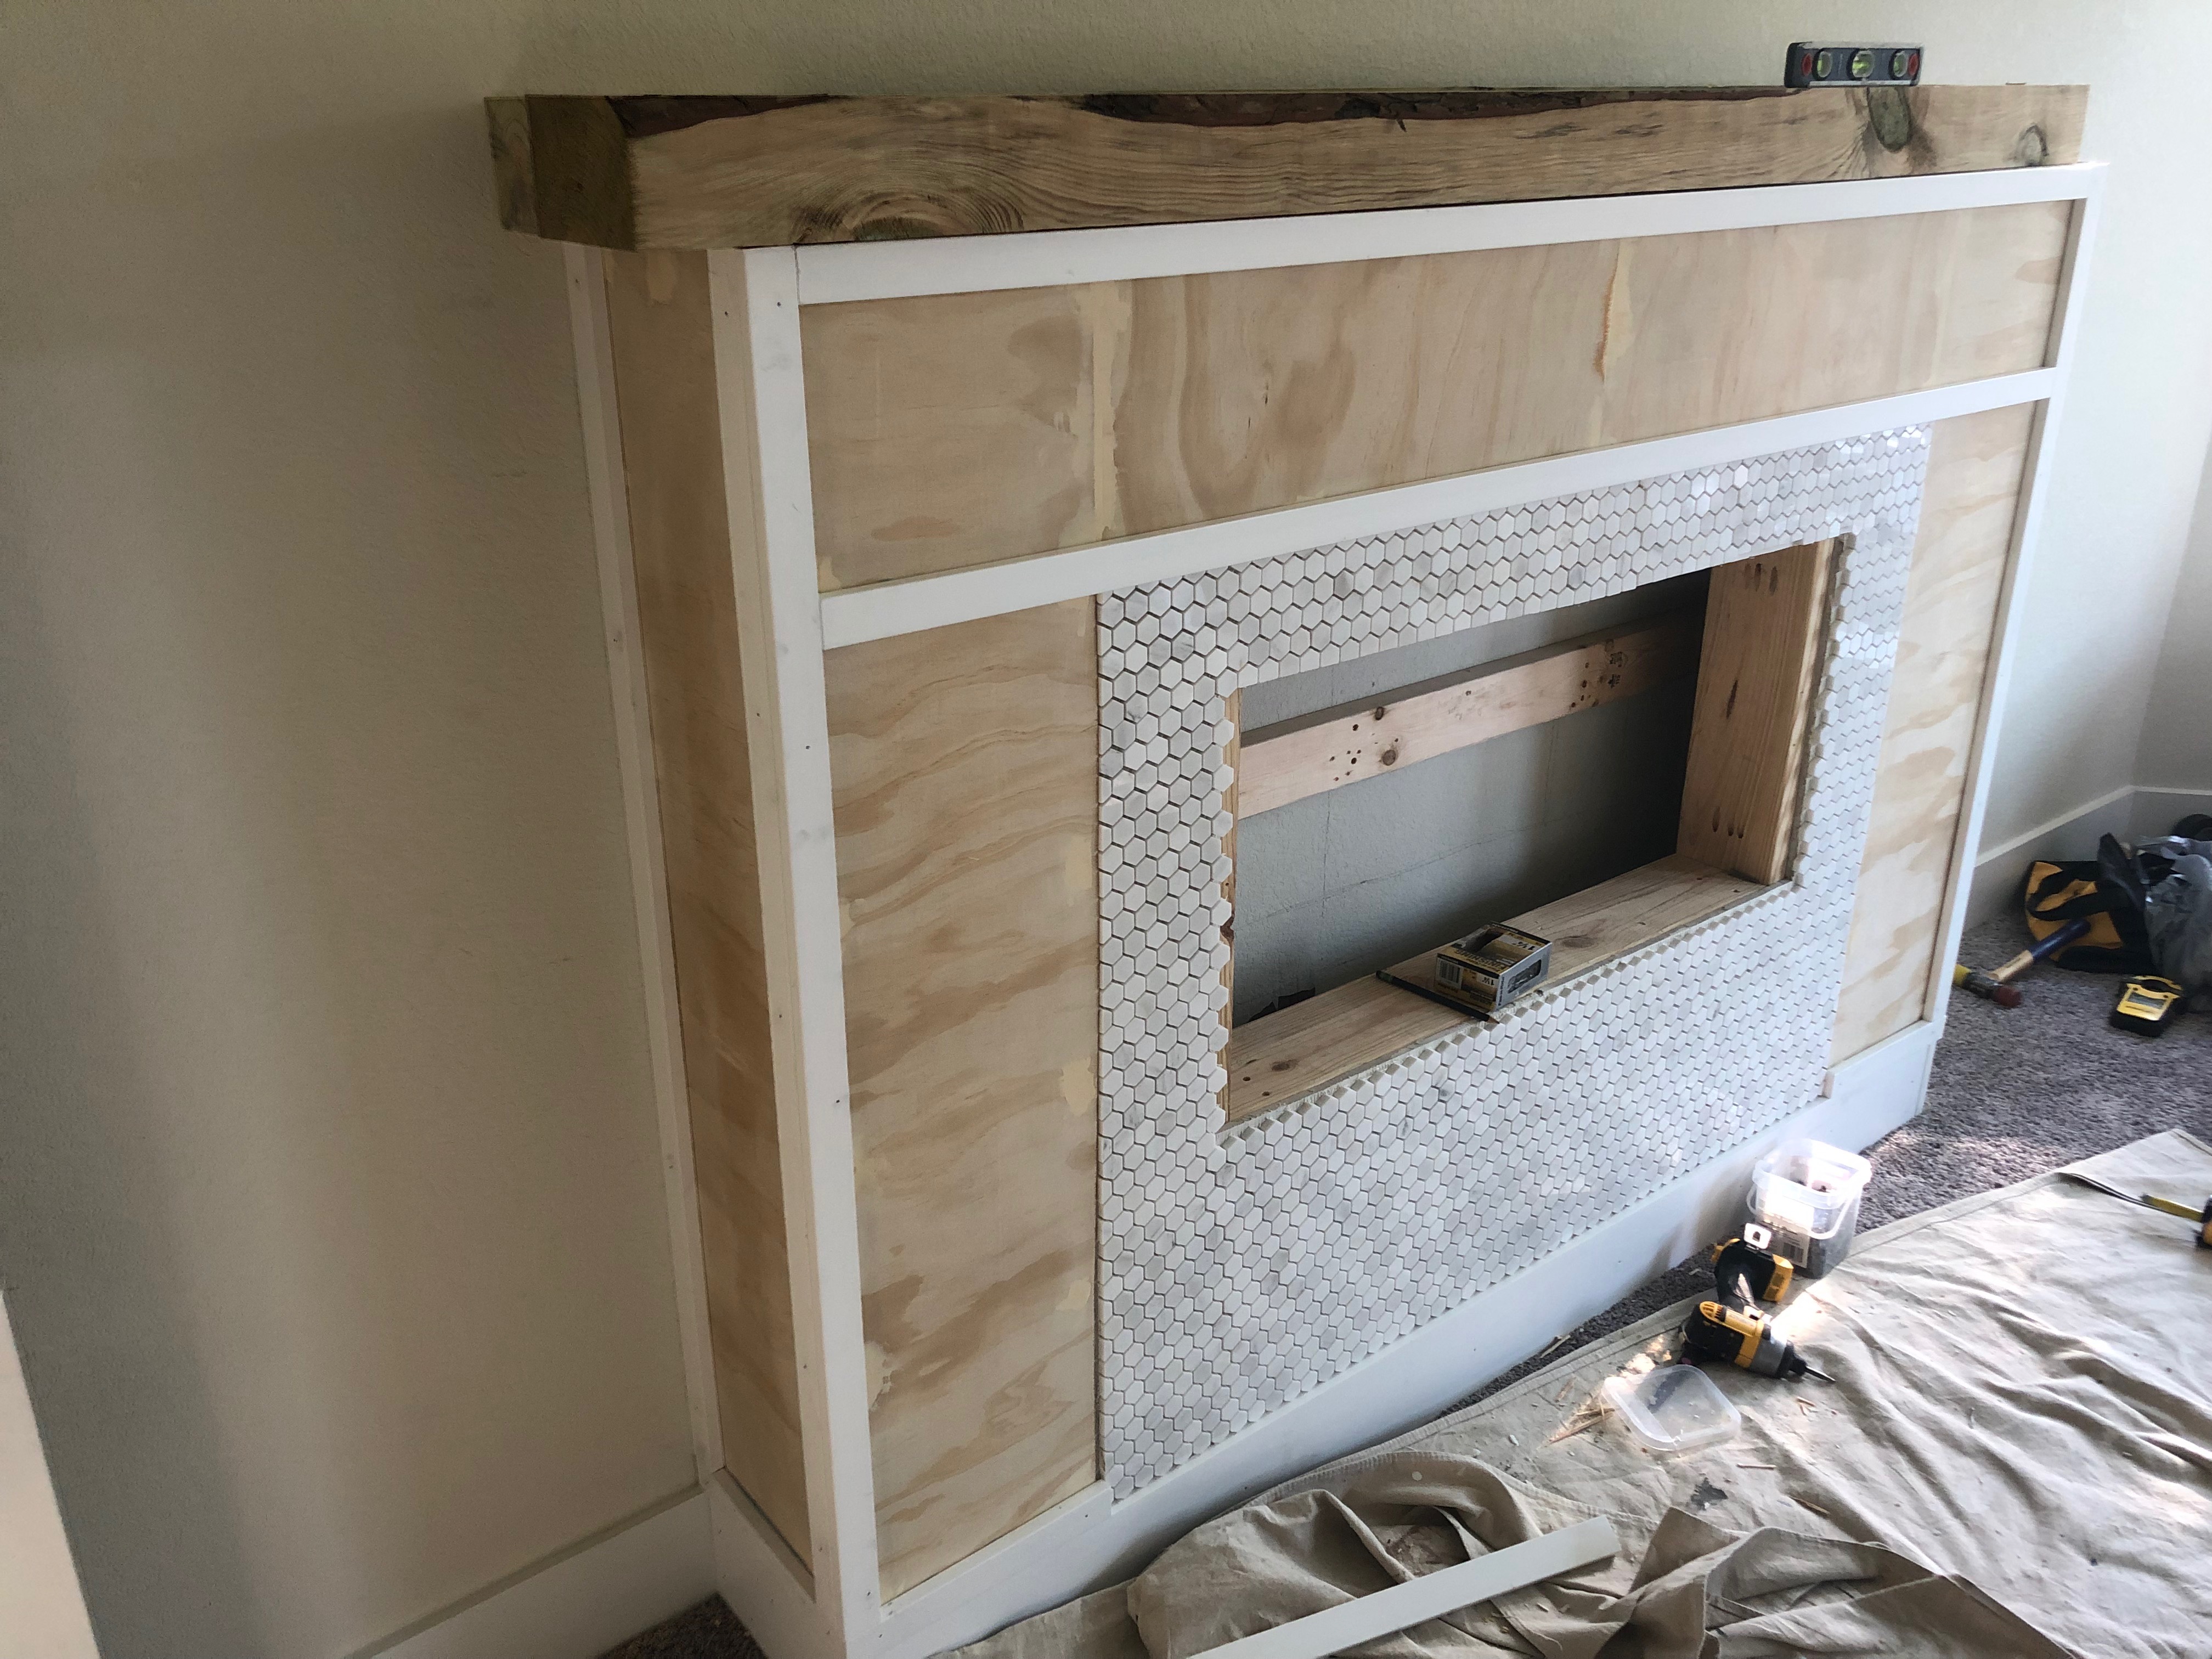
To enclose the framing, we chose to use Hardiebacker Board. We covered the entire frame except for the opening for the fireplace insert. The backer board is for the tile to grip onto instead of plywood for added strength. Also, using it all over helps keep the surface flush so you don’t have to work to get the all the surfaces at the same level or “flushness”.To cover and tie the seam together we used mesh drywall tape, then covered that with a drywall patching compound.
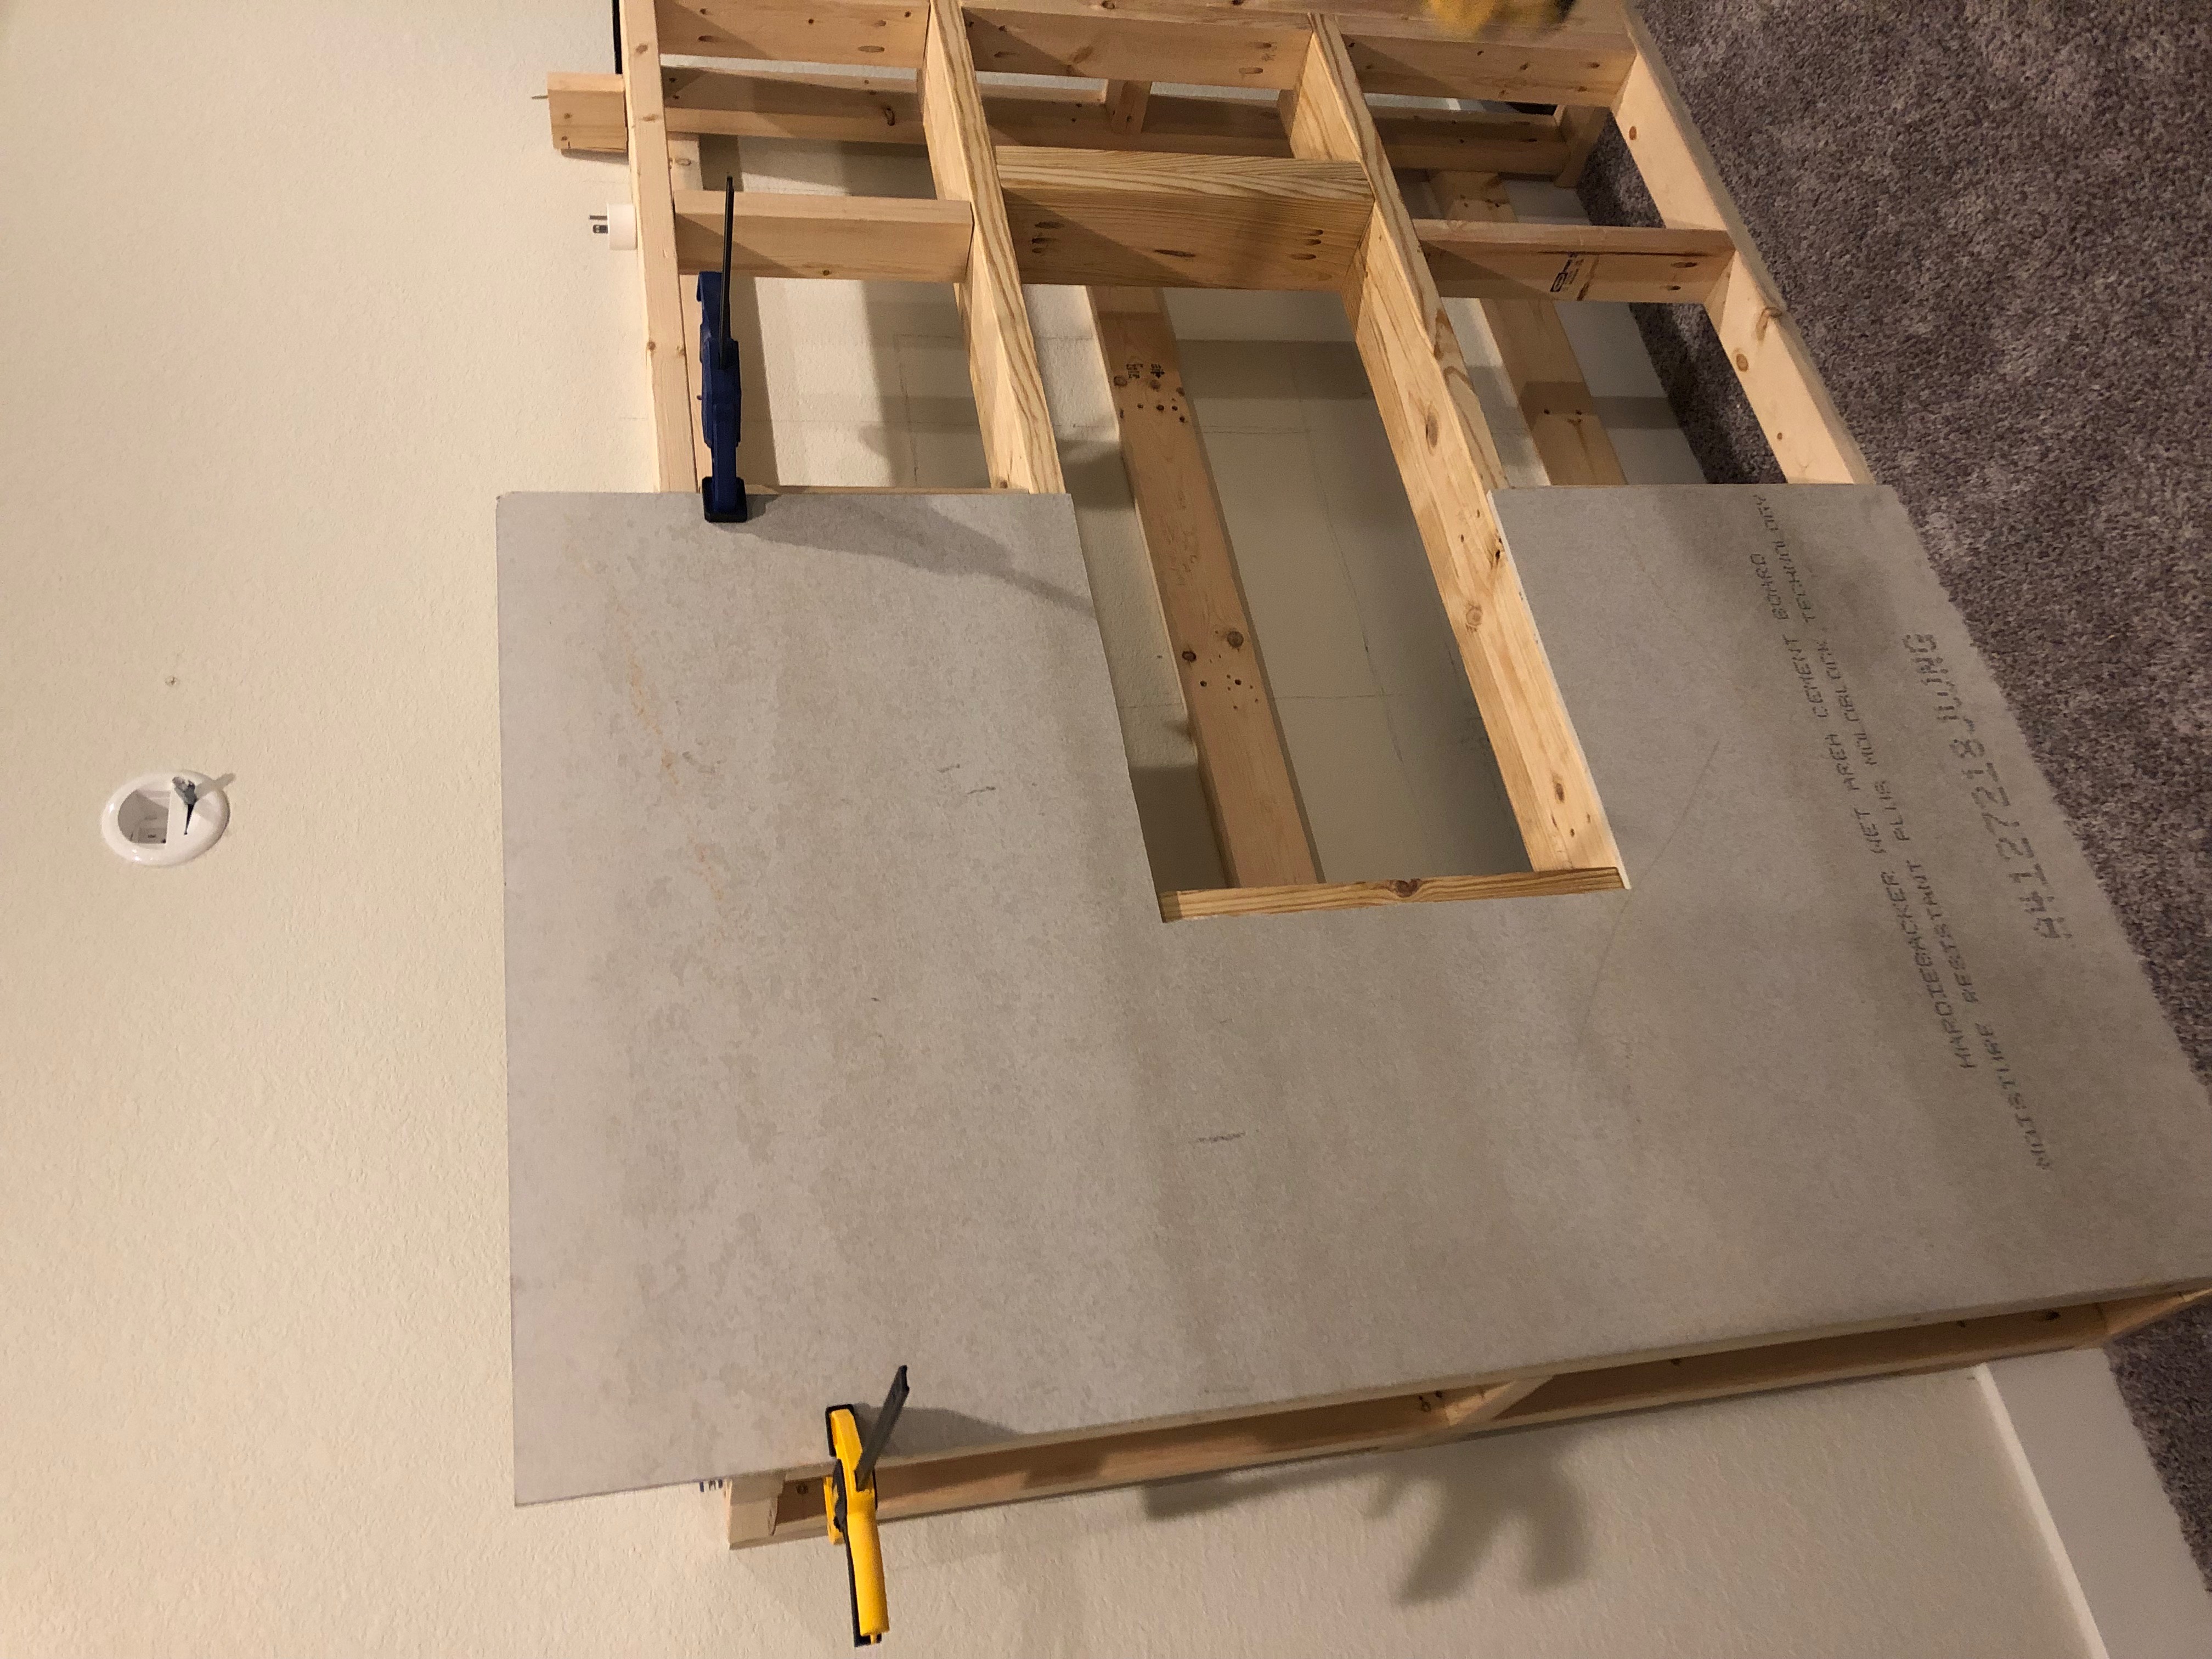
The exposed 2×6 on either side of the opening is to be able to screw in the fireplace insert.
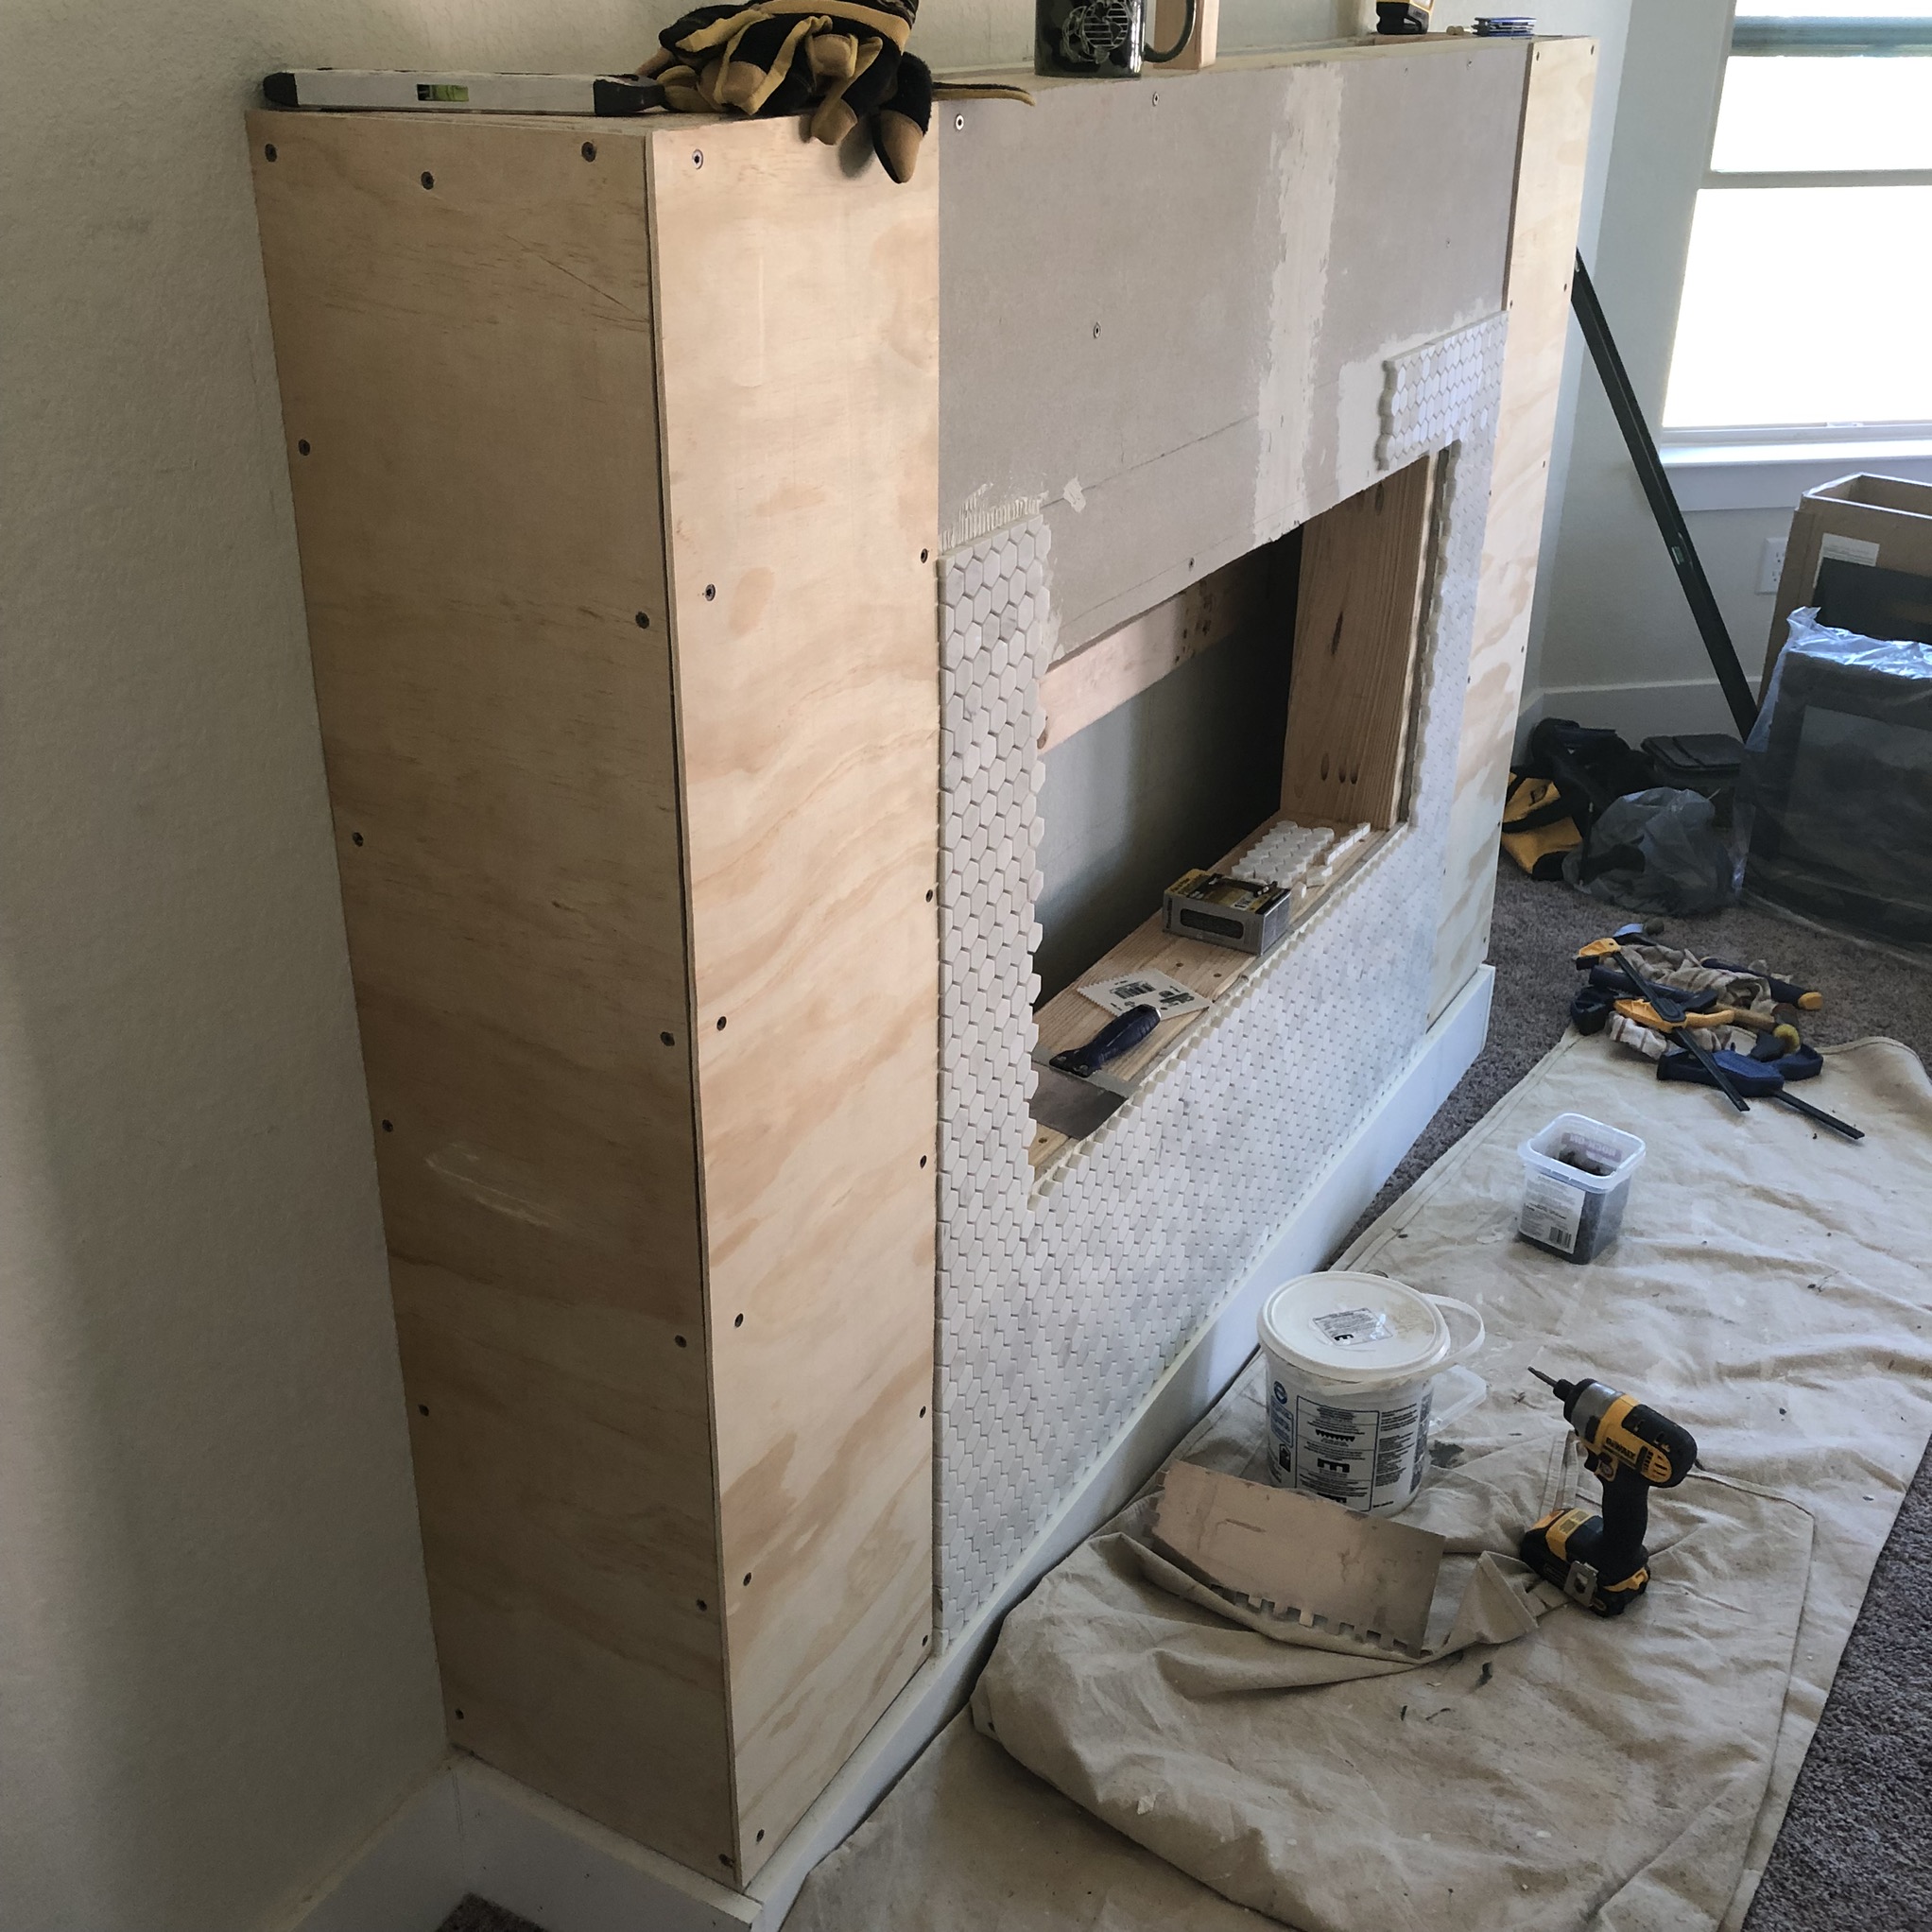
ATTACH PLYWOOD AND TILE
After much deliberation, I decided to go with a Transitional style fireplace (traditional elements with a modern take). I wanted to build out the trim to go around the top and sides but I wanted tile around the actual fireplace insert. It was also so hard to decide the exact trim design and how big of an area the tile would cover.
I finally figured it out and we got cracking. First, the molding we got to match the current baseboards was out down and placed all the way around the fireplace frame. I made sure that the “pilars” of the frame were going to be the same size so I took the measurement of the side of the box and made the front facing fascia that size as well. When all of the measurements were marked, the tiling began for the center around the fireplace insert. Then the plywood strips were secured on the outter edges to have a nicer clean finish.
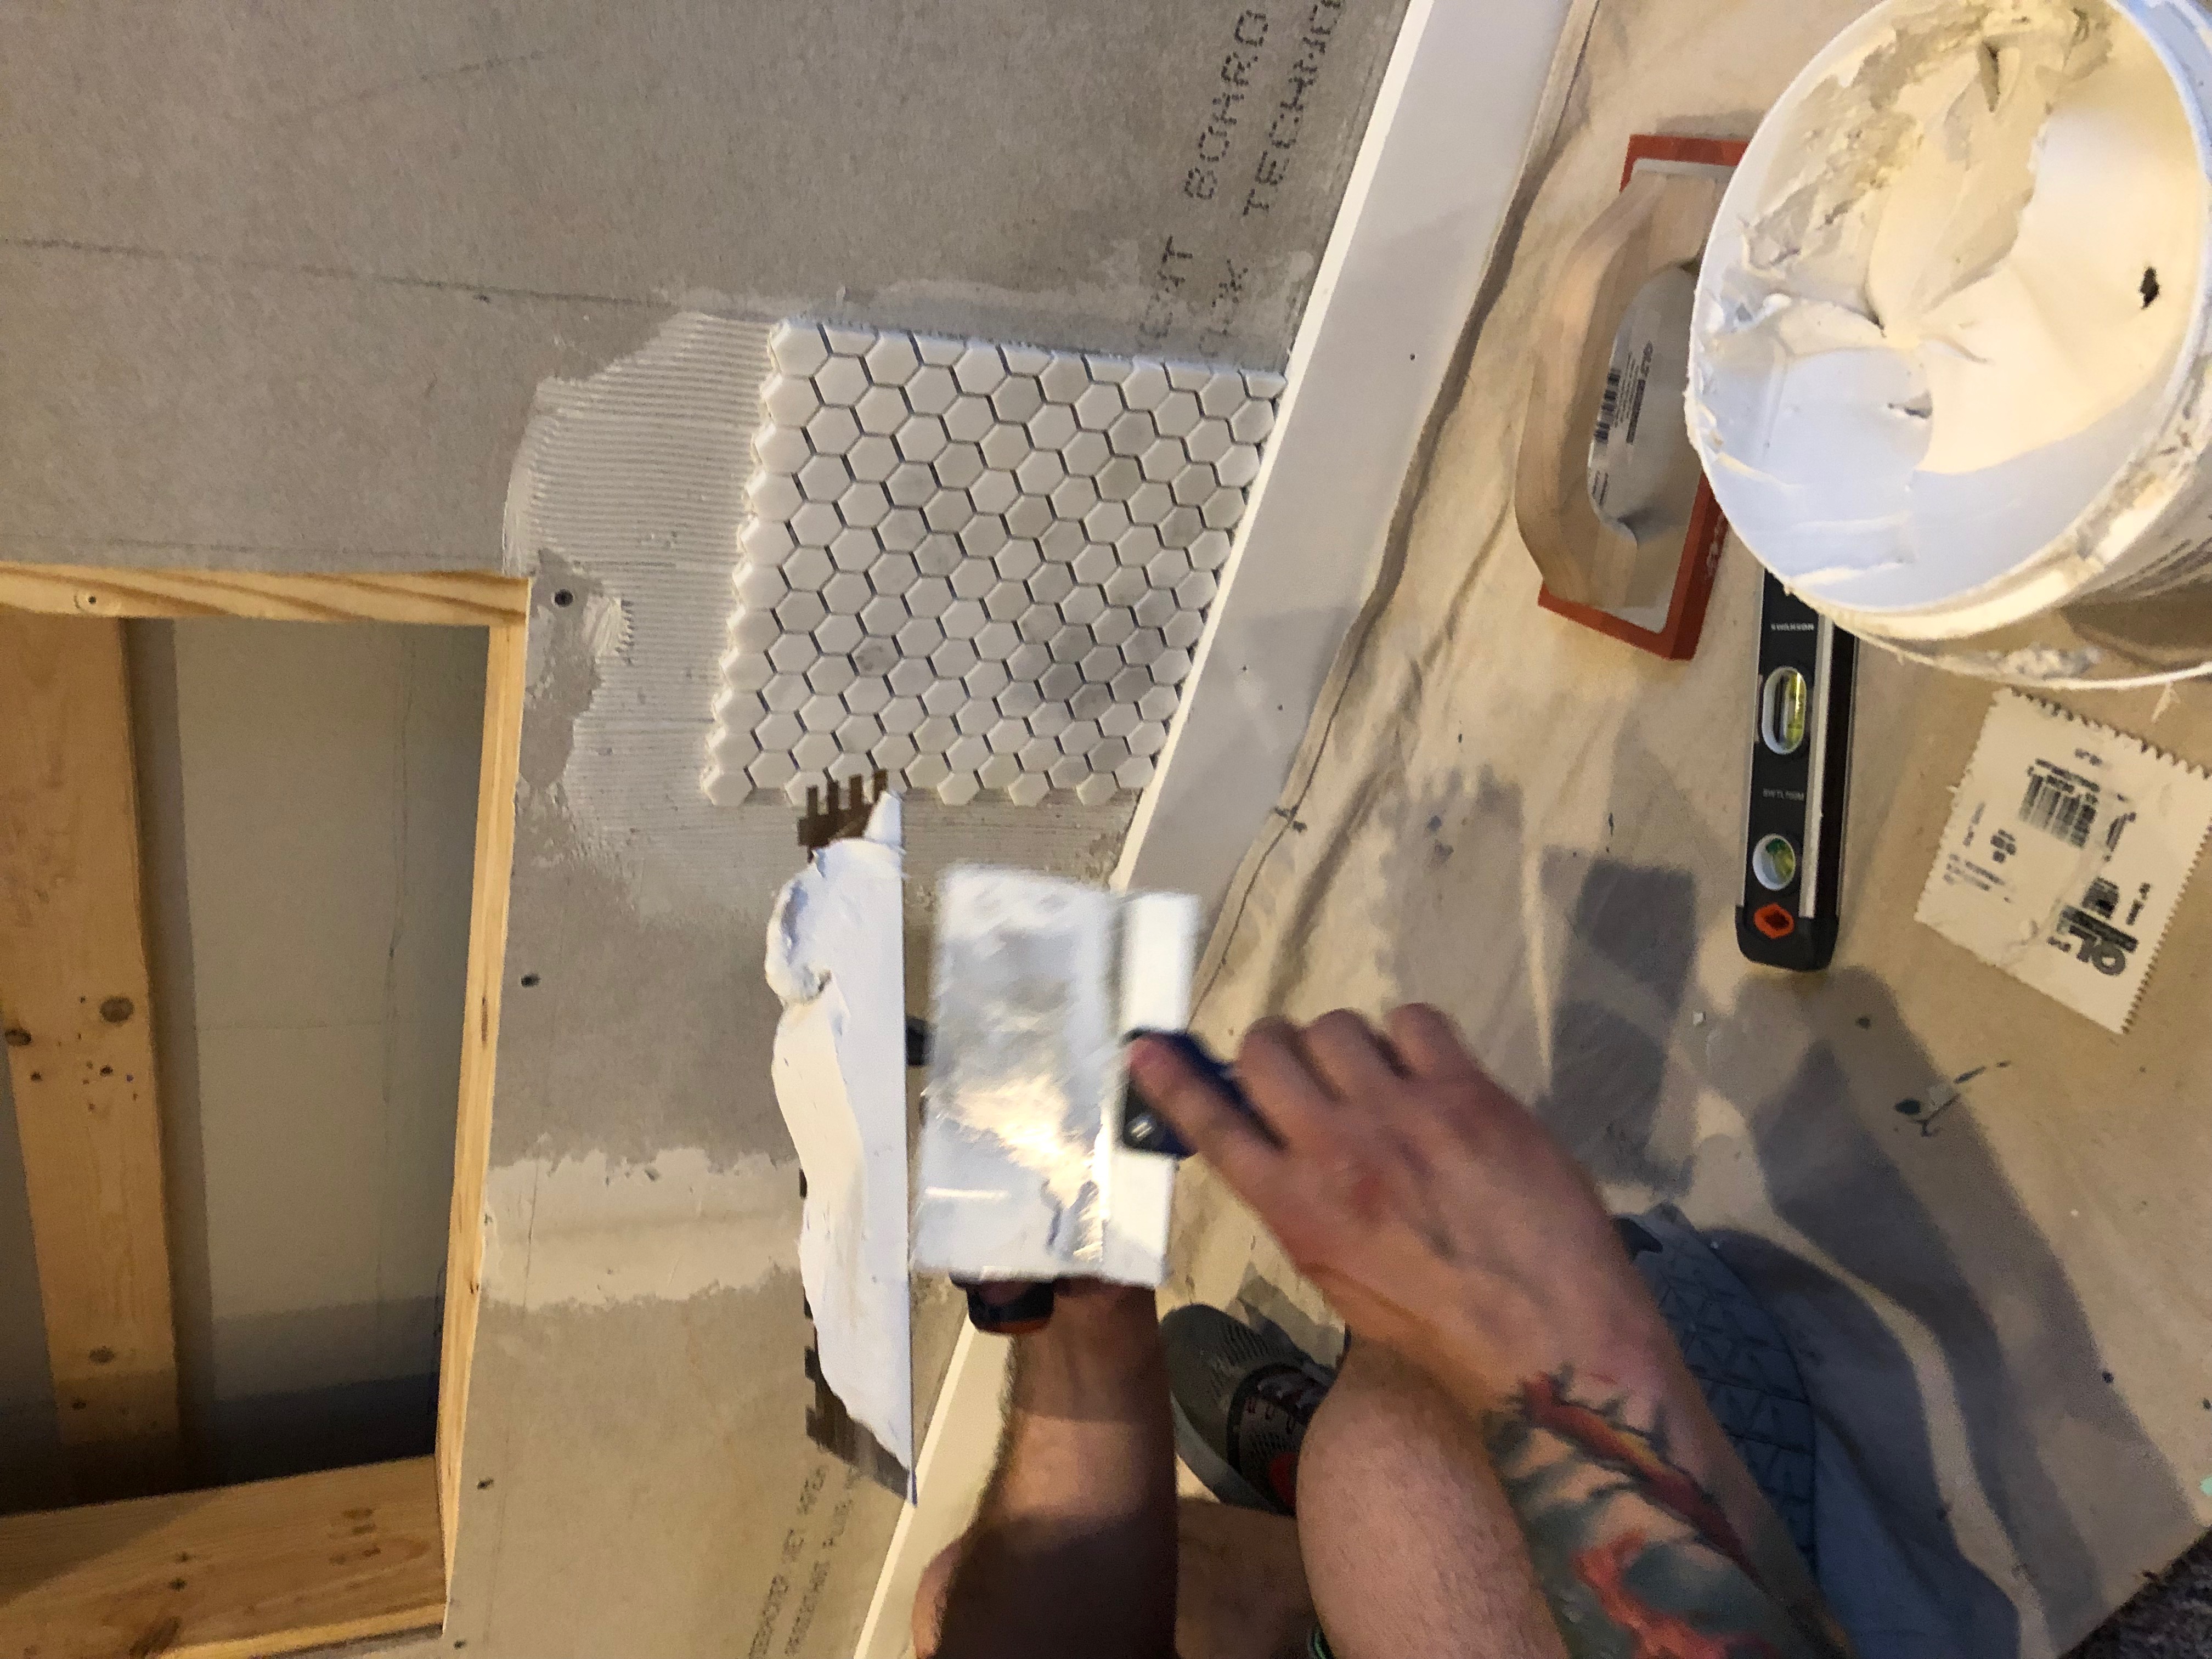
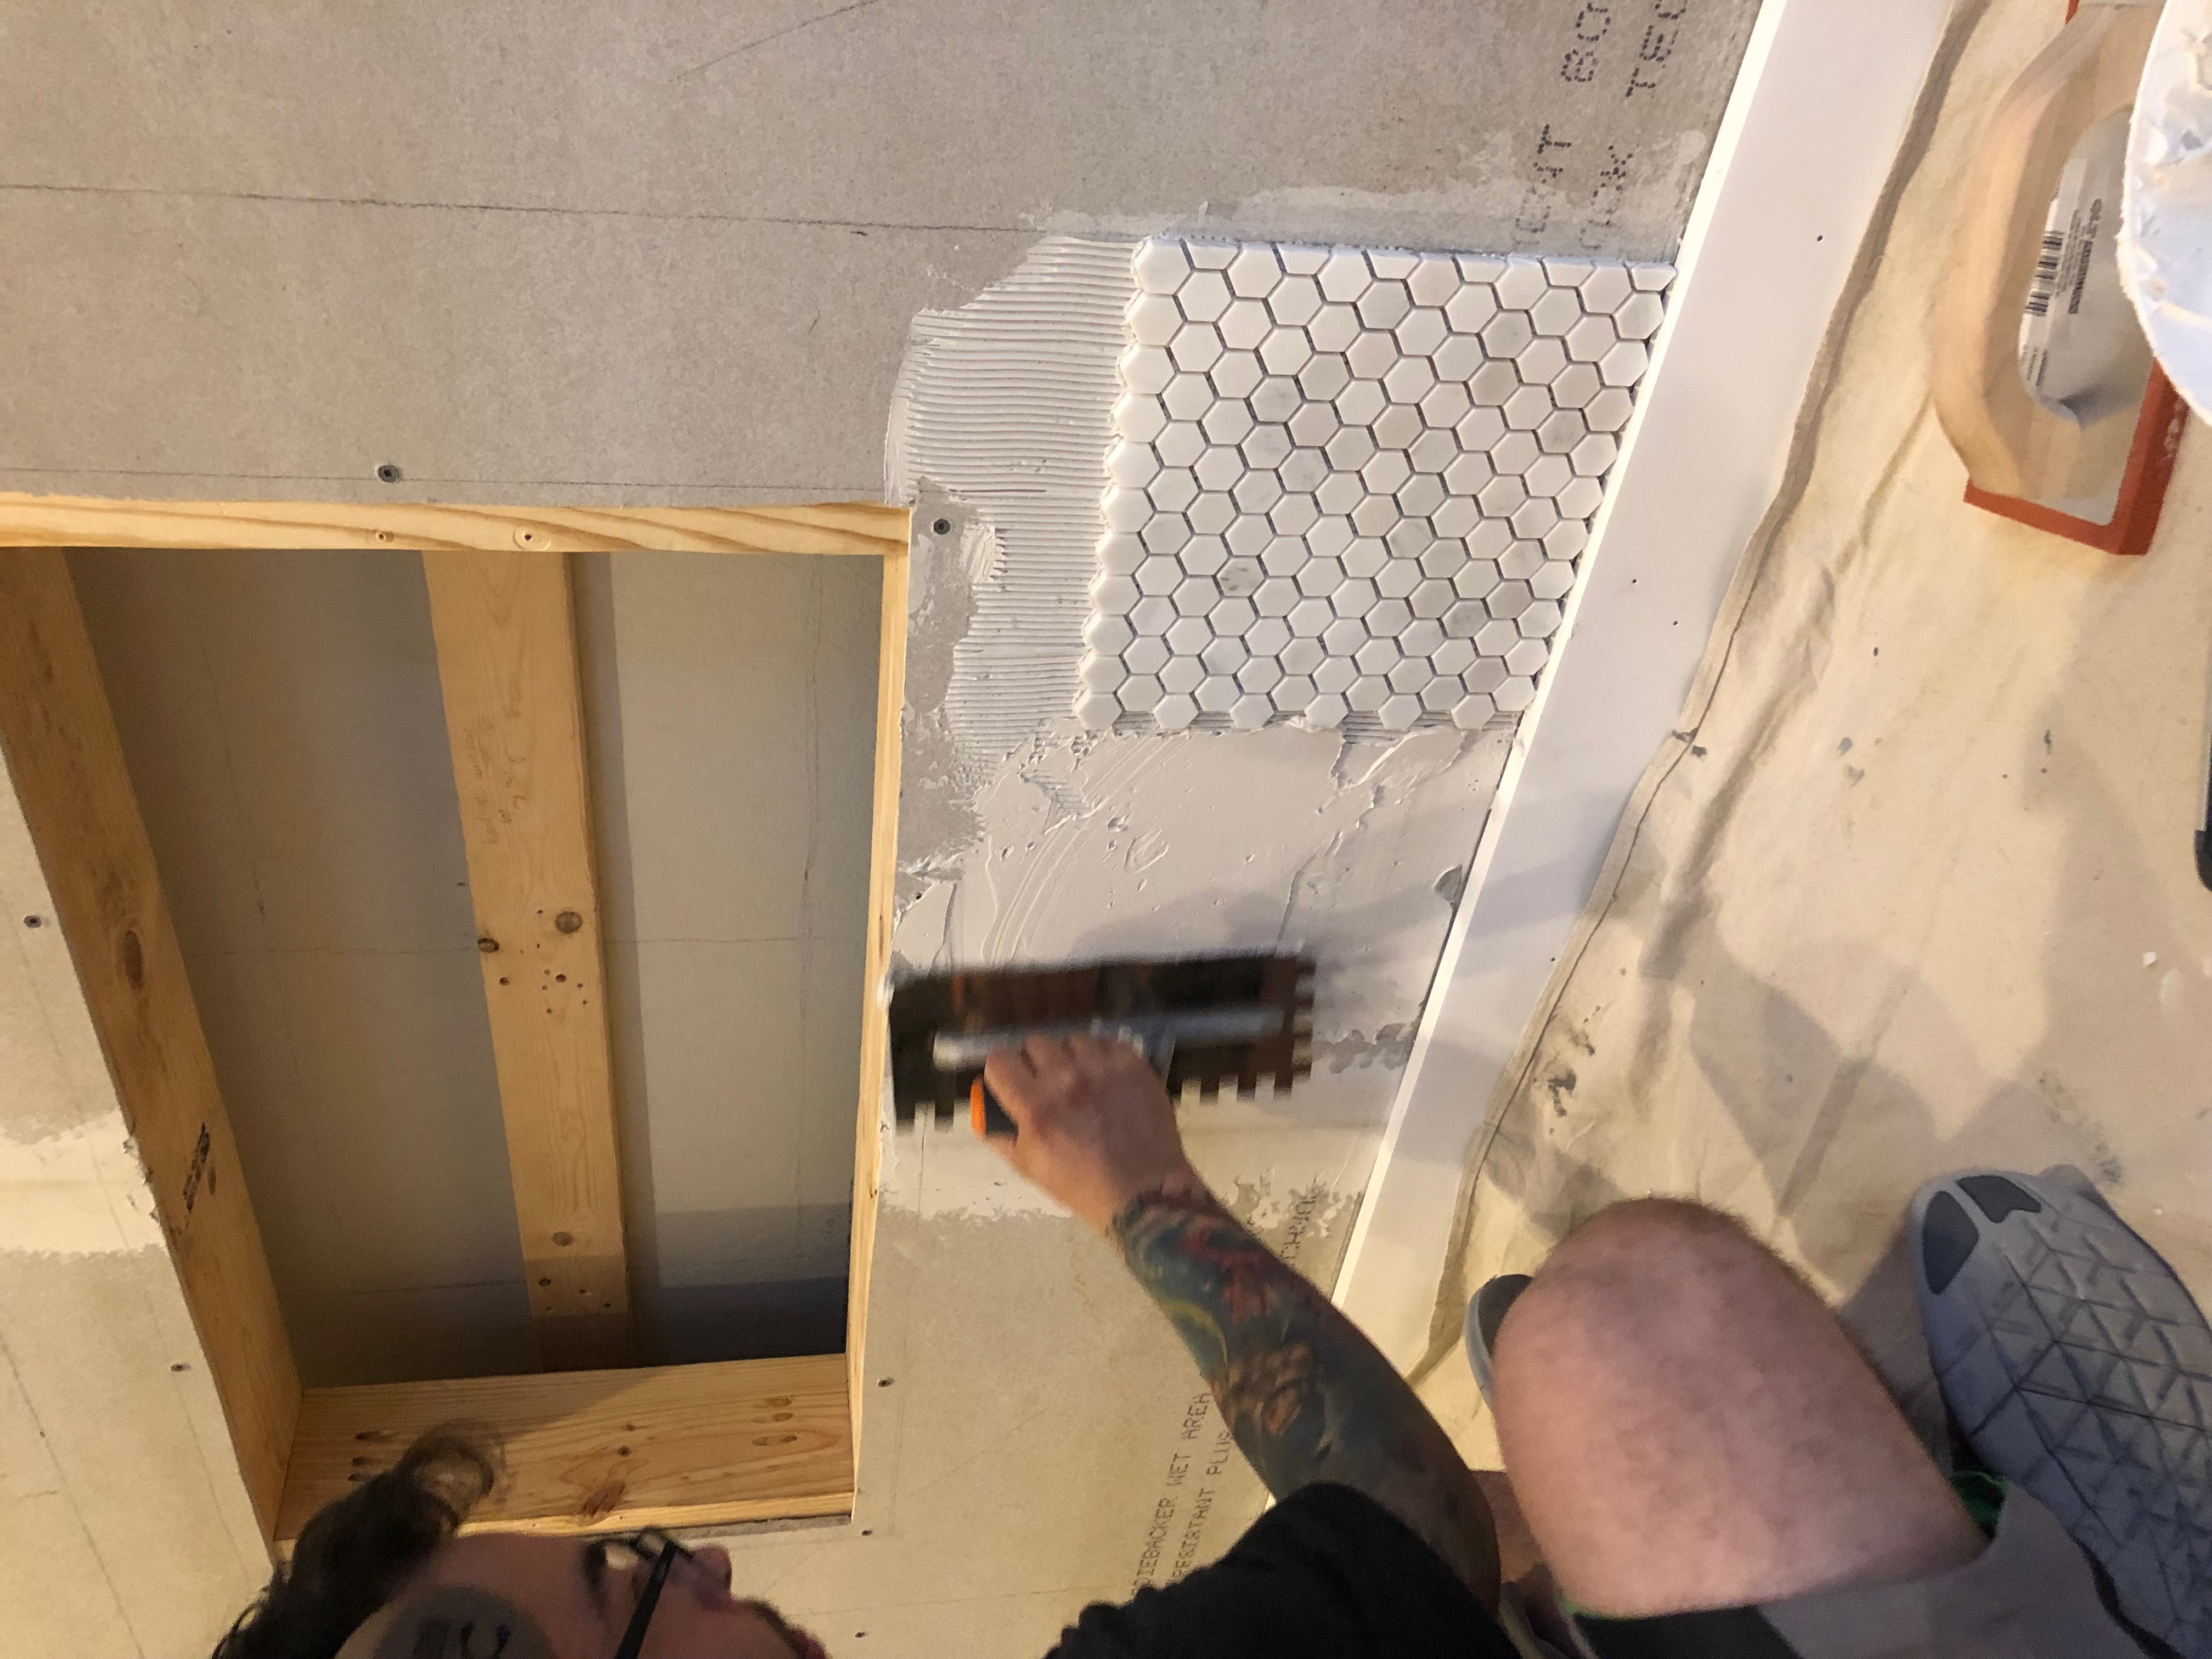
Fun story–
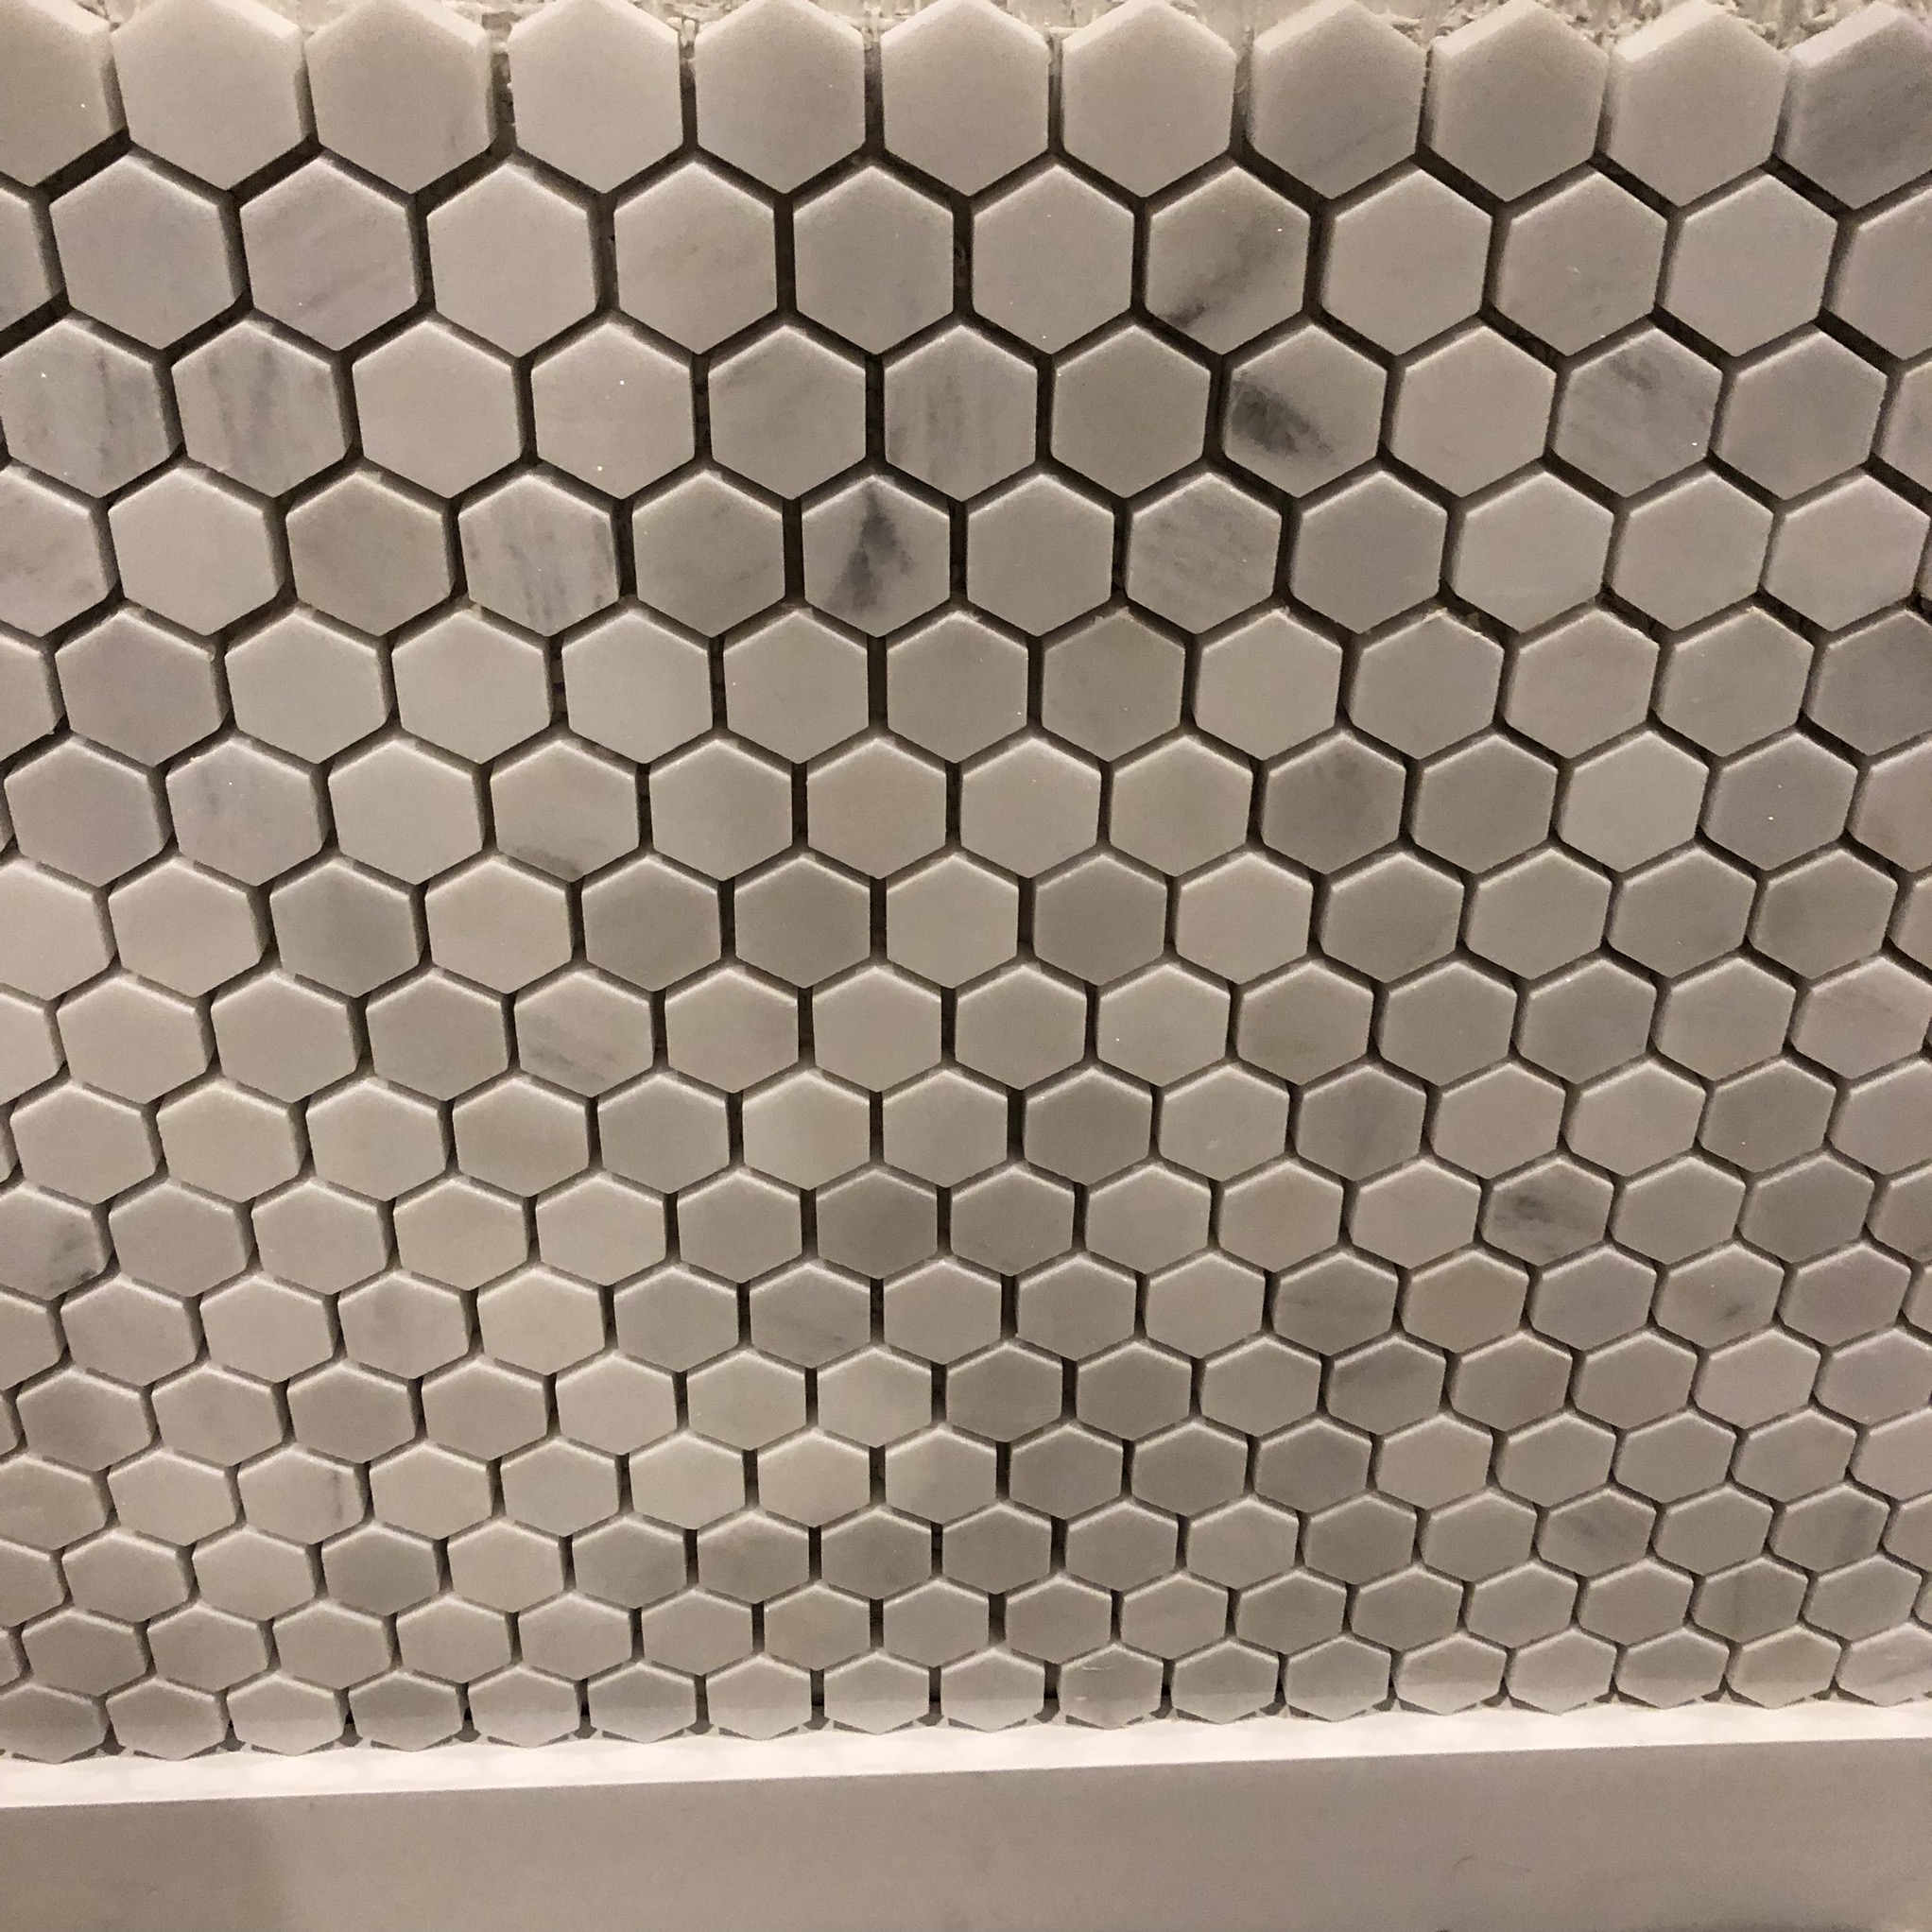
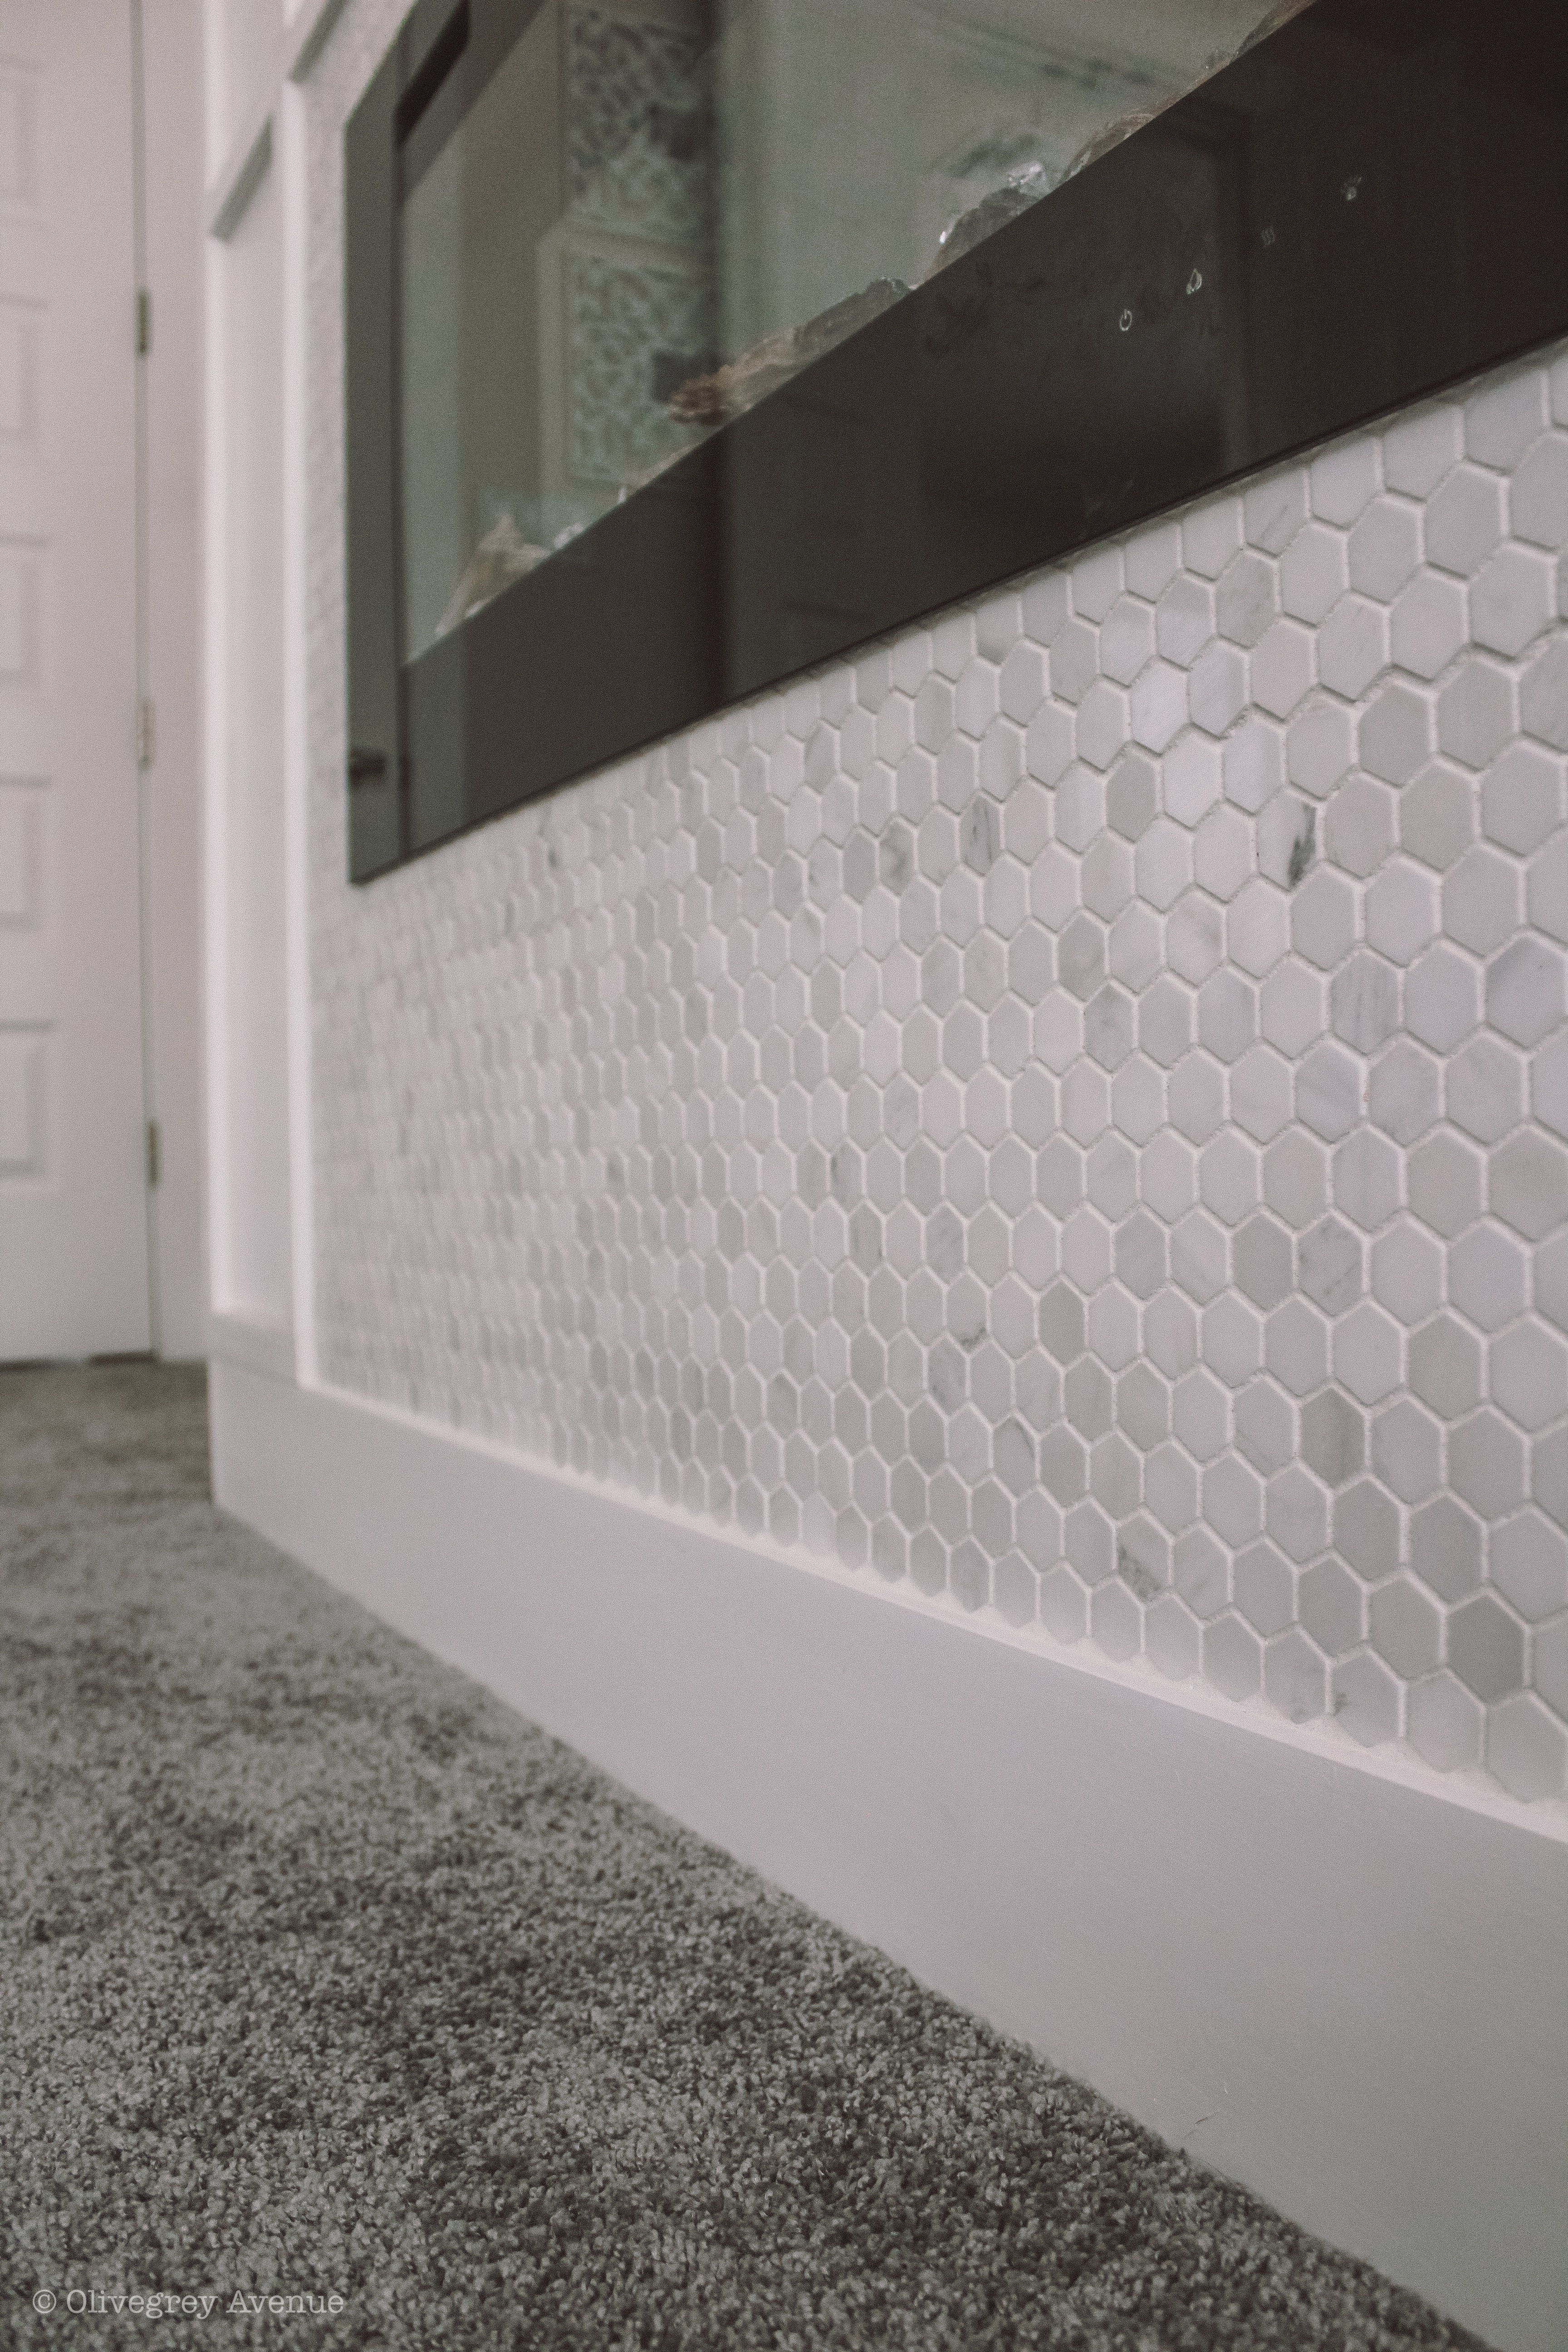
We actually ran out of tile twice. Only because when we first purchased the tile, they didn’t have enough in stock for us to get everything needed. We decided to try it anyways, I love this marble hexagon tile mosaic! Anyways, since we had to go buy-out multiple stores, the tile wasn’t finished before starting on the plywood but it really didn’t matter because we had the exact placement of the tile and plywood marked and as long as the grouting was done after everything was put together, then we’re good.
ATTACH TRIM
After finishing the tile and attaching the plywood with construction adhesive and screws, we attached the trim in the appropriate places. The trim actually covered the screws so nothing needed to be done for those to look nice. To attach the pieces of trim we used construction adhesive and finishing nails. Then you can fill the nail holes and any seams between trim pieces with wood filler, sand it down and then it’s ready for paint!
PAINT
Finally, give all the trim and plywood a coat of paint, sand for smoothness after first coat and apply second coat. I used a brush for cutting in and a small roller for overall smoothness.
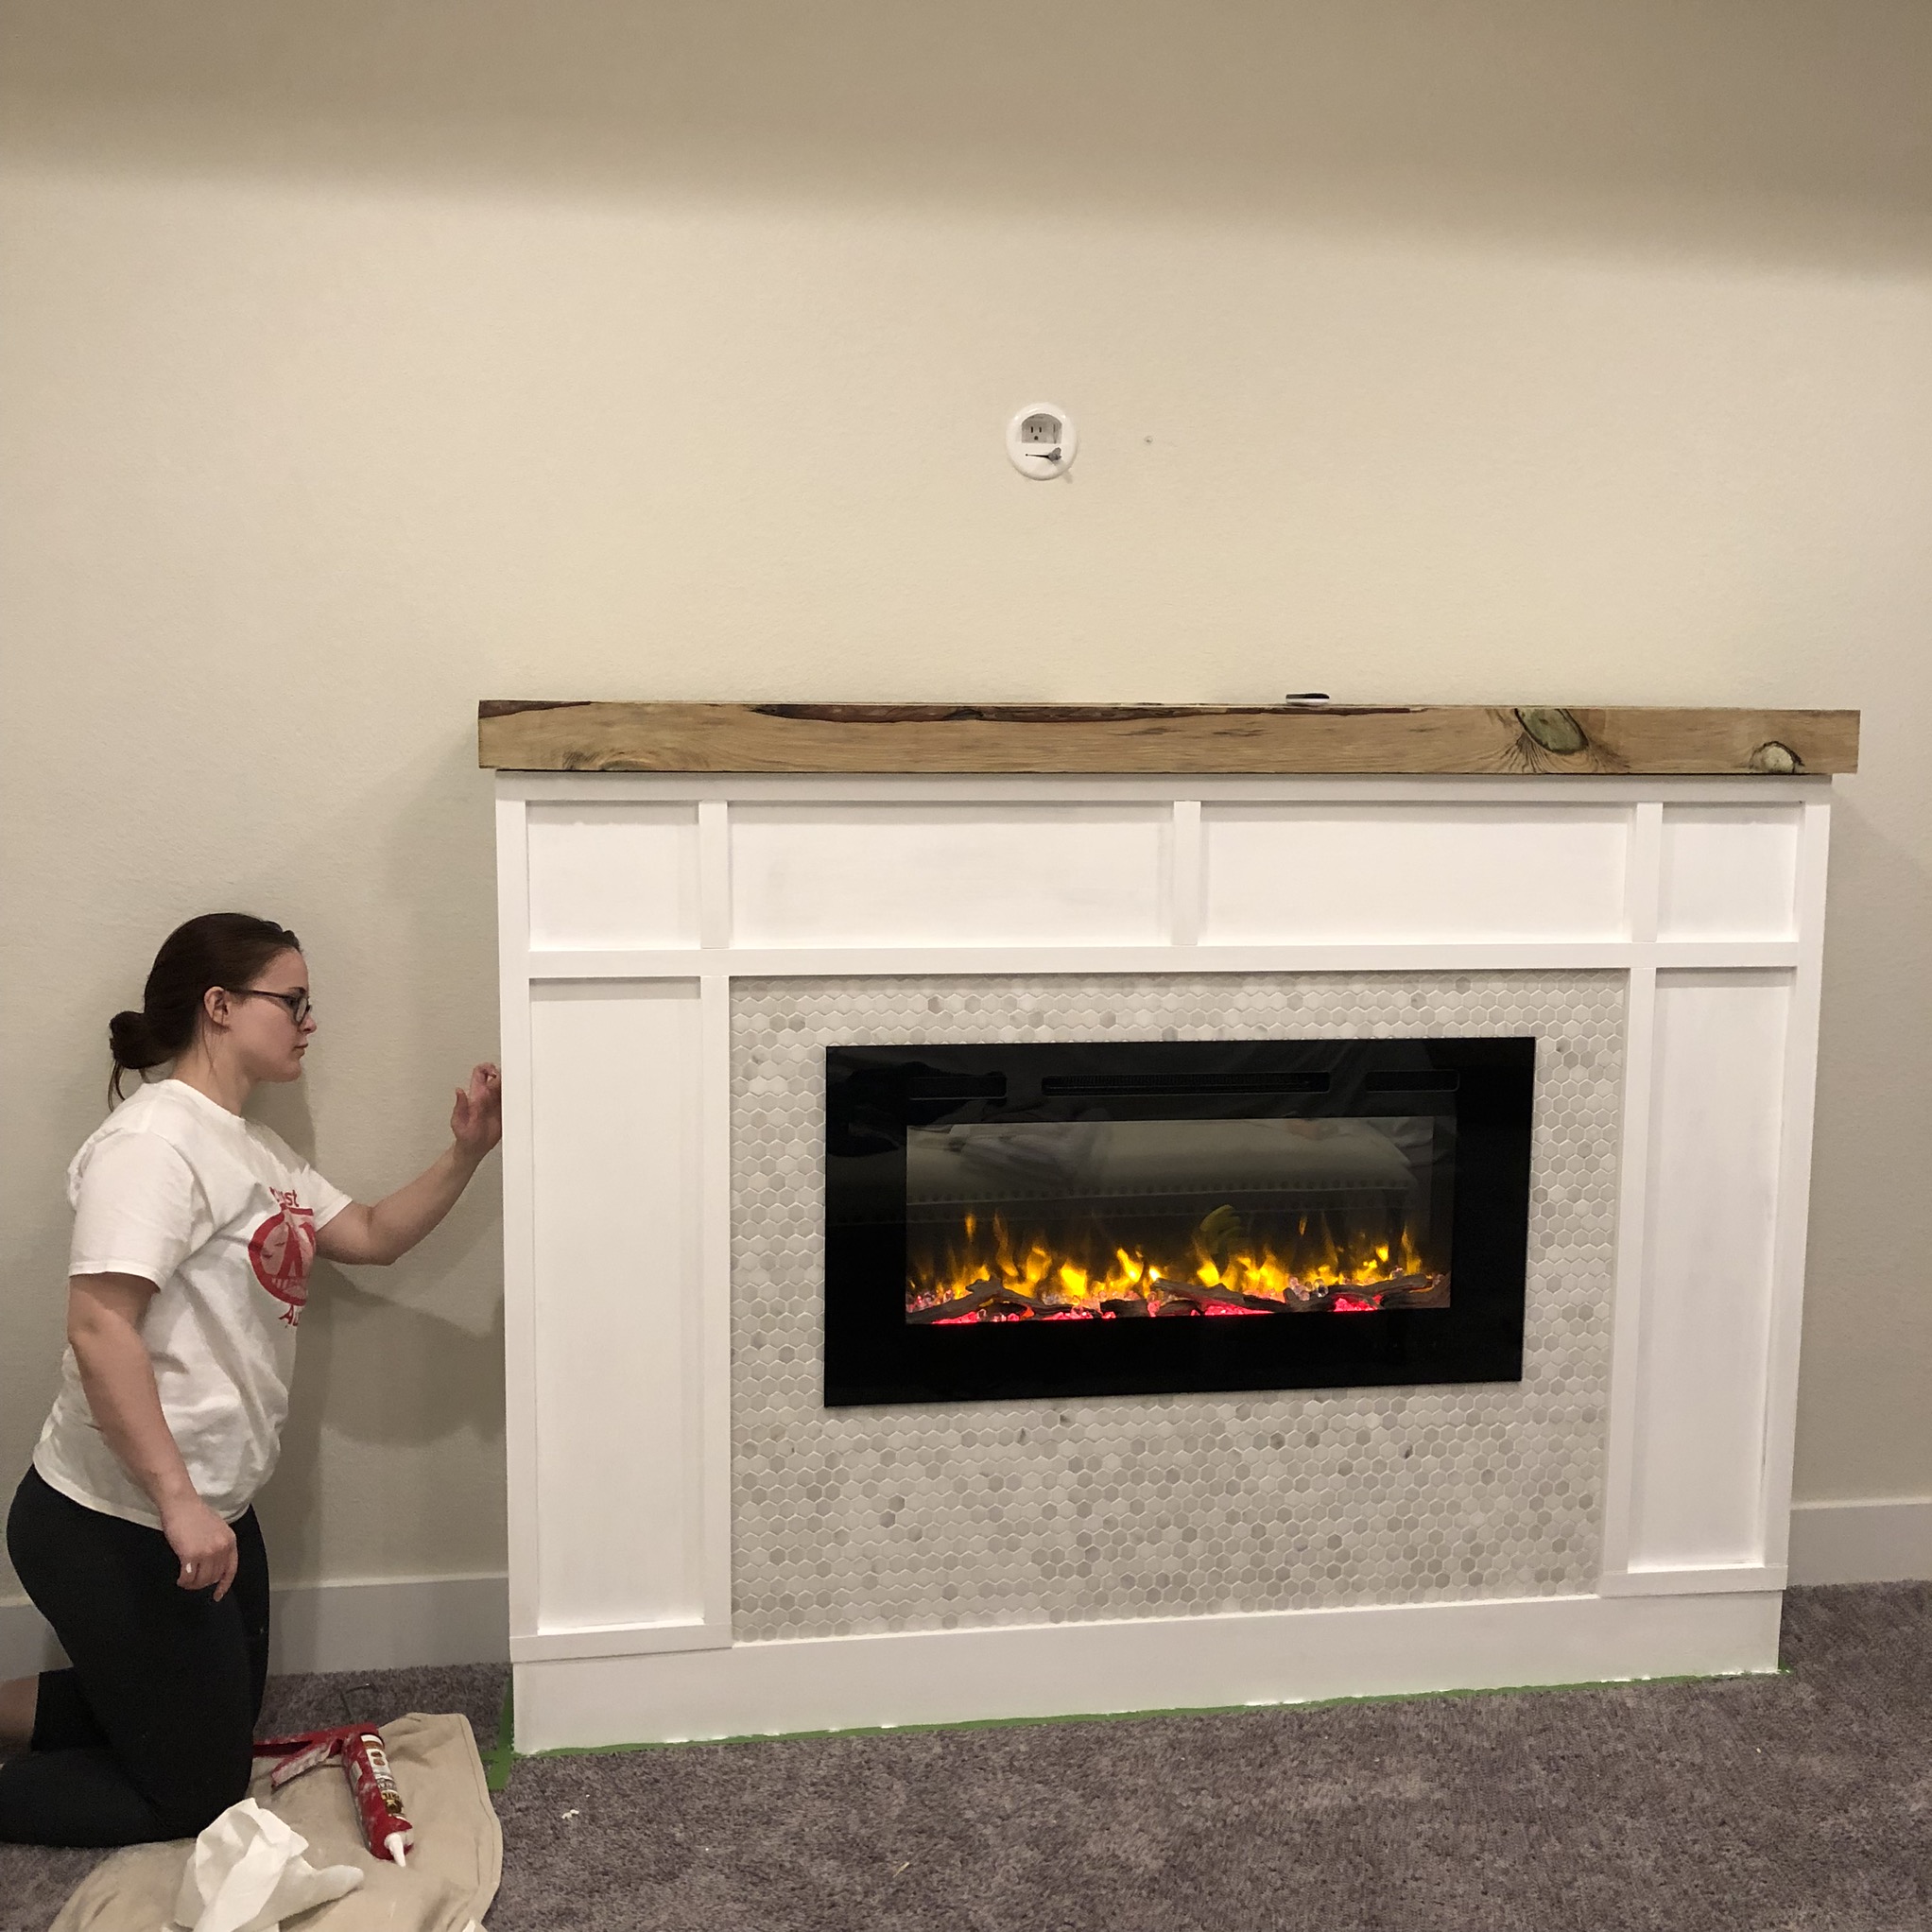
CHOOSE MANTLE
My mantle, for the time being is a couple of 4×6’s cut down to the width of the fireplace and just laid on top. I spent a lot of time looking for a piece of wood that were the right dimentions for this piece and couldn’t find anything so I bought this wood to build my own but with the warping of the wood and it STILL not being deep enough to cover the top of the fireplace, it’s still unfinished. I haven’t come back around to this project to figure it out but that is coming soon!
Done!

Isn’t this the cutest little helper?!
LESSONS LEARNED
WHAT I GOT RIGHT: The framing of this project was very intimidating because it was completely designed by us with minimal help from the manual of the fireplace insert. But, this is an extremely sturdy piece that will withstand the test of time.
WHERE I GOT LUCKY: The mantle is still an issue so I’ll say it’s fortunate that the wood I have just resting on top is functional for the time being but I should have had a better plan for the mantle to actually finish the project. But like I said…soon!

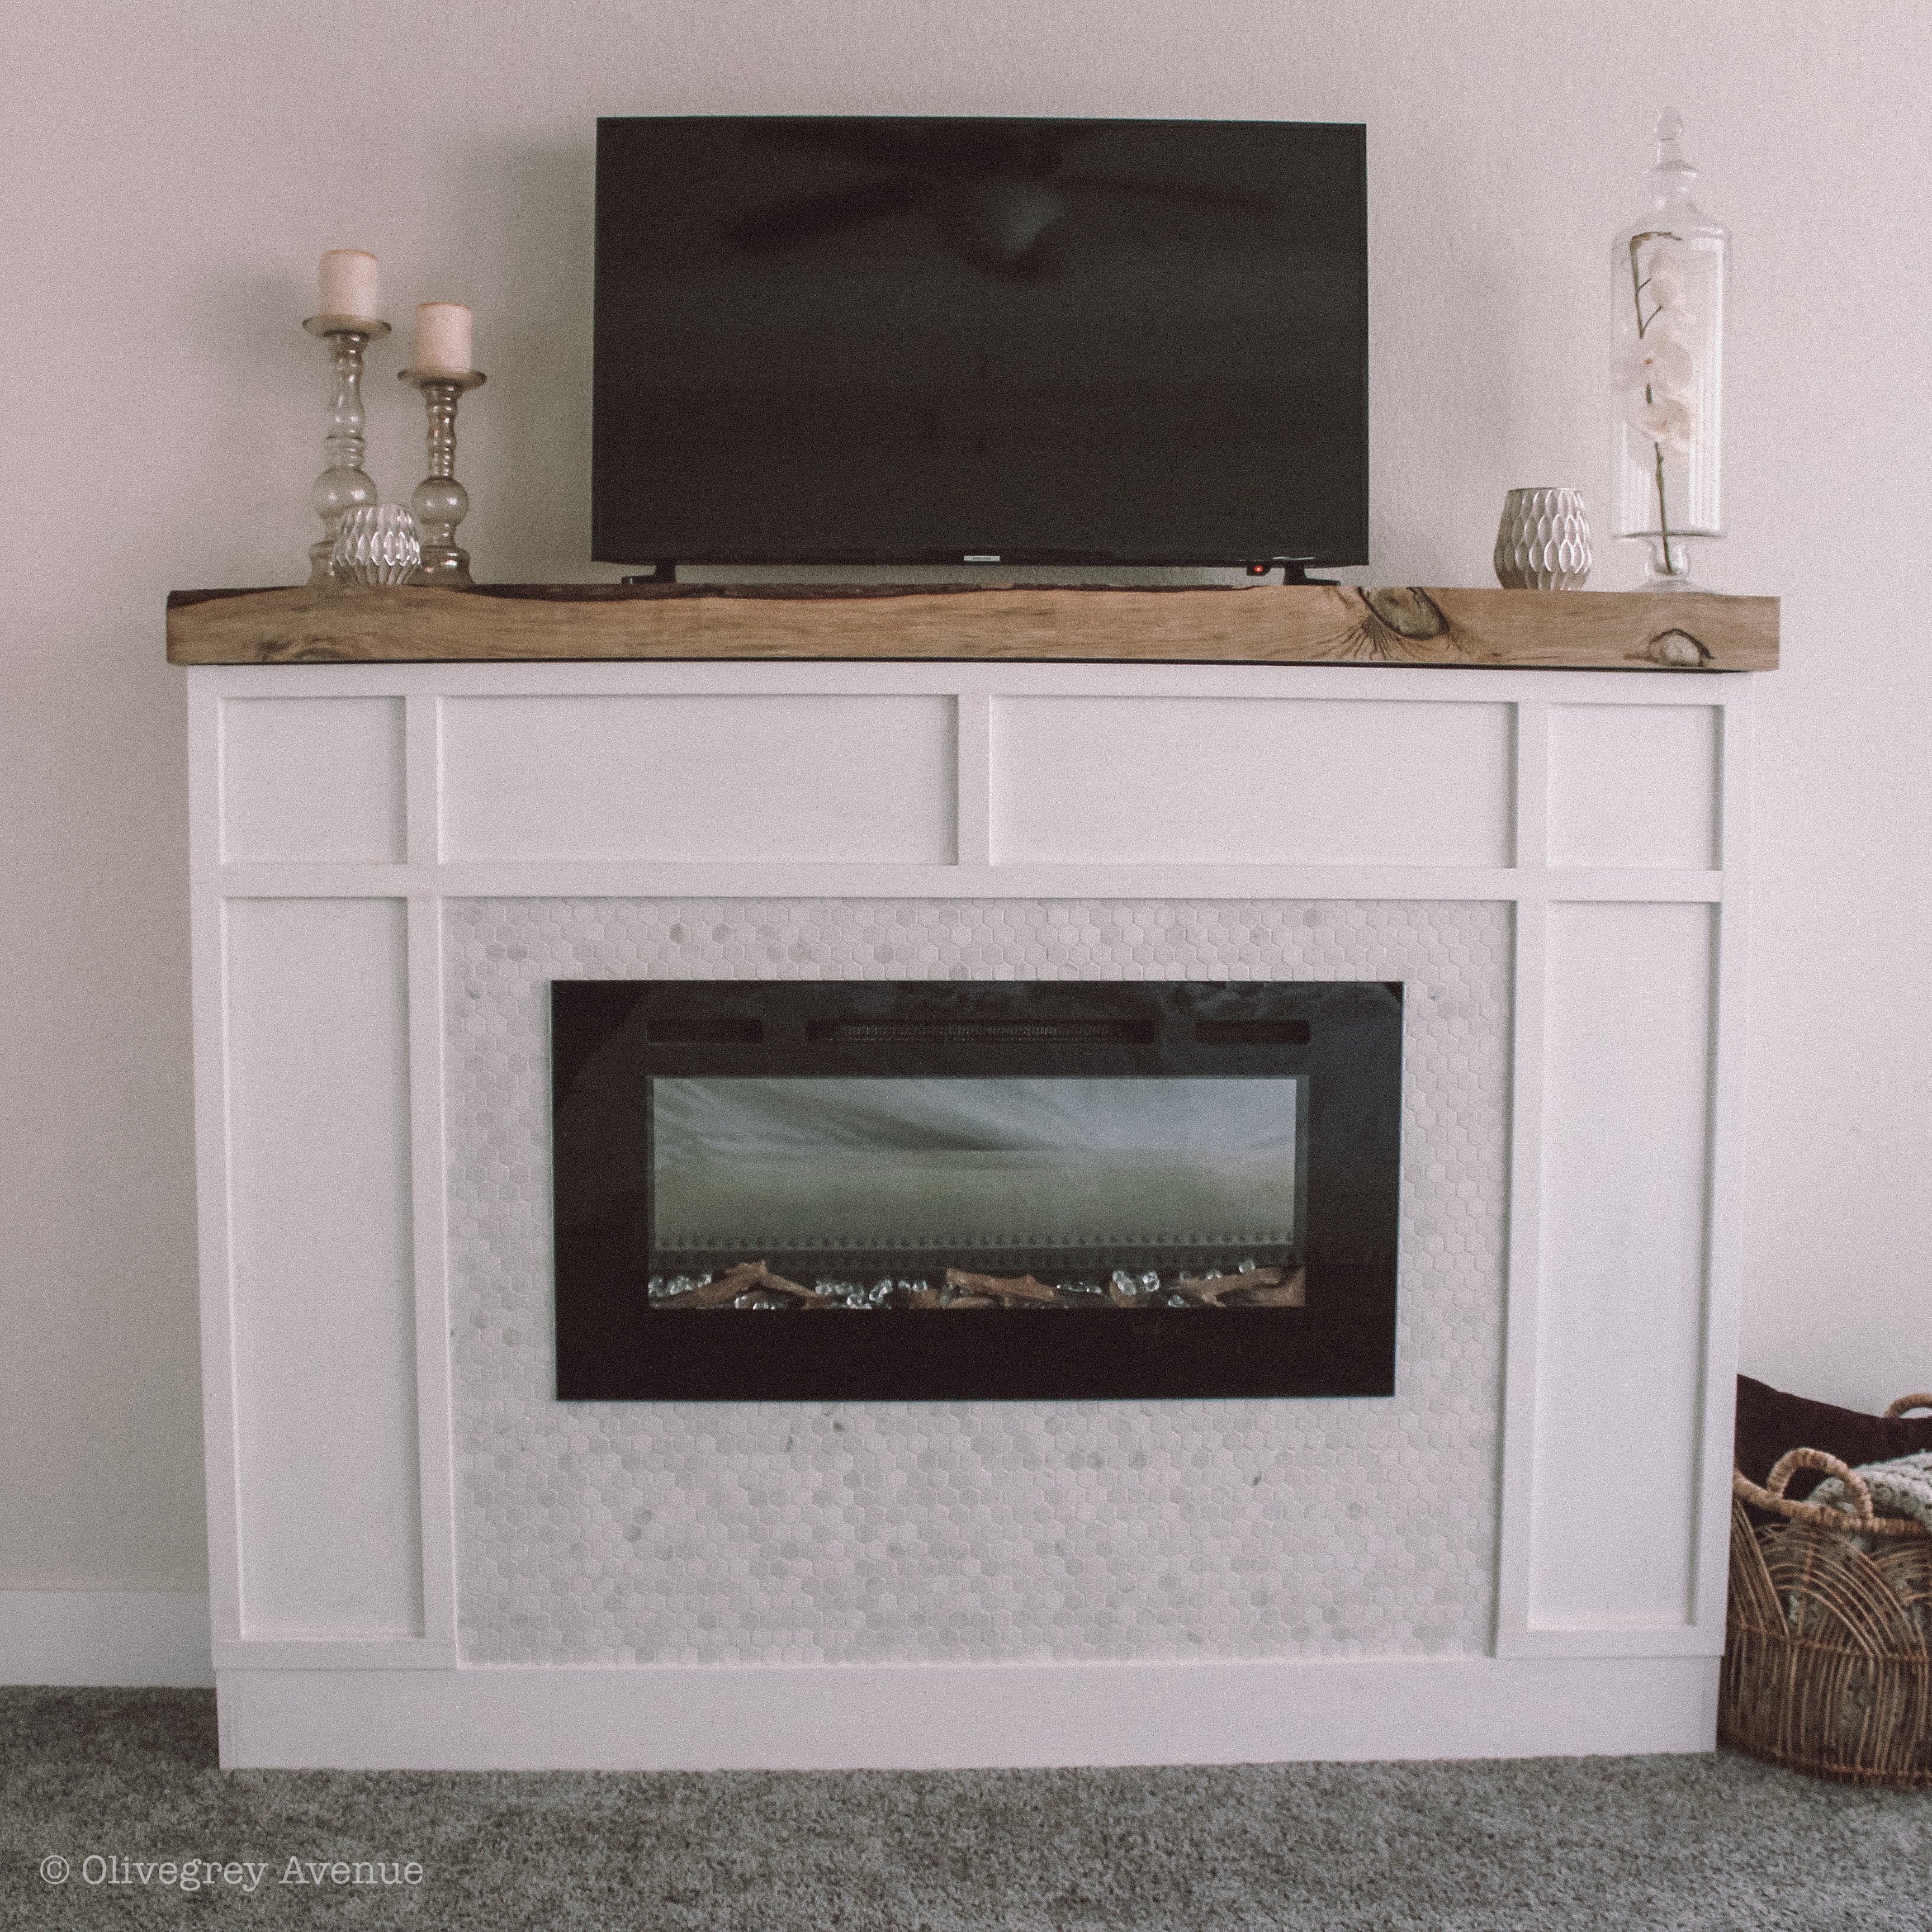
I hope this tutorial helps someone figure out their own DIY Electric Fireplace so that you too can transform your space! Thank you for taking the time to be here and read my rambles. I appreciate each and every one of you!
Find us on social HERE!


